1. Overview
This service is available to all the registered users of the e-Filing portal. This service enables registered users of the e-Filing portal who are not able to verify their ITRs / Forms / Service Requests owing to absence from the country or being a non-resident, or for any other reason, to authorize another person to verify ITRs / Forms / Service Requests. This service also allows users to register as Representative Assessees and register themselves to act on behalf of another person.
2. Prerequisites for availing this service
• Registered user of the e-Filing portal with valid user ID and password
• Active PAN of the user and the representative
3. Step-by-Step Guide
3.1 Register as Representative:
Step 1: Log in to the e-Filing Portal with your user ID and password.

Step 2: Click Authorized Partners > Register as Representative Assessee

Step 3: Click Let's get Started to create new request or view all previous requests.

Step 4: On the Register as Representative Assessee page, click +Create New Request to act as representative of assessee.

Step 5: Choose the Category of assessee who you want to represent from the dropdown.

Step 6: Enter the required details. Upload mandatory attachments and click Continue.
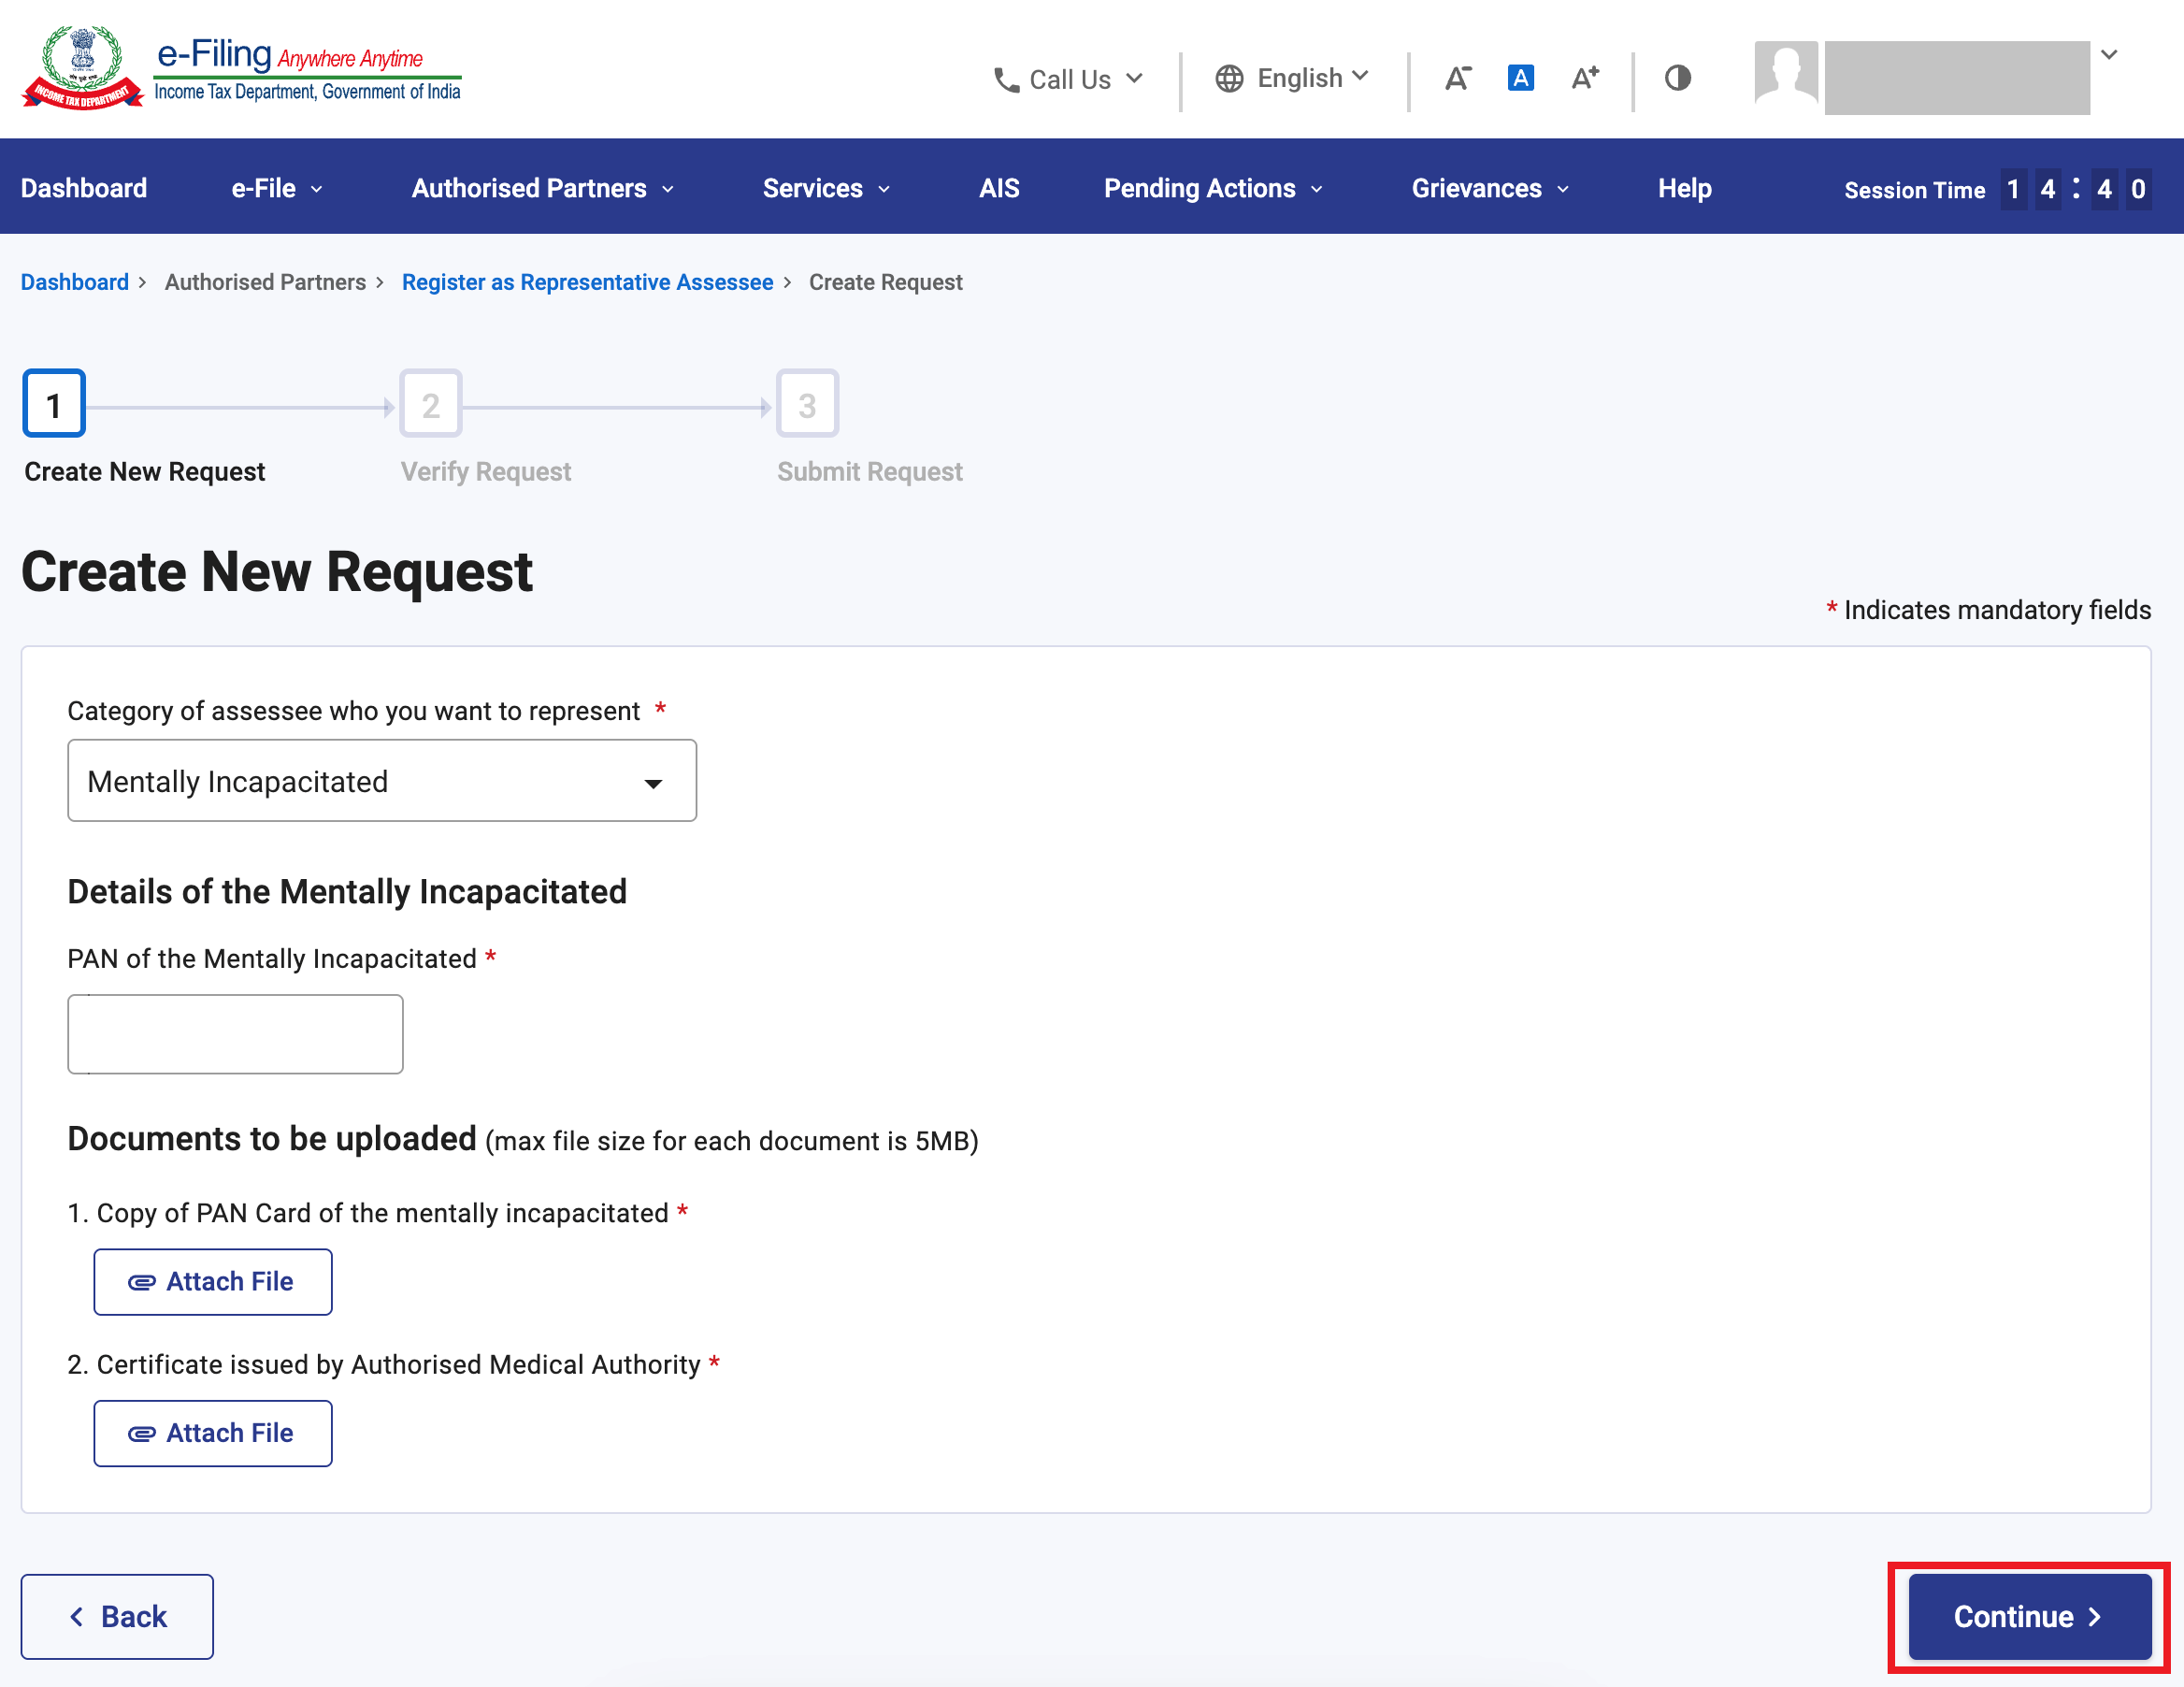

Please Note:
• Required details and mandatory attachments differ as per the category of assessee selected.
• The maximum size of the attachment should be 5 MB.
• If you have multiple documents to upload, put them in a zipped folder and upload the folder. The maximum size for all the attachments in a zipped folder should be 50 MB.
Step 7: On the Verify your Request page, provide the 6-digit OTP received on your mobile number and email ID registered with the e-Filing portal and click Submit.

Please Note:
• OTP will be valid for 15 minutes only.
• You have 3 attempts to enter the correct OTP.
• The OTP expiry countdown timer on screen tells you when the OTP will expire.
• On clicking Resend OTP, a new OTP will be generated and sent.
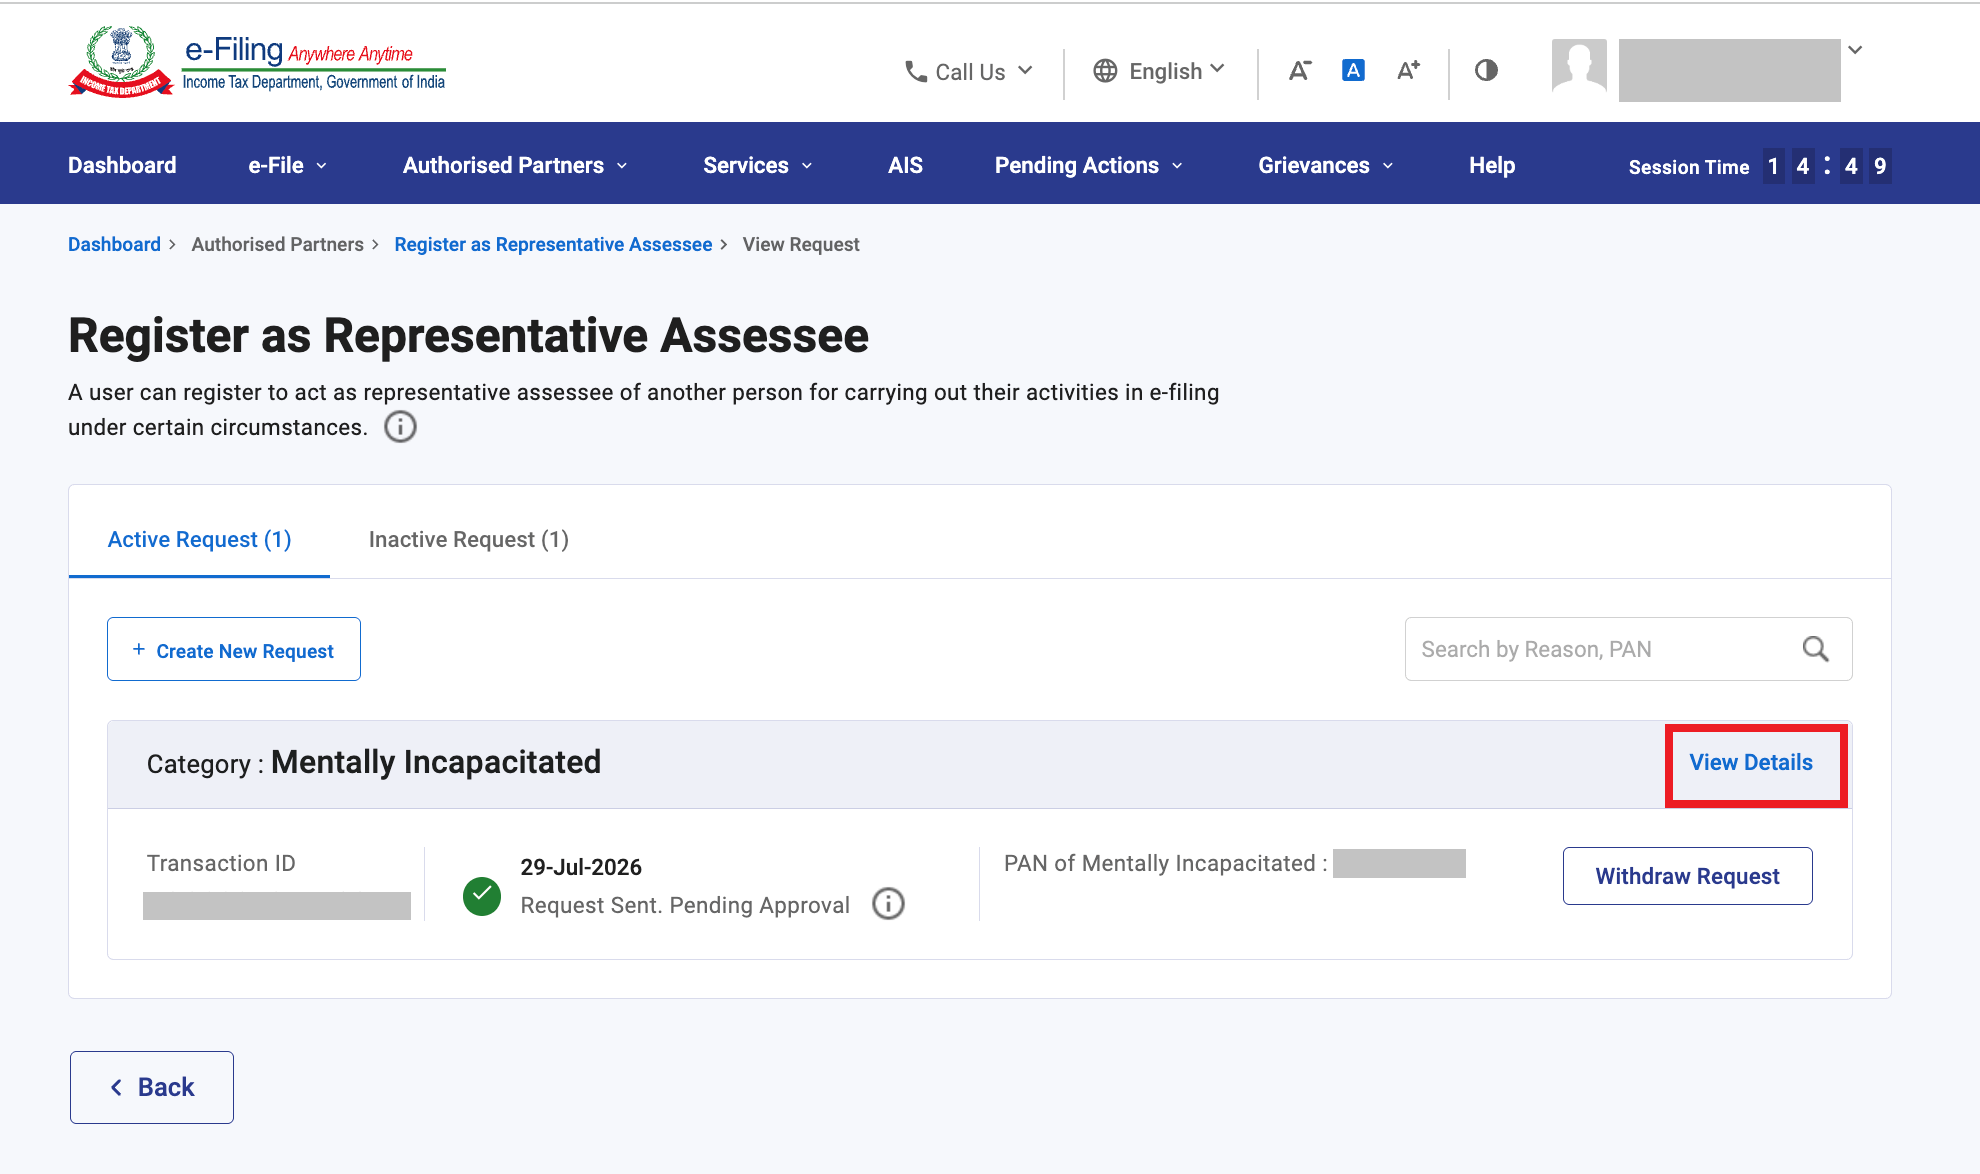
Step 8: Request for register as representative submitted successfully to Income Tax department. Click View Request to see all submitted requests along with the uploaded attachments.

This request will be processed by the Income Tax Department within 7 days.
Upon approval you will be able to perform e-Filing related activities for Person holding PAN EXXXX3479P.

To Download the attachments, click on View details and download.

3.2 Register on Behalf of Another Person:
Step 1: Log in to the e-Filing portal using your user ID and password.

Step 2: Click Authorized Partners > Register to act on behalf of another person.

Step 3: Click Let's get Started.

Step 4: On the Register to Act on Behalf of Another Person page, click Create New Request.

Step 5: Choose the Category of assessee on behalf of whom you want to register from the dropdown.

Step 6: Enter the required details. Upload the mandatory attachments and click Continue.

Please Note:
• Required details and mandatory attachments differ as per the category of assessee selected.
• The maximum size of the attachment should be 5 MB.
• If you have multiple documents to upload, put them in a zipped folder and upload the folder. The maximum size for all the attachments in a zipped folder should be 50 MB.
Step 7: On the Verify your Request page, provide the 6-digit OTP received on your mobile number and email ID registered on the e-Filing portal and click Submit.

Note:
• OTP will be valid for 15 minutes only.
• You have 3 attempts to enter the correct OTP.
• The OTP expiry countdown timer on screen tells you when the OTP will expire.
• On clicking Resend OTP, a new OTP will be generated and sent.
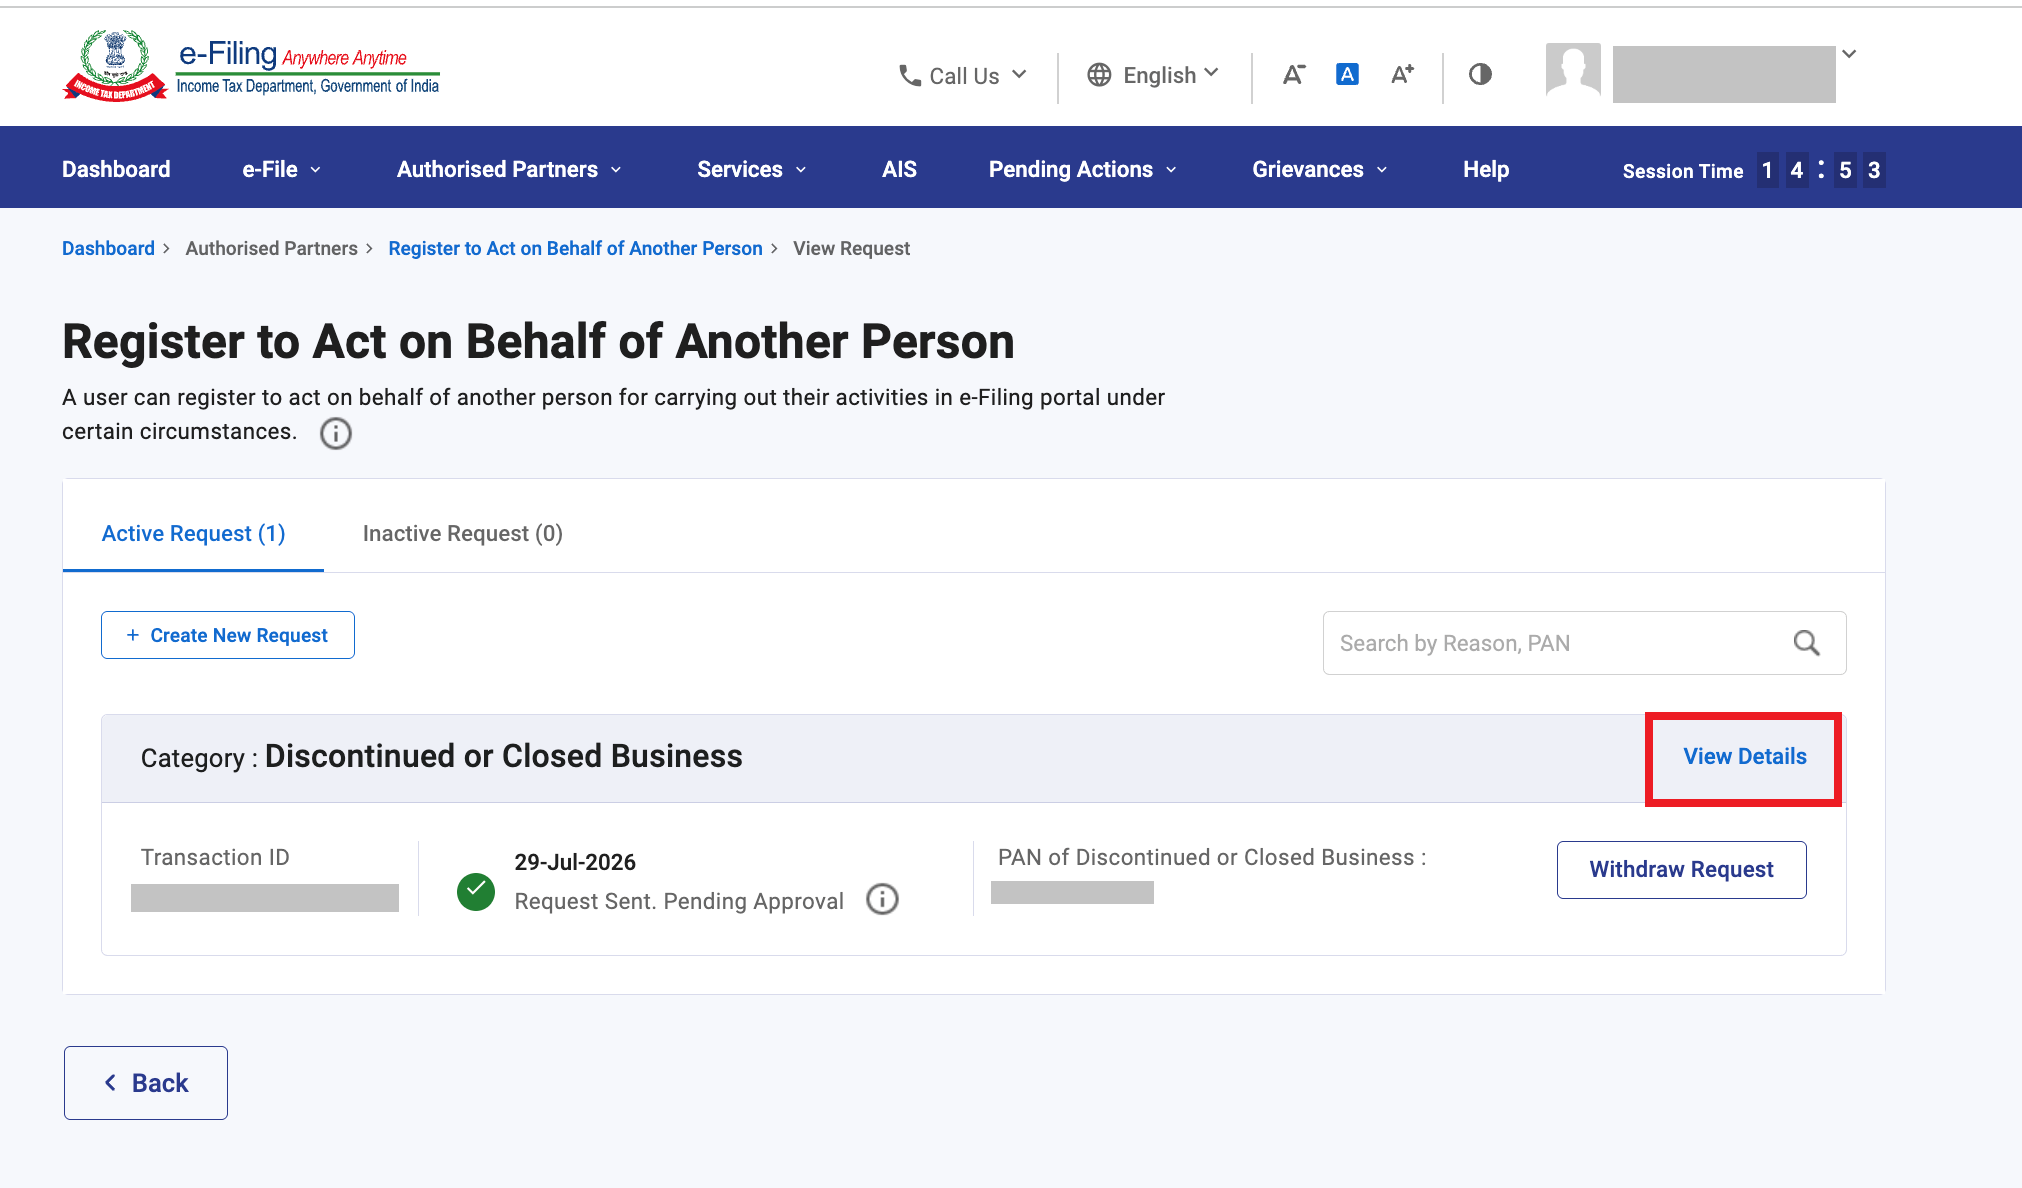
Step 8: Request for register as representative submitted successfully to Income Tax department. Click View Request to see all submitted requests along with the uploaded attachments.

This request will be processed by the Income Tax Department within 7 days.
Upon approval you will be able to perform e-Filing related activities for Person holding PAN EXXXX3479P

To Download the attachments, click on View details and download.

3.3 Authorize another Person to act on Behalf of Self
Step 1: Log in to the e-Filing Portal using your user ID and password.

Step 2: Click Authorized Partners > Authorize another person to act on behalf of self.

Step 3: Click Let's get started.

Step 4: You will now be able to view all the previous requests. For a new request, click Add Authorized Signatory.

Step 5: Choose the reason for adding authorised signatory who you want to add.

Step 6: On the Add Authorized Signatory page, on the basis of reason selected fill the necessary details and click Continue.

Please Note: Required details differ as per the reason selected.
Step 6: On the Verify your Request page, provide the 6-digit OTP received on your mobile number and email ID registered with the e-Filing portal and click Submit.

Note:
• OTP will be valid for 15 minutes only.
• You have 3 attempts to enter the correct OTP.
• The OTP expiry countdown timer on screen tells you when the OTP will expire.
• On clicking Resend OTP, a new OTP will be generated and sent.
Step 7: On successful validation, a success message is displayed along with a Transaction ID. Please keep a note of the Transaction ID for future reference. Click on the View Request button to view all previously submitted requests.

Please Note:
After submitting, the request:
• An alert message will be sent to the Authorized Signatory's email ID and mobile number intimating that a request has been raised.
• The Authorized Signatory can login to the e-Filing portal; go to Worklist > For Your Action to view / accept / reject the request.
• The Authorized Signatory should either accept or reject the request within 7 days from the date of raising the request. The request can be accepted by attaching a PDF copy of notarized Power of Attorney (POA) received from the assessee or the same can be rejected by providing the comments.
You can download the Power of attorney template by clicking on Click here in the success message.
POA as per Income Tax Act,1961:

POA as per Income Tax Act,2025:

Acceptance / Rejection by Authorised Signatory Login:
Step 1: Authorized Signatory will login through his login credentials.

Step 2: Go to > Pending Actions > Work list.

Step 3: Here you can accept/ reject. If you are accepting, you have to upload notarised POA and click continue to verification.

Step 4: Attach the Notarised POA.

Step 5: Select the appropriate mode of verification and verify the form.