

Form 146 User Manual
1. Overview
Form 146 is needed when you make a taxable payment of more than ₹5 lakh in a year to a person who lives outside India or to a foreign company. It is required every time you make such a payment. A Chartered Accountant (CA) reviews the payment and confirms details like what the payment is for, how much TDS (tax) should be deducted, and whether the deduction is correct. In simple terms, form 146 is a certificate in which a CA checks and confirms the tax responsibility for sending money abroad. You can file this form either online or offline, and there is no fixed deadline for submitting it. As per the Income tax Act 1961, Form 146 is known as Form 15CB.
2. Prerequisite for availing this service
• CA should register in e-Filing portal with his membership number.
• Status of CA - ID should be “Active”
• CA must contain the valid DSC (Digital Signature Certificate)
• Taxpayer should assign Form 146 to CA.
3. About the Form
3.1 Purpose
Form 146 is an Accountant's certificate required for payment to be made to a Non-Resident (not being a Company) or to a Foreign Company, which is taxable and if the payment / aggregate of such payments exceeds ₹5 Lakh in the tax year. This form enables the CA to certify the details of remittance to be made outside India and ultimately used by the person who is responsible for making the payment in filing Form 145 Part-C.
3.2 Who can file it?
A Chartered Accountant (CA) can issue Form 146 only if they are registered on the Income Tax e Filing portal and the taxpayer has assigned them Form 146. The CA must also have a Digital Signature Certificate (DSC) registered on the portal so they can electronically verify and submit Form 146.
3.3 Form at a Glance
Form 146 has seven panels:
1. Particulars of the Remitter (Sender):
2. Particulars of the Remittee (Recipient)
3. Particulars of the Remittance (Fund Transfer)
4. Taxability under the provisions of Income-tax Act [without considering Double Taxation Avoidance Agreement (“DTAA”)
5. Taxability under the Double Taxation Avoidance Agreement (“DTAA”)
6. Details of Tax Deducted at Source
7. Verification
4. Step-by-Step Guide
Form 146 can be filed through the following two modes:-
(a) Online Mode – through e-Filing
(b) Offline Mode – through offline utility.
Follow the below steps to fill and submit Form 146 through online mode
4.1. Assigning Form 146 to CA by taxpayer
Step 1: Log in to the e-Filing portal with your User ID and Password.

Step 2: Enter the User ID (PAN) and Password.

Step 3: Go to Authorised Partners > My Chartered Accountants (CA).

Step 4: In My Chartered Accountants (CA) screen, click on “Add CA” button.

Step 5: In Add Chartered Accountant screen, user needs to provide membership number and click on “Add” button.
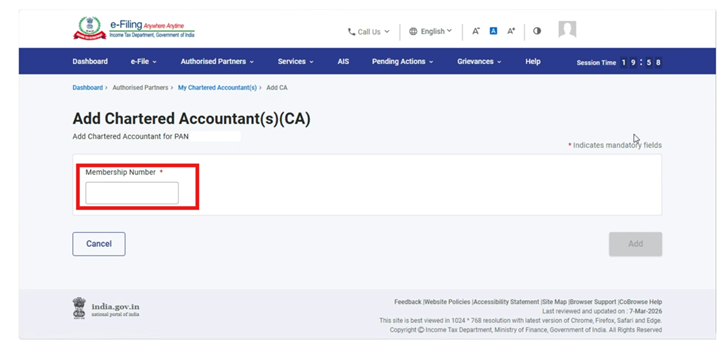

Step 6: The Chartered Accountant (CA) will be added to the user’s profile. After adding the CA, the user is required to assign Form 146 to the CA.
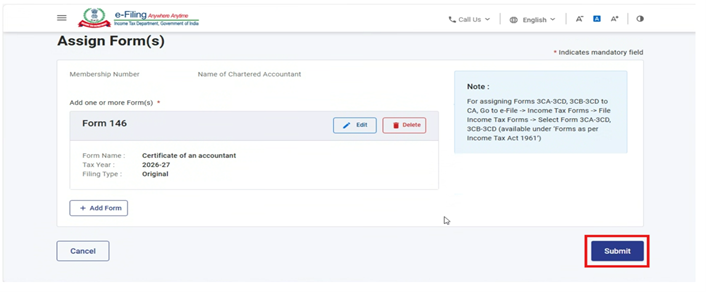
In the Form Assignment dialog box, the user should select “Forms as per the Income Tax Act, 2025”, choose the form 146, and then click the “Add” button.

Step 7: Once the form has been added under the Chartered Accountant’s Name, the user must click the “Submit” button to successfully complete the assignment of Form 146.

4.2. Filing of Form 146 by CA
Step 1: Log in to the e-Filing portal with your User ID and Password.

Step 2: Enter the User ID (ARCA) and Password

Step 3: Go to e-file > Income Tax Forms > File Income Tax Forms

Step 4: Select/Search the form 146 under Forms as per Income Tax Act 2025 tab and click on File Now button.

Step 5: Select the applicable submission mode and tax year and click on Continue

Step 6: After clicking the “Continue” button, a pop up window titled “Enter PAN/TAN Details” will be displayed. The Chartered Accountant (CA) must enter the PAN of the assessee who has assigned the form to the CA and click proceed.

Step 7: Upon clicking “Proceed” button, the user is navigated to the Form screen. Select the first panel i.e. “Particulars of the Remitter (Sender)”.

Step 8: Verify and confirm the particulars of the remitter which will be auto populated from the PAN provided by the CA and click Save.

Step 9: Post saving the first panel, status of the panel will be displayed as “Completed”. Now select the second panel i.e. “Particulars of the Remittee (Recipient)”.

Step 10: Fill the details in the second panel and click on save button. CA needs to provide the required details of the remittee (recipient).
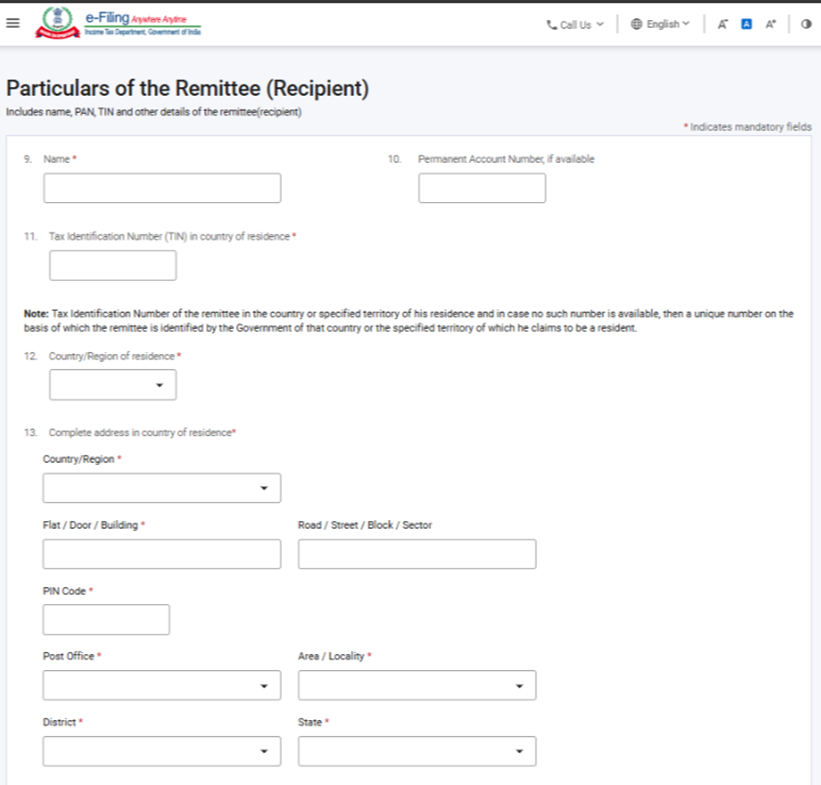

Step 11: Post saving the second panel, status of the panel will be displayed as “Completed”. Now select the third panel i.e. “Particulars of the Remittance (Fund Transfer)”.

Step 12 : Fill the required details in the third panel and click on save button.
Note:
(a) In field no. 19, The amount of remittance should be before deduction of TDS i.e. grossed up.
(b) In field no. 20, once the CA provides a valid IFSC in column a, then column b and column c will be auto populated based on the IFSC provided.
(c) In field no. 21, If the bank and the authorised dealer are not same than select “No” and select the name of the authorised dealer from the dropdown list provided by the RBI.
(d) The Purpose code (field no. 24) and Sub-code (field no. 25) are as per the list provided by the RBI.


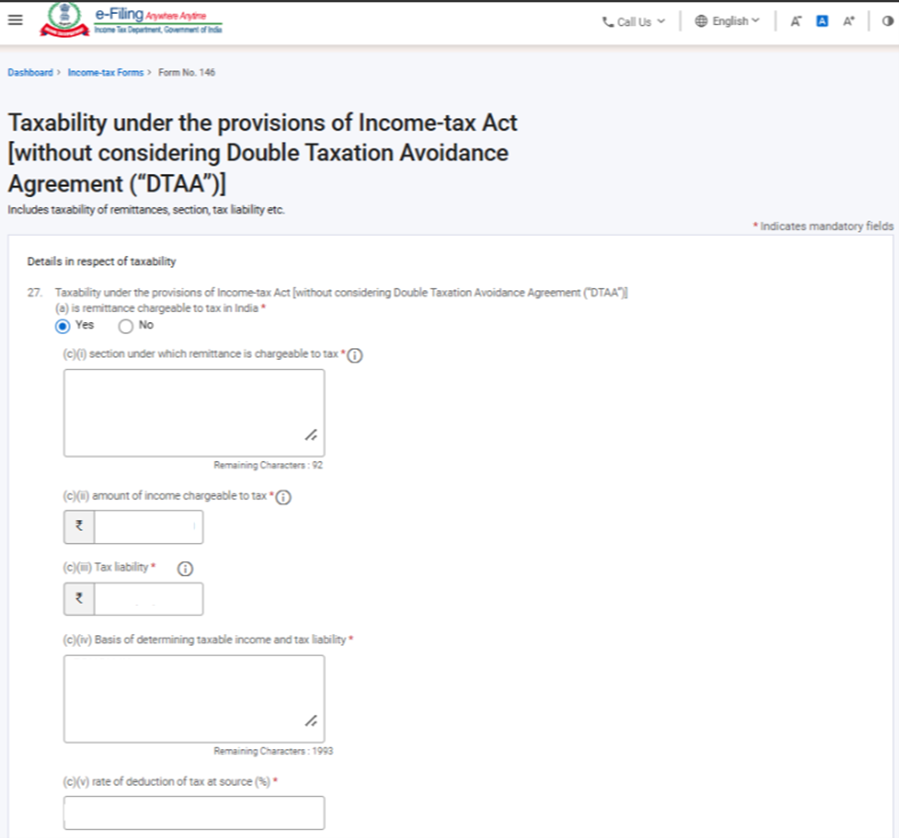
Step 13: Post saving the third panel, status of the panel will be displayed as “Completed”. Now select the fourth panel i.e. “Taxability under the provisions of Income -tax Act [without considering Double Taxation Avoidance Agreement (DTAA)].

Step 14: Fill in the required details in the fourth panel and click on save button.
Note:
(a) In field no. 27(a), CA needs to select whether the transaction is taxable in India or not. If “Yes”, required fields like section, amount and rate of tax needs to be reported. Incase of No, reasons should be reported.
(b) In field no. 28, CA needs to select whether relief under DTAA is claimed or not. If “Yes”, required fields like TRC of remittee, Nature of payment, details of DTAA & taxable income and tax amount need to be reported.

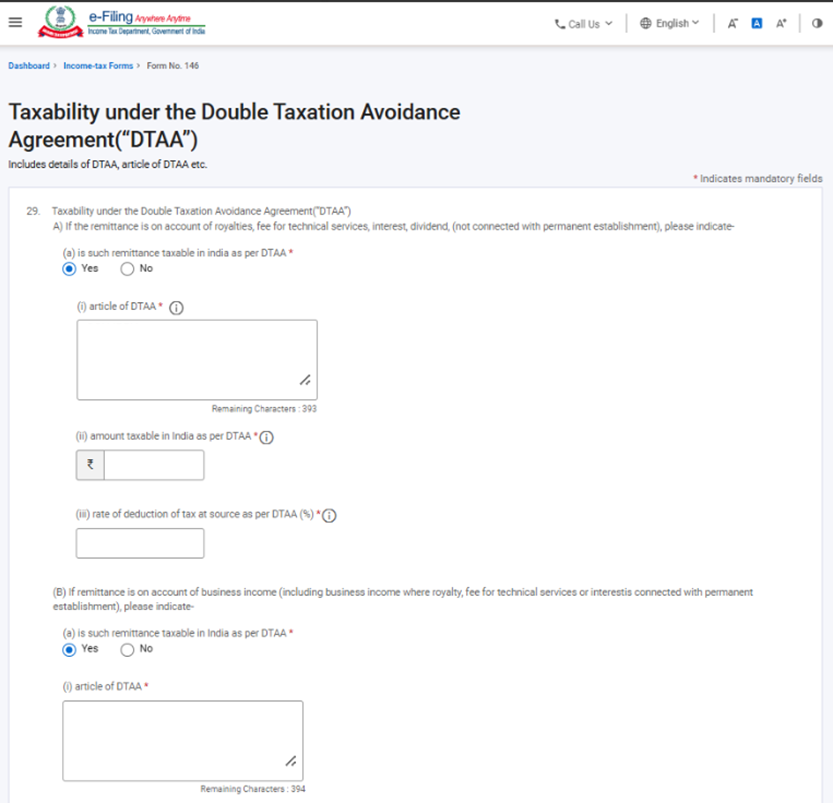
Step 15: Post saving the fourth panel, status of the panel will be displayed as “Completed”. Now select the fifth panel i.e. “Taxability under the Double Taxation Avoidance Agreement (DTAA)”.

Step 16: Fill in the required details in the fifth panel and click on save button.
Note:
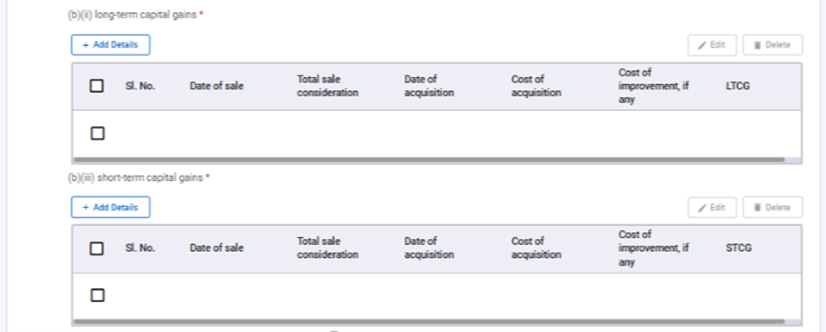
(a) This panel contains details w.r.t. the taxability of the transaction under DTAA.
(b) In field no 29(c), CA needs to explain whether the remittance is on the account of capital gains or not. If “Yes”, then CA needs to provide classification of Capital gains, its sale consideration, date and cost of purchase and the gain amount.

Step 17: Post saving the fifth panel, status of the panel will be displayed as “Completed”. Now select the sixth panel i.e. “Details of Tax Deducted at Source”.

Step 18: Fill in the required details in the sixth panel and click on save button.
Note:
(a) This panel contains details w.r.t the tax deducted at source. In field no. 31, CA needs to select whether the TDS was deducted as per Income-tax or as per DTAA.
(b) In field no. 34, date of deduction should be reported.

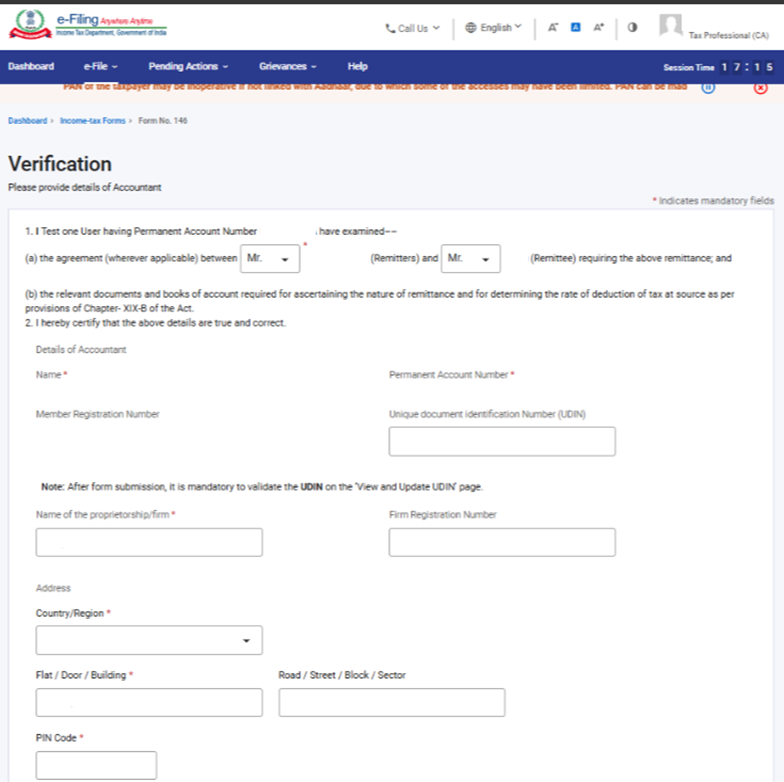
Step 19: Post saving the sixth panel, status of the panel will be displayed as “Completed”. Now select the seventh panel i.e. “Verification”.

Step 20: Fill in the required details in the seventh panel and click on save button.
Notes:
(a) The UDIN field in the form is currently optional. Incase CA updates the UDIN in the form then also he is required to validate the UDIN through “View and Update UDIN” screen.

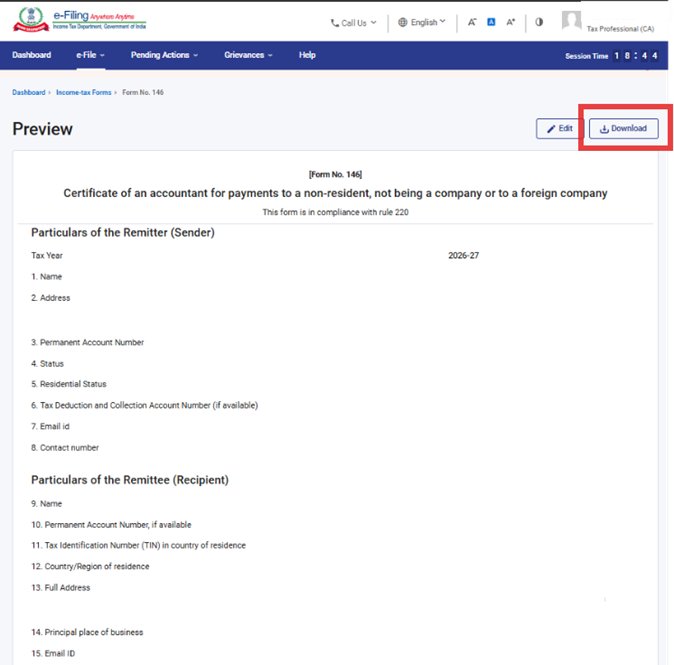
Step 21: Post saving the seventh panel, status of all the panels will be displayed as “Completed”. Now click on preview button.

Step 22: Review the details and click Proceed to e-Verify. User can download the preview PDF by clicking on the download button.

Step 23: Post clicking on “Proceed to E-Verify” button, a confirmation popup will be displayed. User should select “Yes” to proceed with verification, otherwise select “No” to return to preview screen.

Step 24: On clicking Yes, you will be navigated to the e-Verify page where you can verify the Form 146 using DSC only. Click on Continue to e-Verify via DSC.
Note: Refer to the How to e-Verify user manual to learn more.

Step 25: On clicking Continue, you will be navigated to the Data Sign page where you need to verify details of the DSC and provide password for the DSC. Click on “Sign” button to verify and submit form 146.

Step 26: After successful e-Verification, a success message is displayed along with a Transaction ID and Acknowledgement Receipt Number. Please keep a note of the Transaction ID and Acknowledgement Receipt Number for future reference. You will also receive a confirmation message on the email ID(s) and mobile number(s) registered with the e-Filing portal.

Note: Once the Form gets submitted successfully, CA needs to validate the UDIN in View and Update UDIN page.
After successful submission of Form 146, the user can view the filed form under - On your Dashboard, click e-File > Income Tax Forms > View Filed Forms> View Filed Form tab under Income Tax Act 2025.
Note: Refer view filled form user manual to learn more.
5. Related Topics
6. Glossary
| Acronym/Abbreviation | Description/Full Form |
| DSC | Digital Signature Certificate |
| EVC | Electronic Verification Certificate |
| ARN | Acknowledgement Receipt Number |
| PY | Previous Year |
| FY | Financial Year |
| TY | Tax Year |

