My Chartered Accountant(CA) User Manual
1. Overview
The My CA service is available to all registered users of the e-Filing portal who fall under the below categories:
- Individual
- Hindu Undivided Family (HUF)
- Company, Association of Persons (AOP), Body of Individuals (BOI), Artificial Judicial Person (AJP), Trust, Government, Local Authority (LA), Firm
- Tax Deductor and Collector
With this service, registered users will be able to:
- View a listing of their authorized Chartered Accountants (CA)
- Assign forms to a CA
- Withdraw assigned forms
- Activate a CA
- Deactivate a CA
2. Pre-requisites for availing this service
- Registered user of the e-Filing portal with valid user ID and password
- CA should have a valid CA membership number and be registered on the e-Filing portal
- In Case of individual, PAN is linked with Aadhaar number (Recommended)
3. Step-by-Step Guide
3.1 View CA
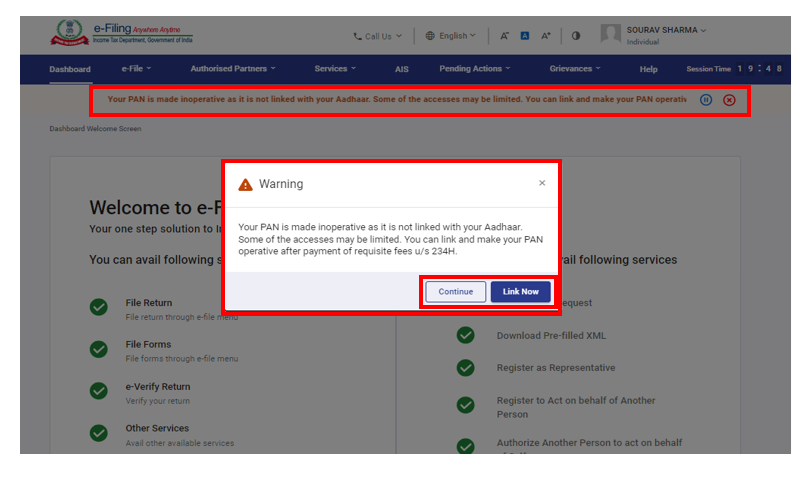
Step 1: Log in to the e-Filing portal using user ID and password.

For Individual users, if PAN is not linked with the Aadhaar you will see a pop-up message that your PAN is made inoperative as it is not linked with your Aadhaar.
To link the PAN with Aadhaar, click on Link Now button else click Continue.
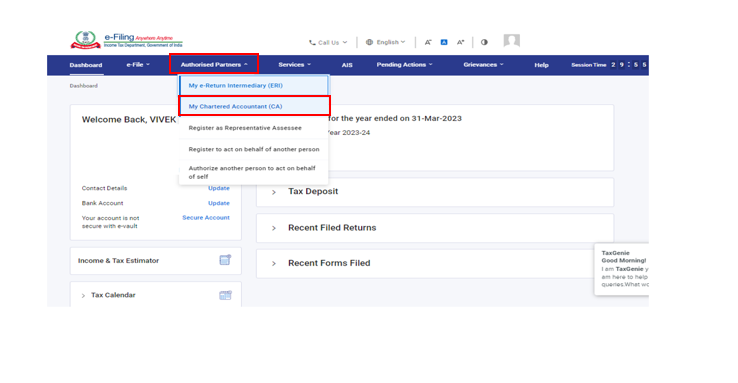
Step 2: Click Authorized Partners > My Chartered Accountant.
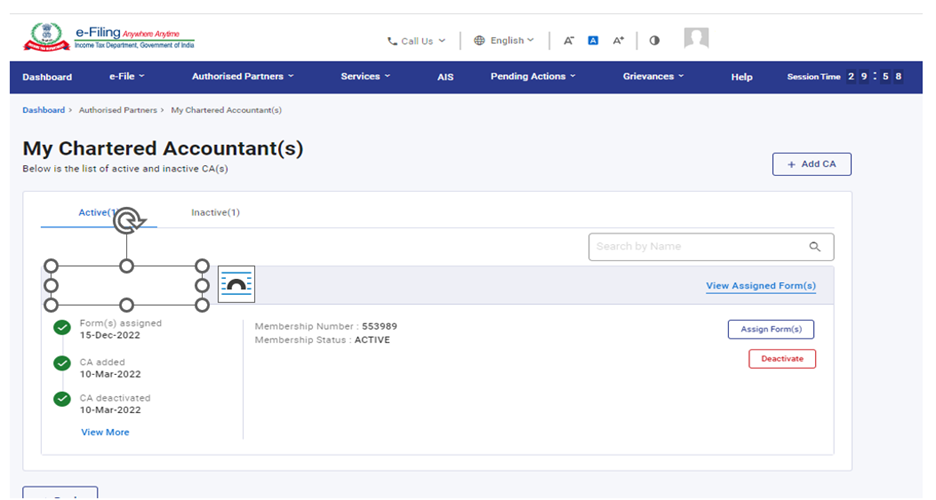
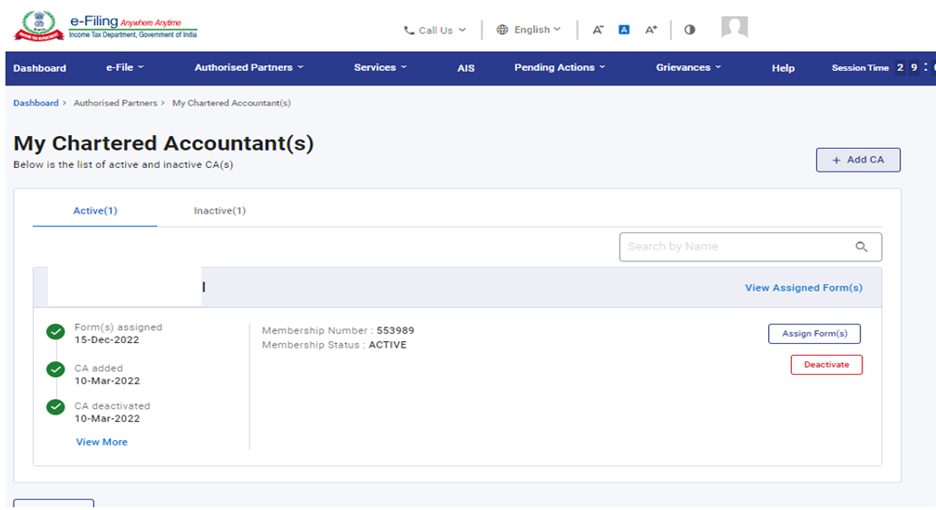
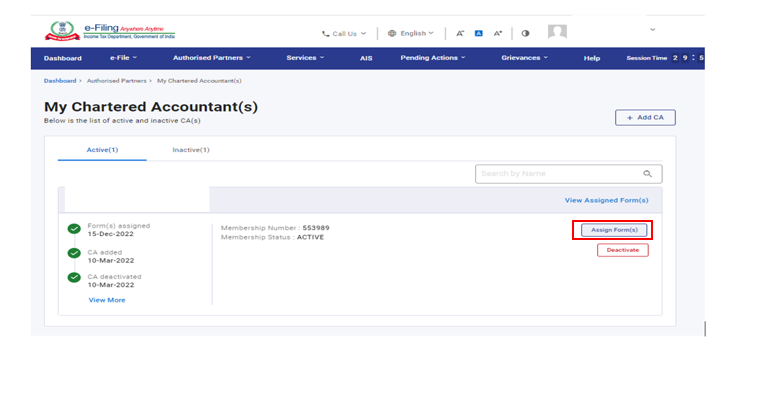
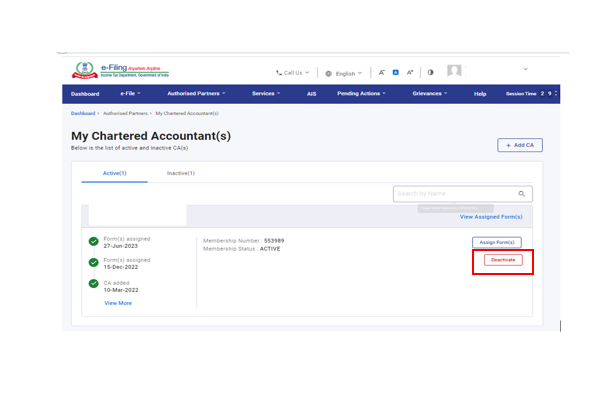
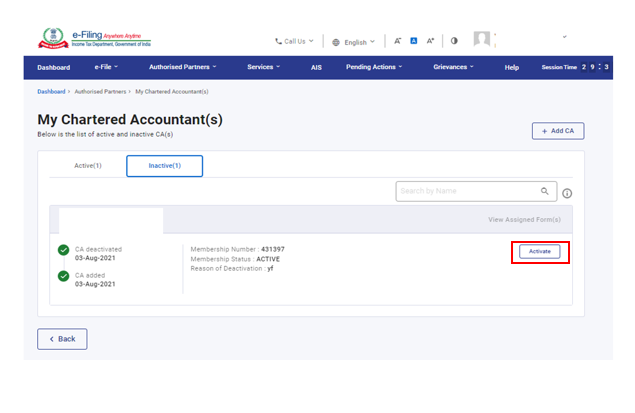
Step 3: The My Chartered Accountant(s) page appears. It displays the active and inactive CAs under the respective tabs.
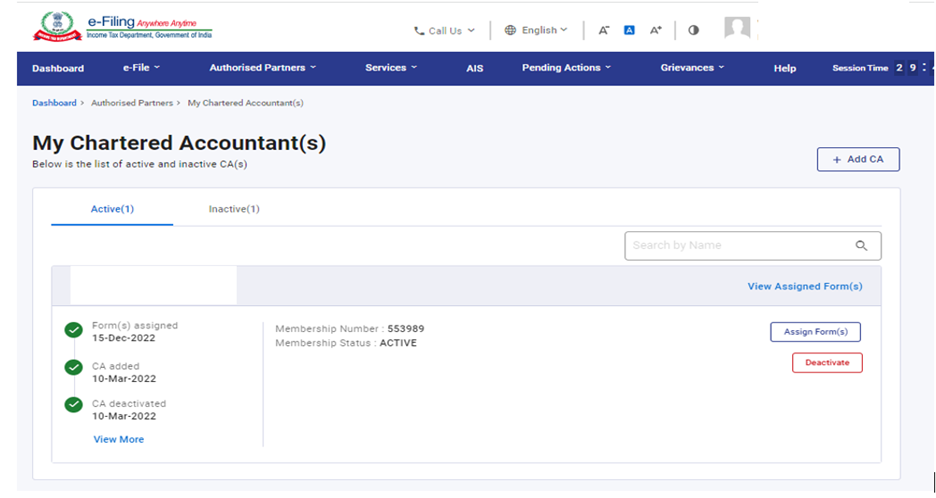
Step 4: Enter name in the Search by Name textbox to view all matching records.
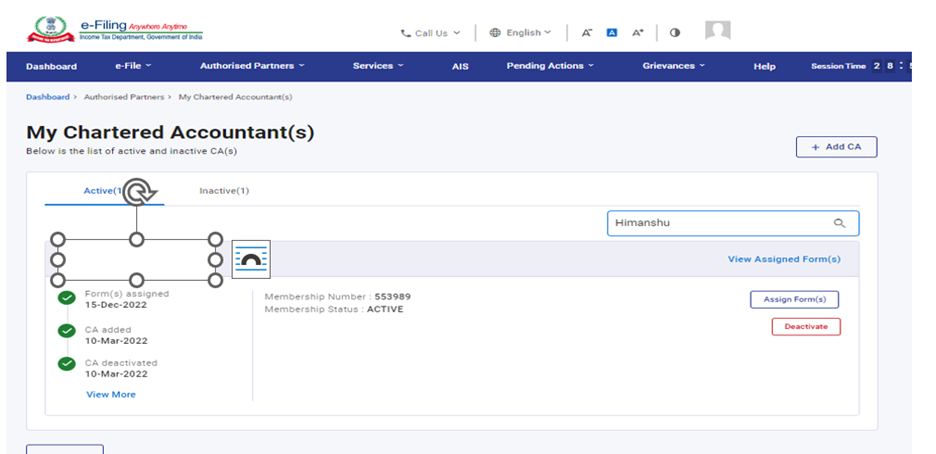
Step 5: Click View Assigned Forms to display the status and details of all forms assigned to a specific CA.
Other actions that you can perform after reaching the My Chartered Accountant(s) page are as follows:
|
Add CA |
Refer to Section 3.2 |
|
Assign Forms to CA |
Refer to Section 3.3 |
|
Deactivate CA |
Refer to Section 3.4 |
|
Activate CA |
Refer to Section 3.5 |
|
Withdraw a Form |
Refer to Section 3.6 |
3.2: Add CA
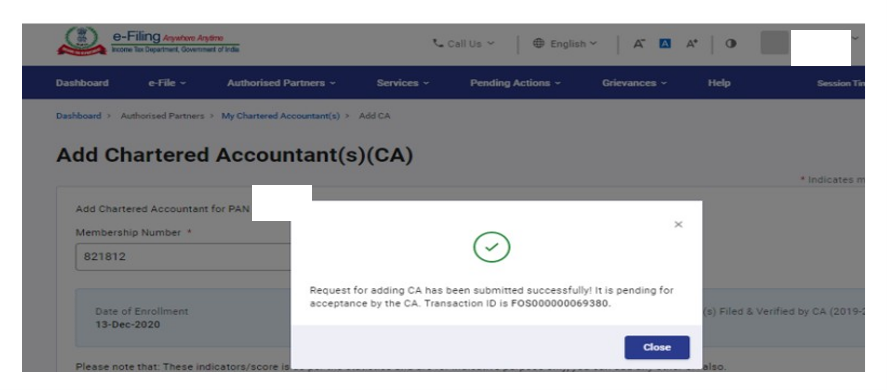
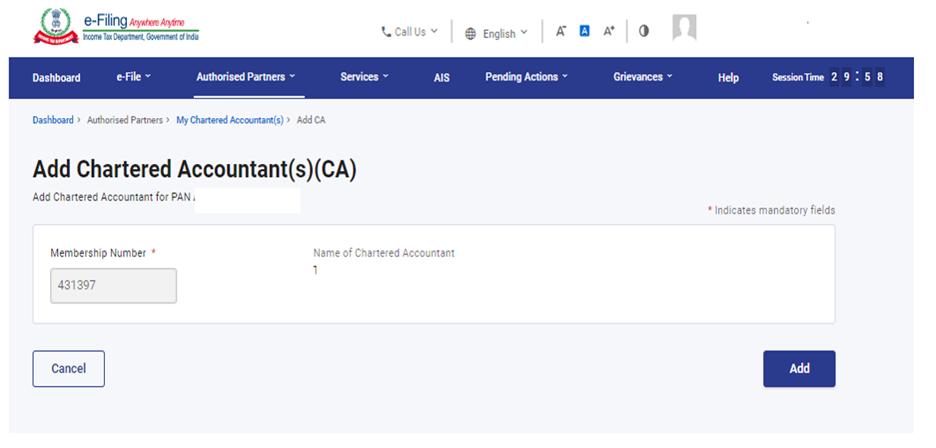
Step 1: For assigning forms to a CA, the CA must be added and authorized by you in your profile. If you want to add a CA, click Add CA.
Step 2: The Add Chartered Accountant(s)(CA) page appears. Enter the Membership Number of the CA. The CA name is filled automatically from the database.
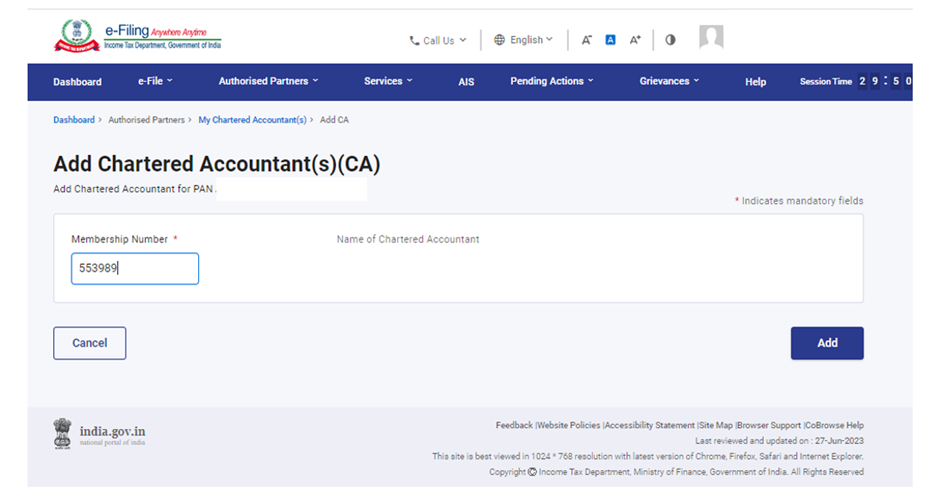
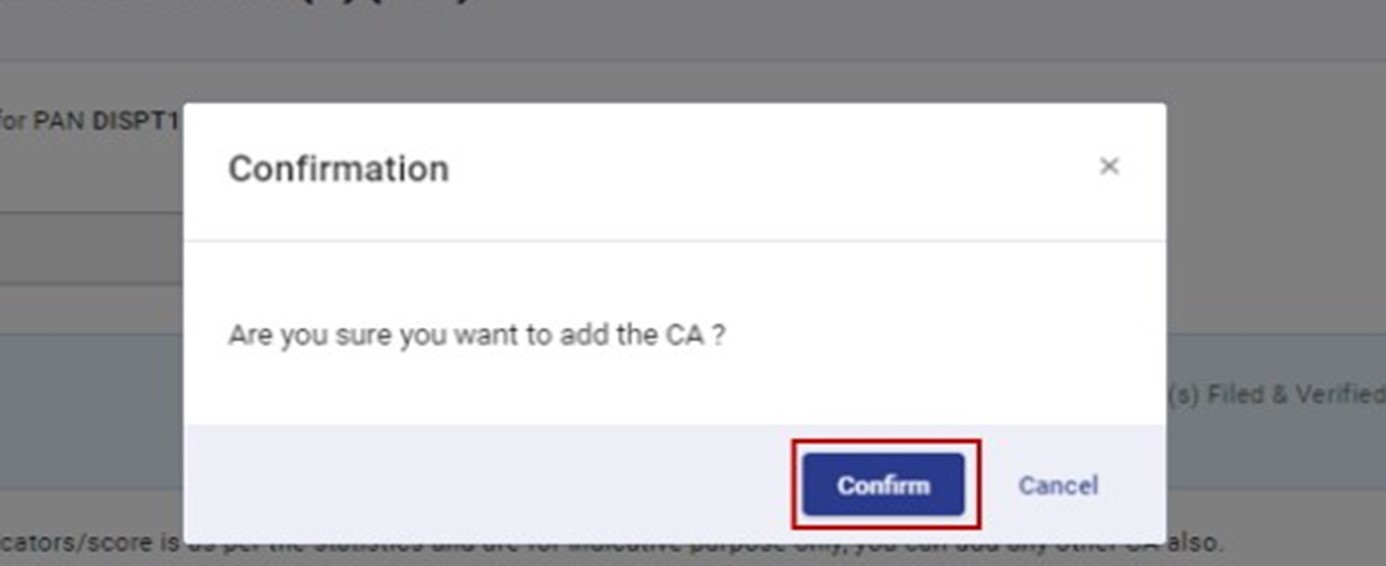
Step 3: Click Confirm to add the CA.

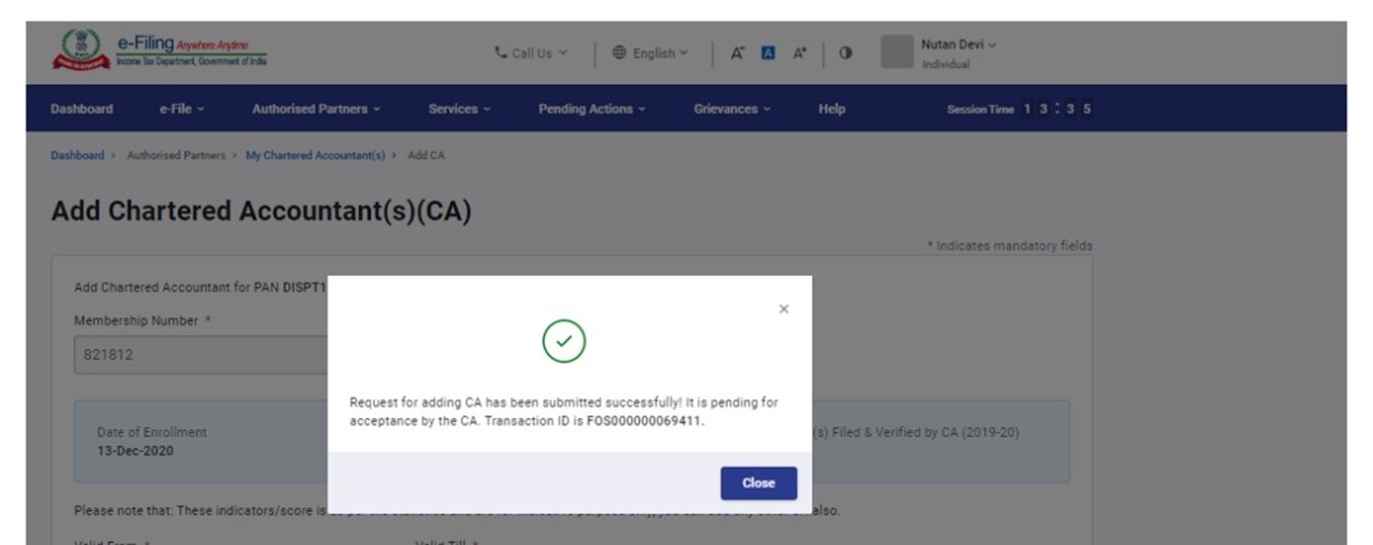
A success message is displayed along with the Transaction ID for future reference.
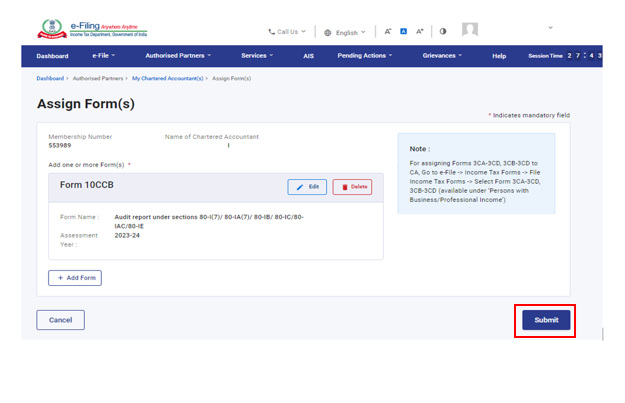
3.3 Assign Forms to CA
Step 1: In the My Chartered Accountant(s) page, click Assign Form(s) against the required CA in the Active CA tab.
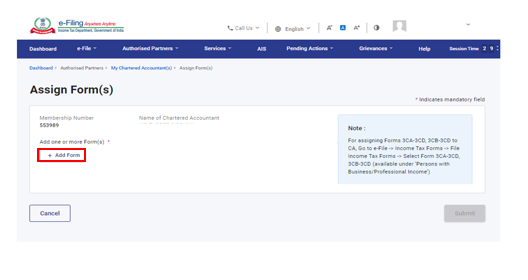
Step 2: Click Add Form on the Assign Form(s) page.
Step 3: Select the “Forms as per income Tax Act 1961, Form Name, Assessment Year, Filing Type and click Add to assign Income tax Act 1961 forms.
Select the “Forms as per income Tax Act 2025, Form Name, Tax Year, Filing Type and click Add to assign Income tax Act 2025 forms.
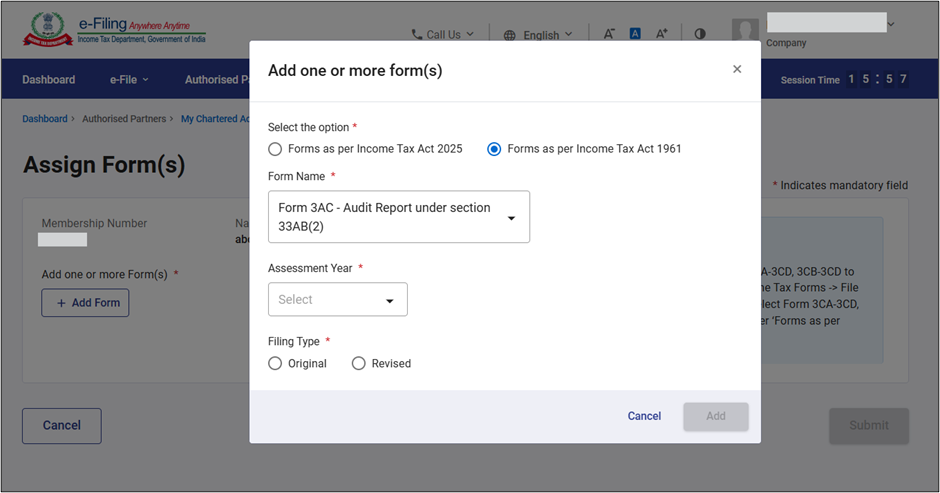
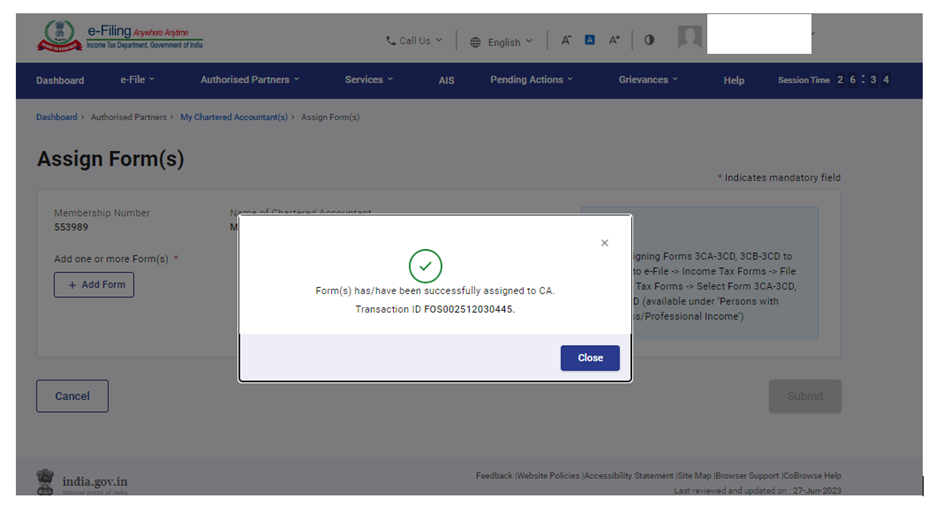
Step 4: The Assign Form(s) page will appear with the selected form added. Review the information displayed and click Submit.
A success message is displayed along with a Transaction ID.
3.4 Deactivate CA
Step 1: On the My Chartered Accountant(s) page, click Deactivate against the required active CA under the Active tab.
Step 2: On the Deactivate CA page, select the reason for deactivation and click Continue.
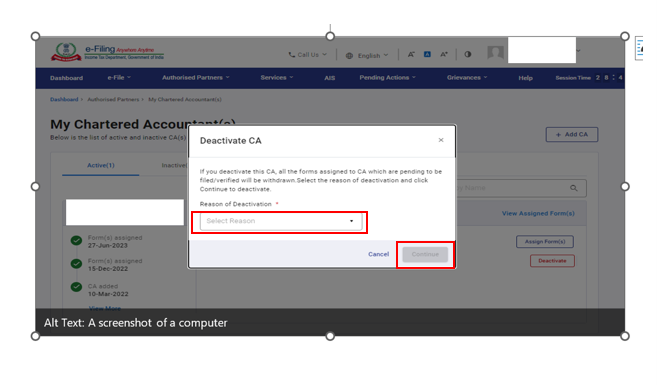
A success message is displayed along with the Transaction ID. Please keep note of the Transaction ID for future reference.

3.5 Activate CA
Step 1: To activate an inactive CA from the My Chartered Accountant(s) page, click Activate against the corresponding CA under the Inactive tab.
Step 2: The Add Chartered Accountant(s) page will appear displaying pre-filled details of the CA to be activated.
Step 3: Click Confirm if the entered details are correct. Else, click Cancel.
A success message is displayed along with the Transaction ID. Please keep note of the Transaction ID for future reference.
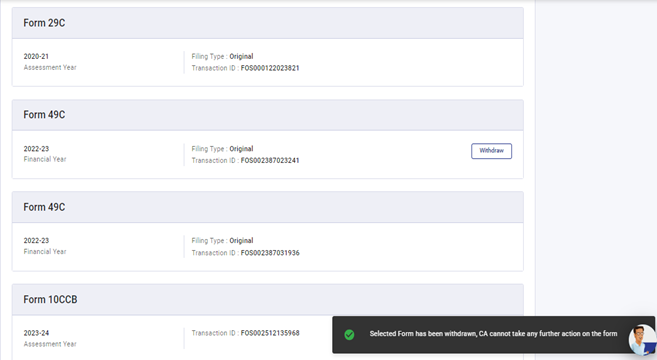
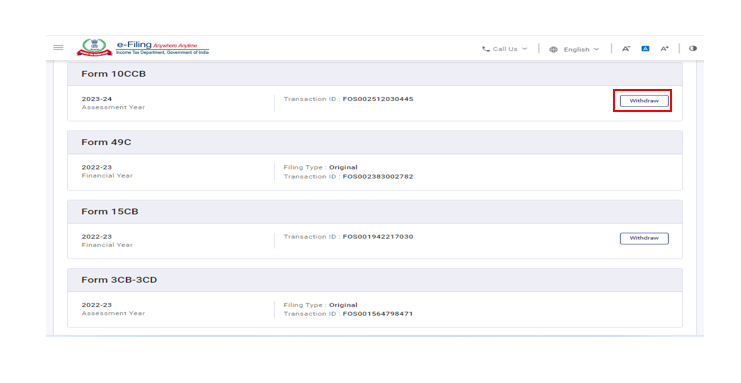
3.6 Withdraw a Form
Step 1: Click View Assigned Form(s) under the Active tab.

Step 2: Click Withdraw against the corresponding form to be withdrawn.
Step 3: Click Confirm to withdraw the form.
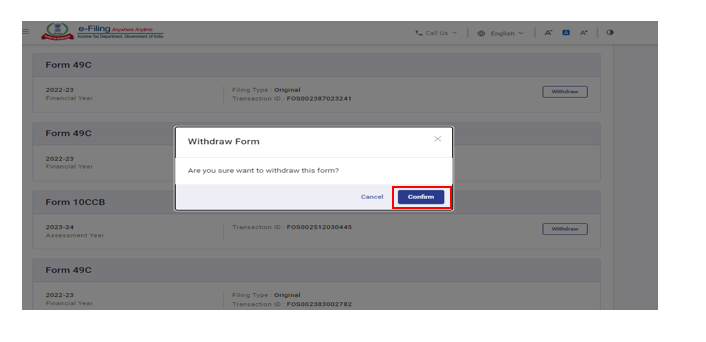
A success message is displayed that the selected Form has been withdrawn, CA can not take any further action on the form.