Form 142 User Manual
1. Overview
Form No. 142 is PAN based quarterly form, prescribed under Rule 219 (2) and (3) for furnishing a quarterly statement filed by Virtual Digital Asset (VDA) Exchanges that:-
• Facilitates buying and selling of virtual digital asset (VDAs) (e.g., crypto exchanges), and
• Have agreed to deposit tax on behalf of buyers or brokers under section 393(1) [Table: Sl. No. 8(vi)]. This form must be filed electronically on the Income-tax e-Filing portal.
2. Who can file Form 142
Form No. 142 must be filed by any ‘Exchange’ (who has agreed in accordance with guidelines issued in Circular no. 13/2022 dt. 22.06.2022 to pay tax on transaction of transfer of VDA owned by it as an alternative to tax required to be deducted by the buyer of such asset u/s 393(1) [Table: Sl. No. 8(vi)].
3. Due Date to file Form 142
Form 142 must be furnished quarterly, within one month from the end of each quarter.
Below are the due dates:
| Quarter | Period | Due Date |
| Q1 | April – June | On or before July 31st of financial year |
| Q2 | July – September | On or before October 31st of financial year |
| Q3 | October – December | On or before January 31st of financial year |
| Q4 | January – March | On or before May 31st of financial year immediately following the tax year |
4. Prerequisites for availing this service
• Taxpayer is registered at e-filing portal.
• Taxpayer has valid Username (PAN) and Password of E-filing 2.0 portal.
• Status of PAN of the Taxpayer is “Active” as per PAN database.
• Taxpayer should have a valid DSC to verify form through DSC Mode. It should be registered on the e-filing portal & not expired.
5. Step-by-Step Guide
5.1 How to File Form 142
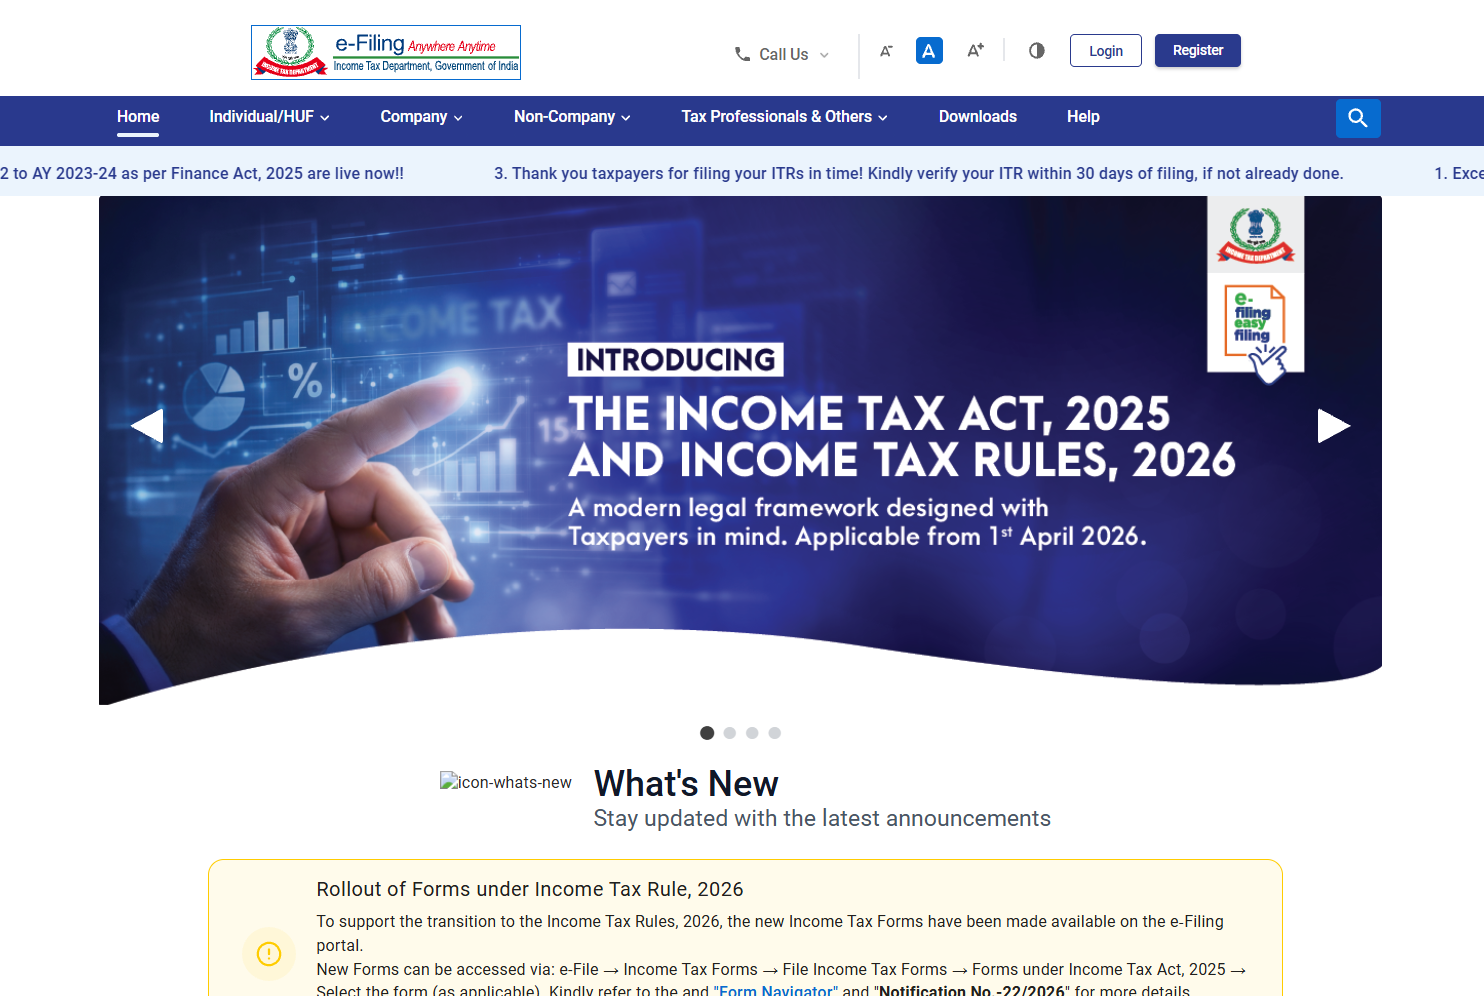
Step 1: Visit Income Tax e-filing portal (http://www.incometax.gov.in/).
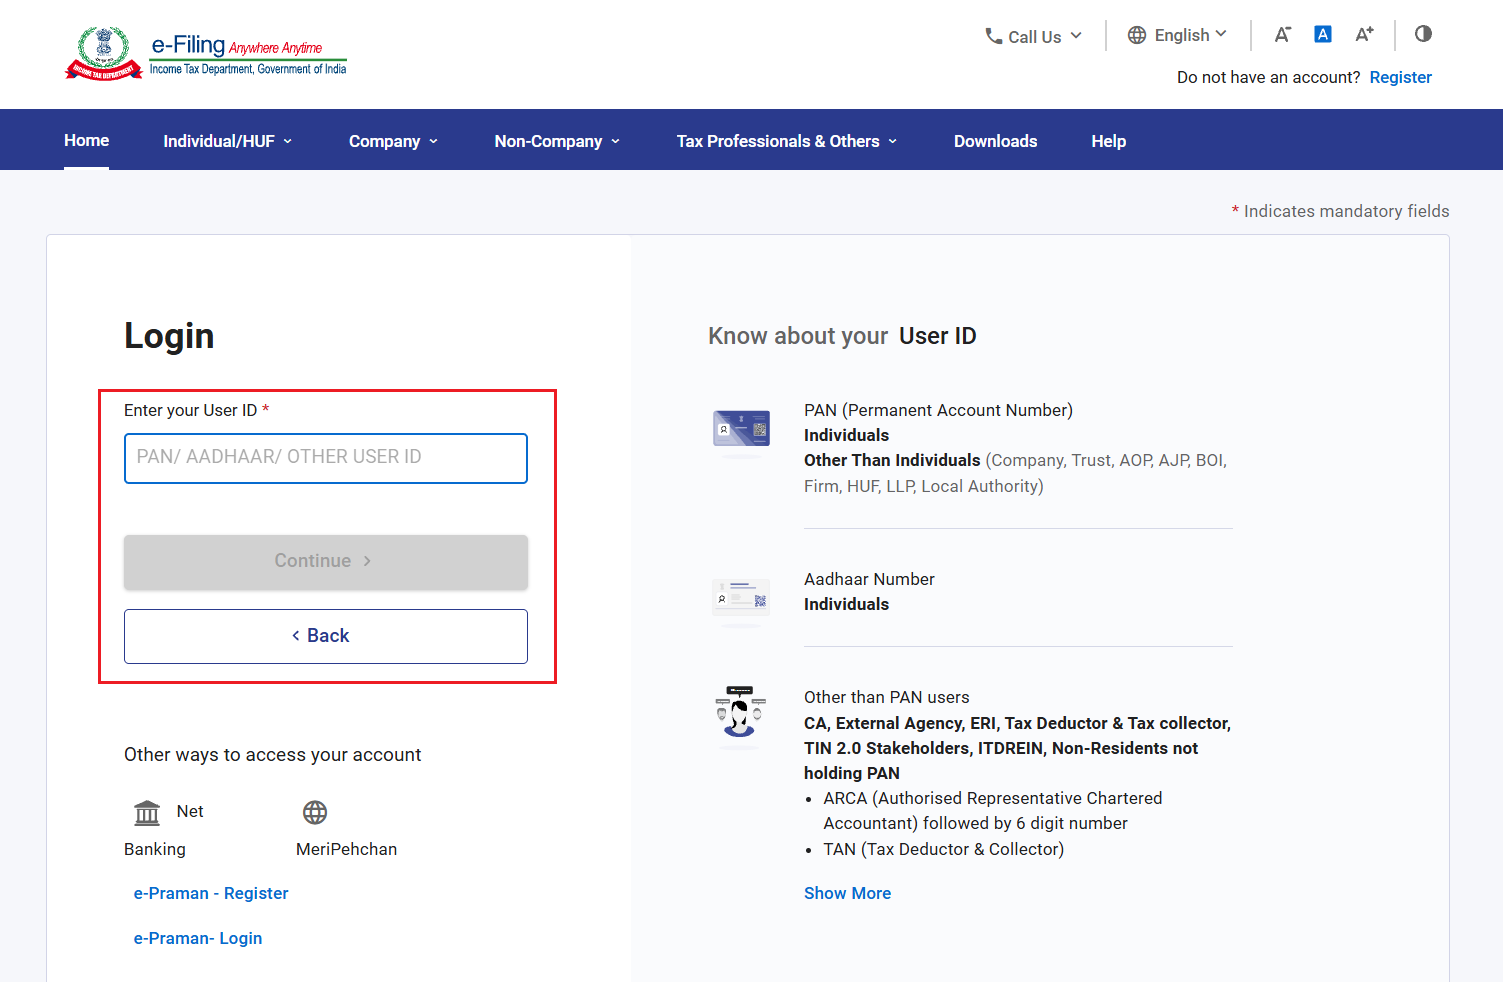
Step 2: Login with User ID (PAN) and password.
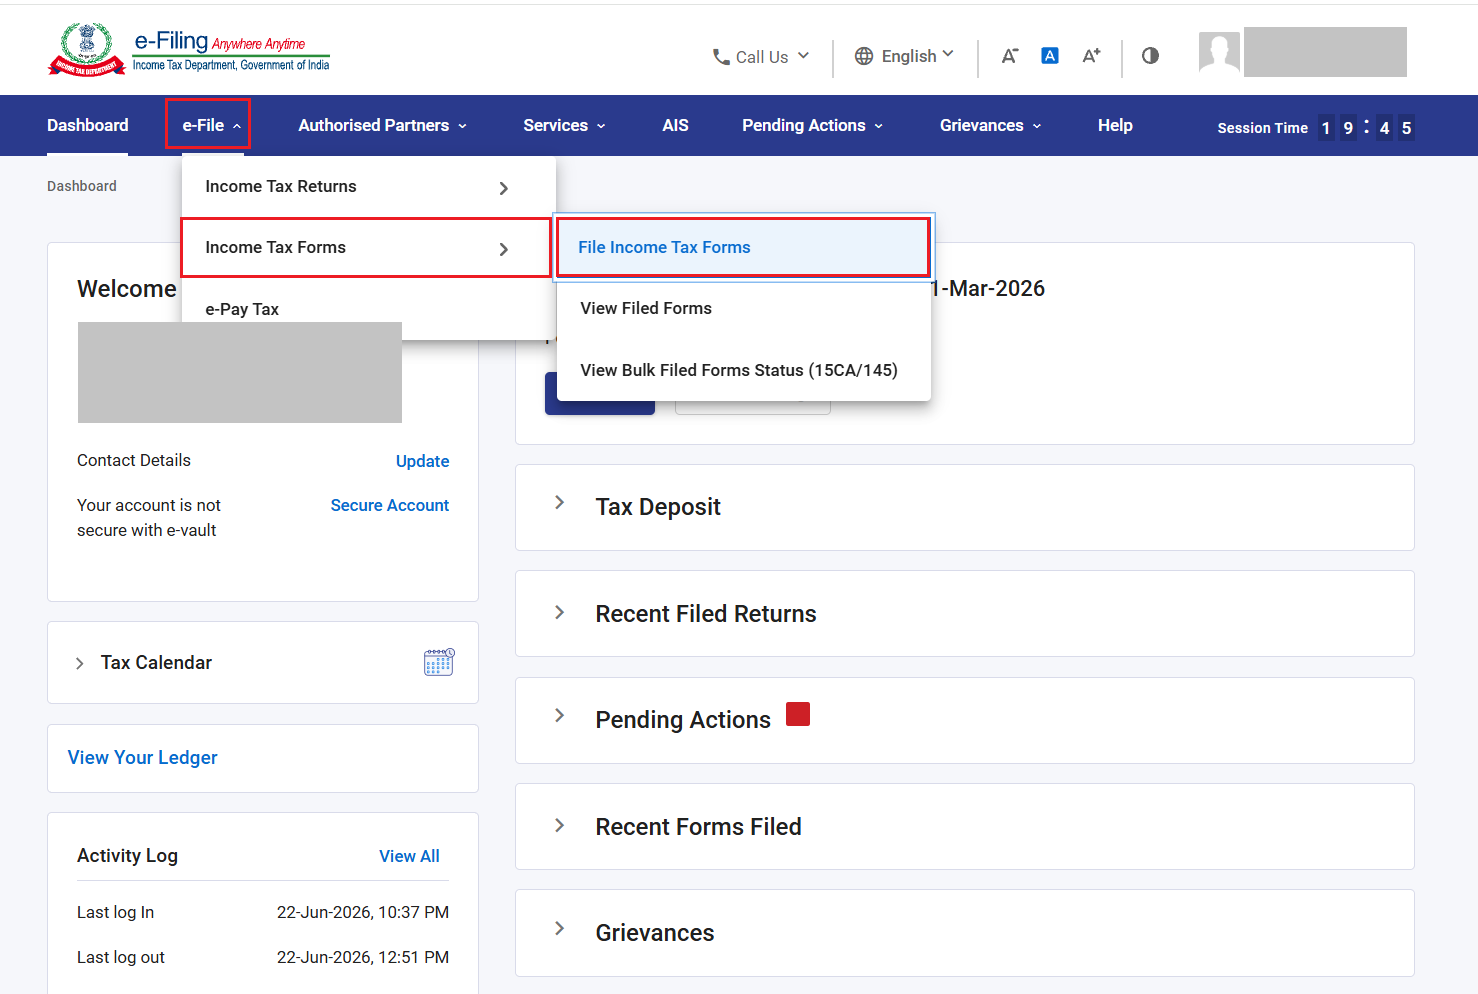
Step 3: After successful login, Go to ‘e-File’ > ‘Income Tax Forms’ > ‘File Income Tax Forms’.
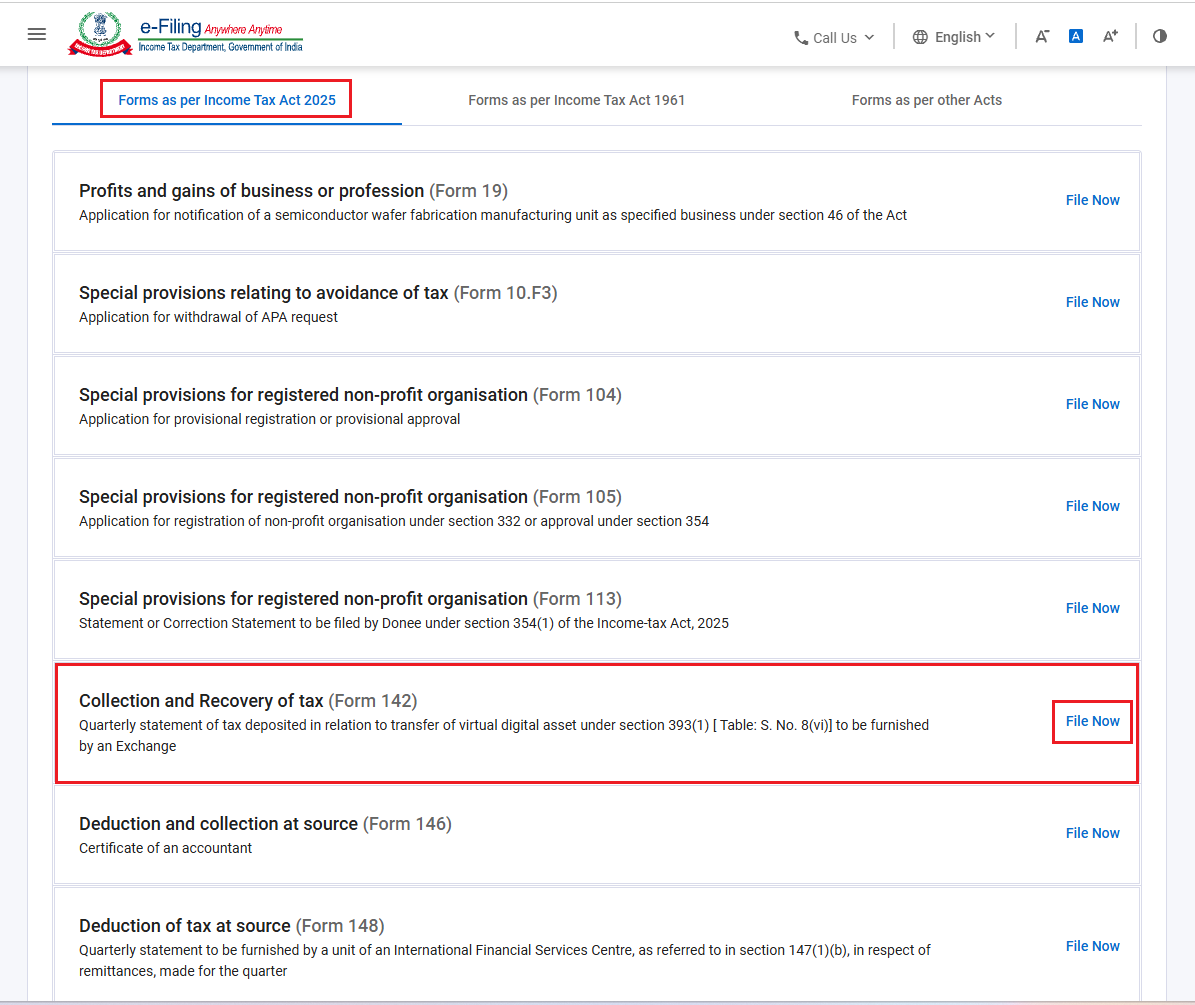
Step 4: Under ‘Forms as Per Income Tax Act 2025’ tab, select ‘Form 142’ and click ‘File Now’.
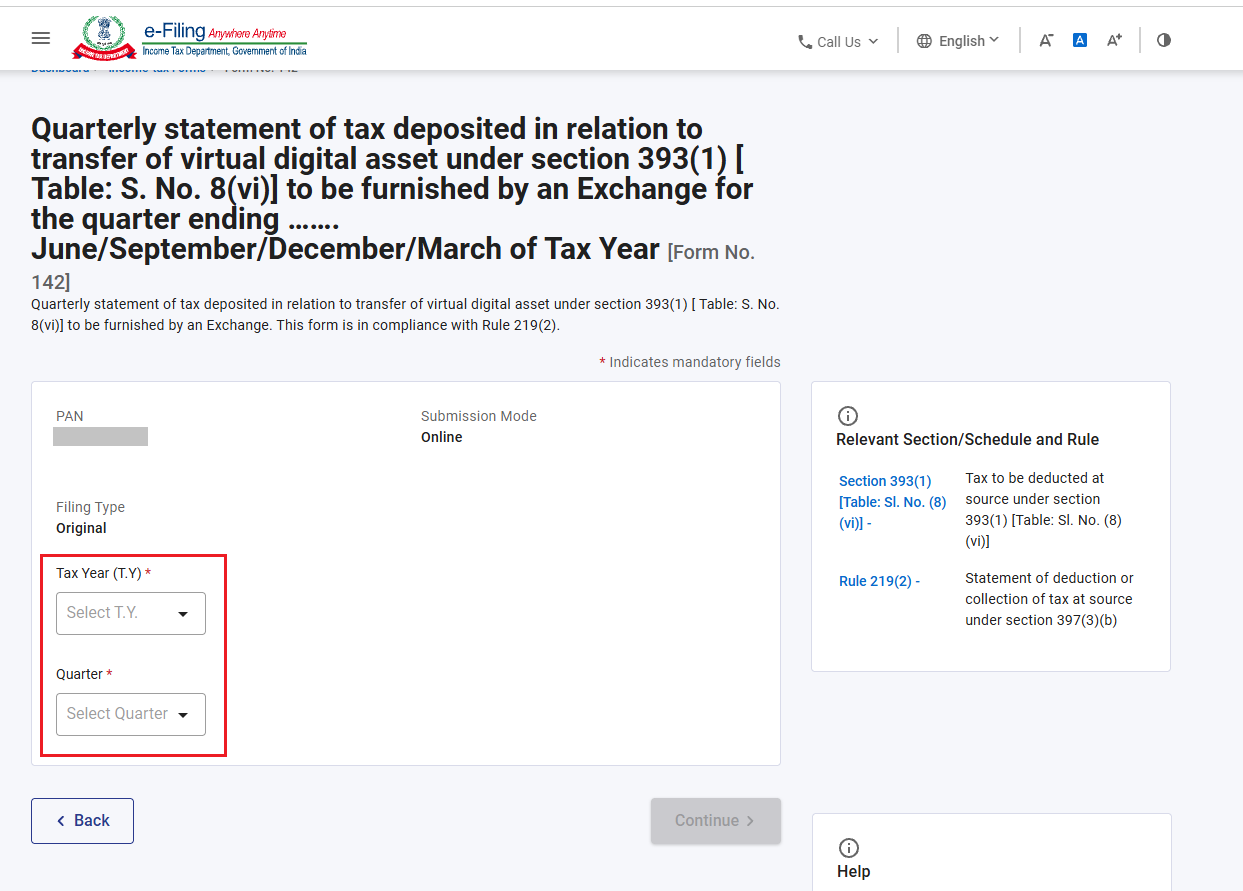
Step 5: On the form page, Select Applicable Tax Year and Quarter and click ‘Continue’.
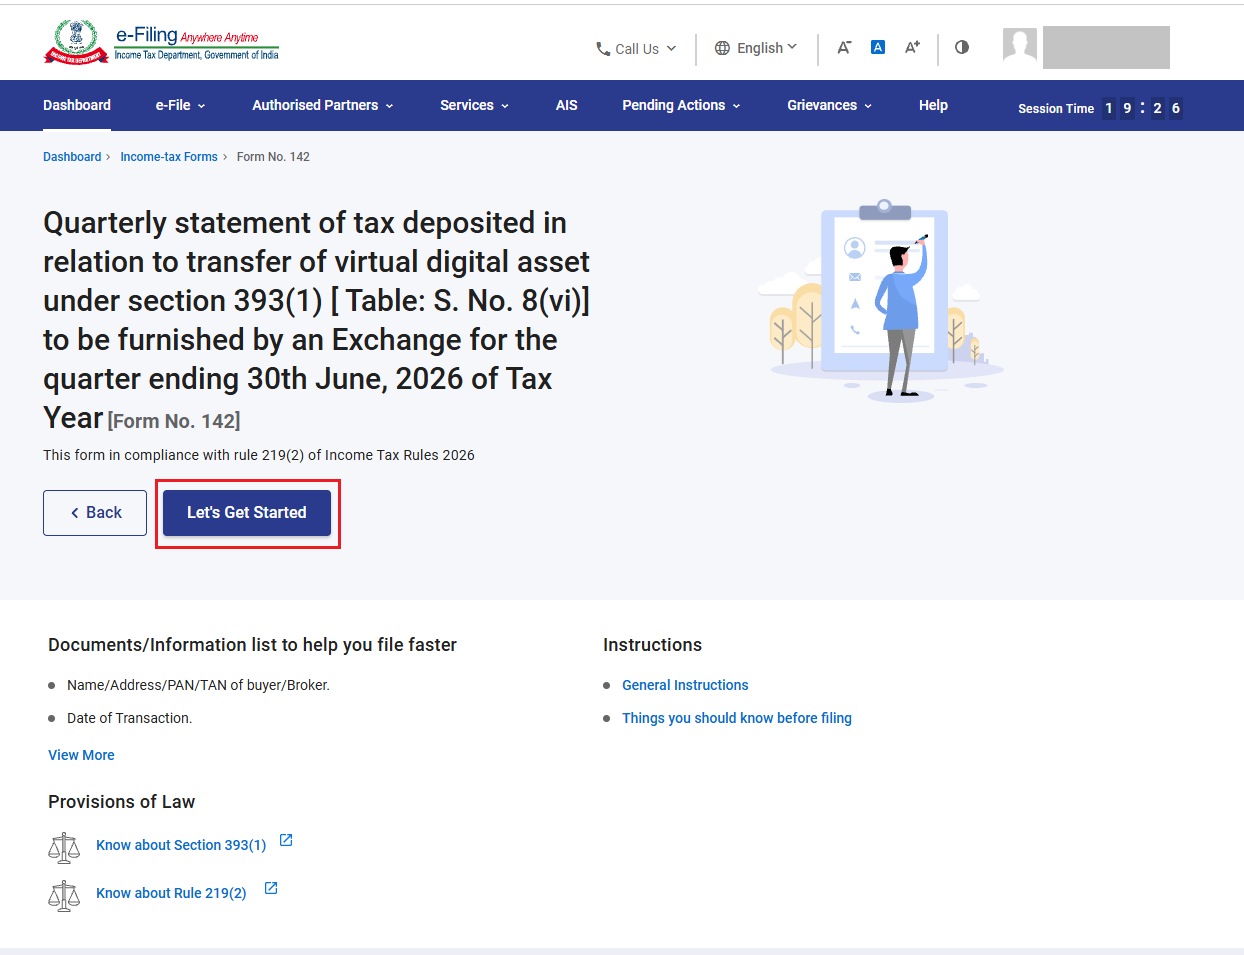
Step 6: Read the Instruction to file the Form and Click on ‘Let’s get Started’.
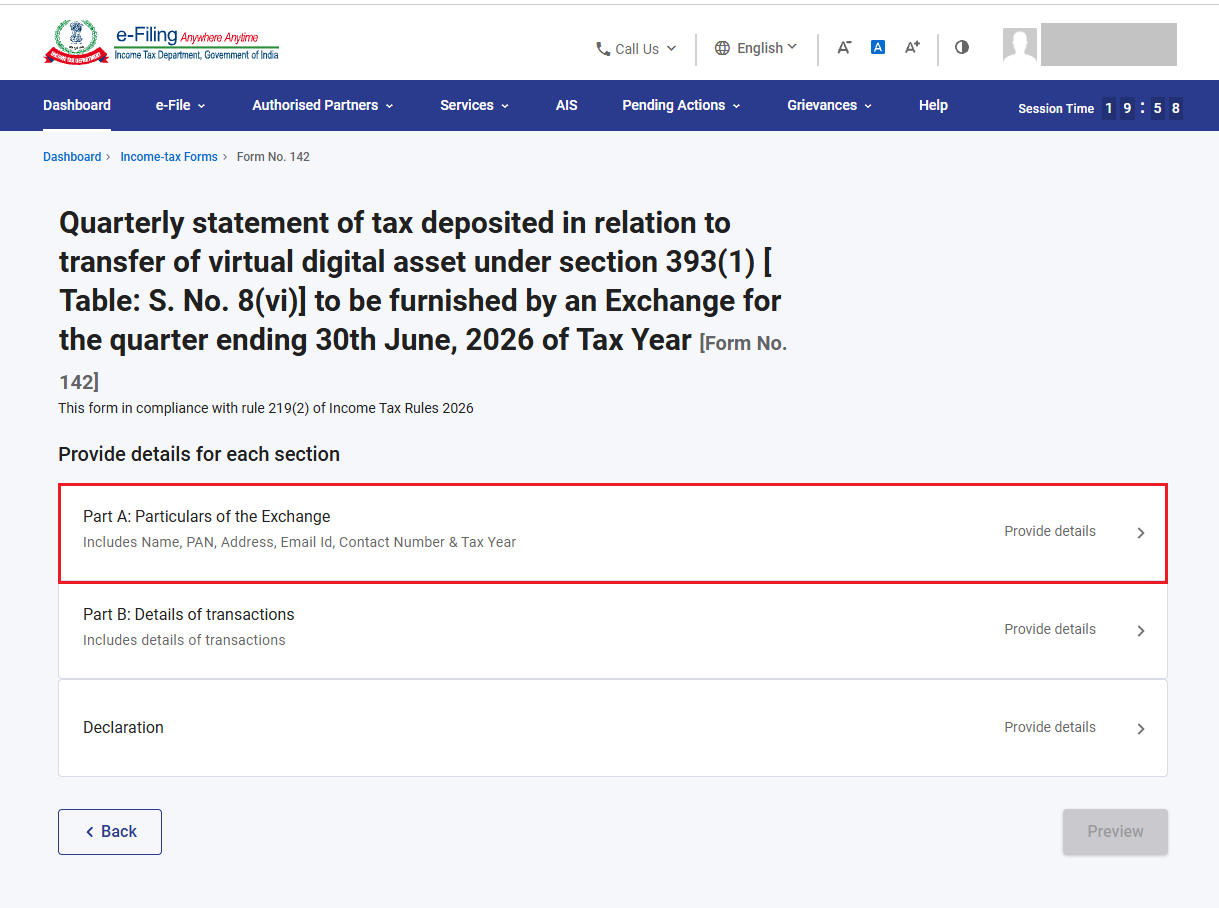
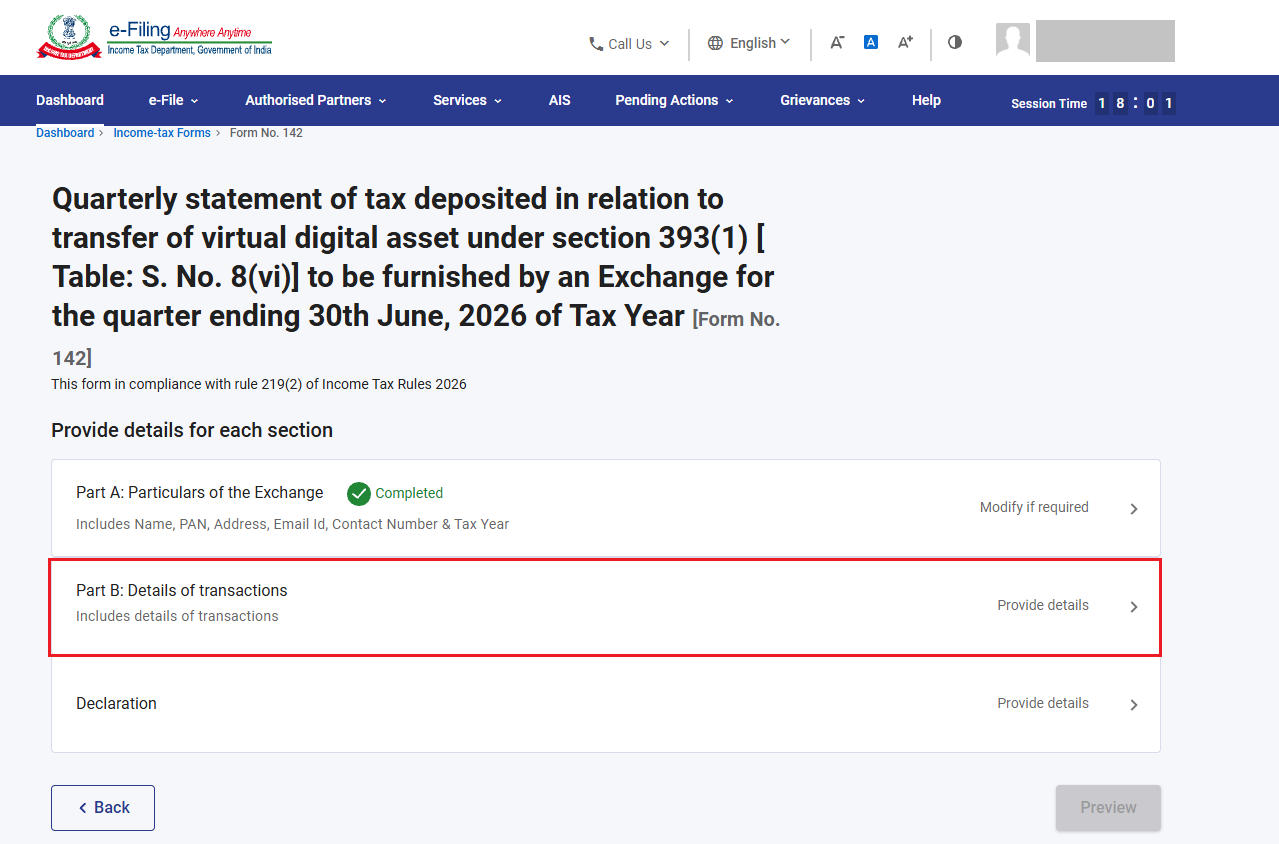
Step 7: Form 142 have 3 sections:
1. Part A: Particulars of the Exchange
2. Part B: Details of Transactions
3. Declaration
To complete the form, complete each section of form.
Now, click on ‘Part A: Particulars of the Exchange’.
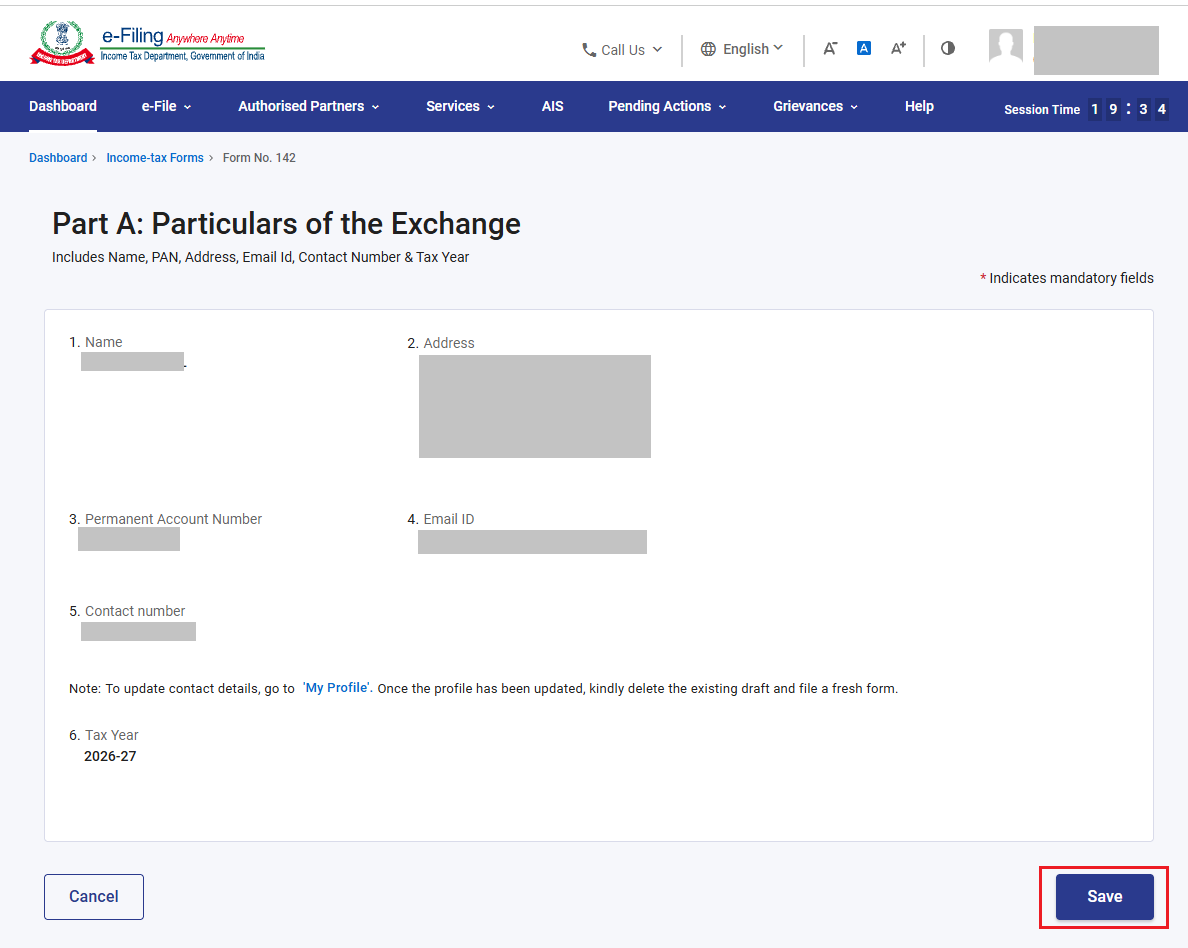
Step 8: Basic information (Name, Address, Email ID, PAN etc) of Exchange will be prefilled from profile section. Verify the Particulars and click on ‘Save’.
Note: Please ensure that all mandatory details under "My Profile" section including address are completed. You can update your contact and address details by clicking on hyperlink “My Profile”.
Step 9: Part A: Particulars of the Exchange is completed. Now, Click on ‘Part B: Details of transactions.
Step 10: In ‘Part B: Details of transactions’ has to be furnished.
• Select the type of transaction(s) from the “Transactions reported in table” dropdown. You can choose (i), (ii), both, or none. Based on the selection, the relevant “Download Template” and “Upload CSV” buttons will be enabled.
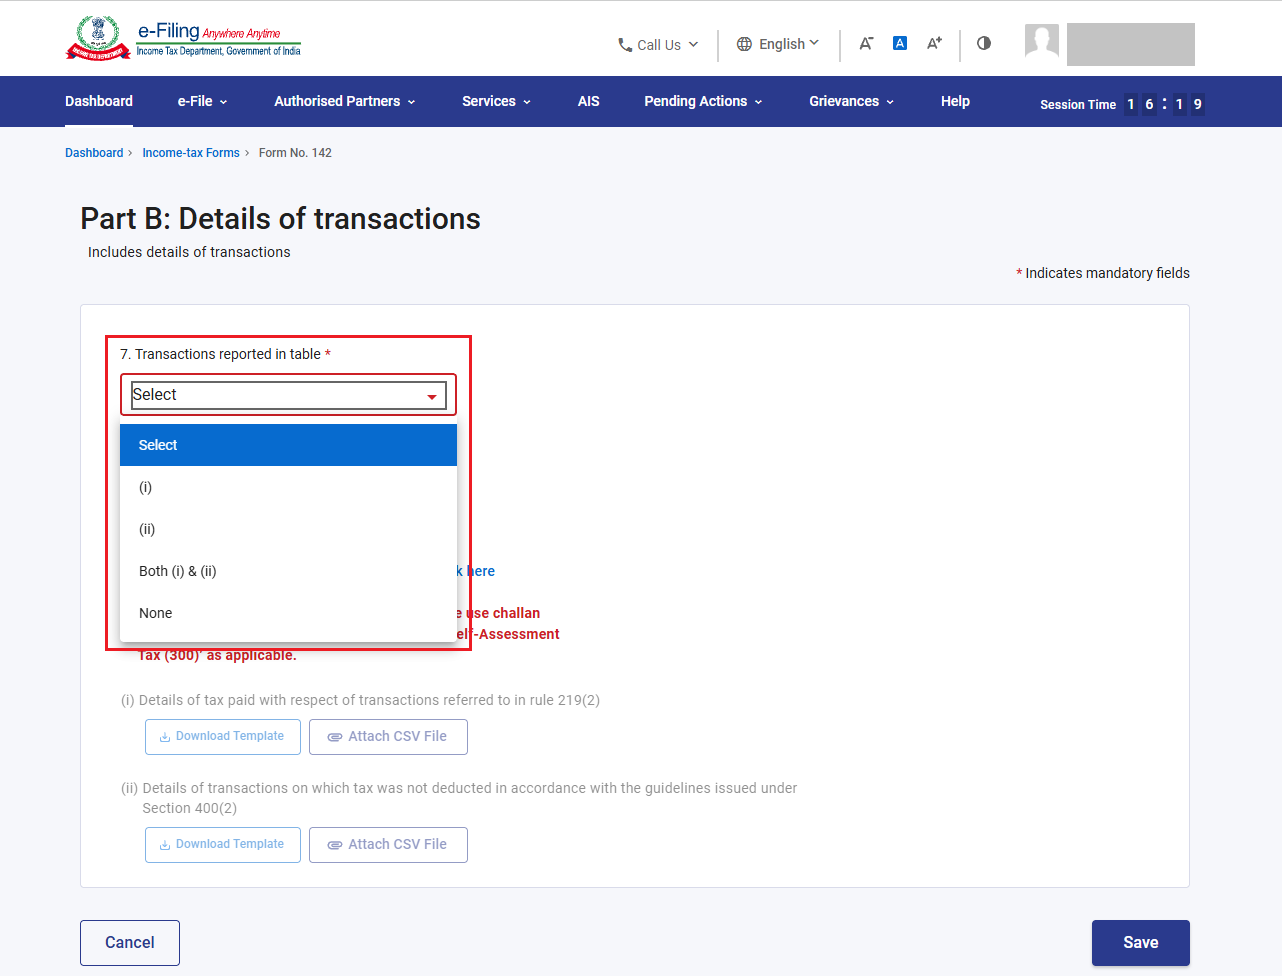
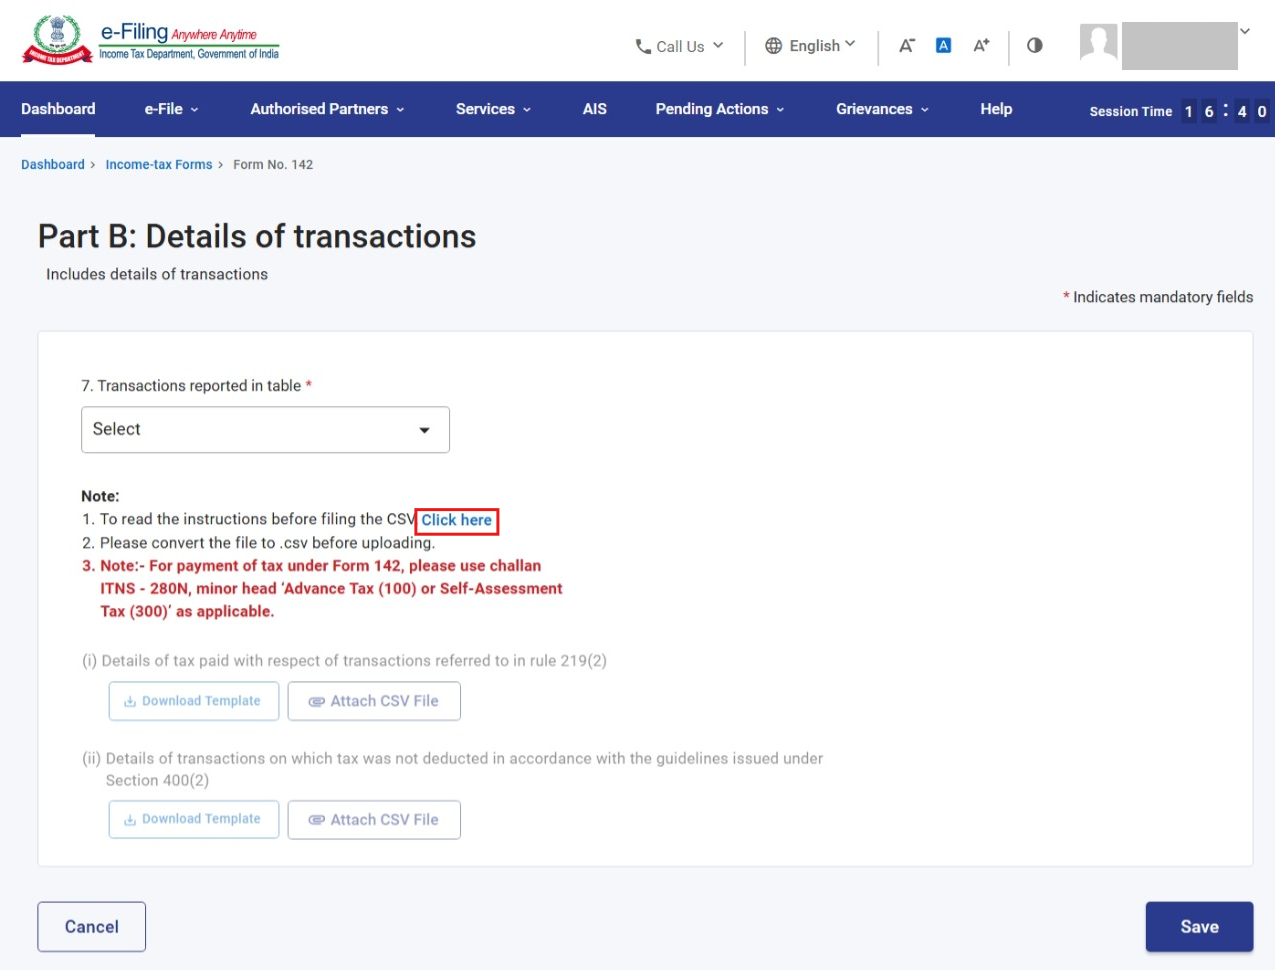
Please Note: Download the Instruction sheet by clicking on the hyperlink ‘Click here’ and fill the information in excel sheet accordingly to avoid any error in uploading .CSV file.
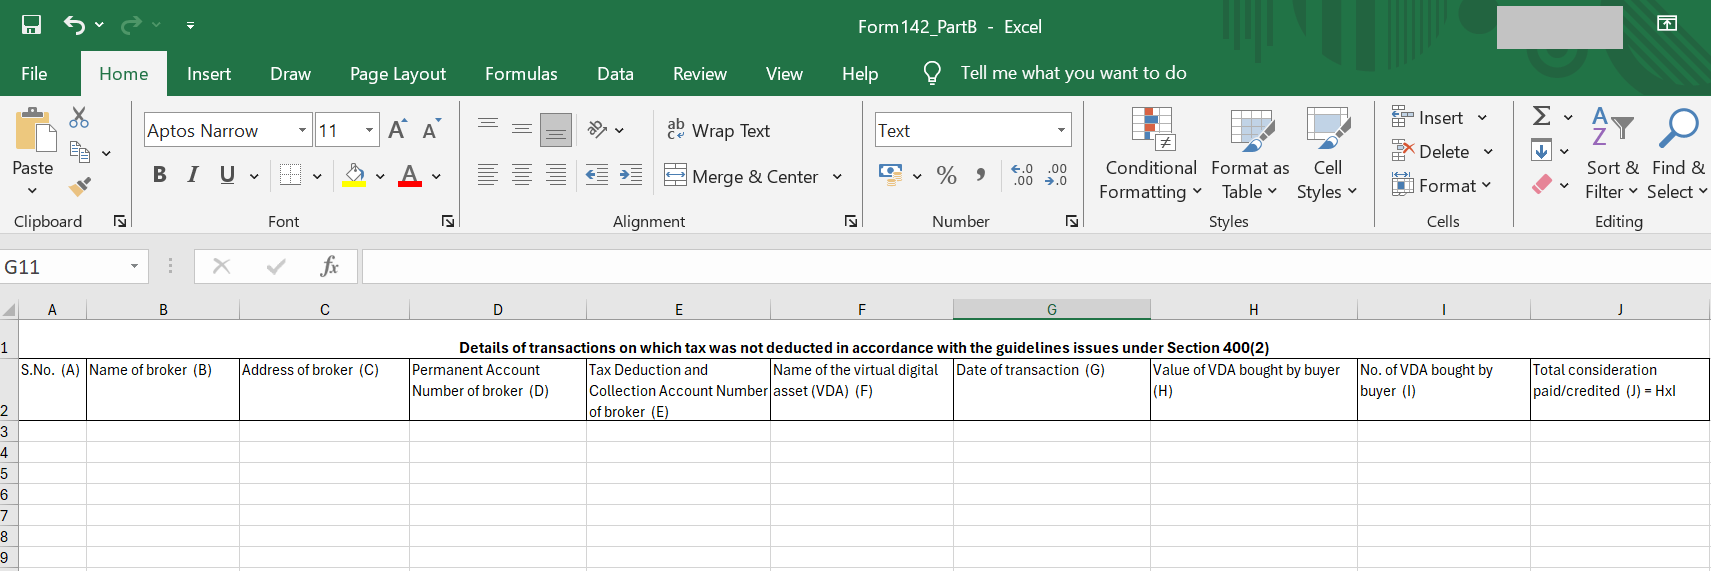
• Download below excel Template/Templates (i), (ii) or both and furnish the information in format.
After entering the data into the downloaded Excel template, save it by going to File > Save as or pressing Alt + F + A. In the Save as type dropdown, choose CSV (Comma delimited) and then click Save. The file will be saved in CSV format.
(i) Details of tax paid with respect of transactions referred to in rule 219(2)
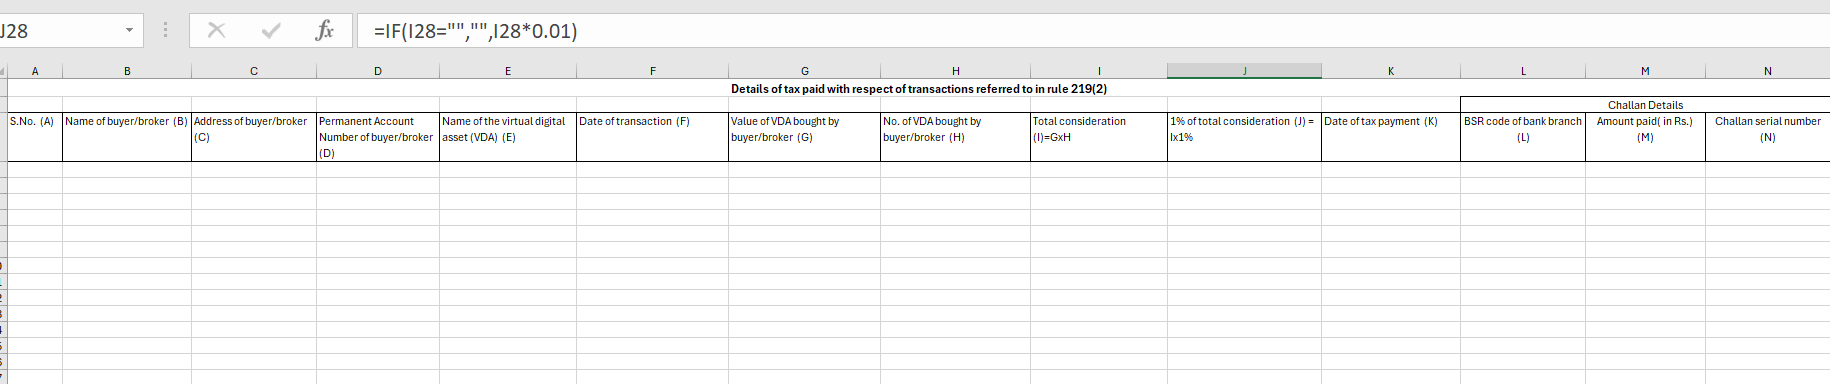
(ii) Details of transactions on which tax was not deducted in accordance with the guidelines issued under Section 400(2)
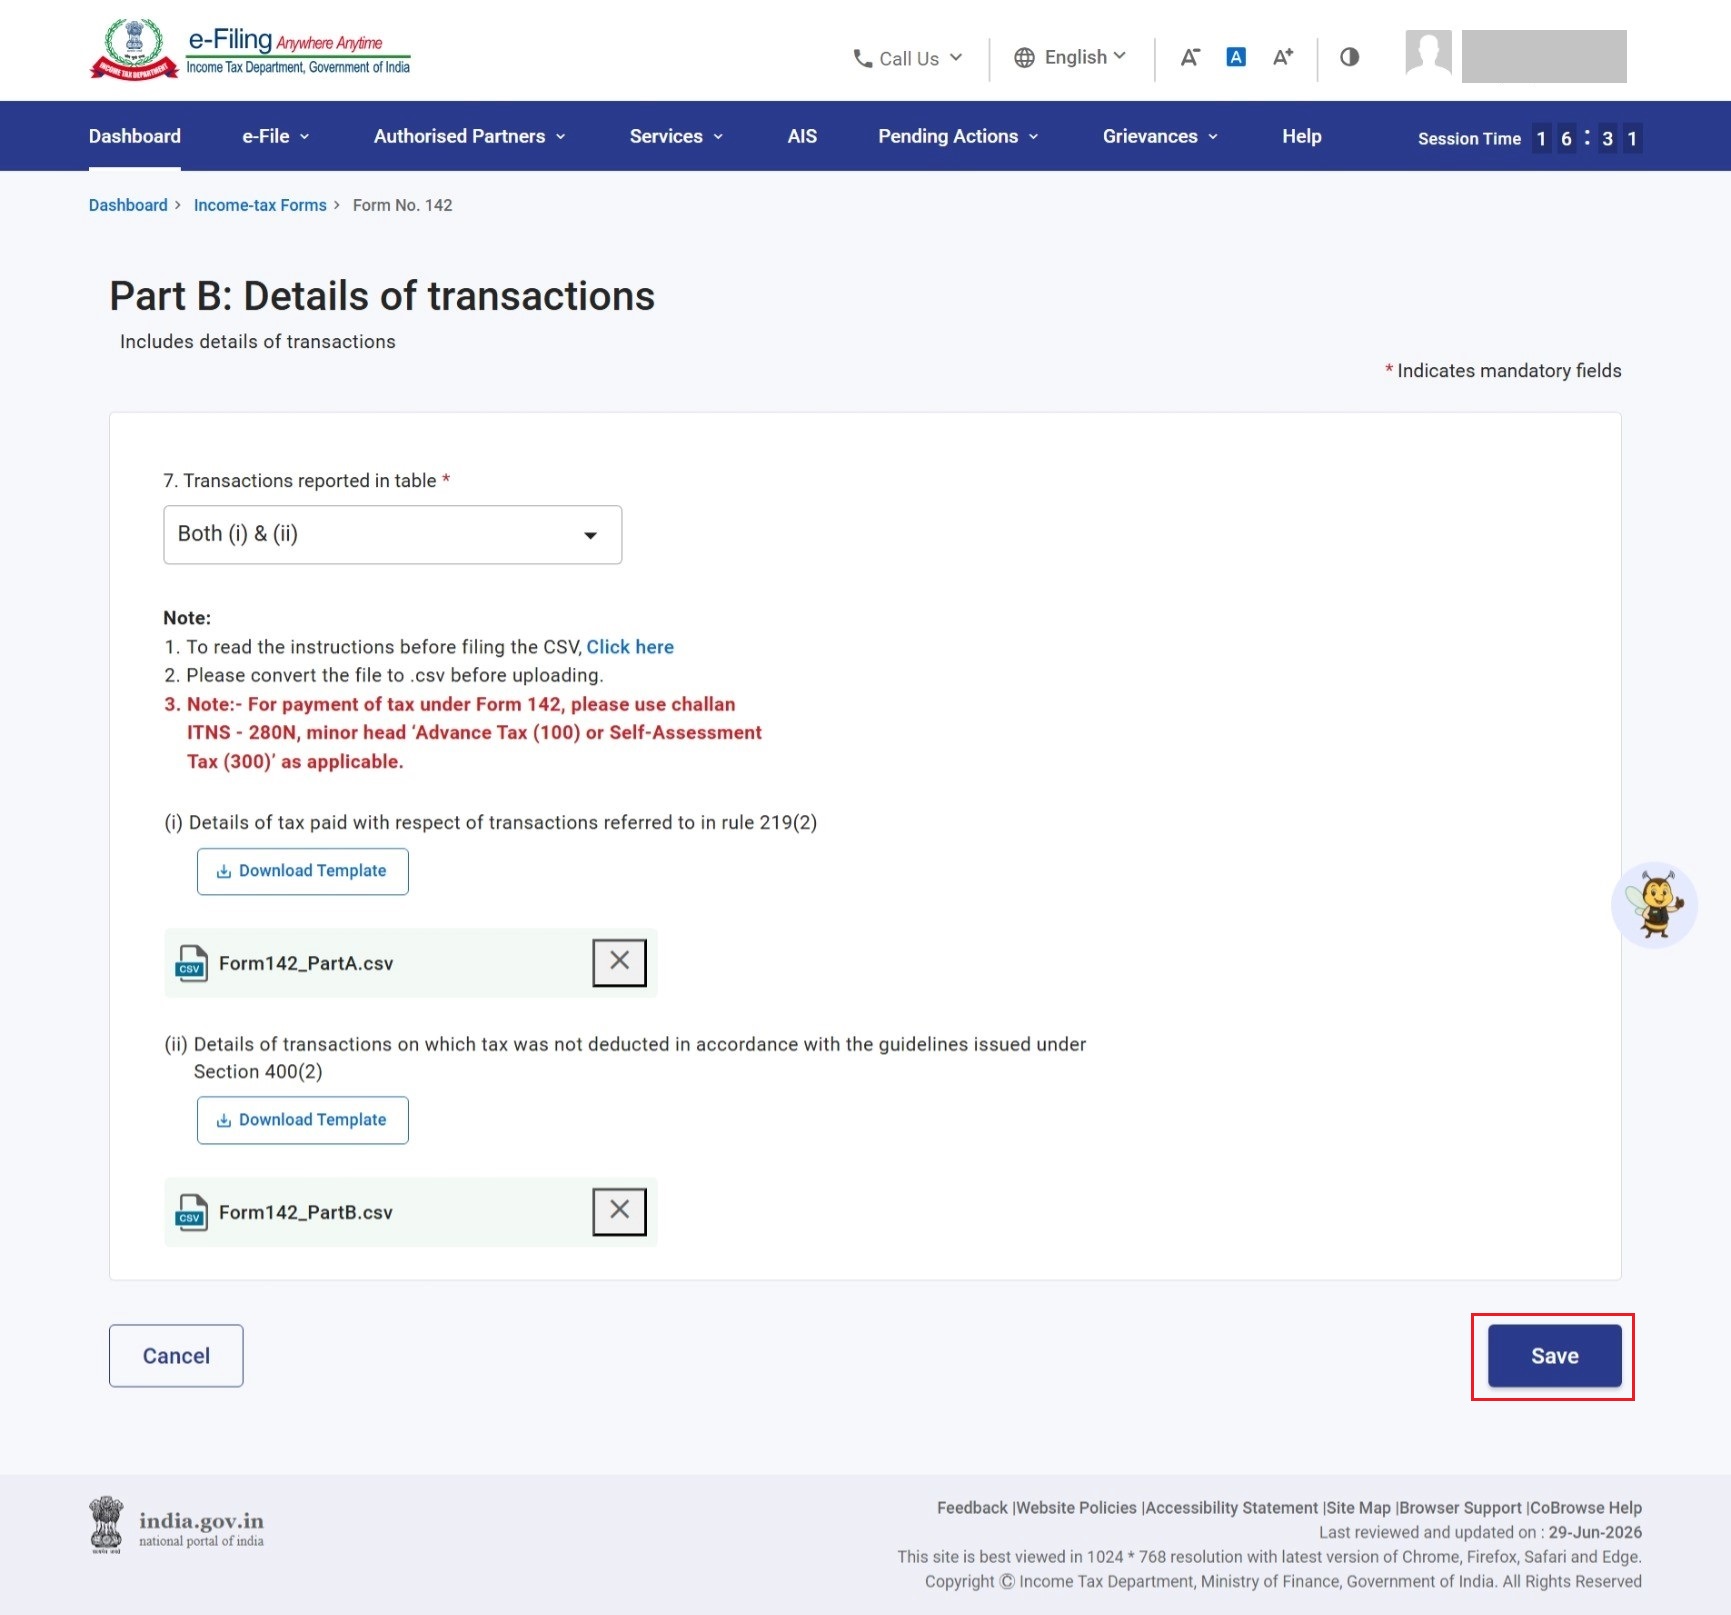
Now, Upload the .CSV file by clicking on upload CSV. If there is no error in uploaded file, Click ‘Save’.
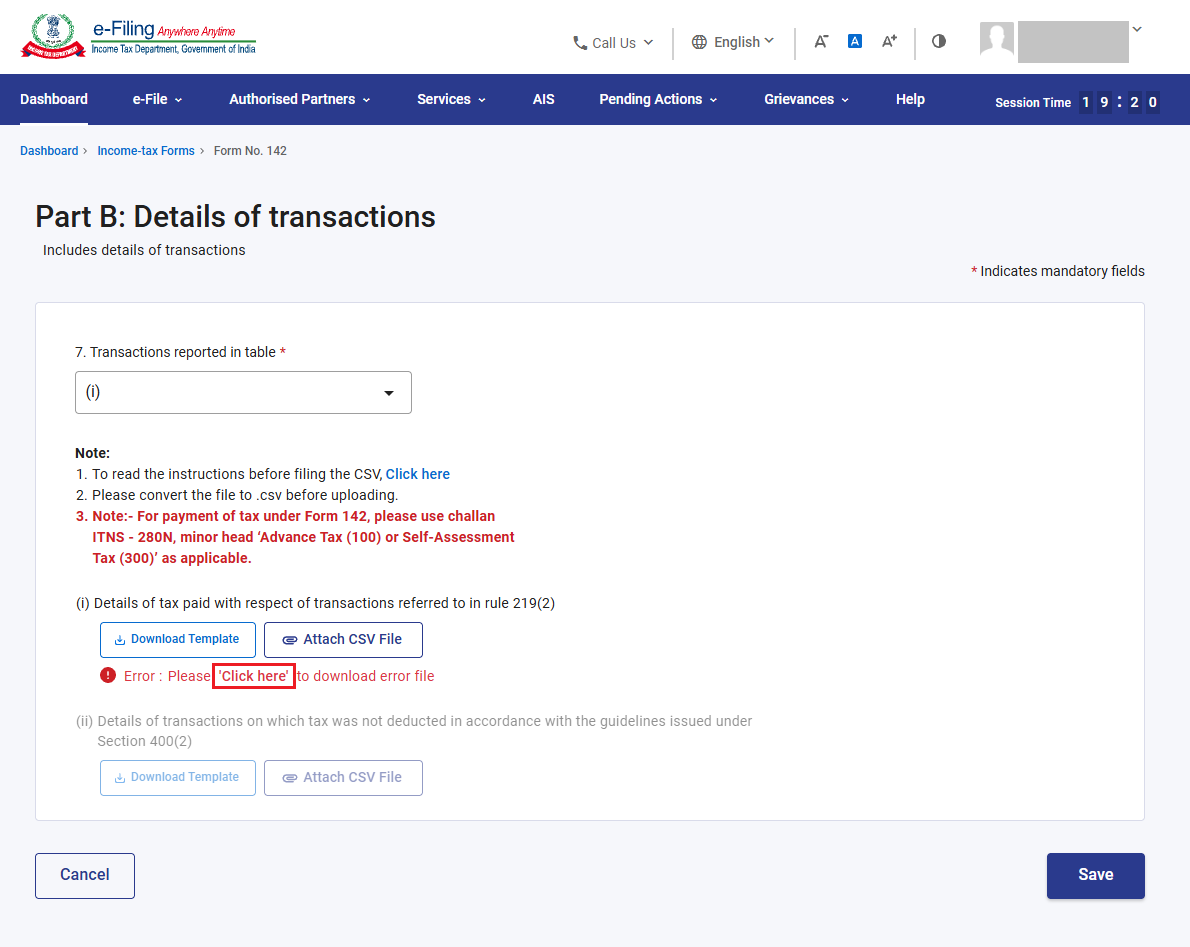
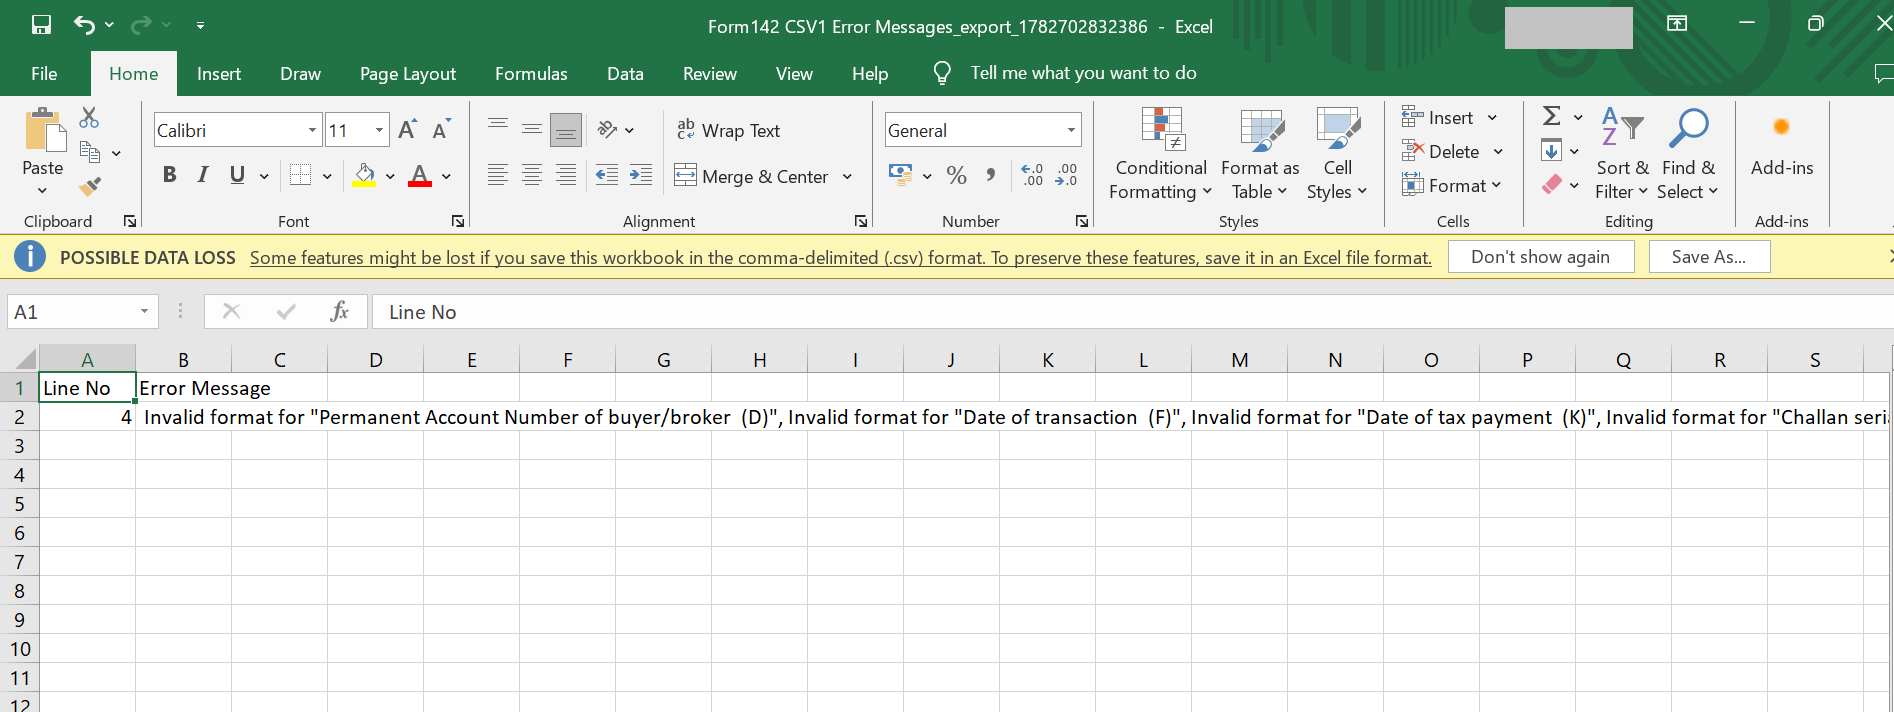
If there is error in uploaded .CSV file, click on ‘Click here’ to download error file and check the error.
Rectify the error in below error sheet and upload again. You can refer the instruction sheet which can be downloaded by clicking on ‘Click here’ in Note 1 to rectify the error.
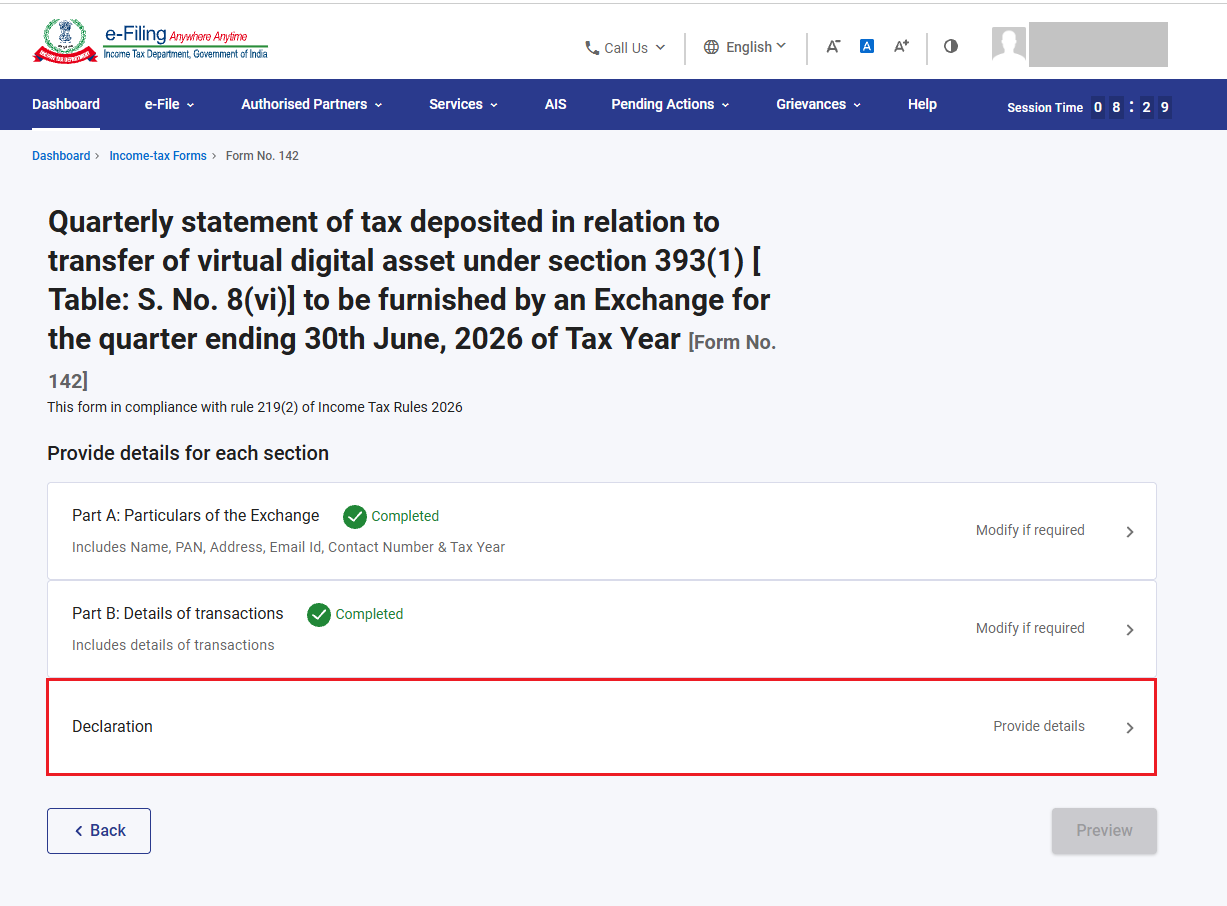
Step 11: Part B: Details of transactions is completed. Now, Click on ‘Declaration’ panel.
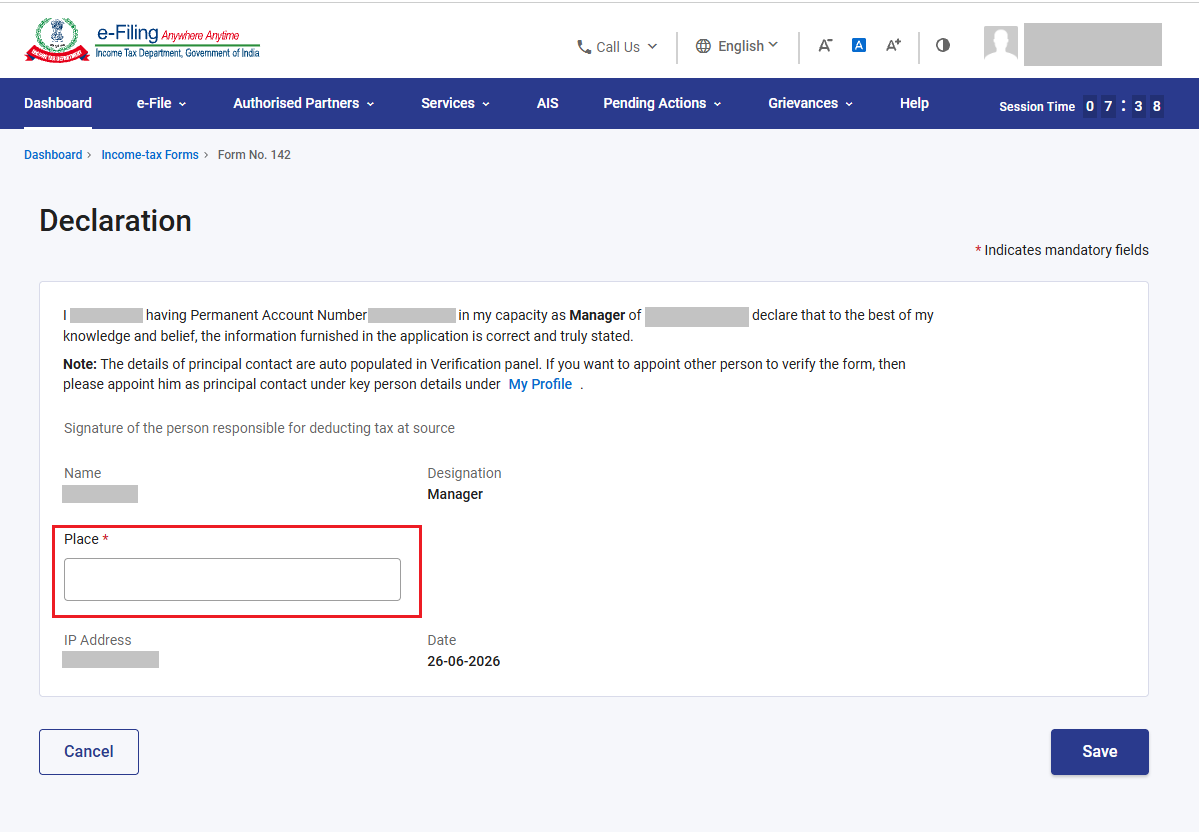
Step 12: In the Declaration section, enter the place and click on ‘Save’.
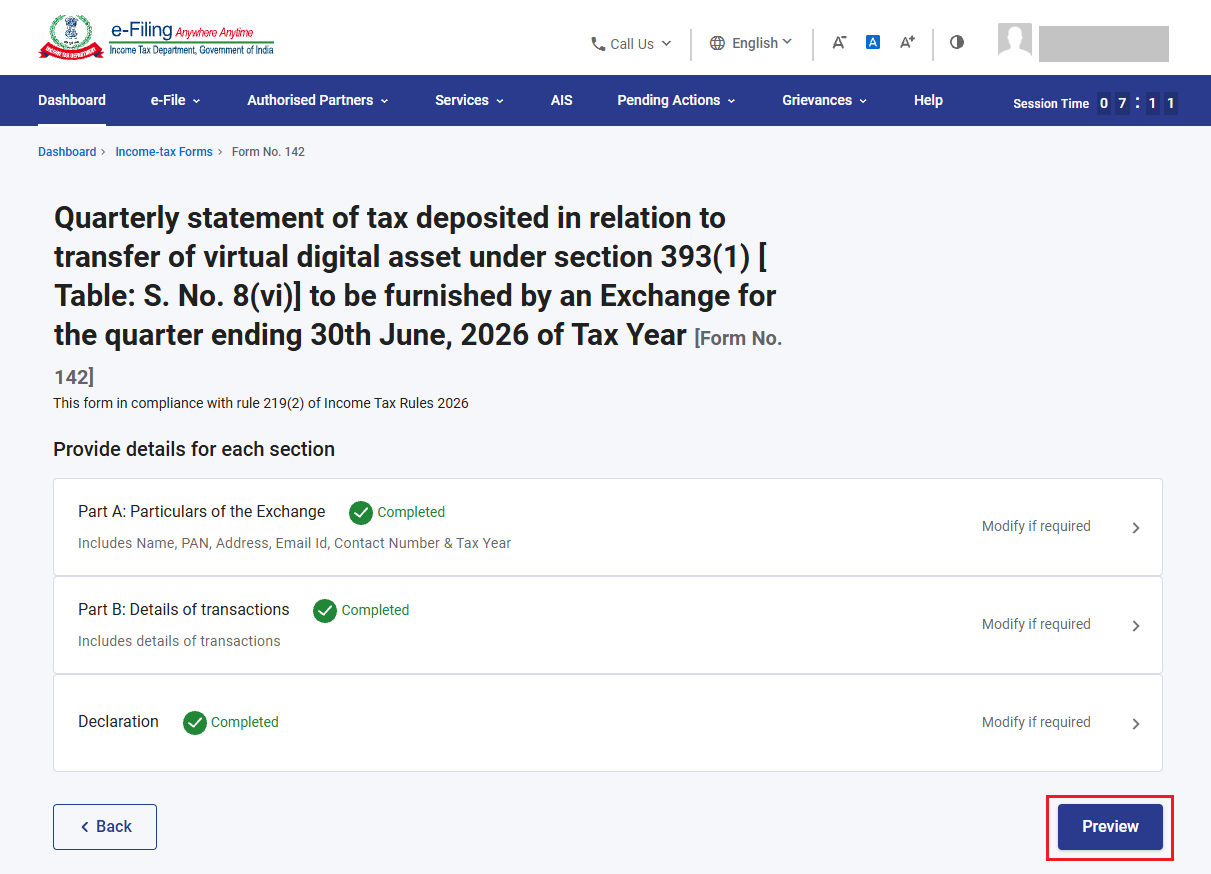
Step 13: All the three sections are now completed. Click on ‘Preview’.
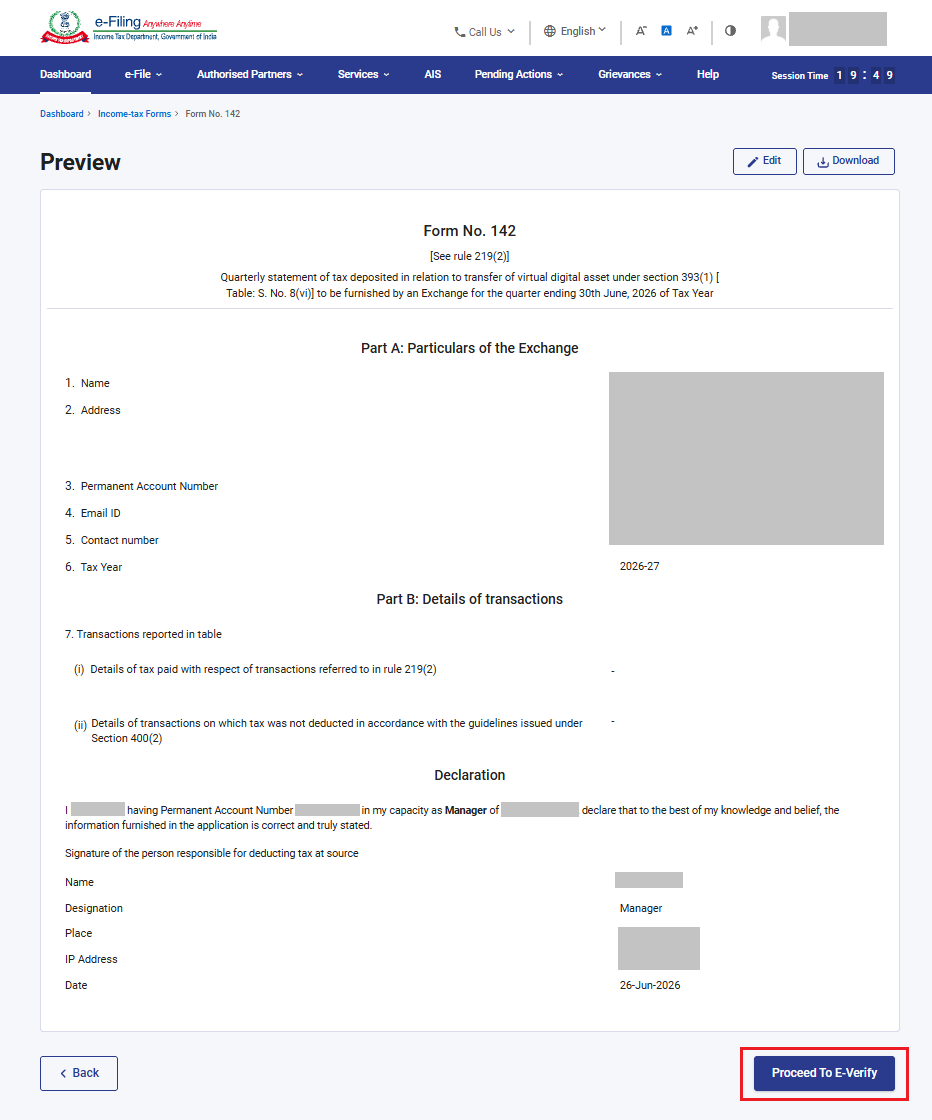
Step 14: Verify the details in the preview of form. Click ‘Proceed to E-Verify’. By clicking the “Download” button, the user can download the preview PDF and verify the details before proceeding with e verification.
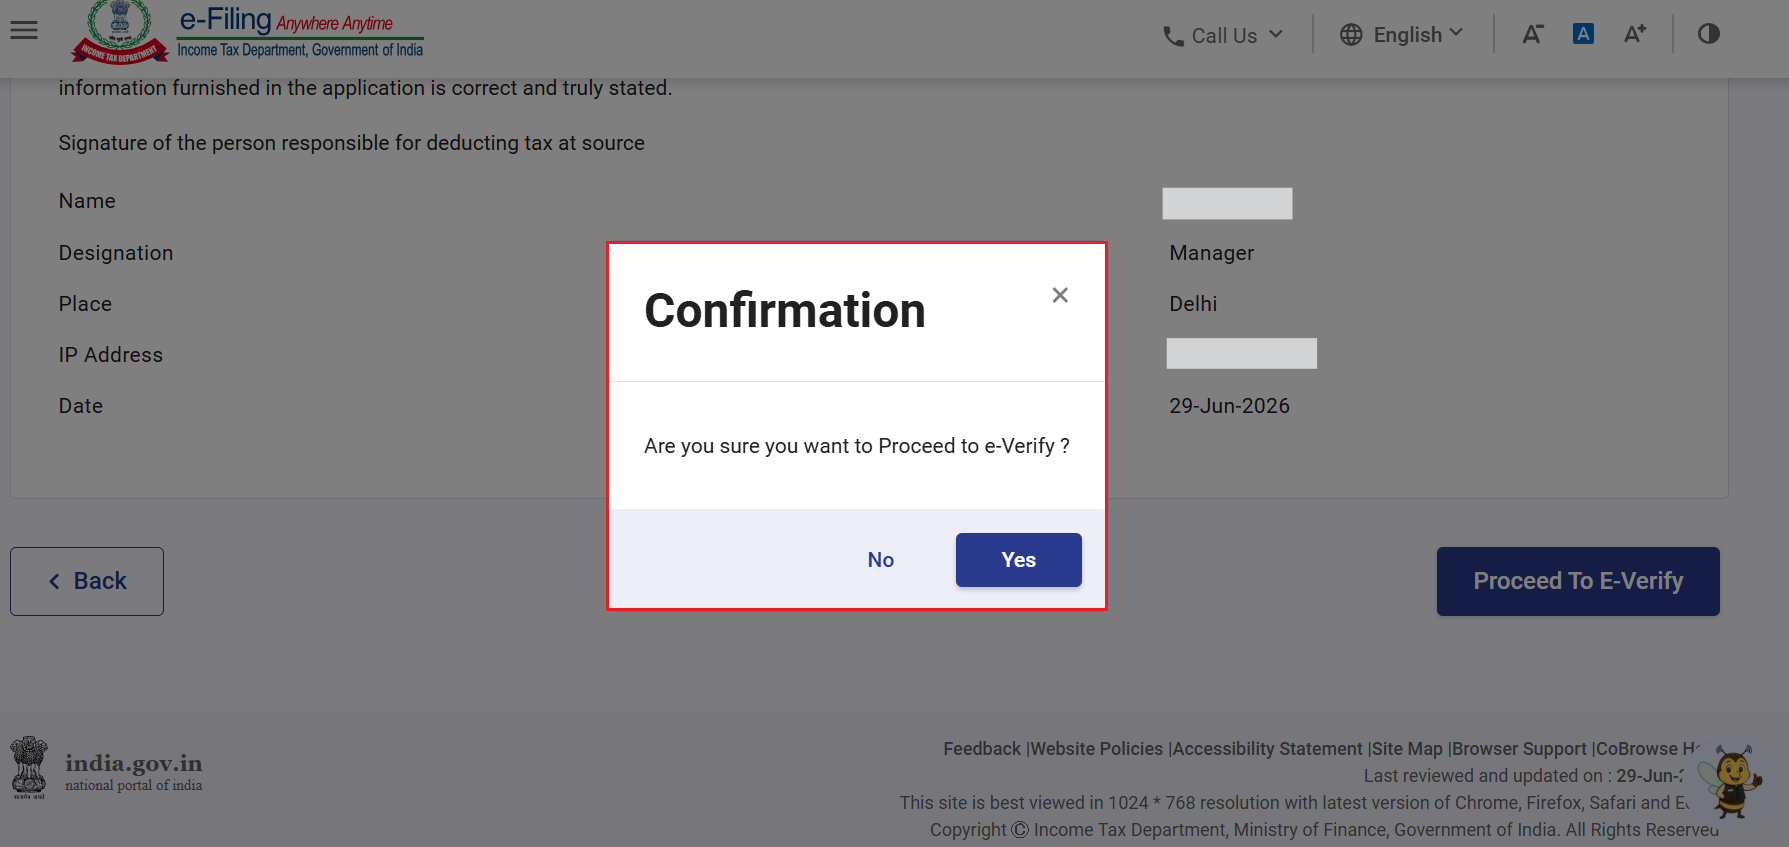
Step 15: Post clicking on “Proceed to E-Verify” button, a popup confirmation displaying that you would like to proceed to e-Verify. Click on Yes.
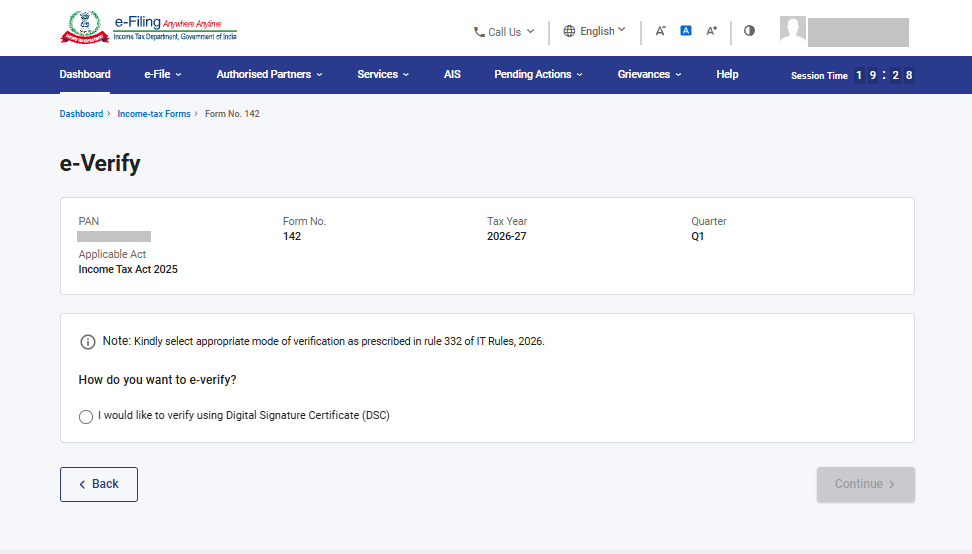
Step 16: On clicking Yes, you will be navigated to the e-Verify page where you can verify the Form 142 using DSC/EVC (as applicable).
Step 17: After successful e-Verification form will be submitted and a success message will be displayed along with a Transaction ID and Acknowledgement Receipt Number. Please keep a note of the Acknowledgement Receipt Number and Transaction ID for future reference. You will also receive a confirmation message on the email ID and mobile number registered with the e-Filing portal.
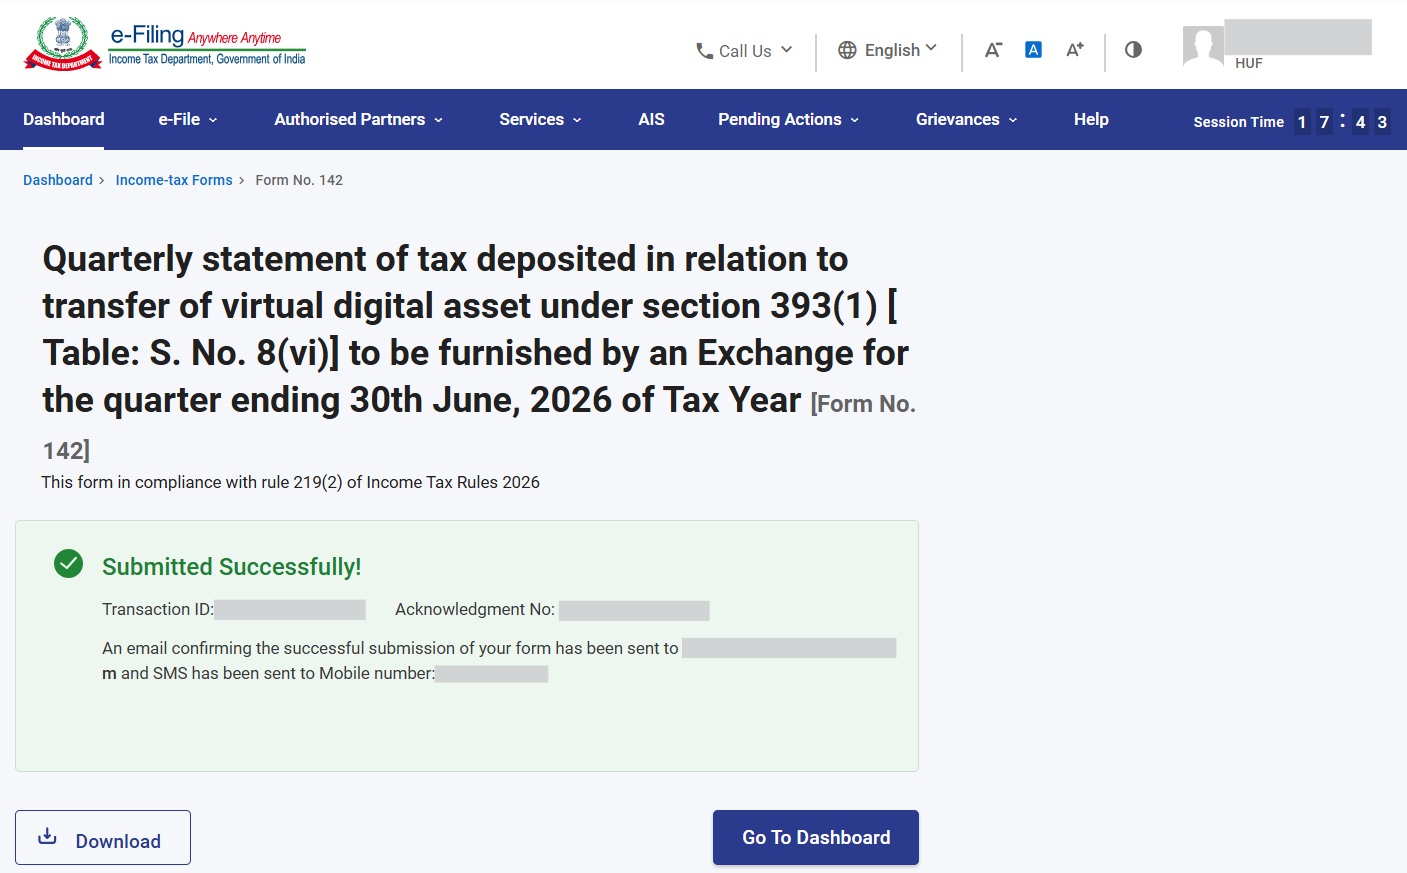
Click on Download button to download the Acknowledgement receipt.
5.2. How to view filed form?
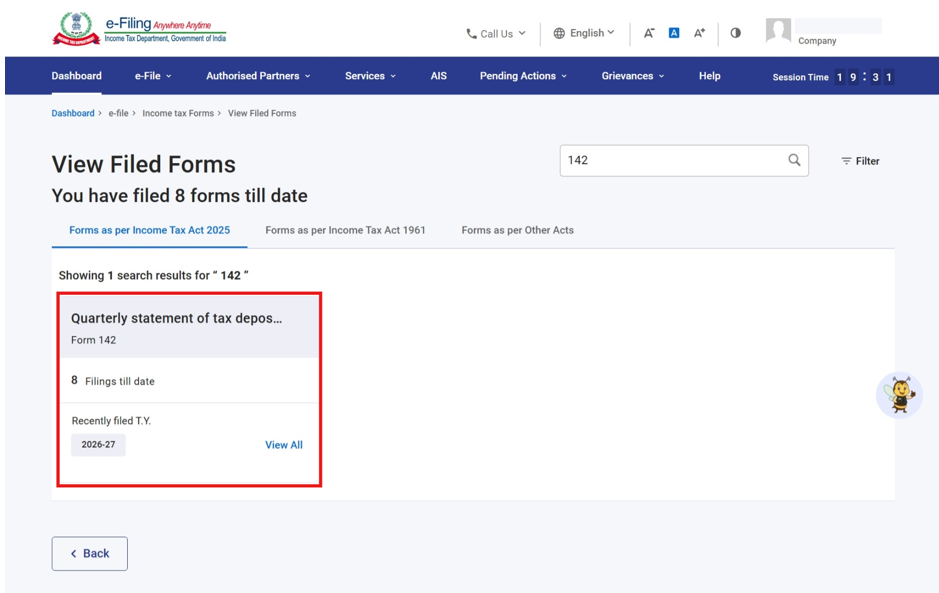
After successful submission of form 142 user can view the filed form under - On your Dashboard, click e-File > File Income Tax Forms > View Filed Forms> Forms as per Income Tax Act 2025.