Form 148 User Manual
1. Overview
Form No. 148 is a quarterly statement filed by units of an International Financial Services Centre (IFSC) in respect of remittances made to a non-resident (not being a company) or to a foreign company. Form 148 must be furnished quarterly, within 15 days from the end of each quarter.
2. Who can file Form 148
Every unit of an International Financial Services Centre making a remittance to a non-resident (not being a company) or to a foreign company must file this form, regardless of whether the remittance is taxable or not.
3. Due Date to file Form 148
Form 148 must be furnished quarterly, within 15 days from the end of each quarter.
Below are the due dates:
| Quarter | Period | Due Date |
| Q1 | April – June | On or before July 15th of Tax year |
| Q2 | July – September | On or before October 15th Tax year |
| Q3 | October – December | On or before January 15th Tax year |
| Q4 | January – March | On or before April 15th Tax year |
4. Prerequisites for availing this service
• Valid User ID and password.
• Valid DSC is registered on e-Filling portal.
5. Step-by-Step Guide
5.1 How to File Form 148
Step 1: Visit Income Tax e-filing portal (http://www.incometax.gov.in/).
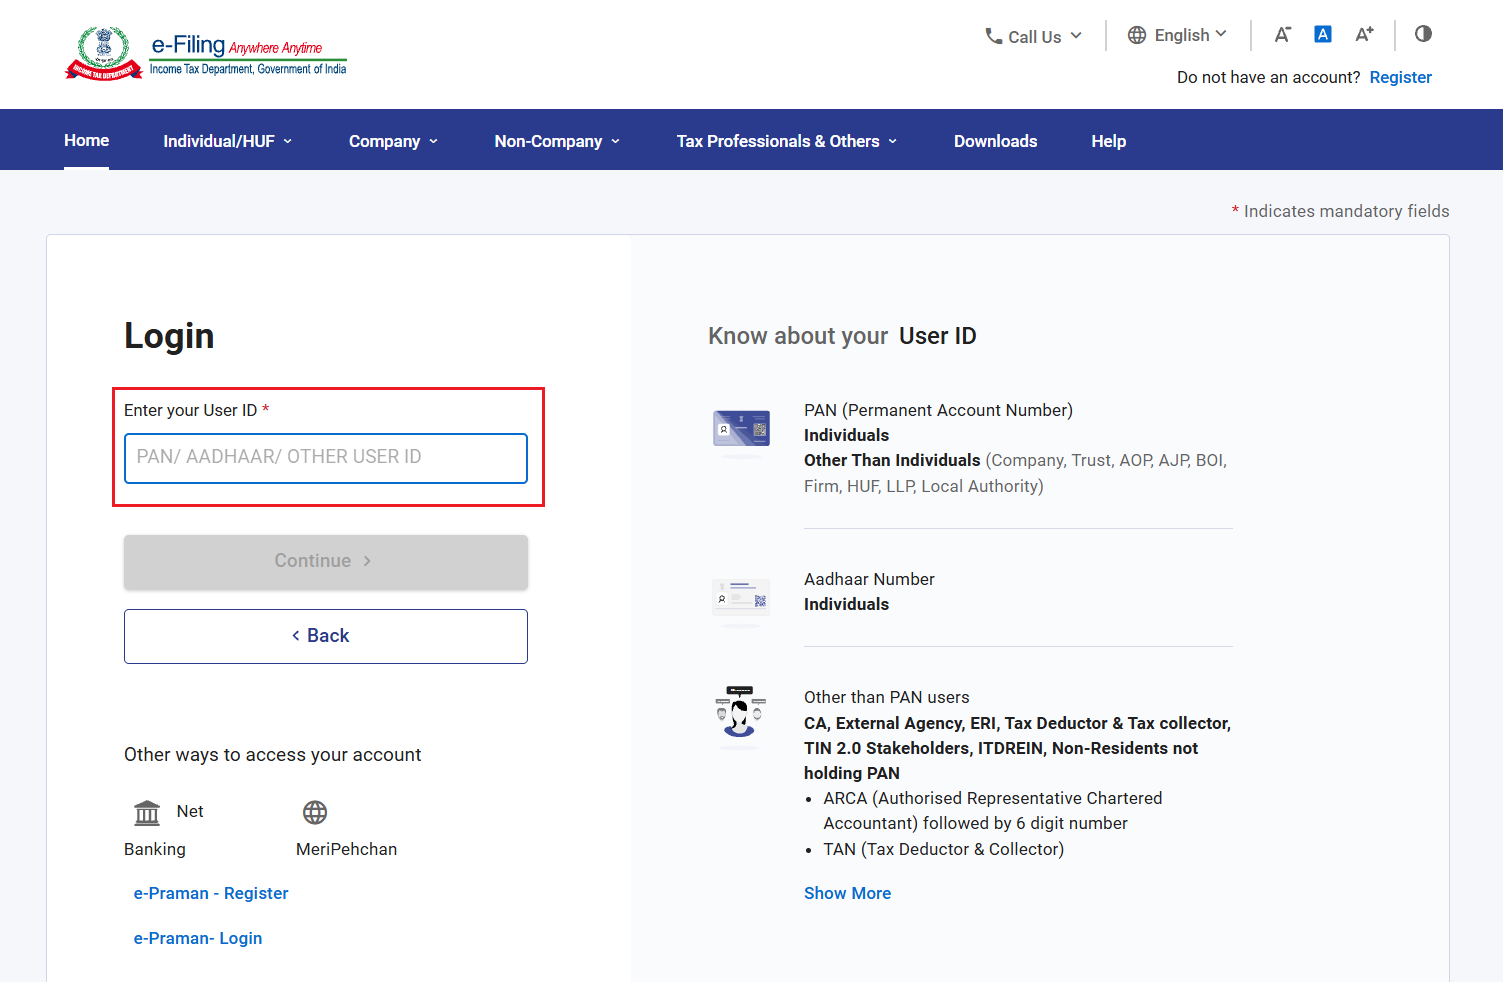
Step 2: Login with User ID (PAN) and password.
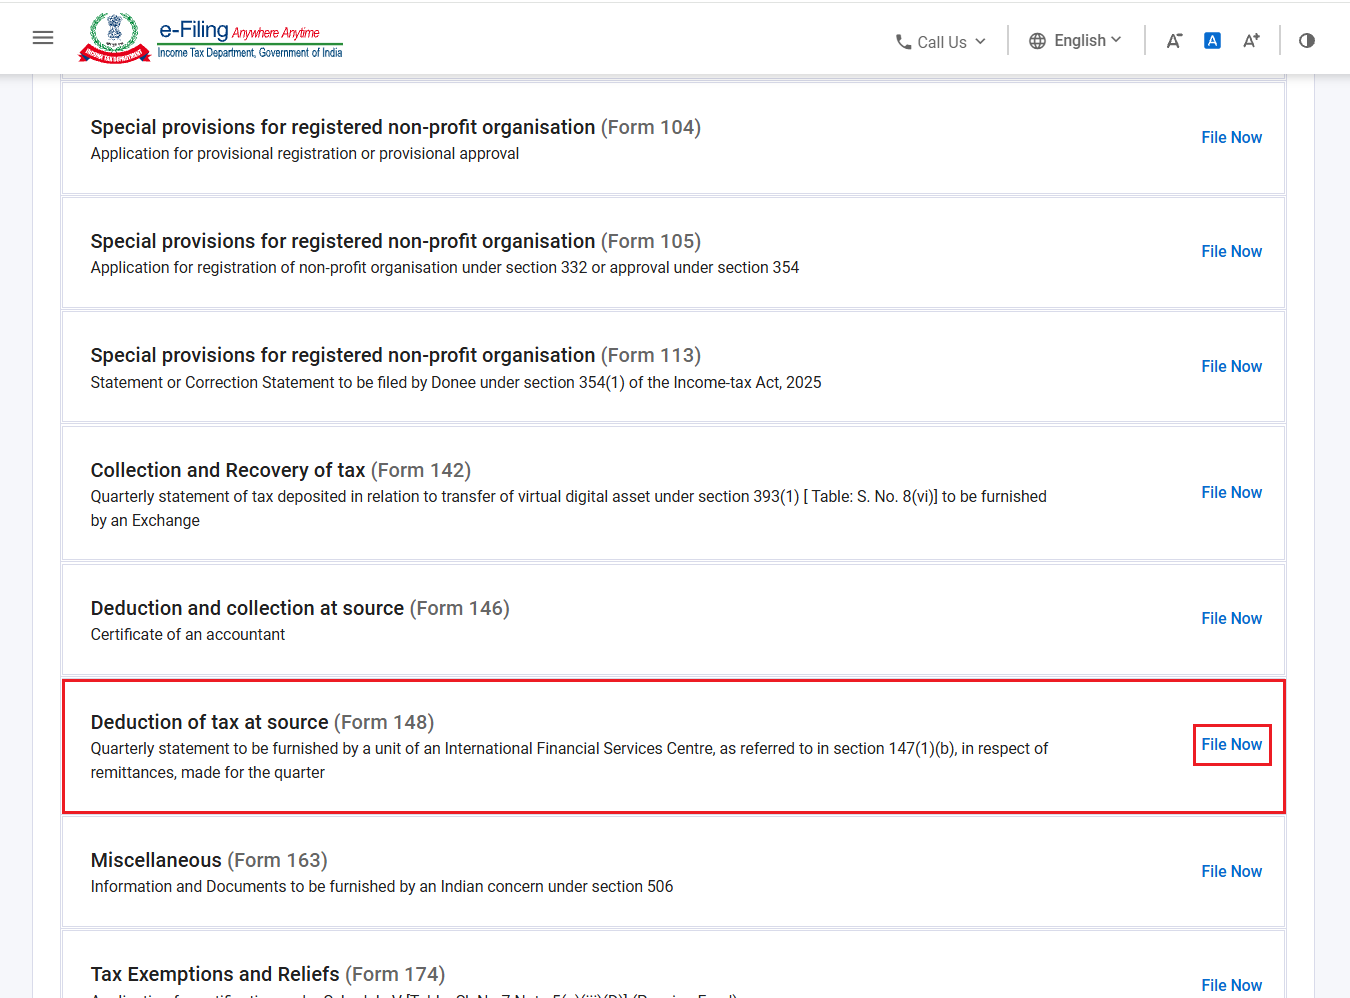
Step 3: After Login, Go to ‘e-File’ > ‘Income Tax Forms’ > ‘File Income Tax Forms’.
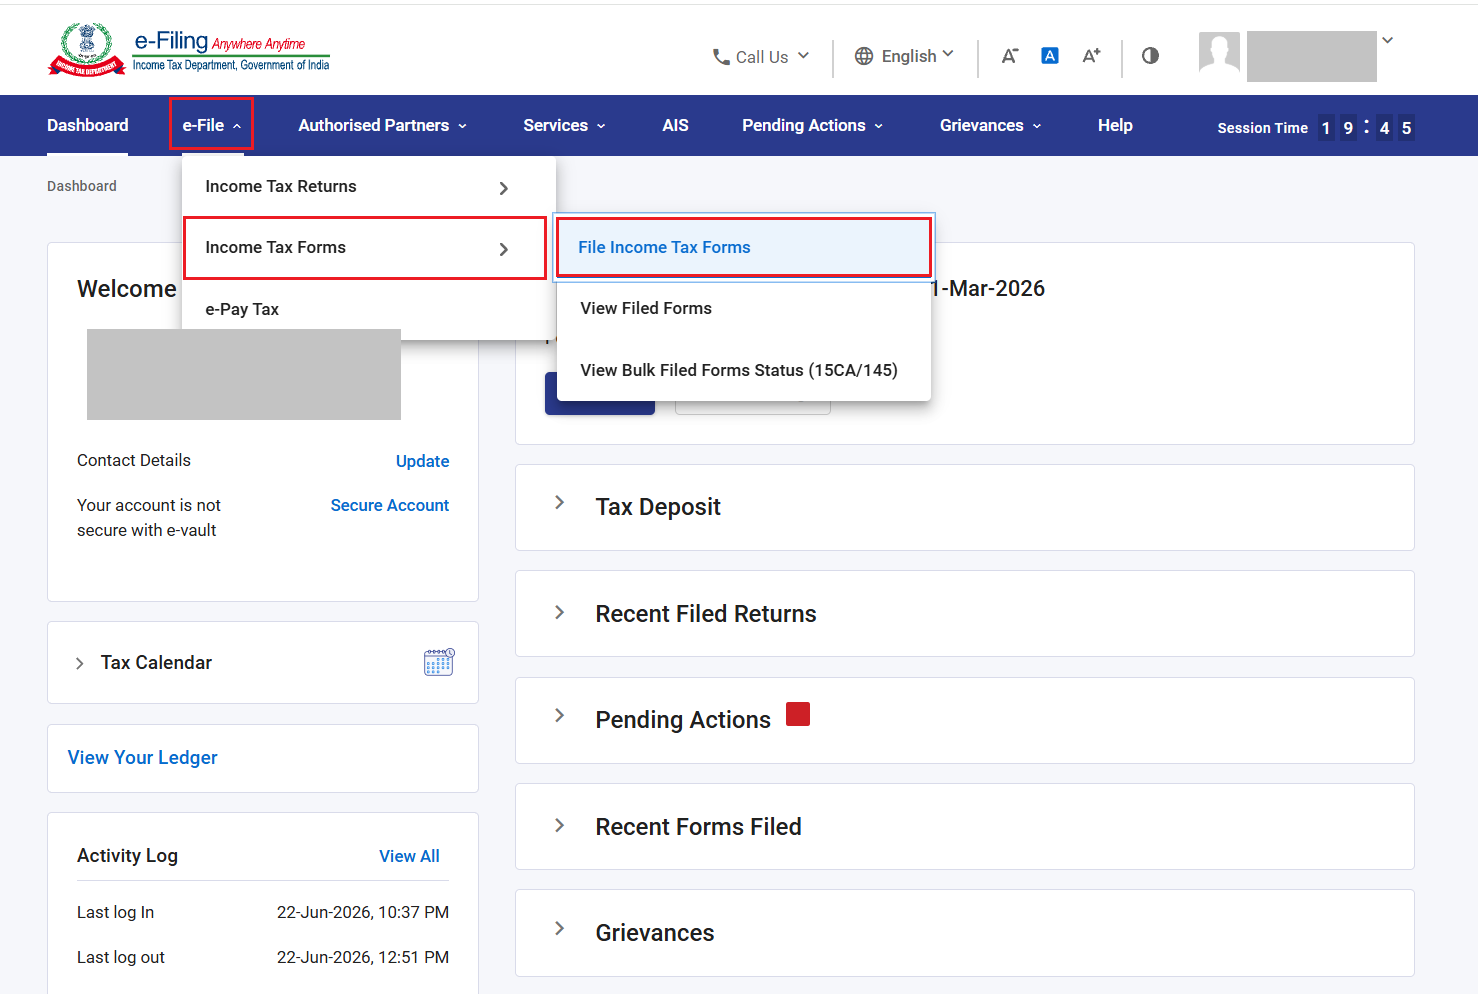
Step 4: Under ‘Forms as Per Income Tax Act 2025’ category, select ‘Form 148’ and click ‘File Now’.
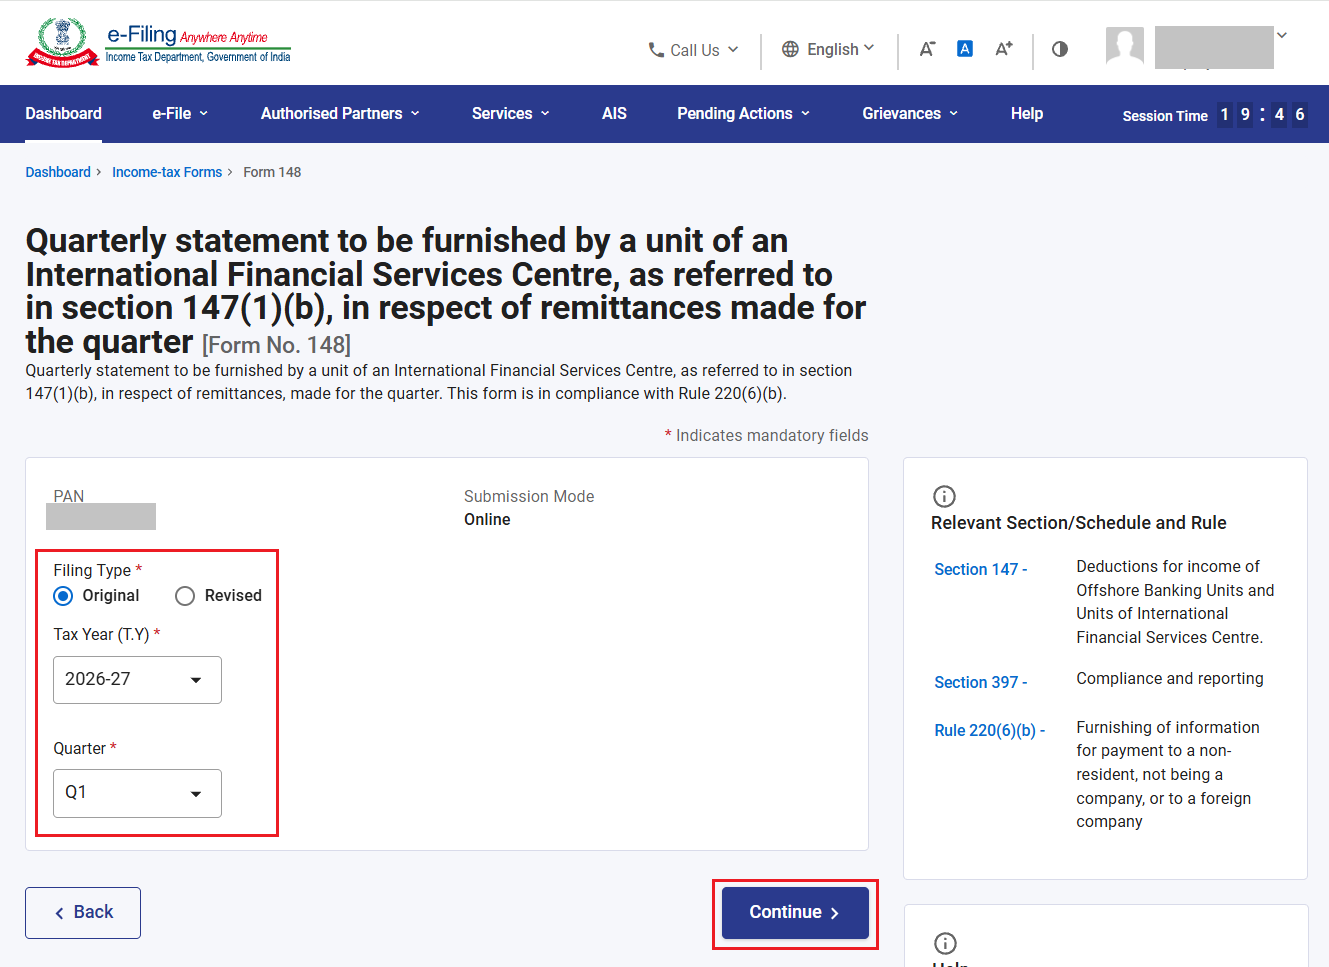
Step 5: On form page, select Applicable Filing Type, Tax Year, and Quarter and click ‘Continue’.
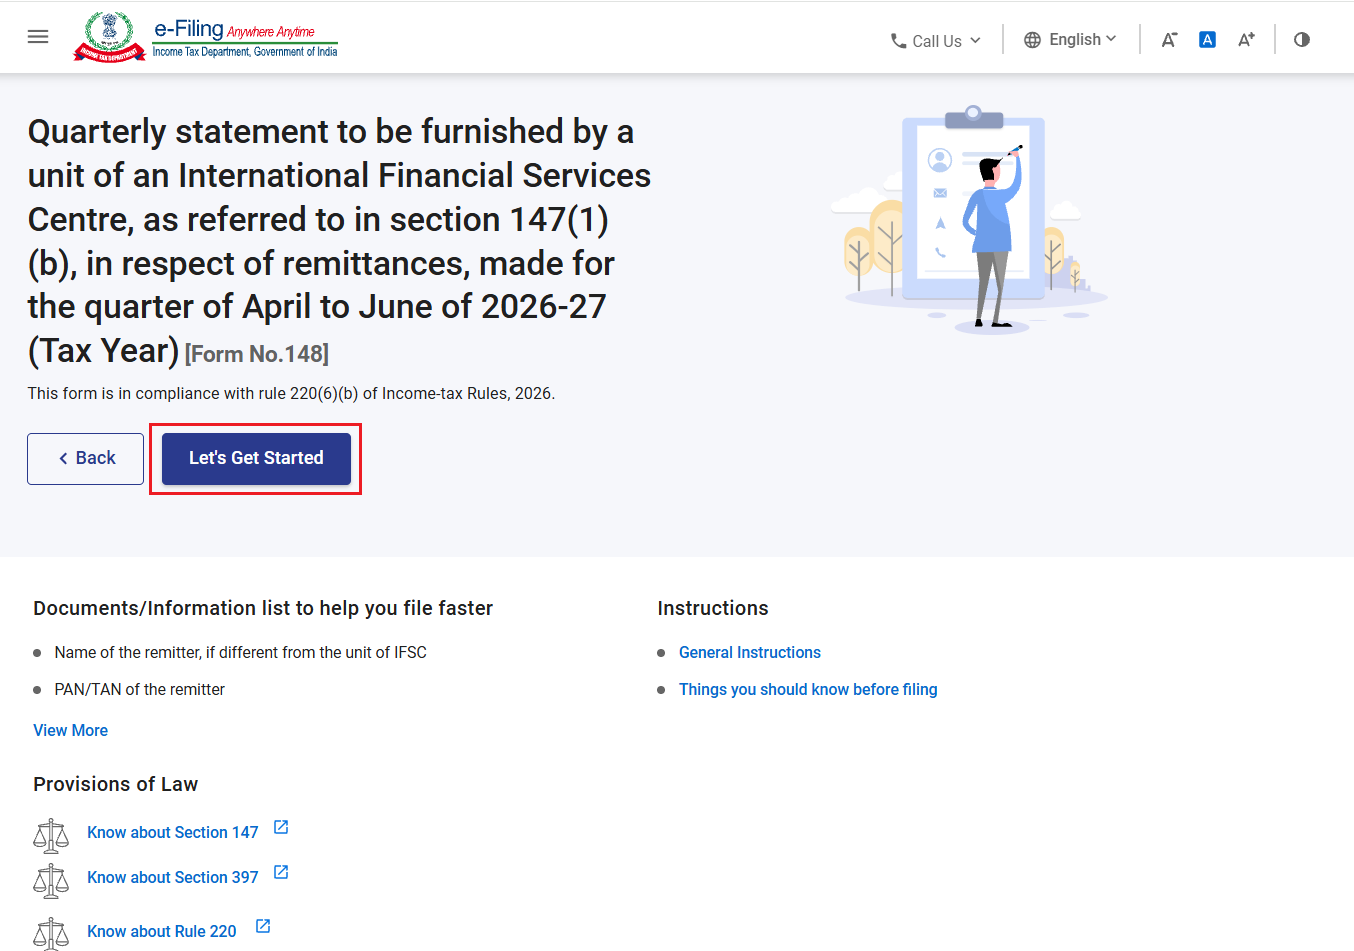
Step 6: Read the instruction to file the Form and click on ‘Let’s get Started’.
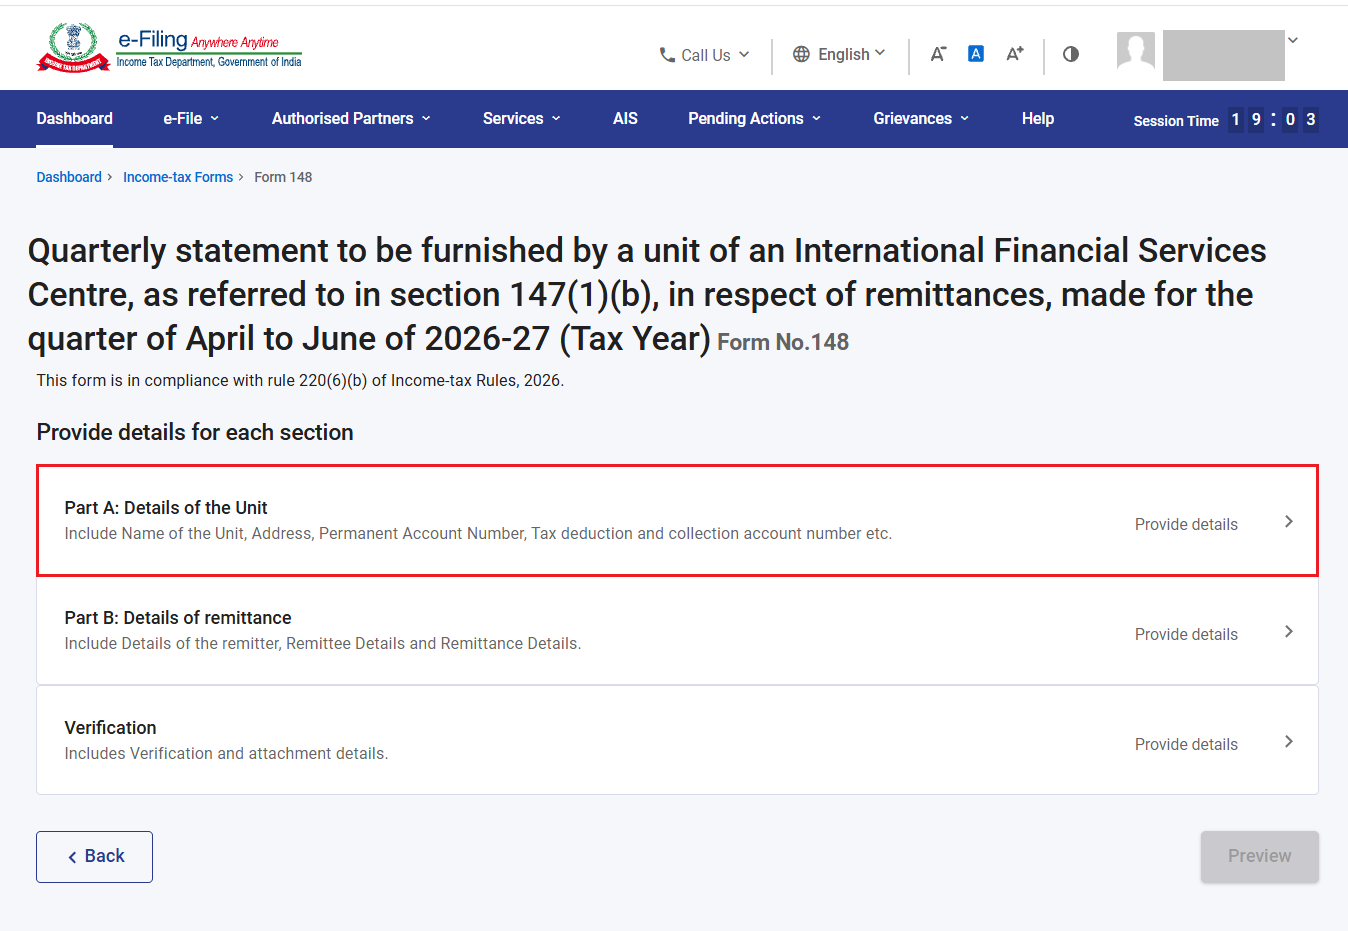
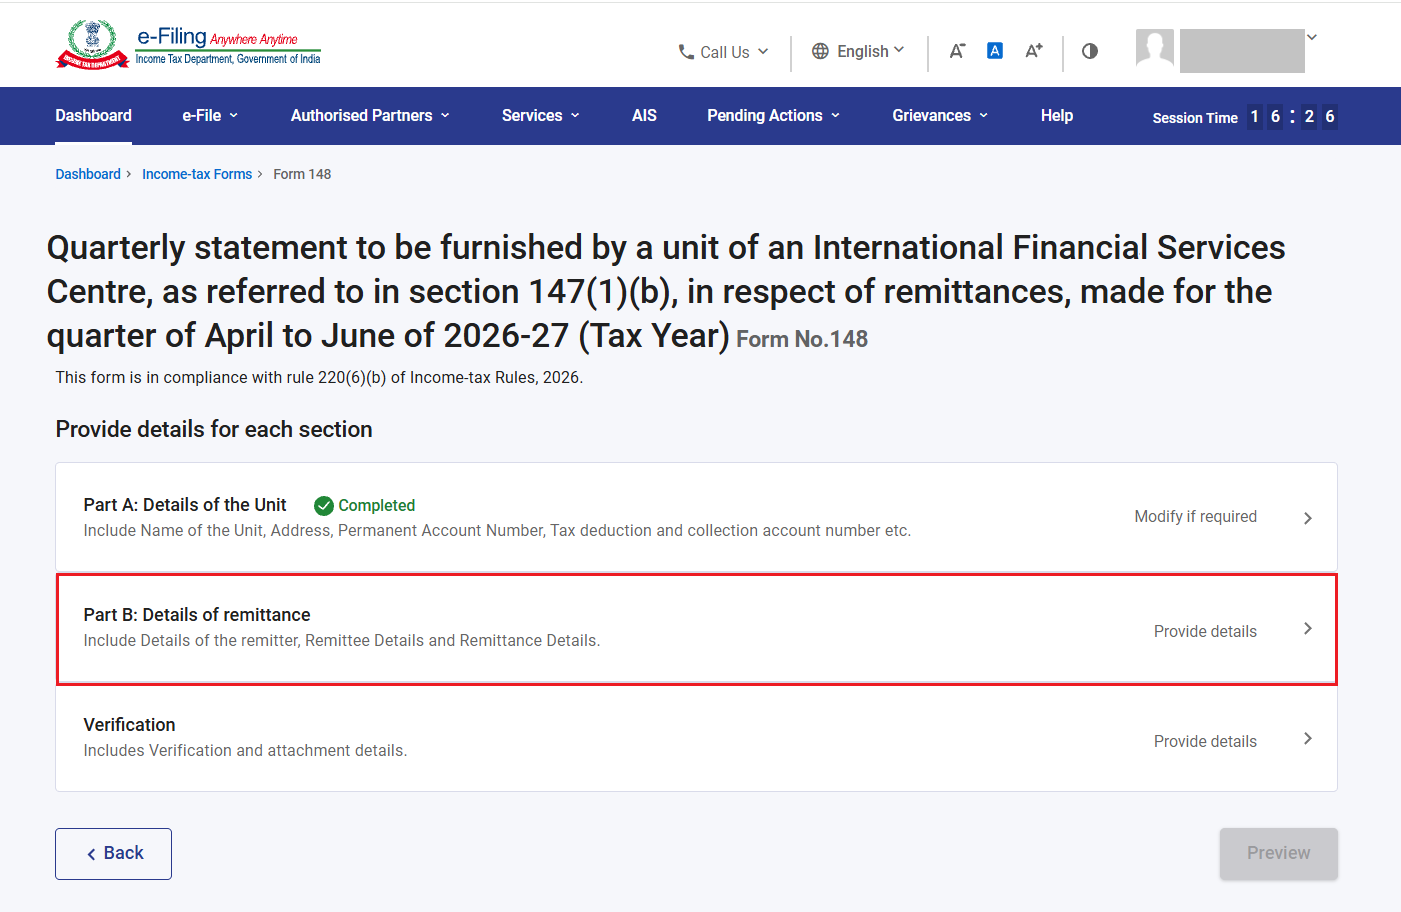
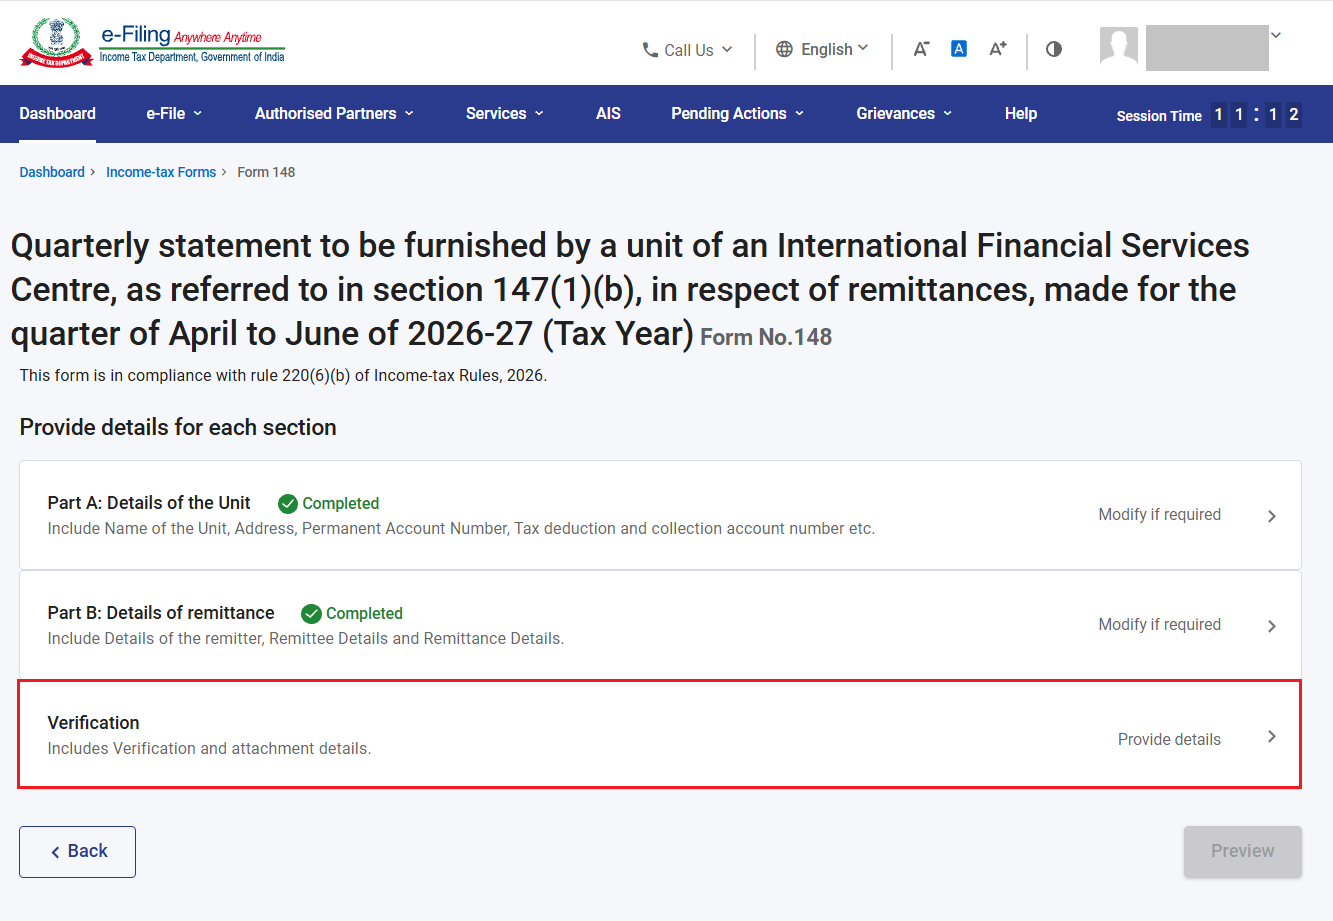
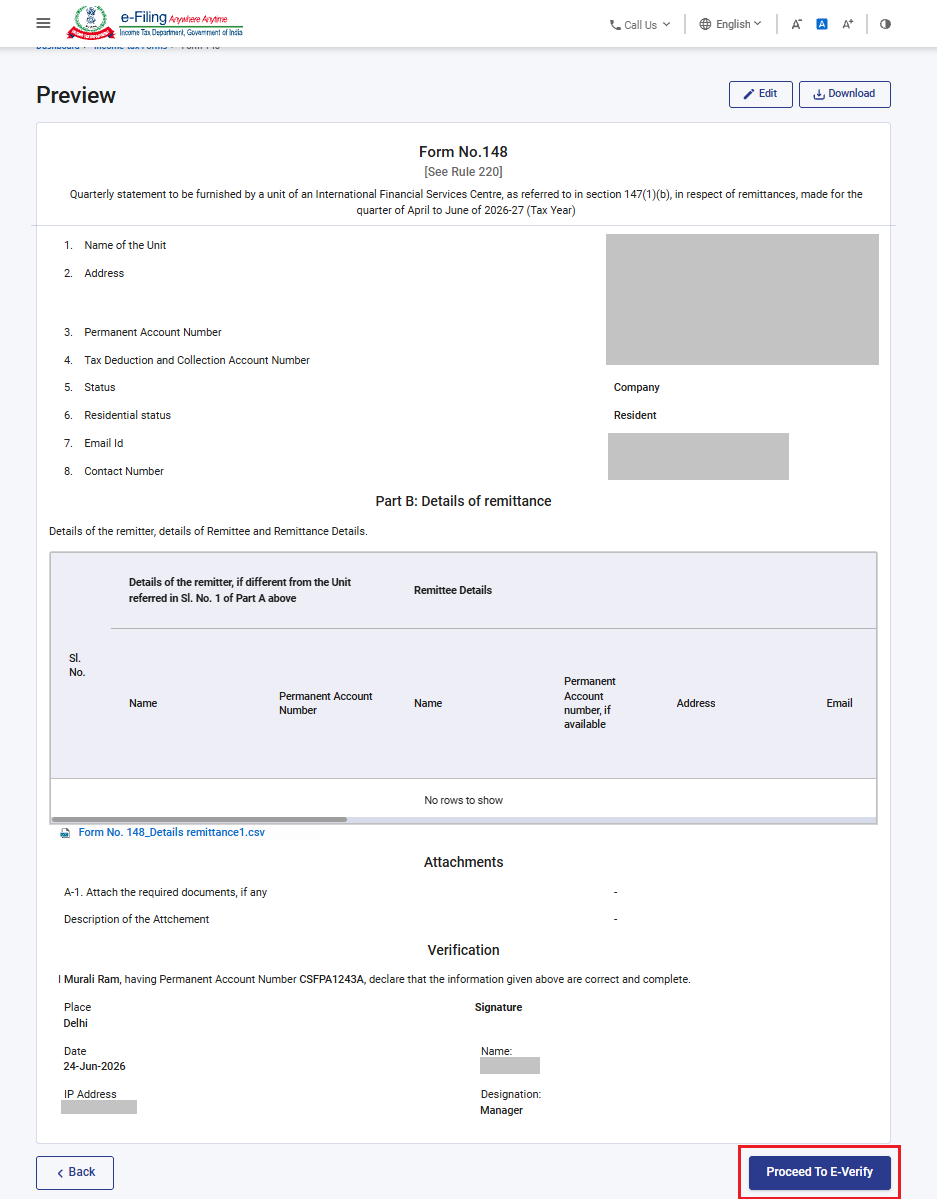
Step 7: Form 148 have 3 sections:
1. Part A- Details of Unit
2. Part B- Details of remittance
3. Verification
To complete the form, confirm each section of form.
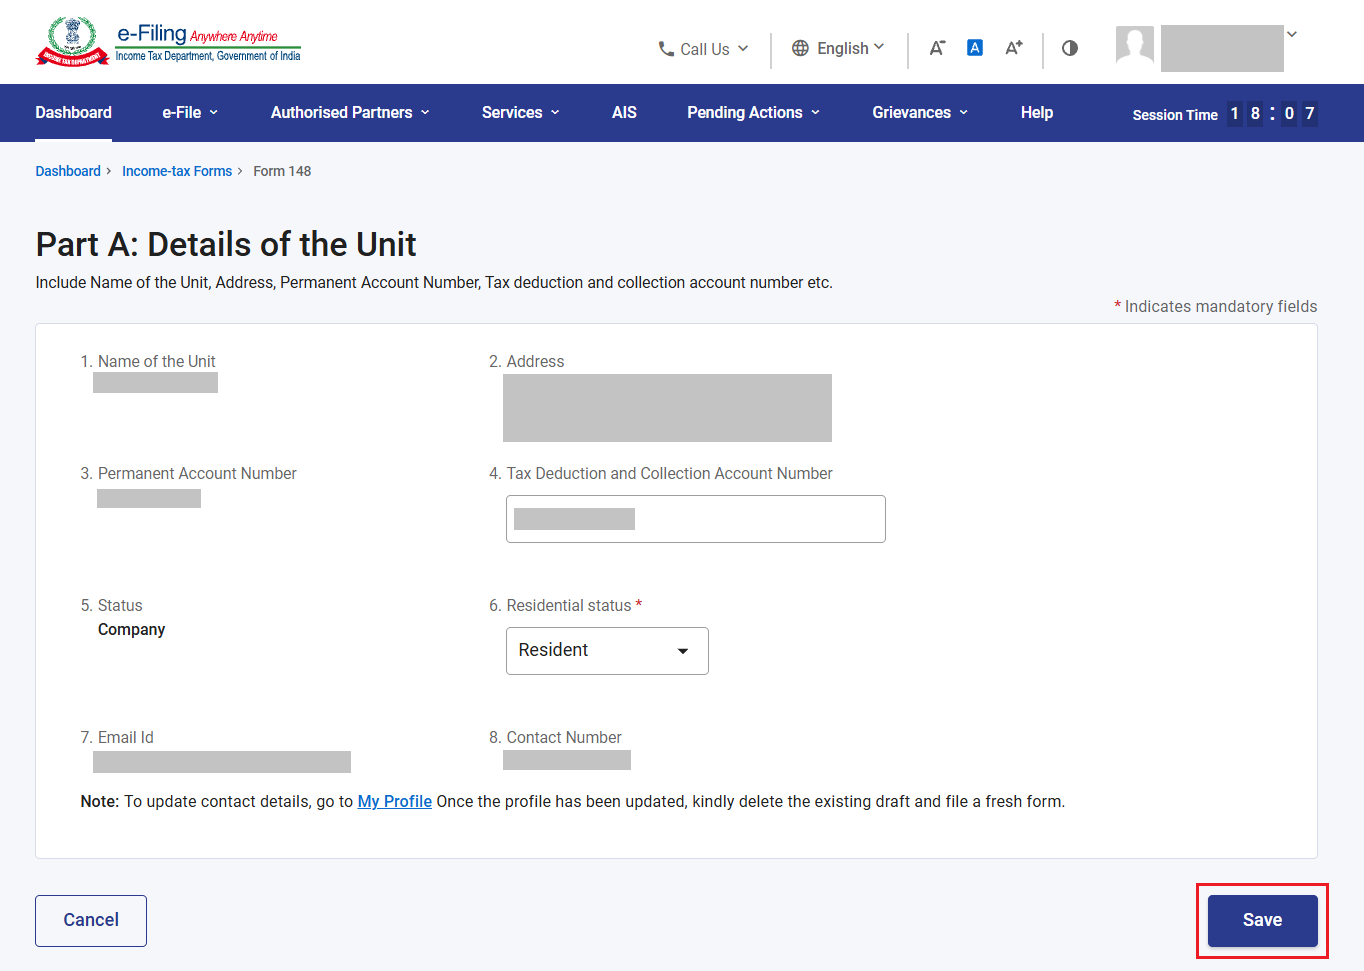
Now, click on ‘Part A- Details of Unit’.
Step 8: Basic information (Name, Address, Email ID etc) of unit will be prefilled from profile section. To change/update, go to My profile and change the information. Additionally,
• Select residential Status
• Enter TAN number.
Click ‘Save’.
Step 9: Part A is completed. Now, click on ‘Part B- Details of Remittances’.
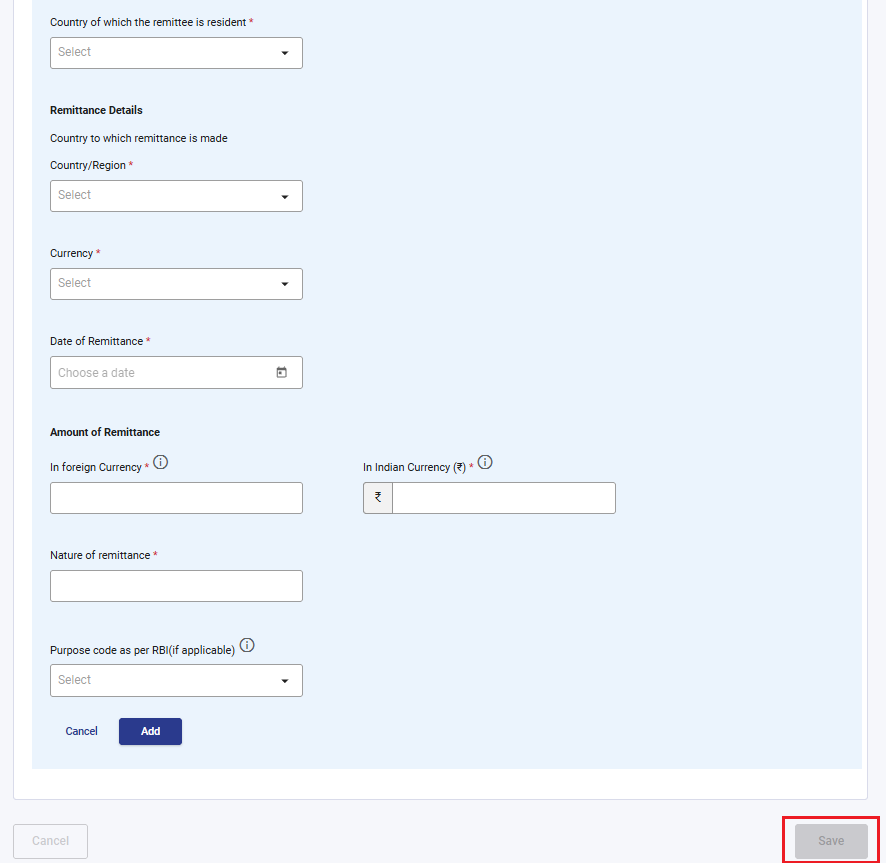
Step 10: In ‘Part B- Details of Remittances’, please furnish the details Remittances. If records are up to 50, click on ‘+Add Details’ and add the records.
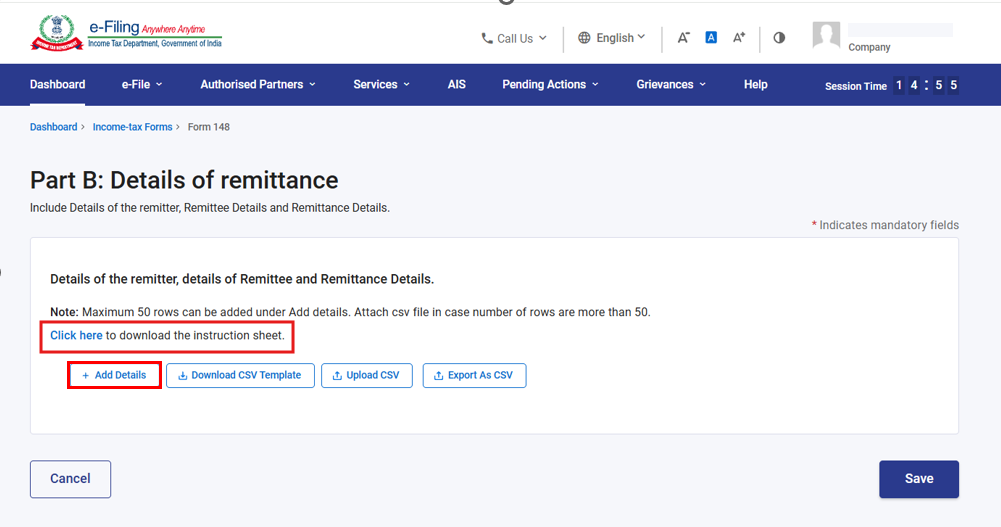
Please Note: Download the instruction sheet by clicking on the hyperlink ‘Click here’ and fill the information in excel sheet accordingly to avoid any error in uploading the file. Later save the file in CSV UTF-8(Comma delimited) format.
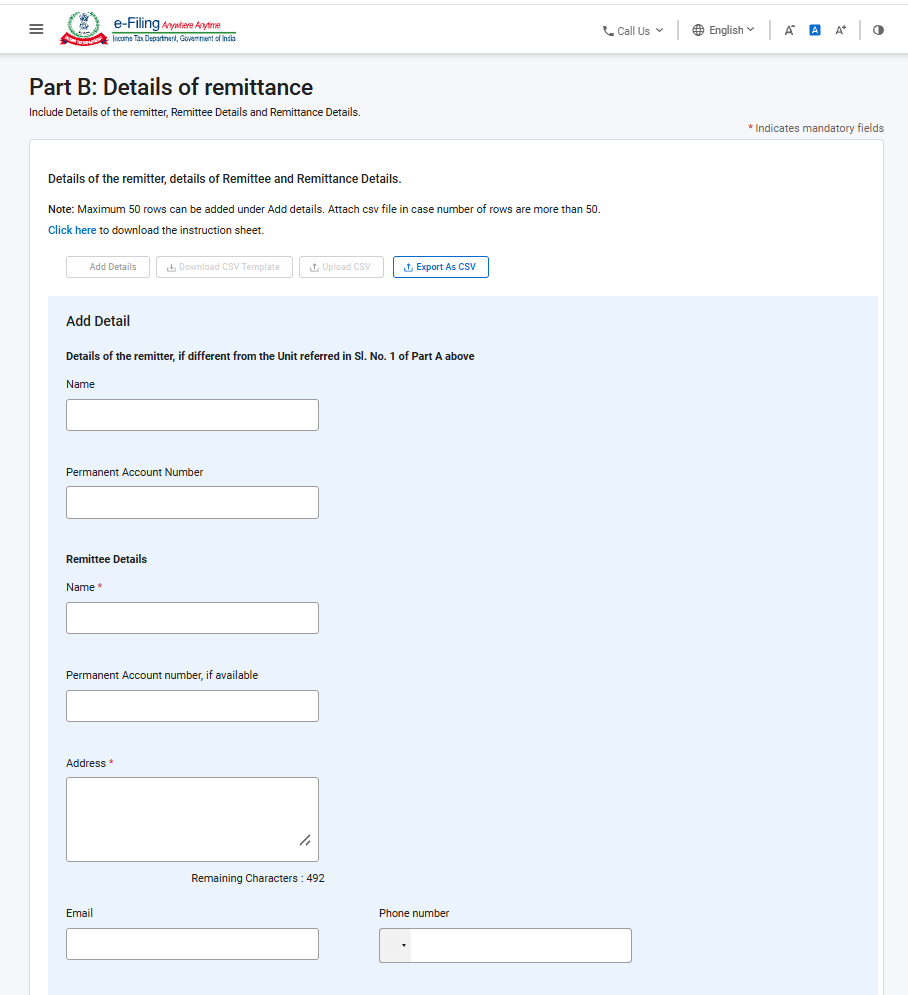
-To add the record of non-resident, furnish below information related to remittances made. Add the record and click ‘Save’.
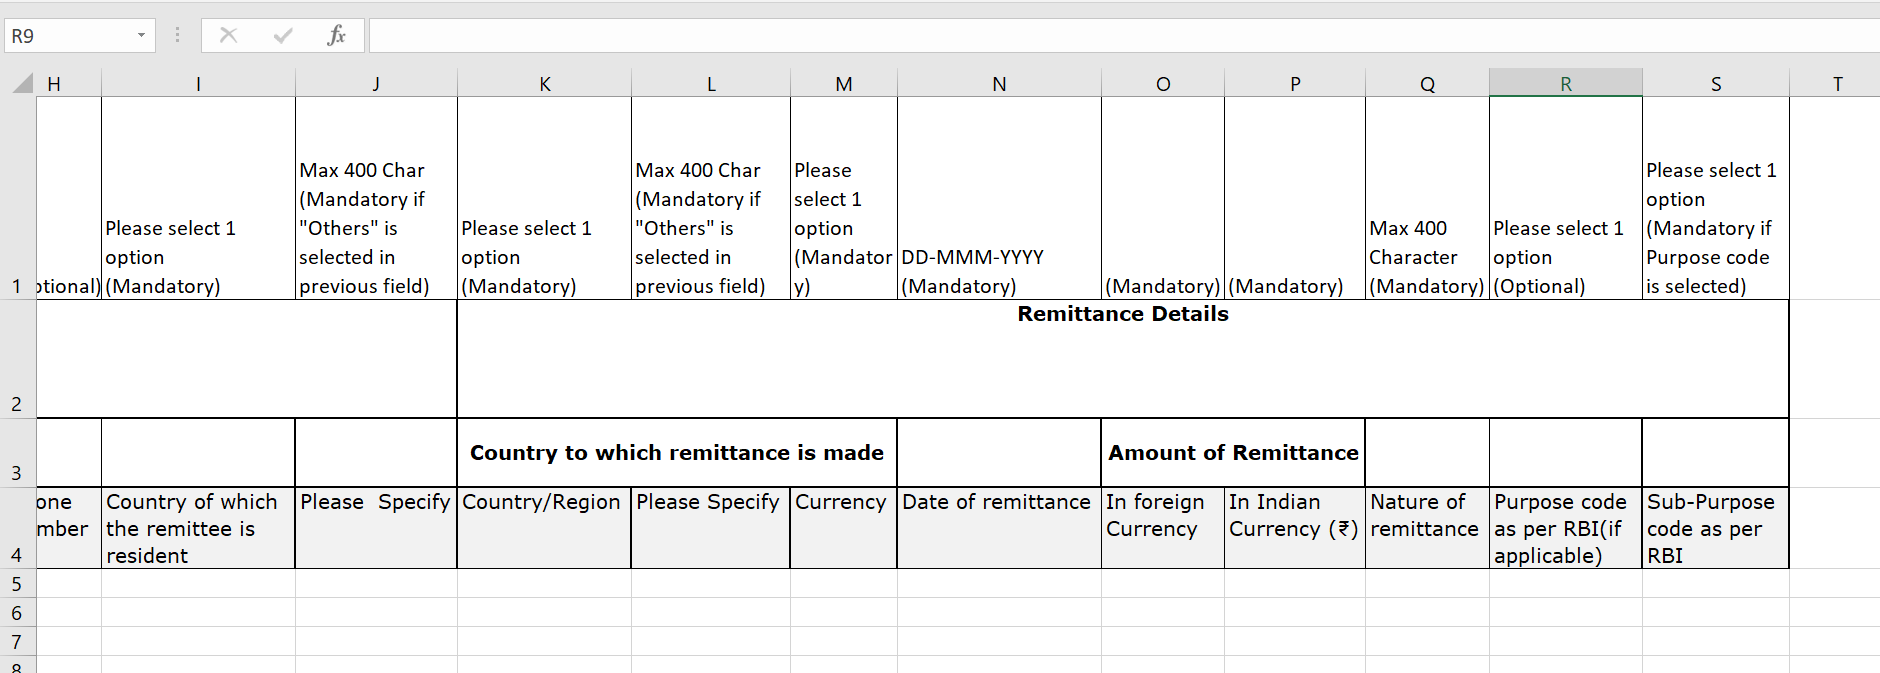
• If Records are more than 50, Download below excel template and furnish the same information in excel format (Column A to Column S) and create .CSV file.

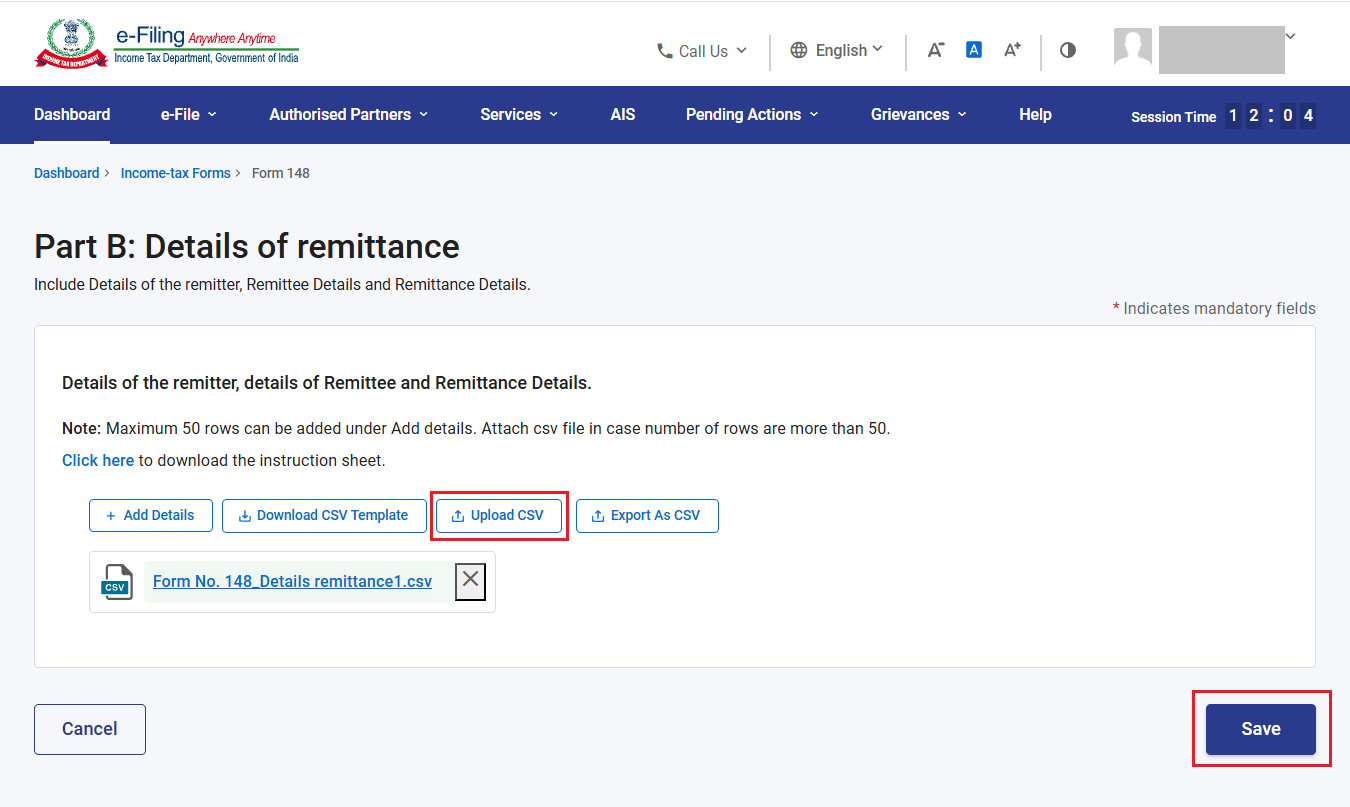
Now, upload the .CSV file by clicking on ‘Upload CSV’. If there is no error in uploaded file, click ‘Save’.
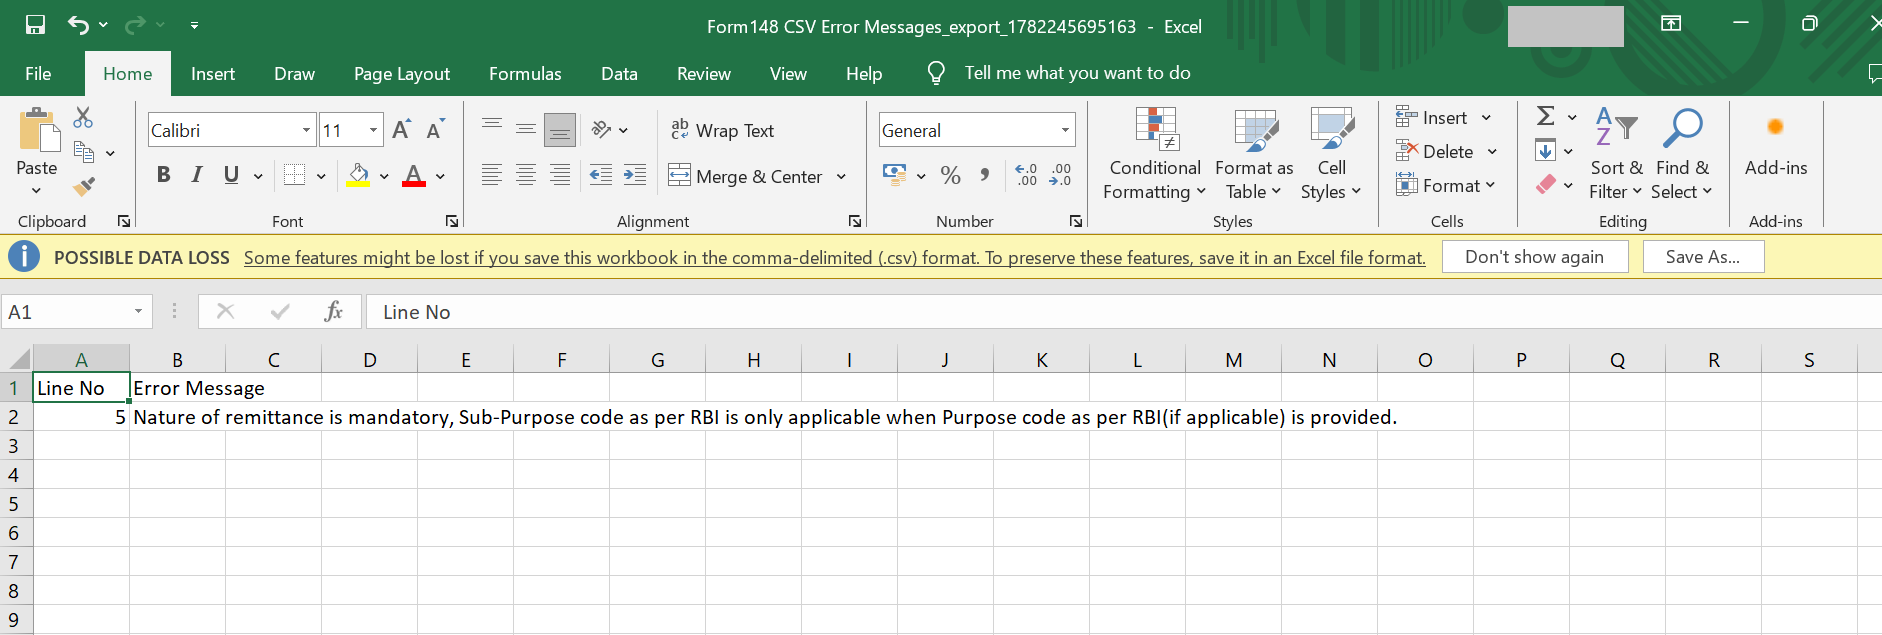
-If there is error in uploaded .CSV file, click on ‘Click here’ to download error file and check the error.
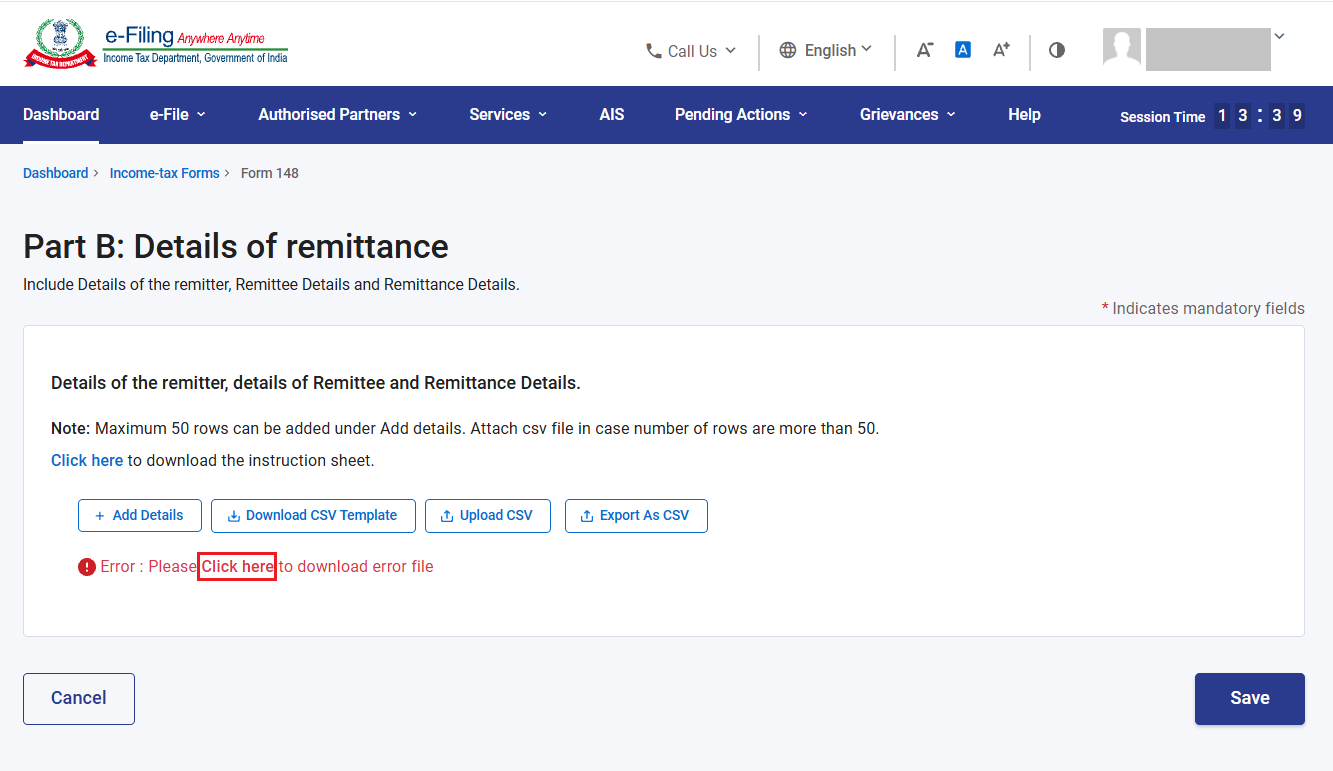
Rectify the error in below error sheet and upload again. you can refer the instruction sheet to rectify the error.
Step 11: Part B is confirmed. Now, click on Verification.
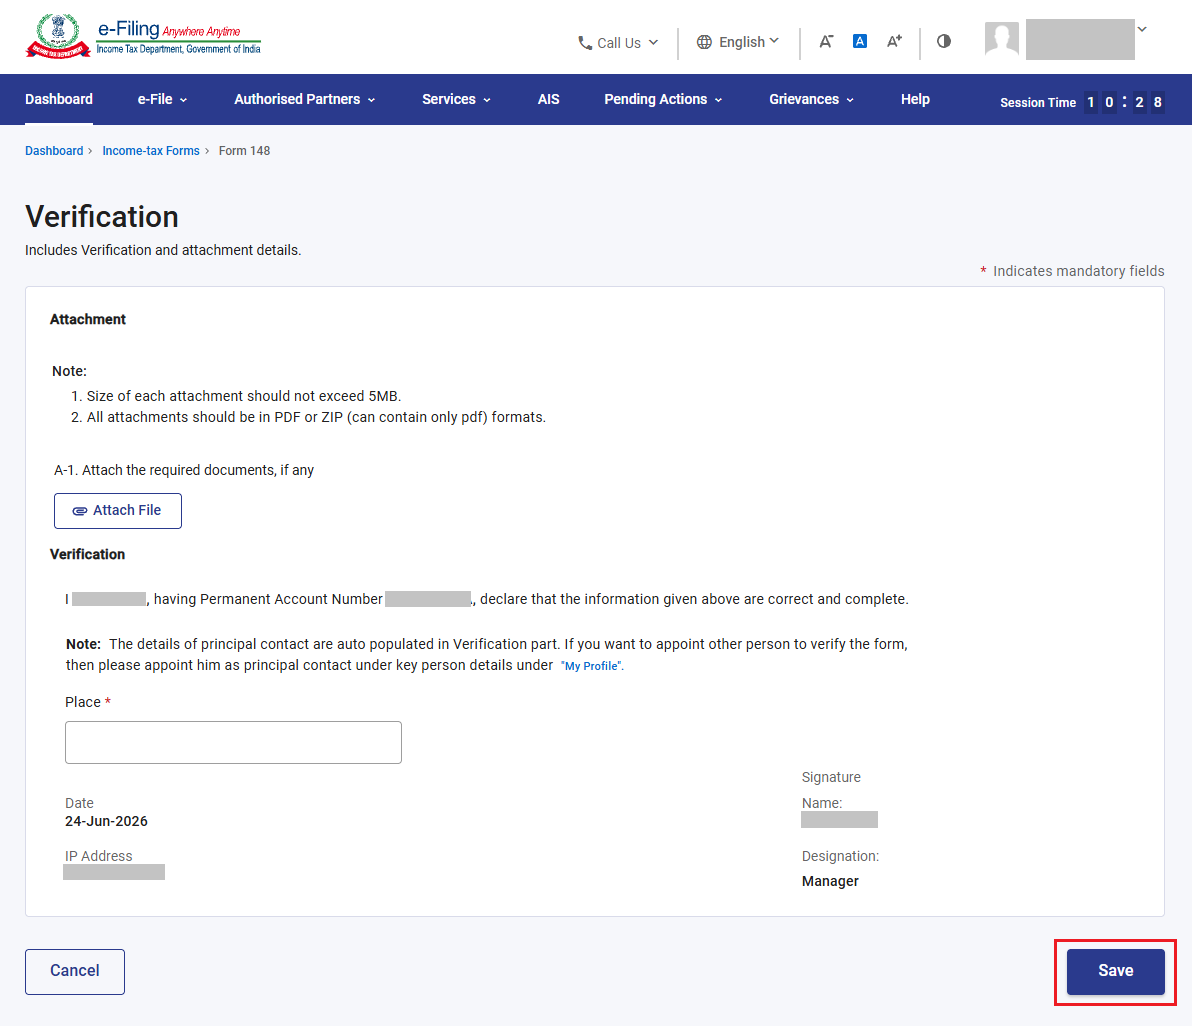
Step 12: You can attach the required documents (if any) and enter place. Click ‘Save’.
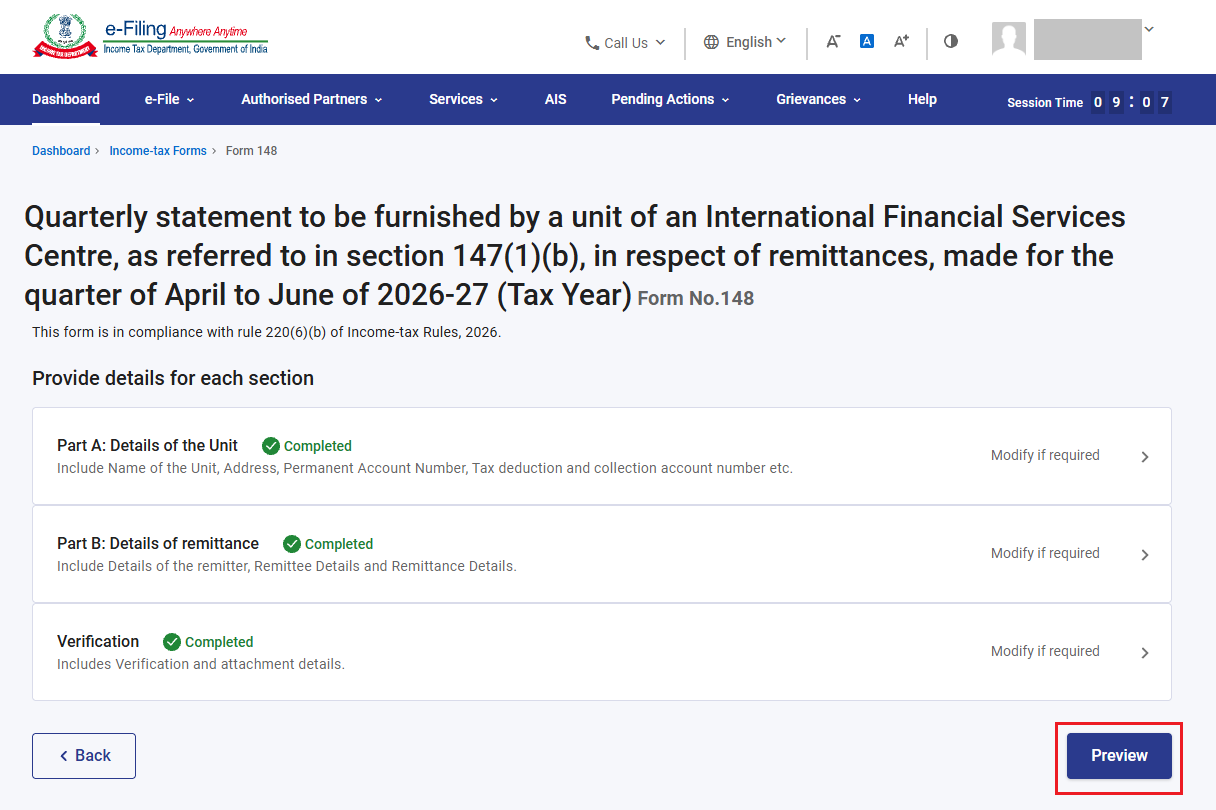
Step 13: All the three sections are confirmed. Click ‘Preview’.
Step 14: Check the preview of form. Click ‘Proceed to E-Verify’.
Step 15: Verify the form through DSC of authorised person.

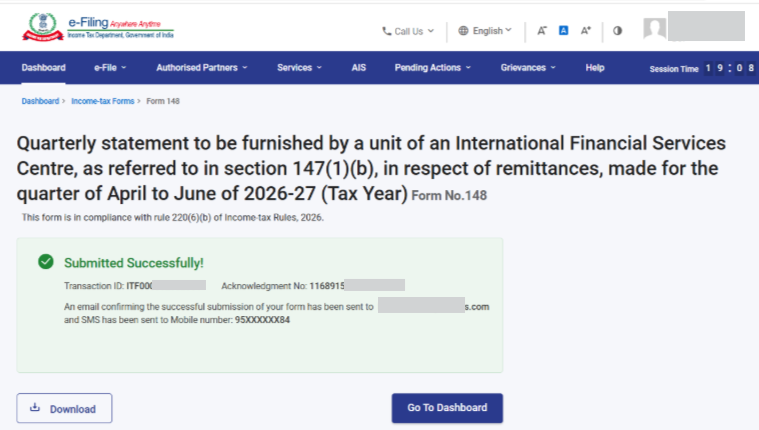
Step 16: After verification form will be submitted. Note the acknowledgement number and transaction ID for future reference. Same will be communicated on your registered email ID.