Form 163 User Manual
1. Overview
Form 163 is for reporting indirect transfers of assets located in India. It is required under Section 506 of the Income Tax Act, 2025 and prescribed under Rule 235 of Income-tax Rules, 2026. This form is to be filed by an Indian concern or its representative, whose assets are indirectly transferred by a non-resident.
2. Due Date to file Form 163
Information shall be furnished in Form No. 163 within a period of ninety days from the end of the financial year:
• In which any transfer of the share of, or interest in, a company or entity incorporated outside India has taken place or
• Where a transaction involving a share or an interest has the effect of directly or indirectly transferring rights of management or control in relation to the Indian concern.
3. Prerequisites for availing this service
Prerequisites for filing Form 163 are:
• Have a valid User ID and password.
• Ensure that DSC (class 3) is not expired and is registered on e-Filling portal
4. Step-by-Step Guide
4.1 How to File Form 163
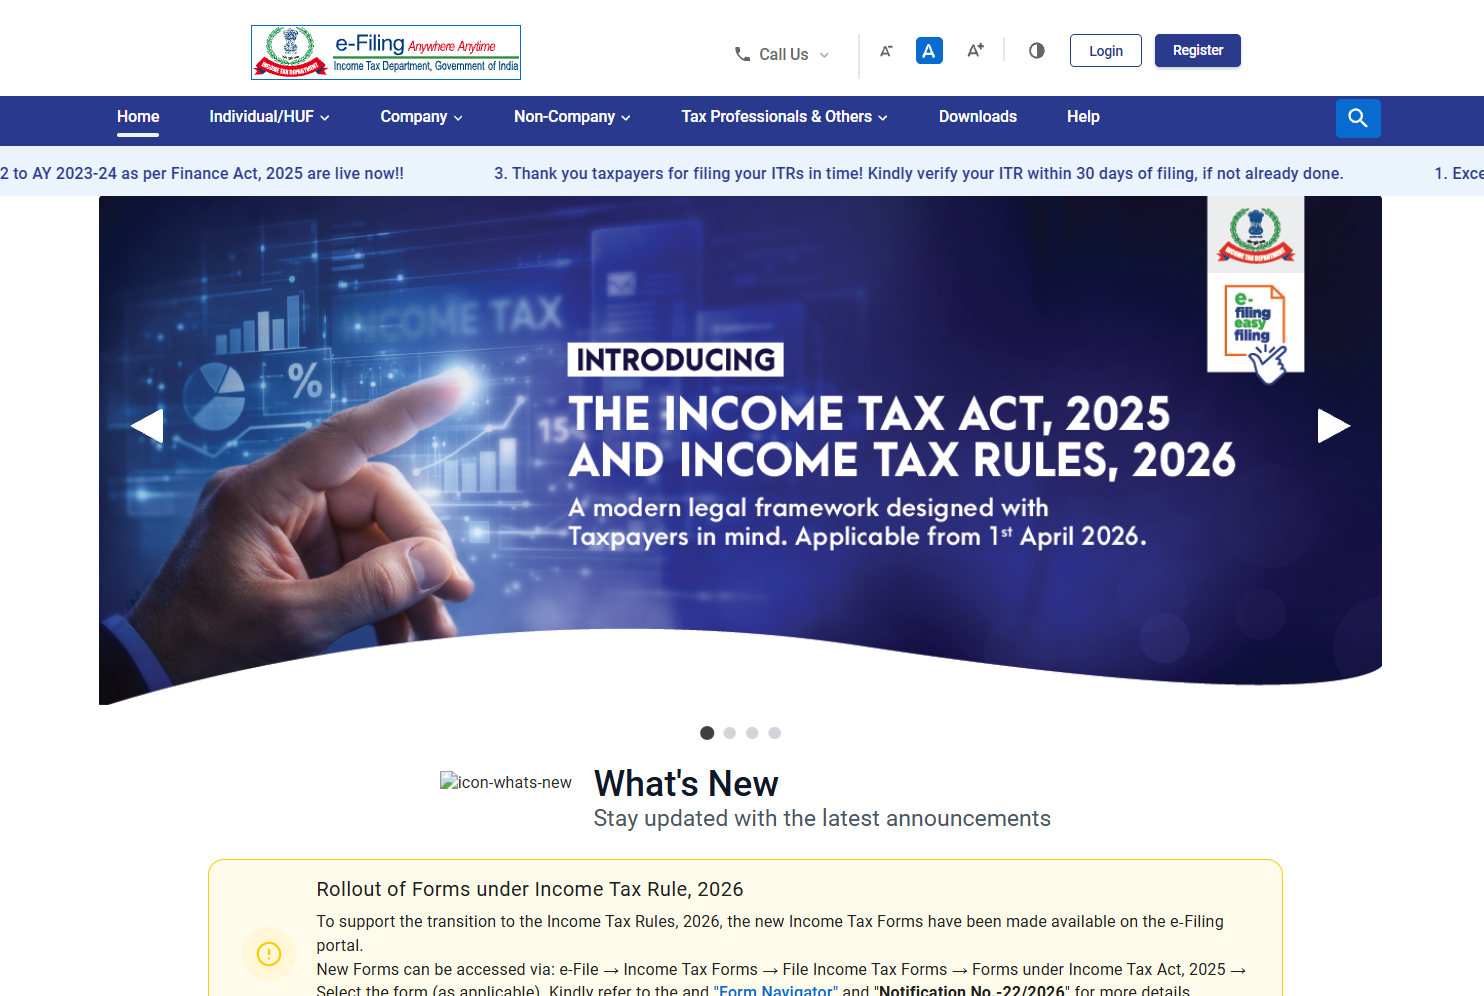
Step 1: Access the Income Tax e-Filing portal by visiting the official website at http://www.incometax.gov.in/.
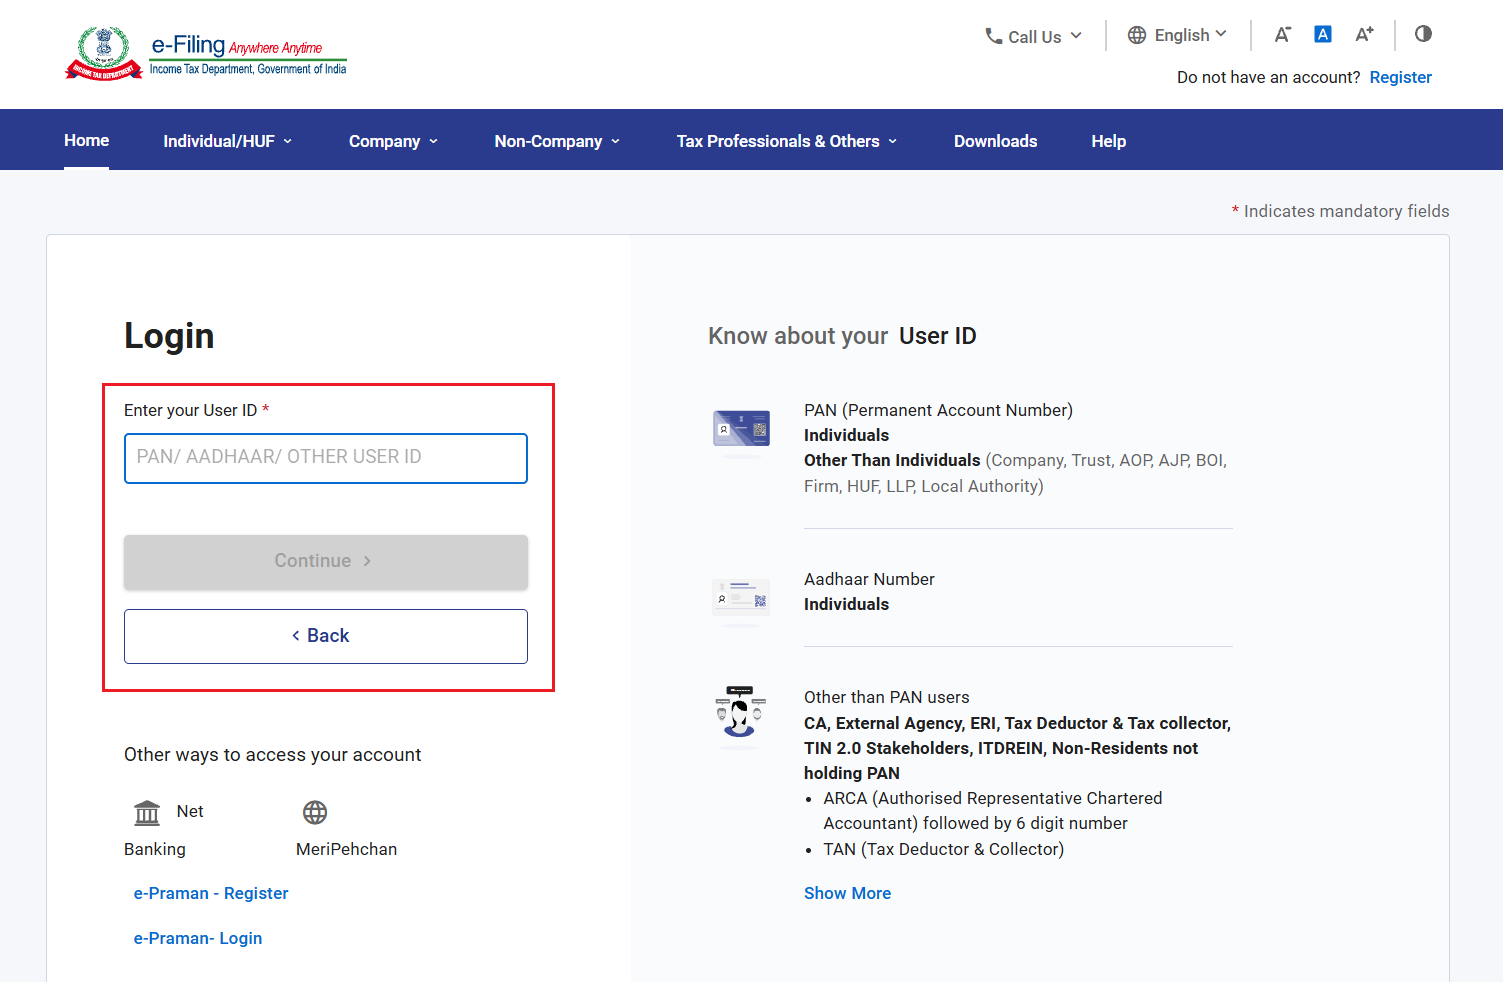
Step 2: Log in using your User ID (PAN) and password.
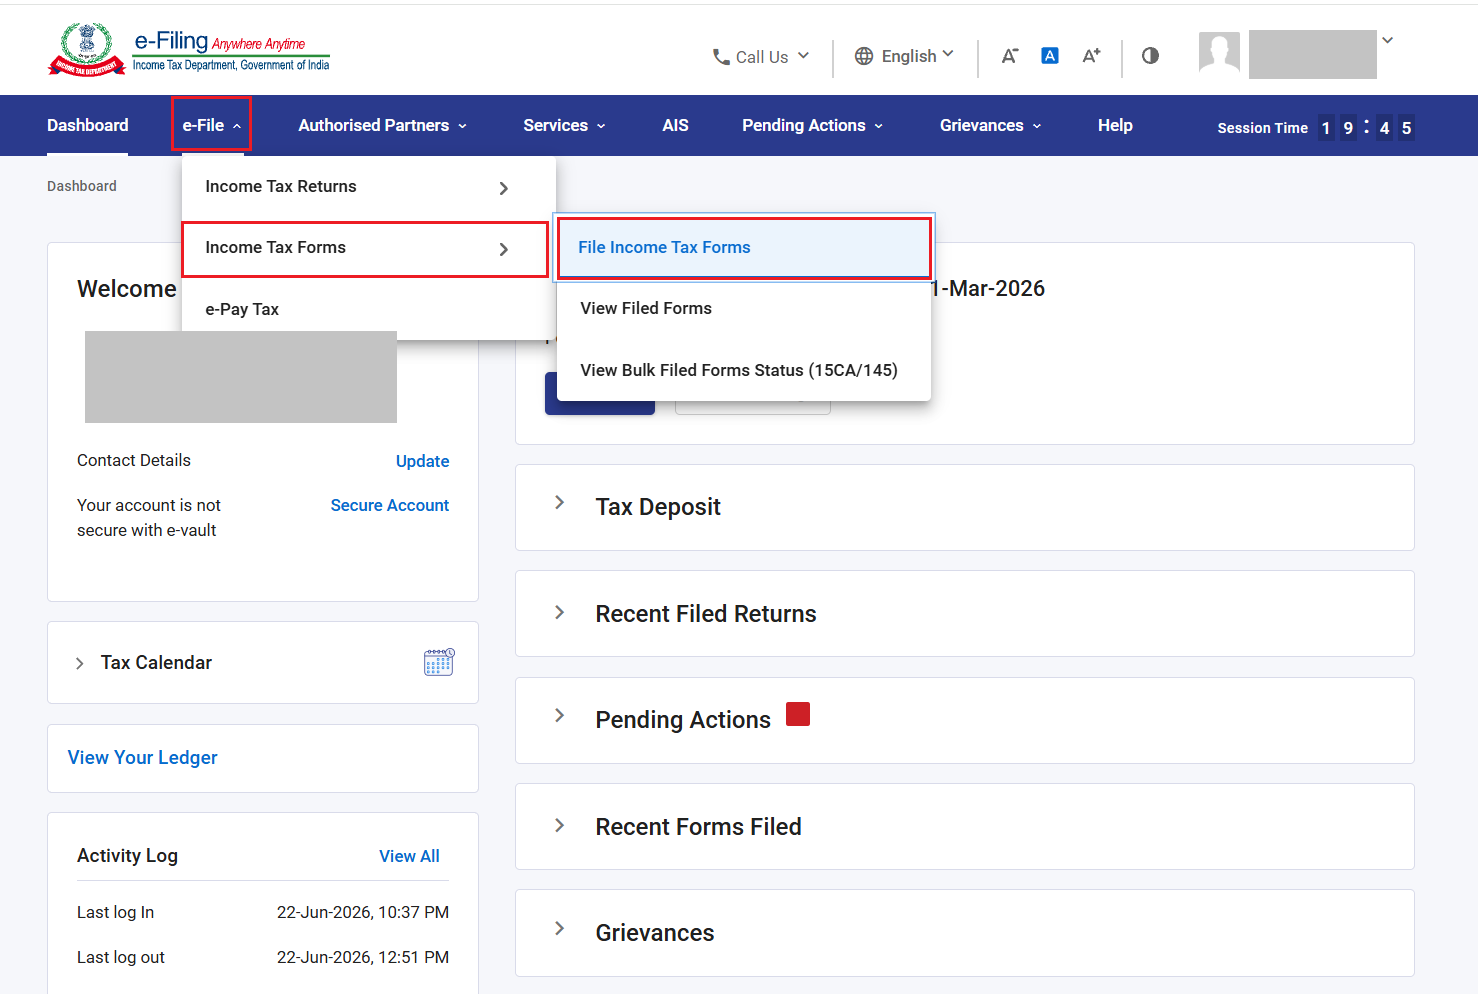
Step 3: After logging in, navigate to ‘e-File’ > ‘Income Tax Forms’ > ‘File Income Tax Forms’.
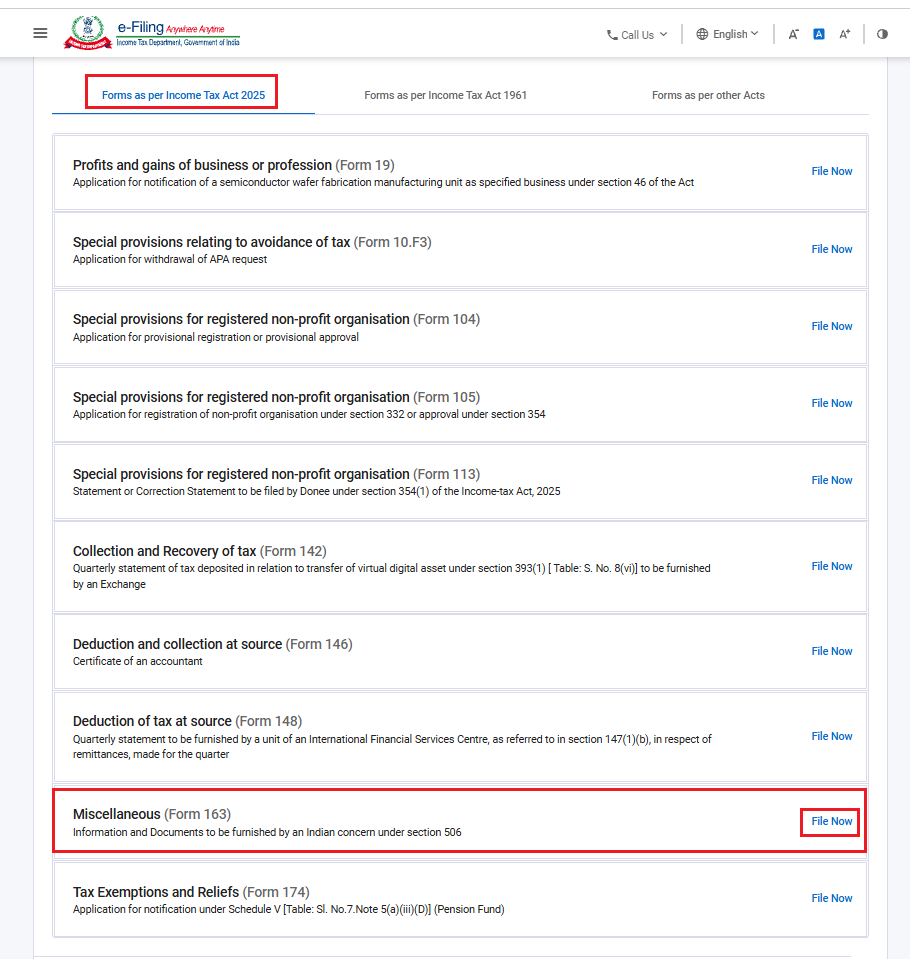
Step 4: Under ‘Forms as Per Income Tax Act 2025’ category, select ‘Form 163’ and click ‘File Now’.
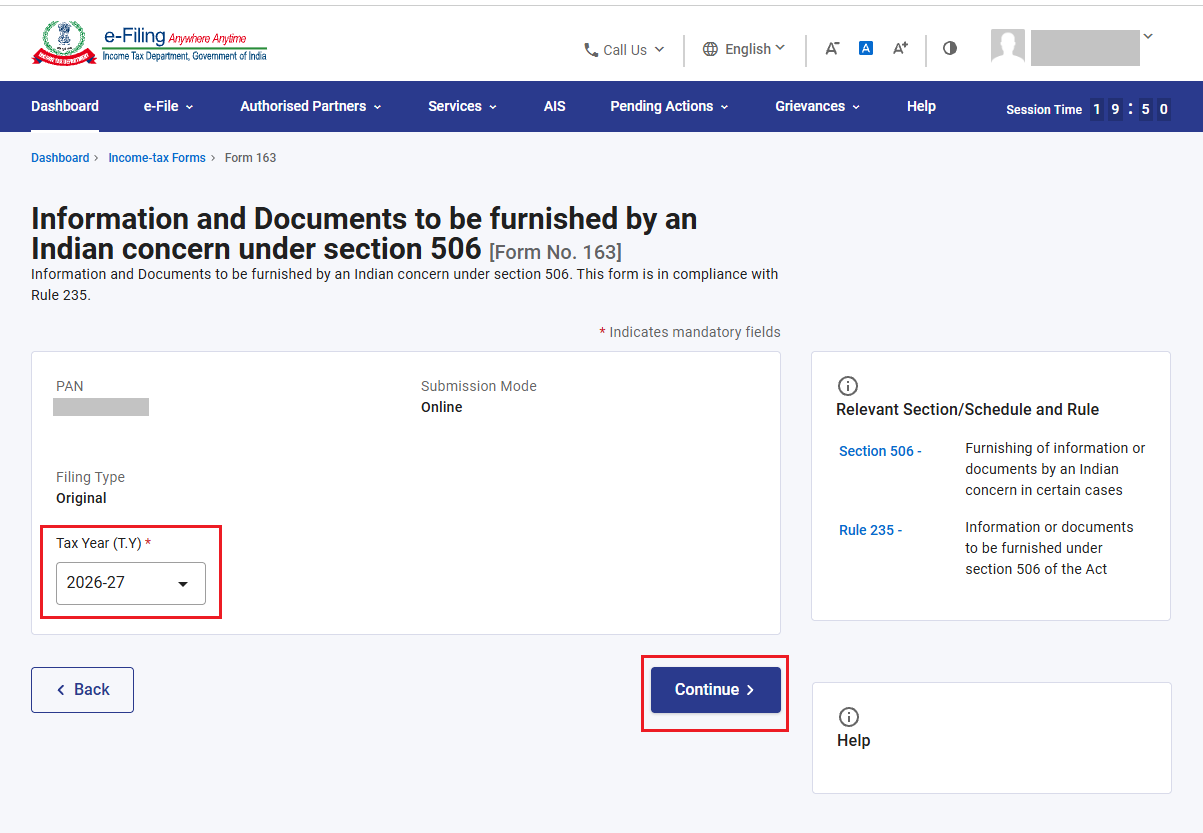
Step 5: On the form selection page, choose the applicable tax year and click ‘Continue’.
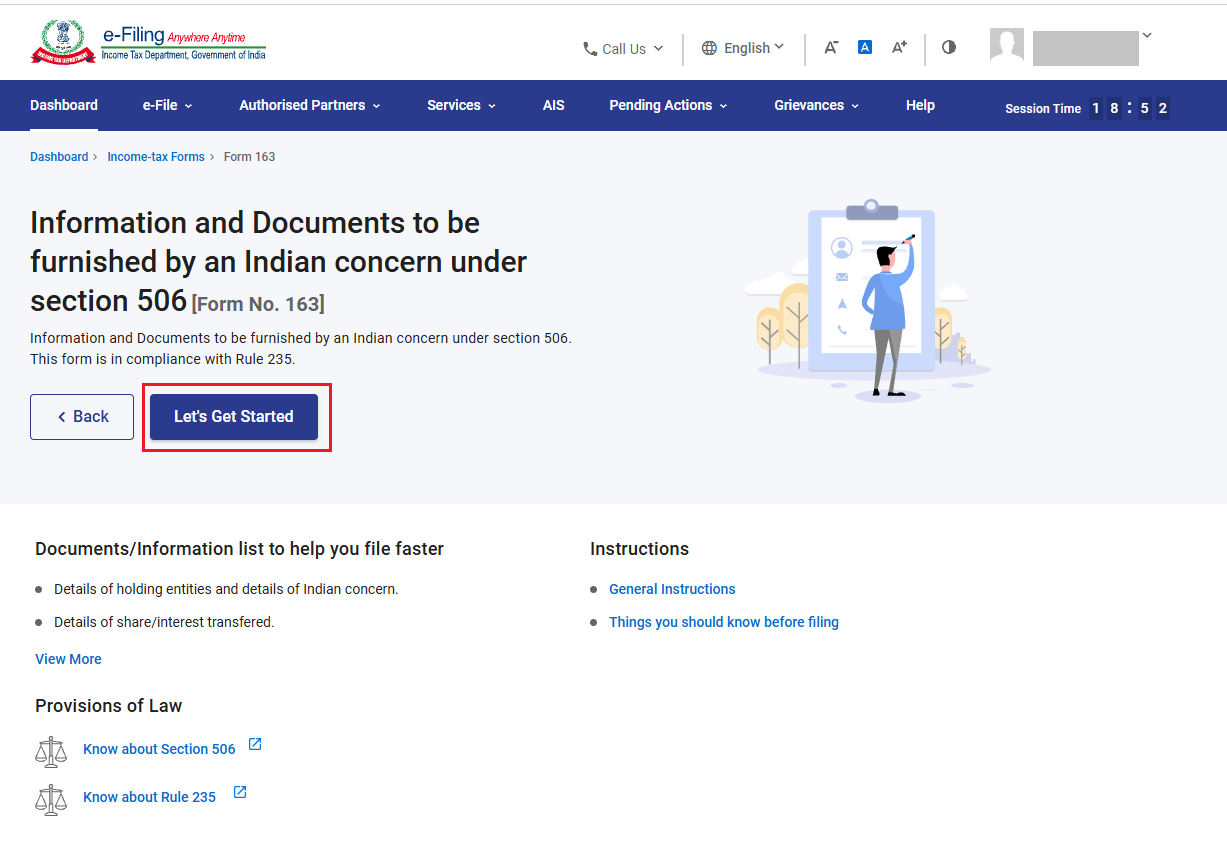
Step 6: Kindly refer the Instructions, Documents/Information list to help file the form faster and then click ‘Let’s Get Started’.
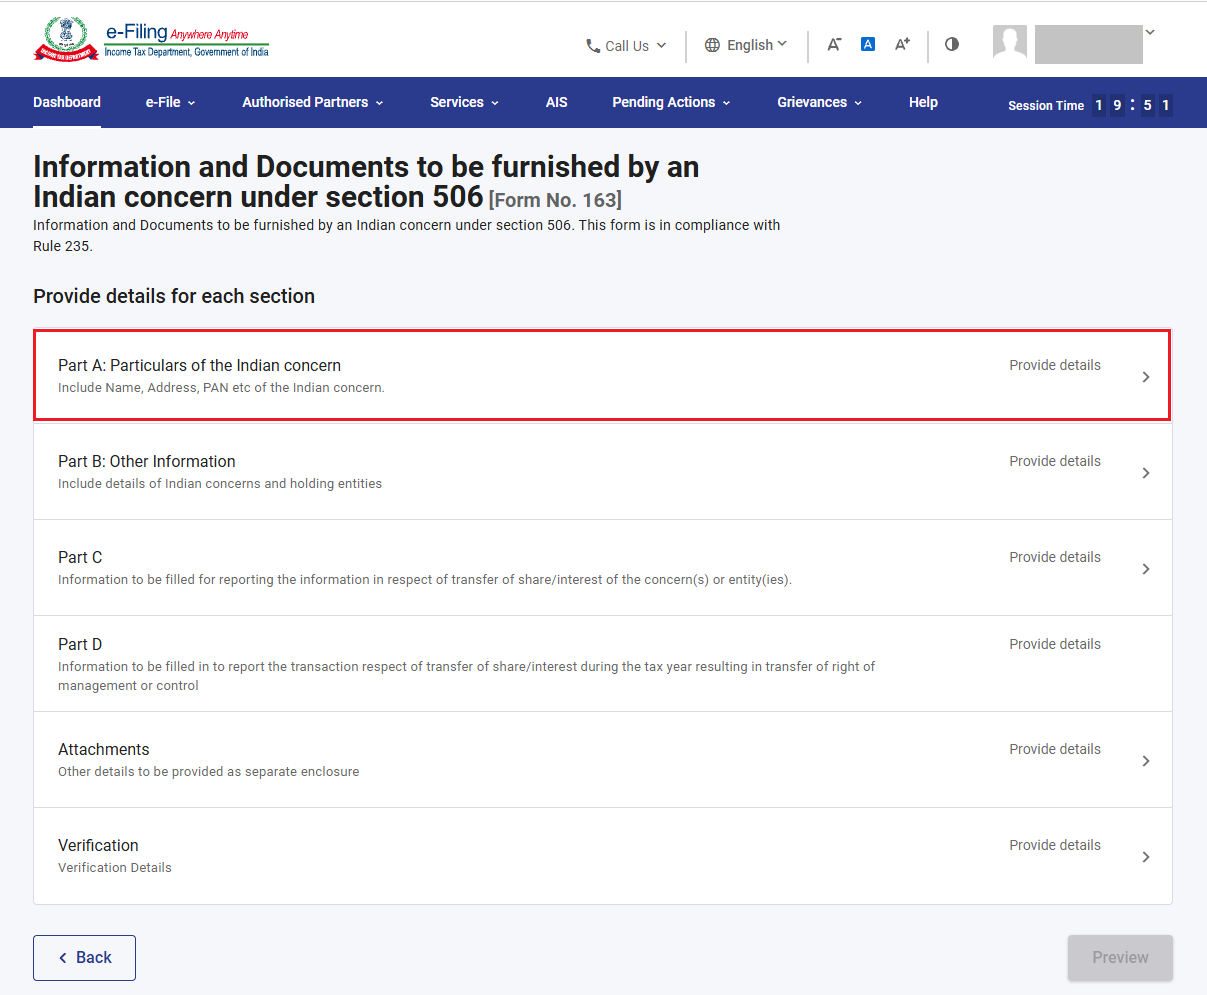
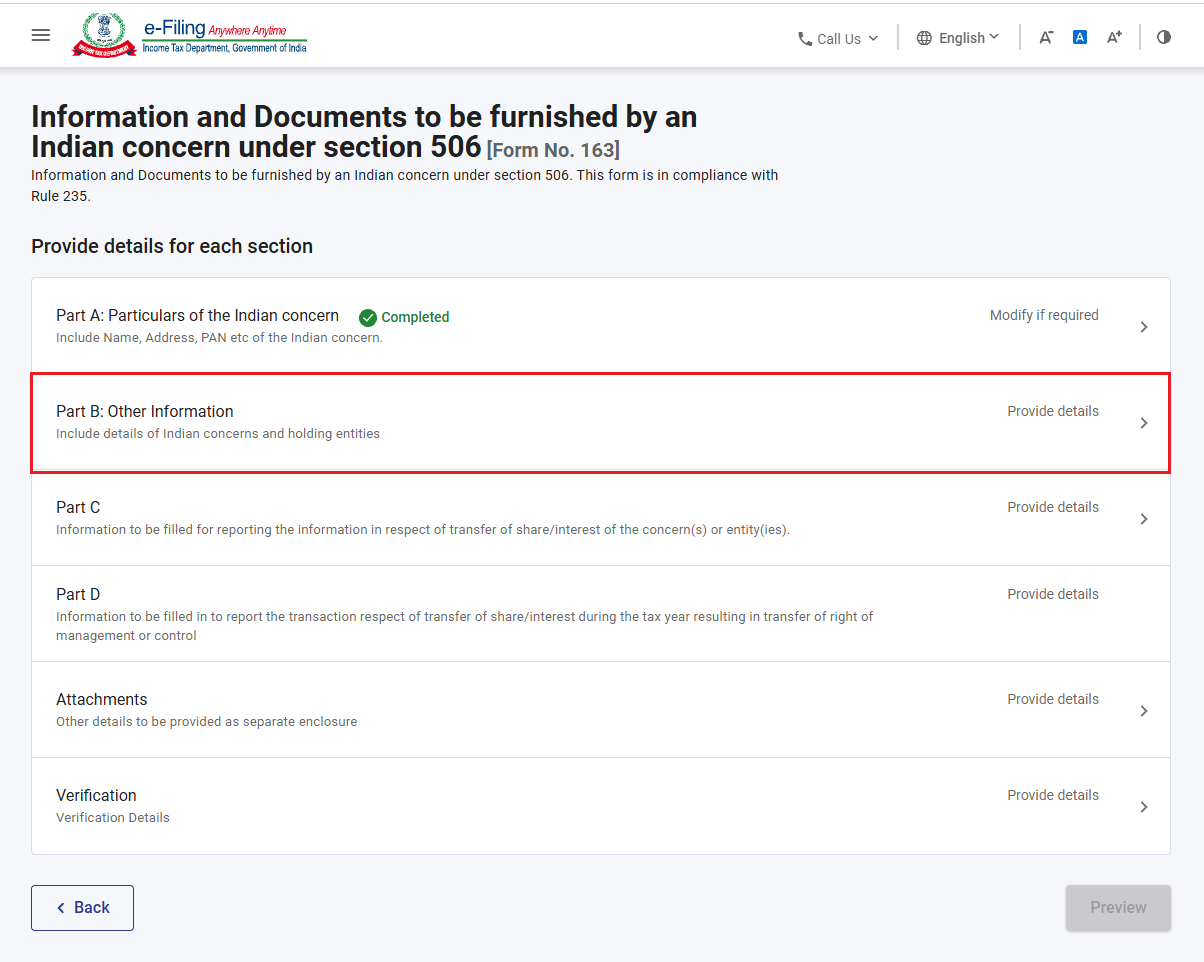
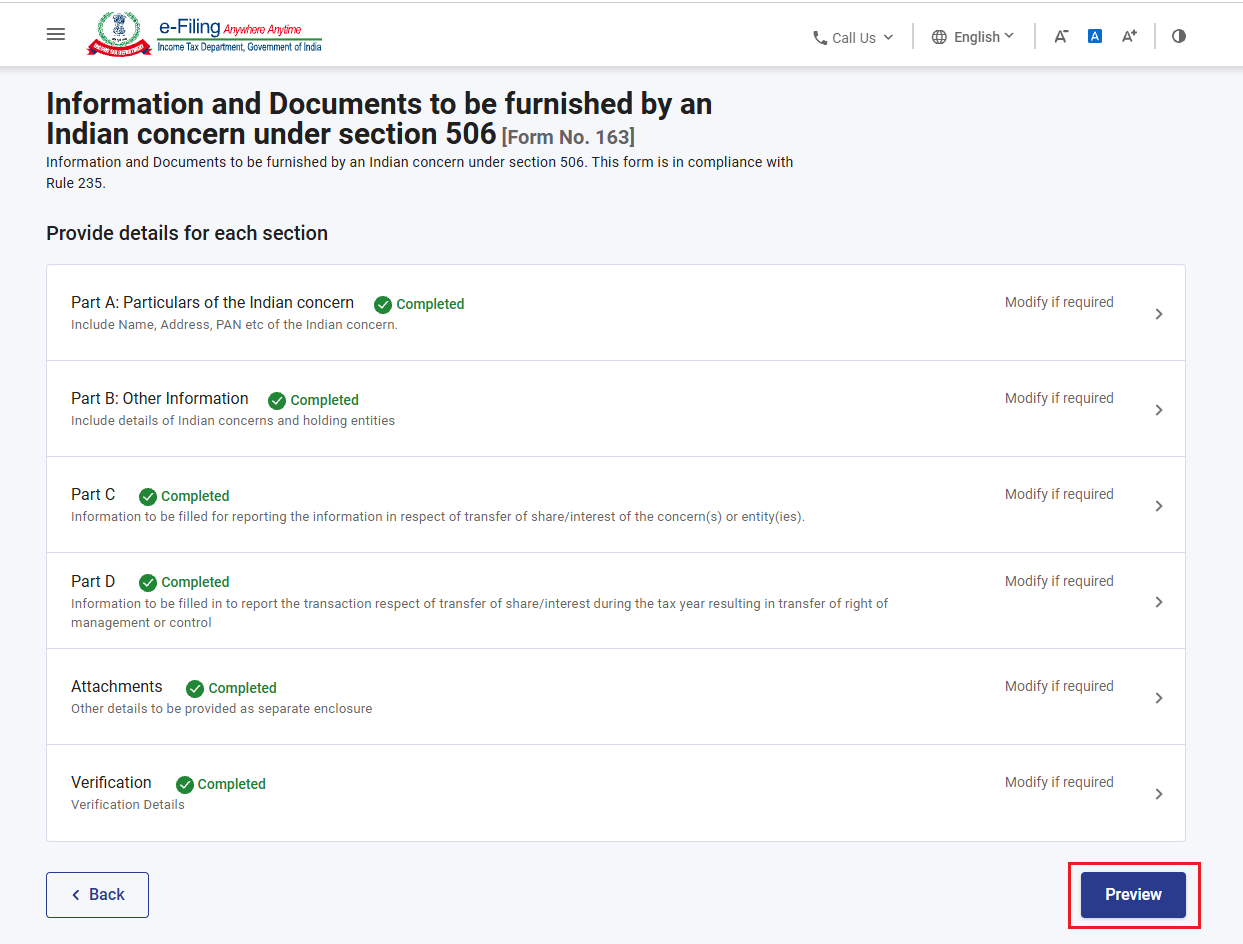
Step 7: Form 163 has 6 sections:
1. Part A- Particulars of Indian Concern
2. Part B- Other Information
3. Part C
4. Part D
5. Attachments
6. Verification
To complete the filing process, confirm each section of the form.
Proceed to ‘Part A – Particulars of Indian Concern’ by clicking on the relevant section.
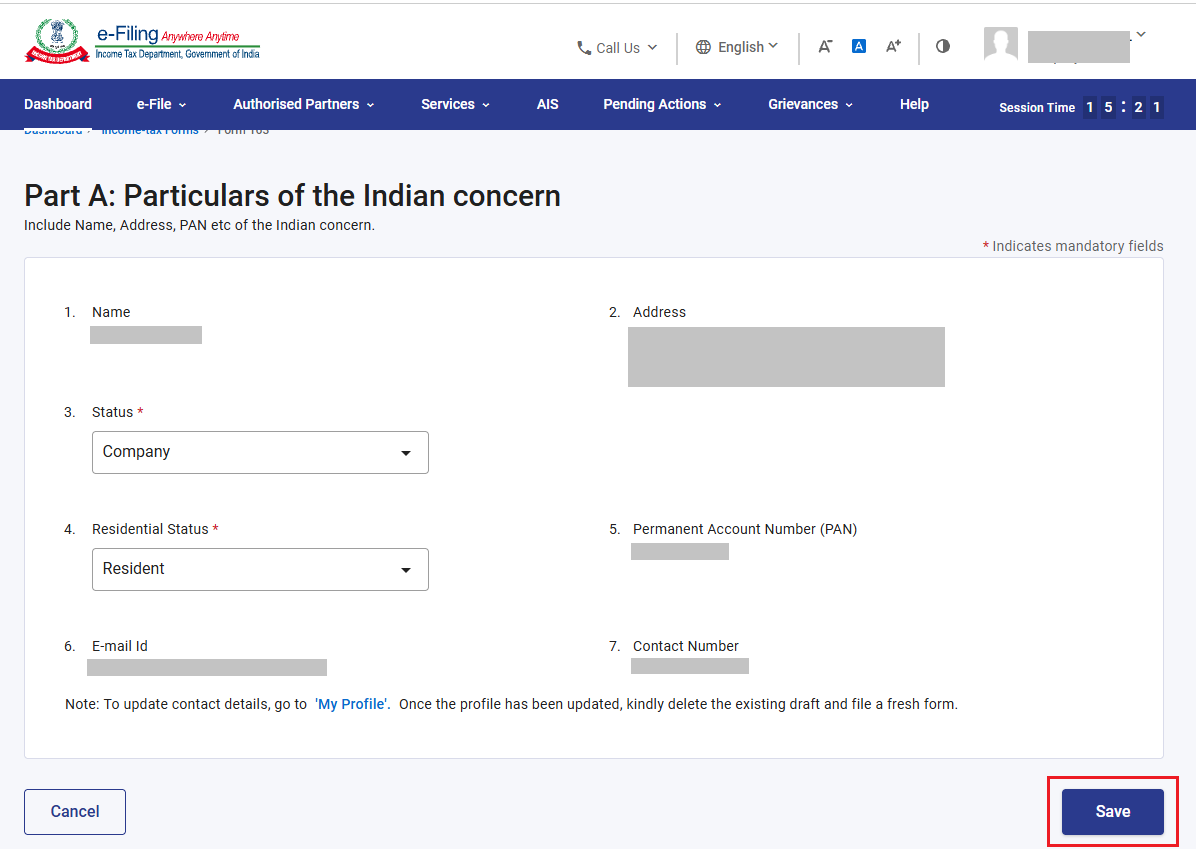
Step 8: The basic information of the Indian concern (such as Name, Address, Email ID, etc.) will be pre-filled from the profile section. If any modifications or updates are required, please navigate to ‘My Profile’ and update the relevant details.
Additionally, select the appropriate Status and Residential Status, and then click ‘Save’.
Step 9: ‘Part A – Particulars of Indian Concern’ has now been completed. Please proceed by selecting ‘Part B – Other Information’.
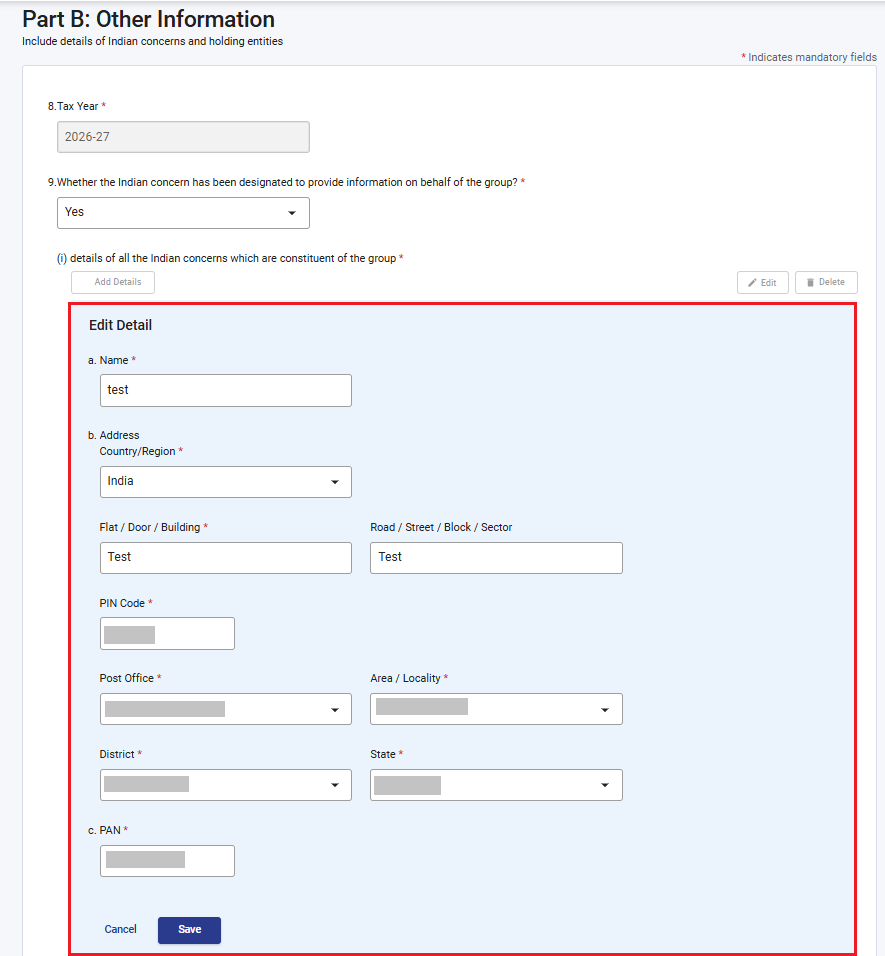
Step 10: Under ‘Part B- Other Information’ section,
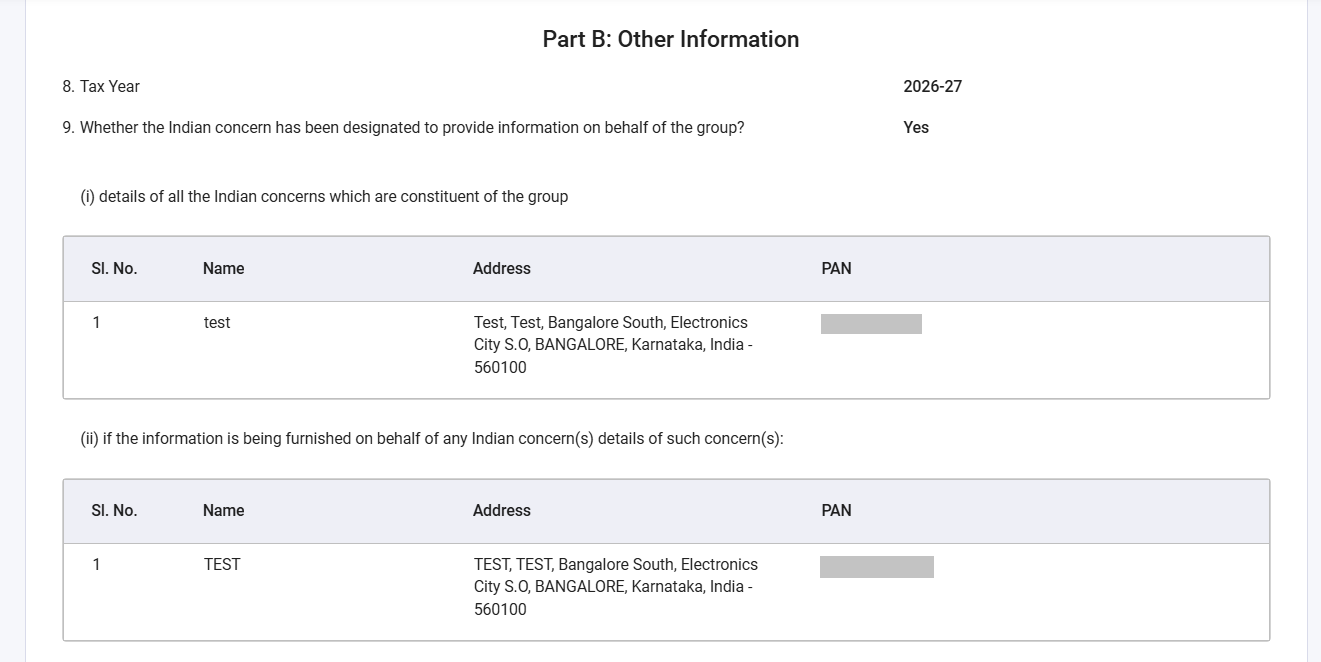
• Indicate whether the Indian concern has been designated to provide information on behalf of the group by selecting ‘Yes’ or ‘No’. If ‘Yes’ is selected, provide details of all such Indian concerns by clicking on ‘Add Detail’.
Enter the details:
o Name
o Address
o PAN
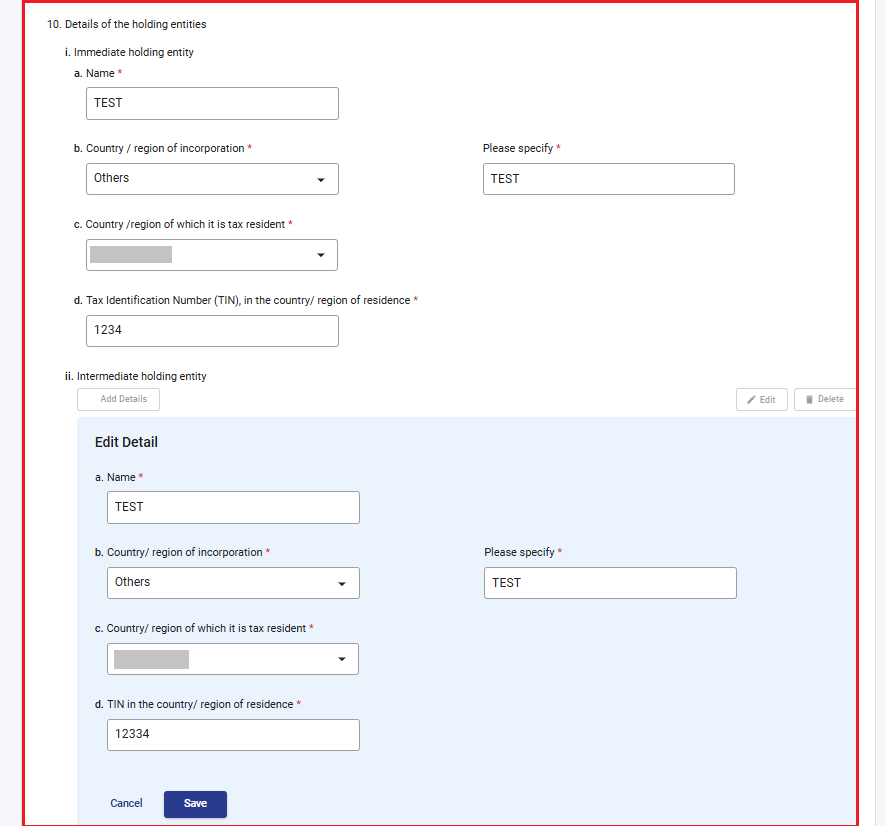
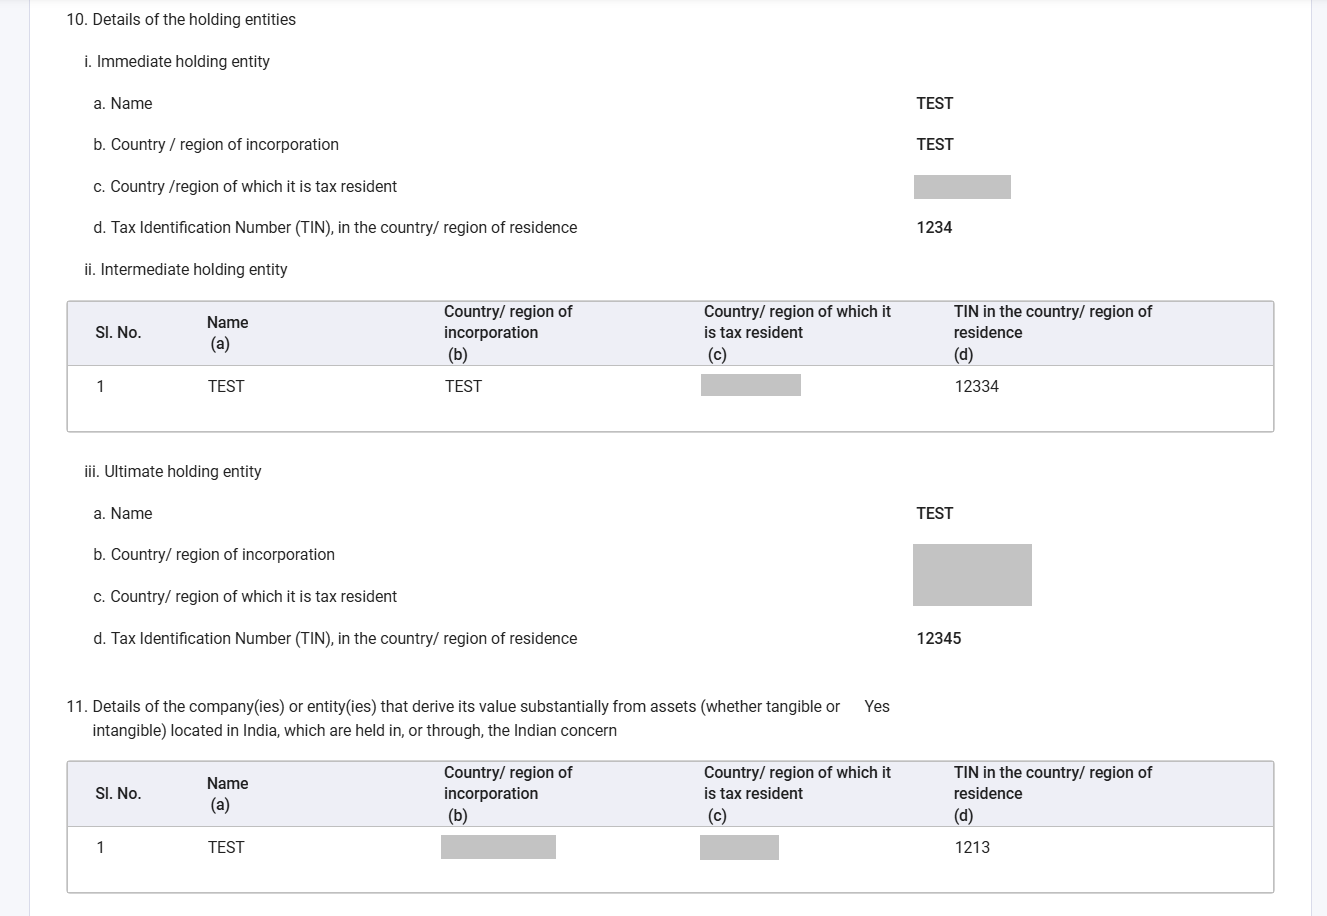
• Furnish the details of the holding entities, including the Immediate Holding Entity, Intermediate Holding Entity and Ultimate Holding Entity.
Note: In the “Country/Region” field, users can choose an option from the dropdown list. If the required option is not available, select “Others” and specify the details in the text box.
• Provide details of entities that derive substantial value from assets located in India through the Indian concern.
Note: If “Yes” is selected, the “Add Details” button will be enabled, allowing the user to enter the required information.
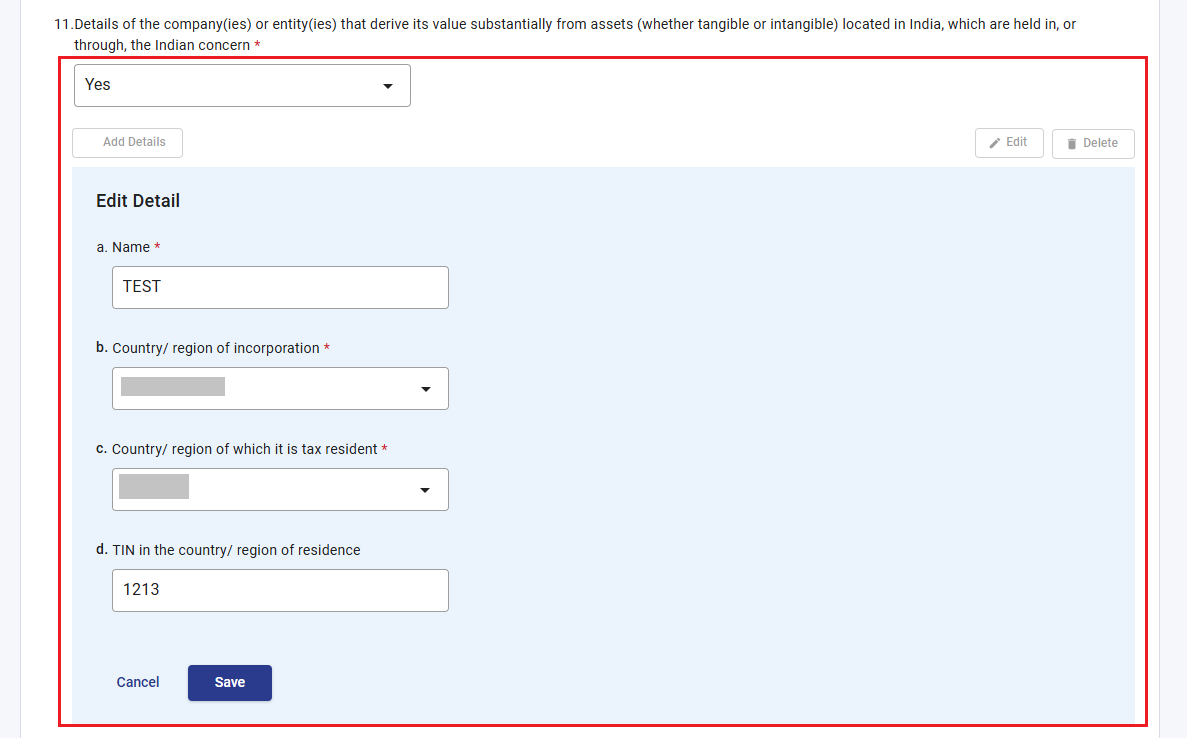
After completing all the mandatory fields, click “Save”.
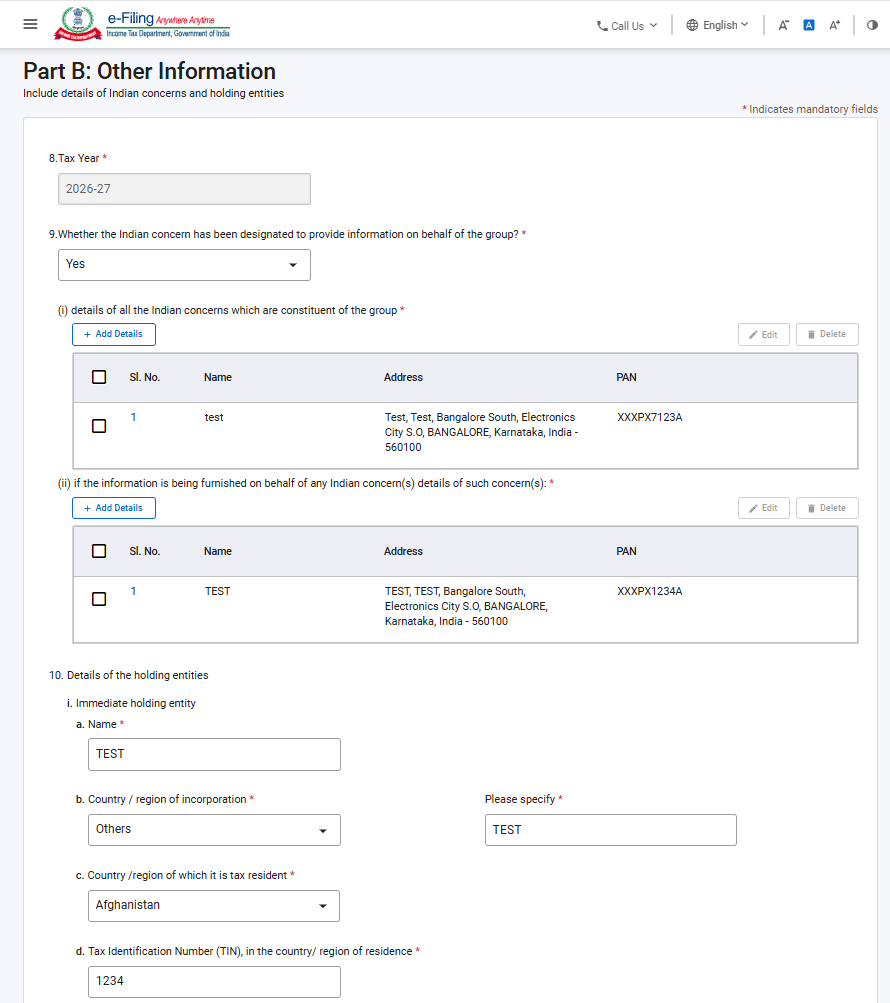
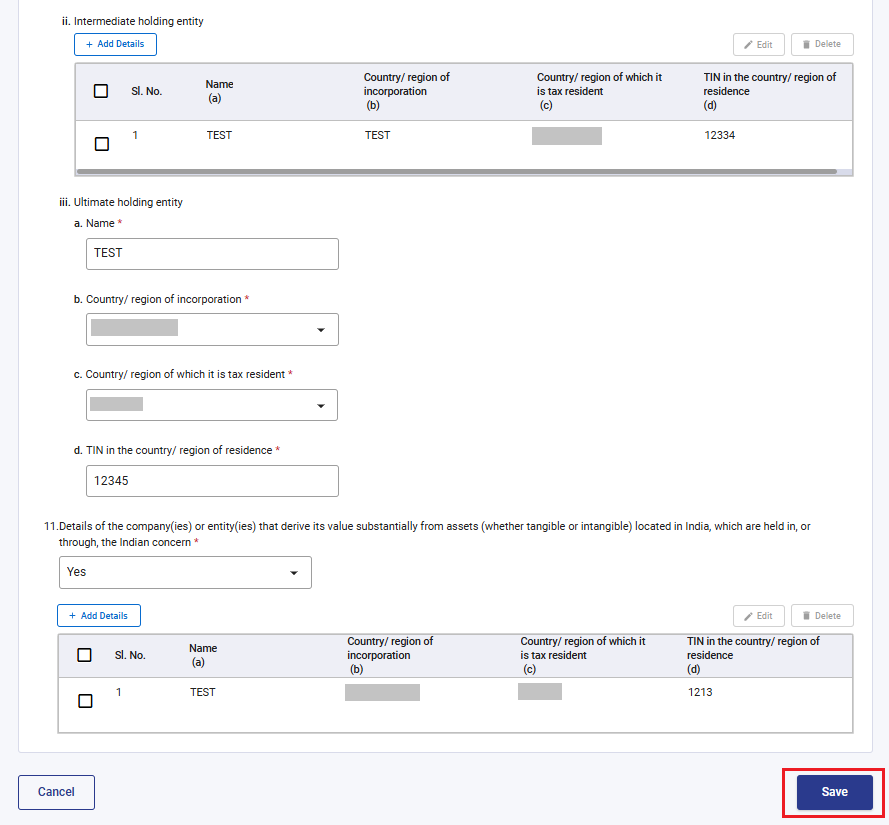
Step 11: ‘Part B – Other Information’ has been completed. Please proceed by selecting ‘Part C’.
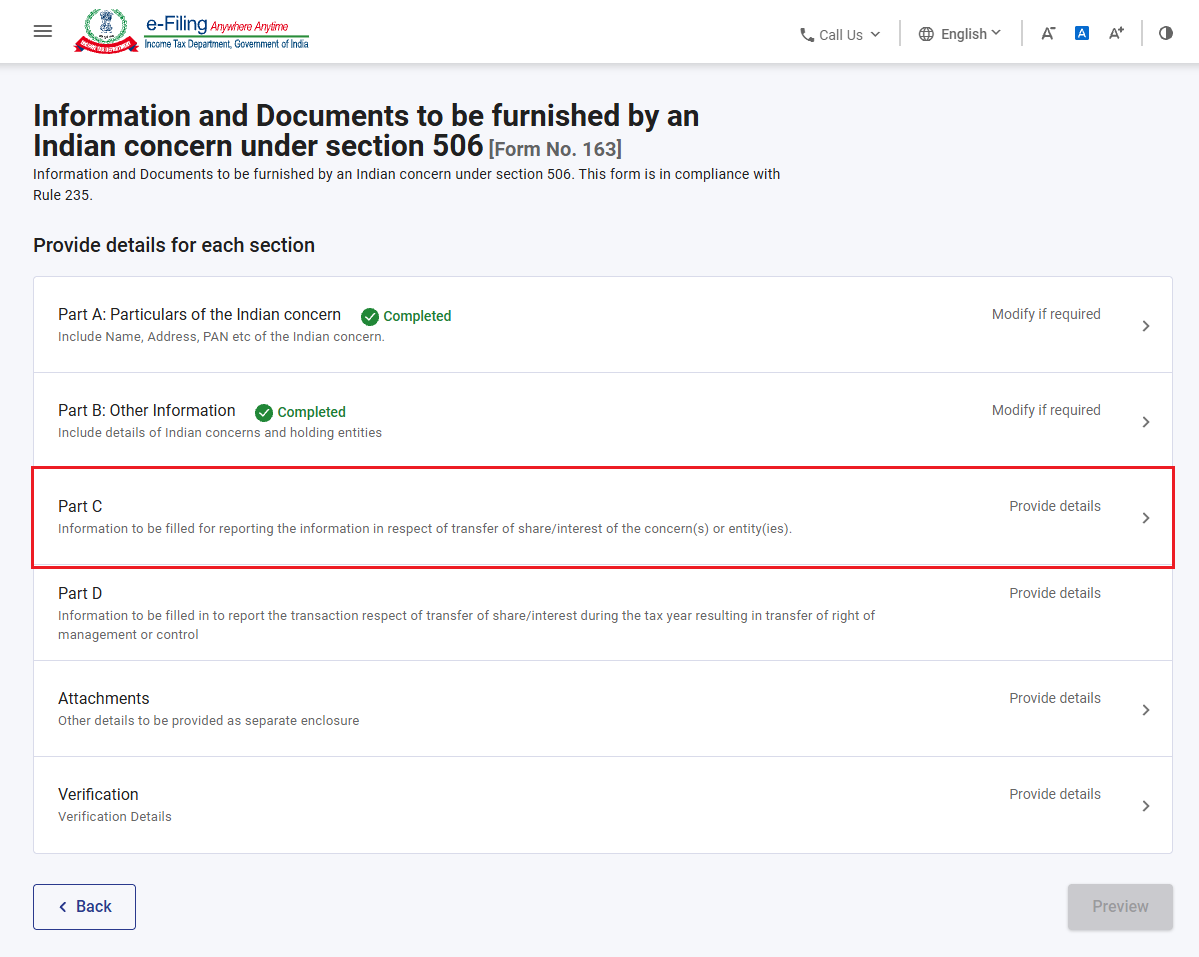
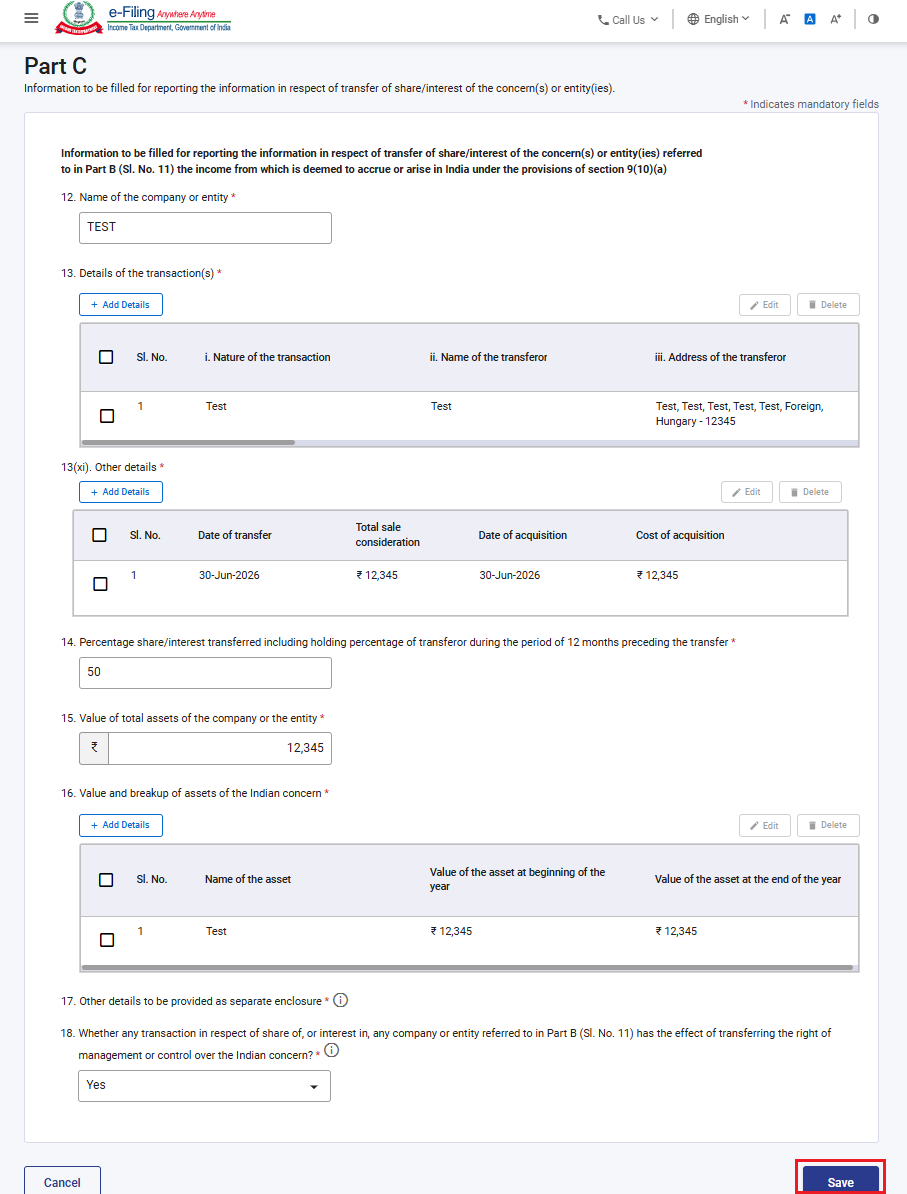
Step 12: In ‘Part C’, furnish the information required for reporting details in respect of the transfer of shares or interests of the concern(s) or entity(ies) referred to in Part B (Sl. No. 11), the income from which is deemed to accrue or arise in India under the provisions of Section 9(10)(a).
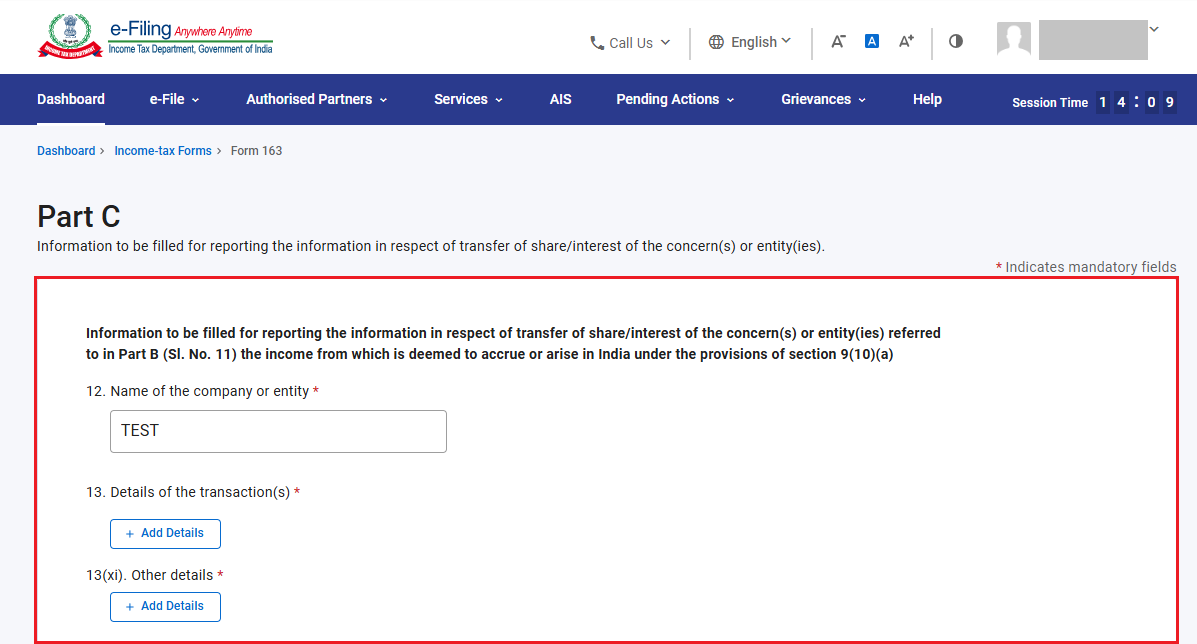
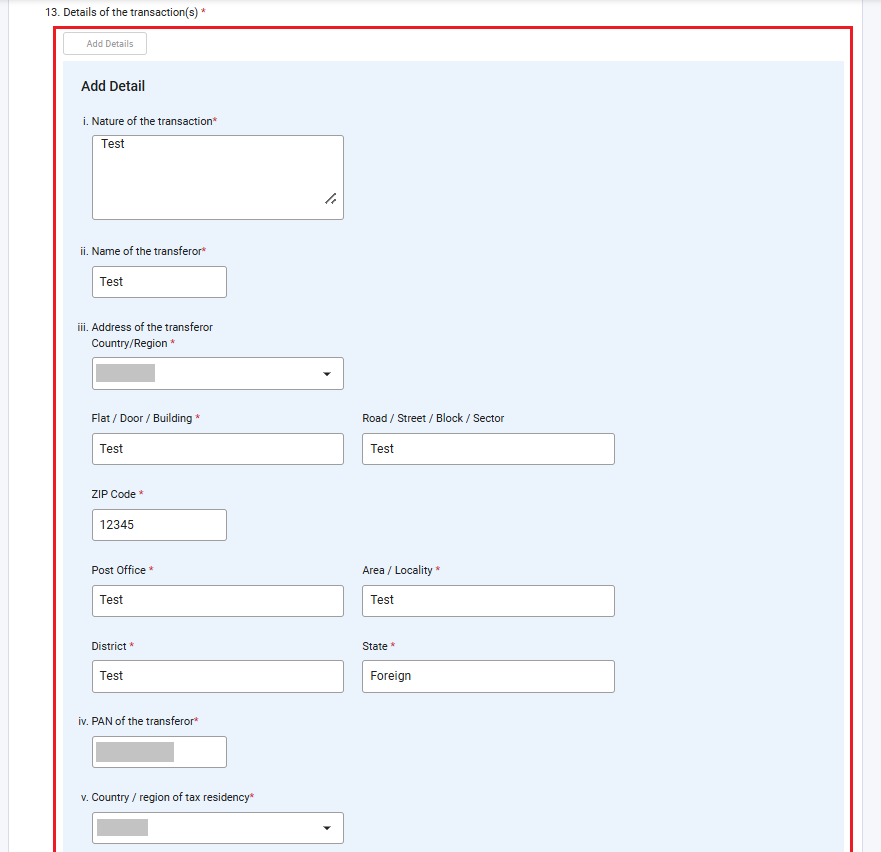
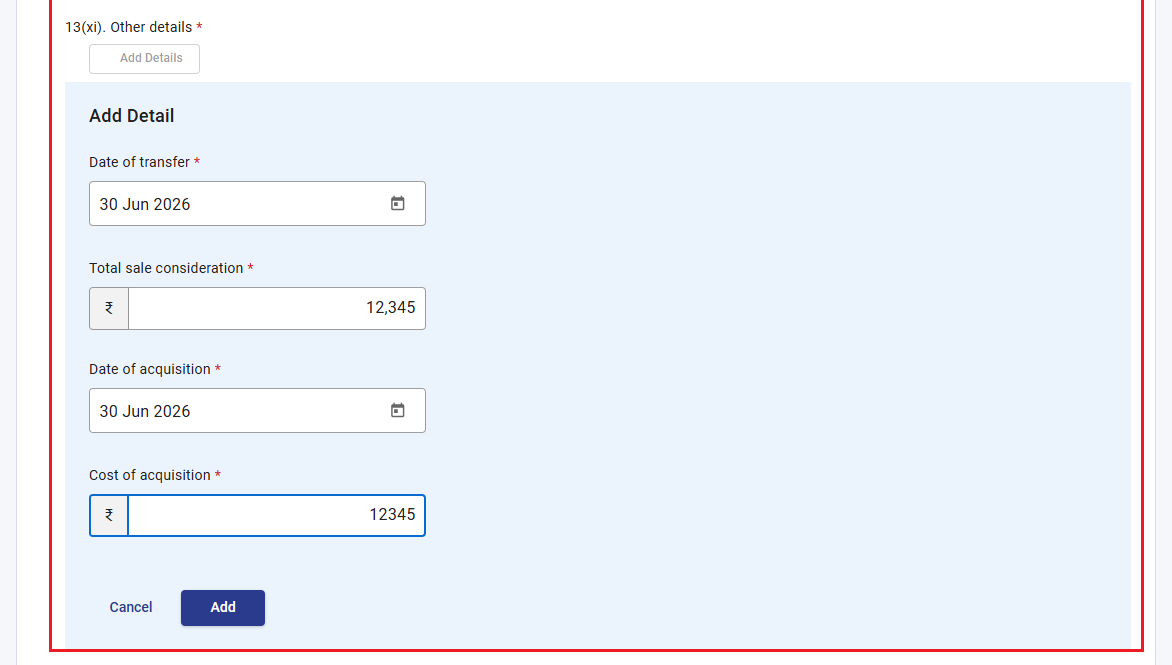
Serial No. 13: By clicking on “Add Details,” users can enter the details of the transactions.
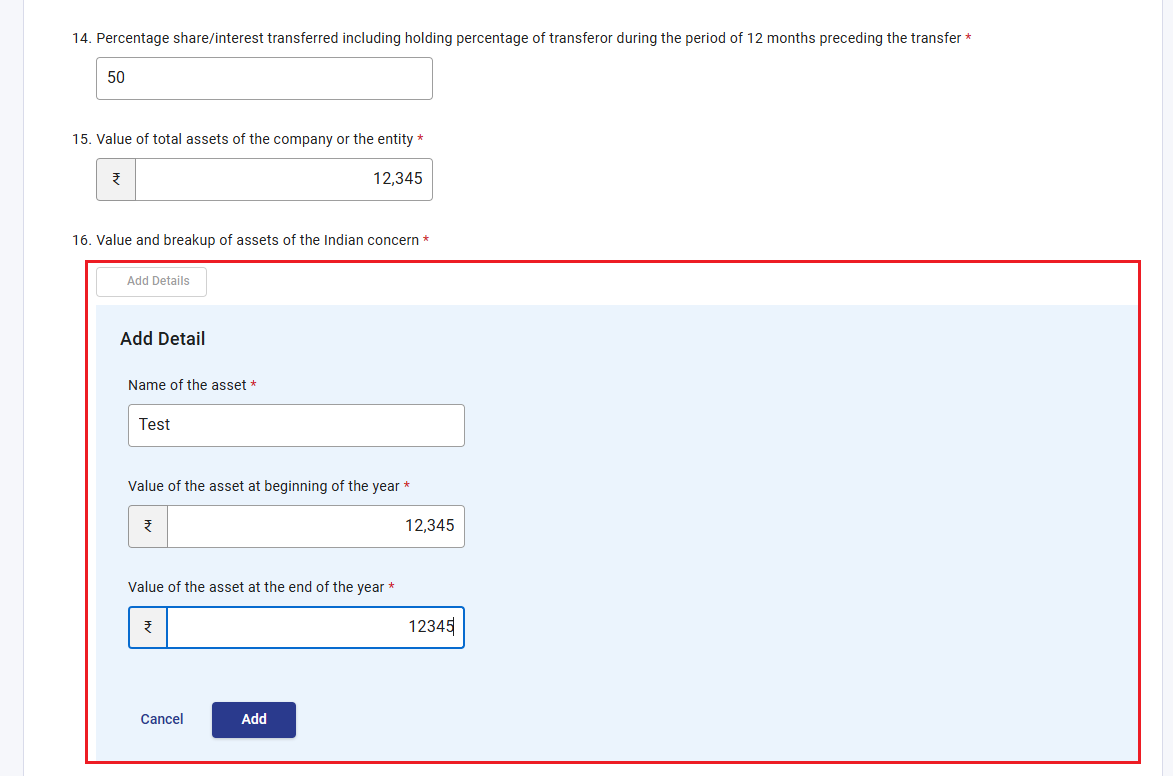
Serial No. 16: By clicking on “Add Details,” users can Provide the Value and breakup of assets.
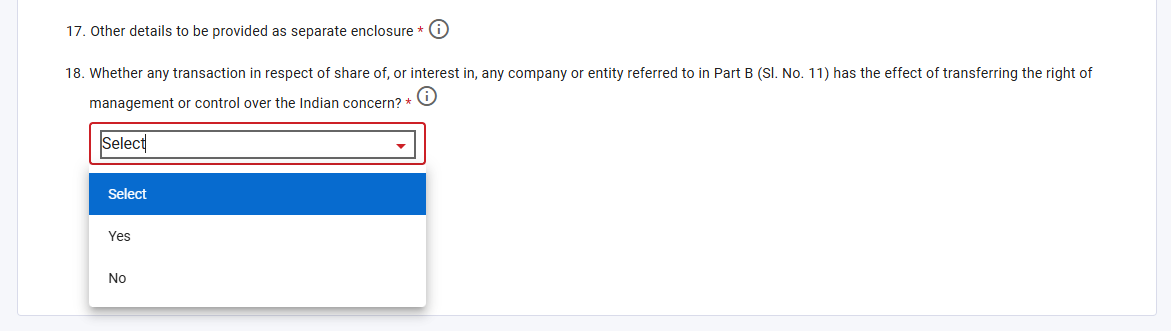
Serial No. 18: If “Yes” is selected, please provide the required information in Part D. If “No” is selected, you may skip Part D and proceed directly to the next panel.
After completing all the mandatory fields, click “Save”.
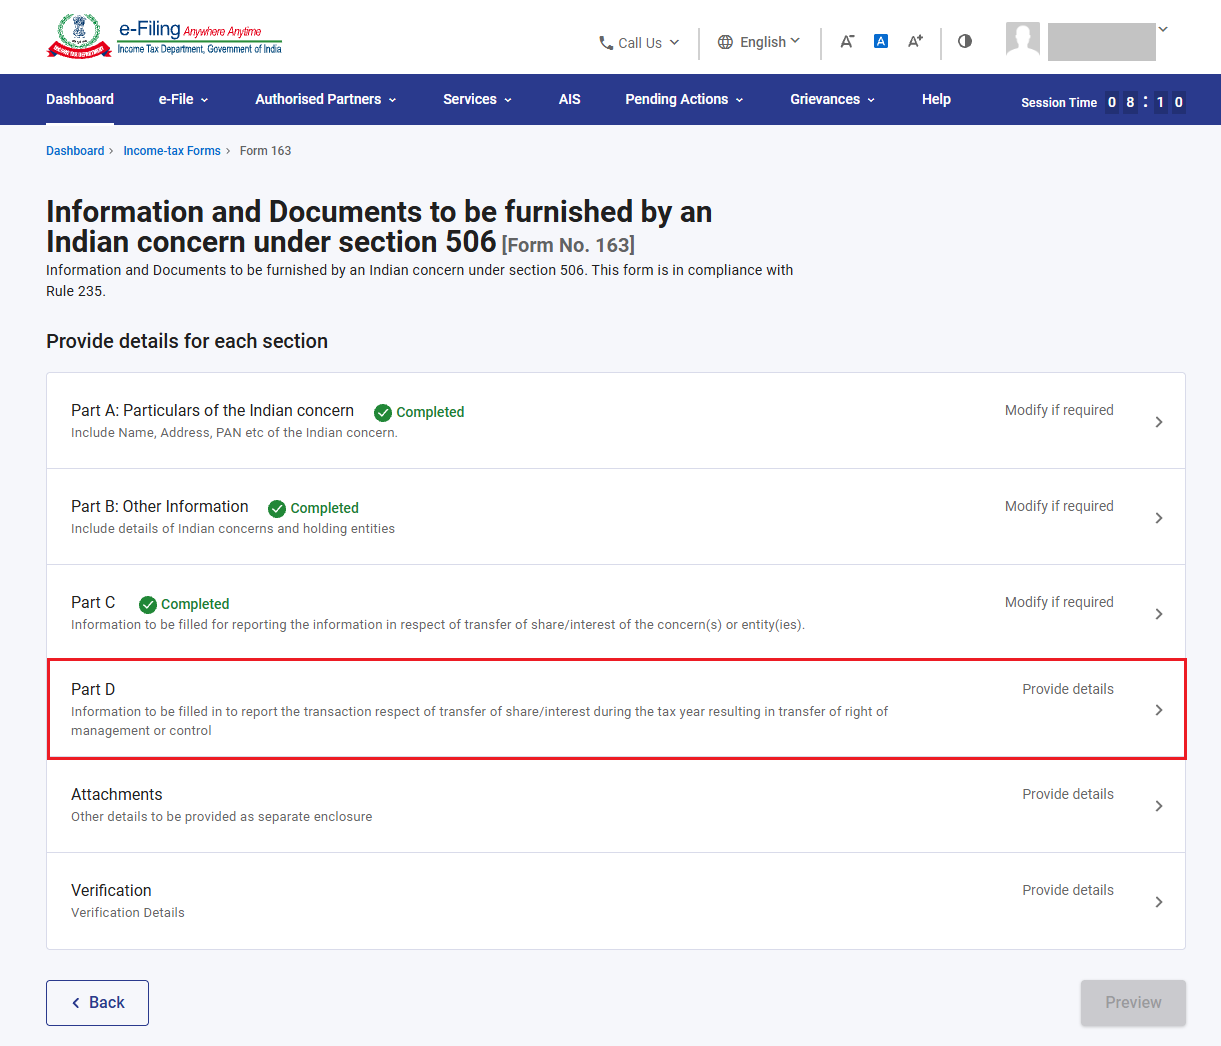
Step 13: ‘Part C’ has been completed. Please proceed by selecting ‘Part D’.
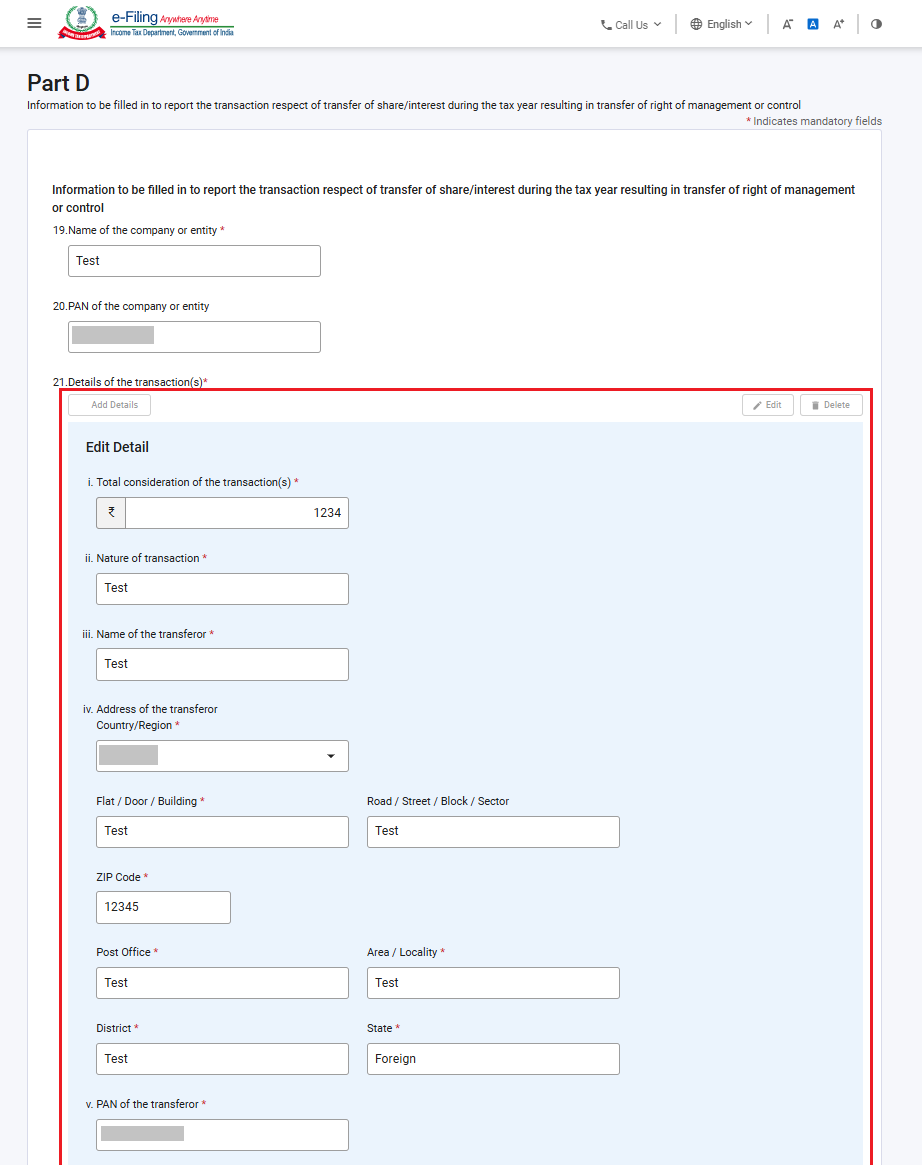
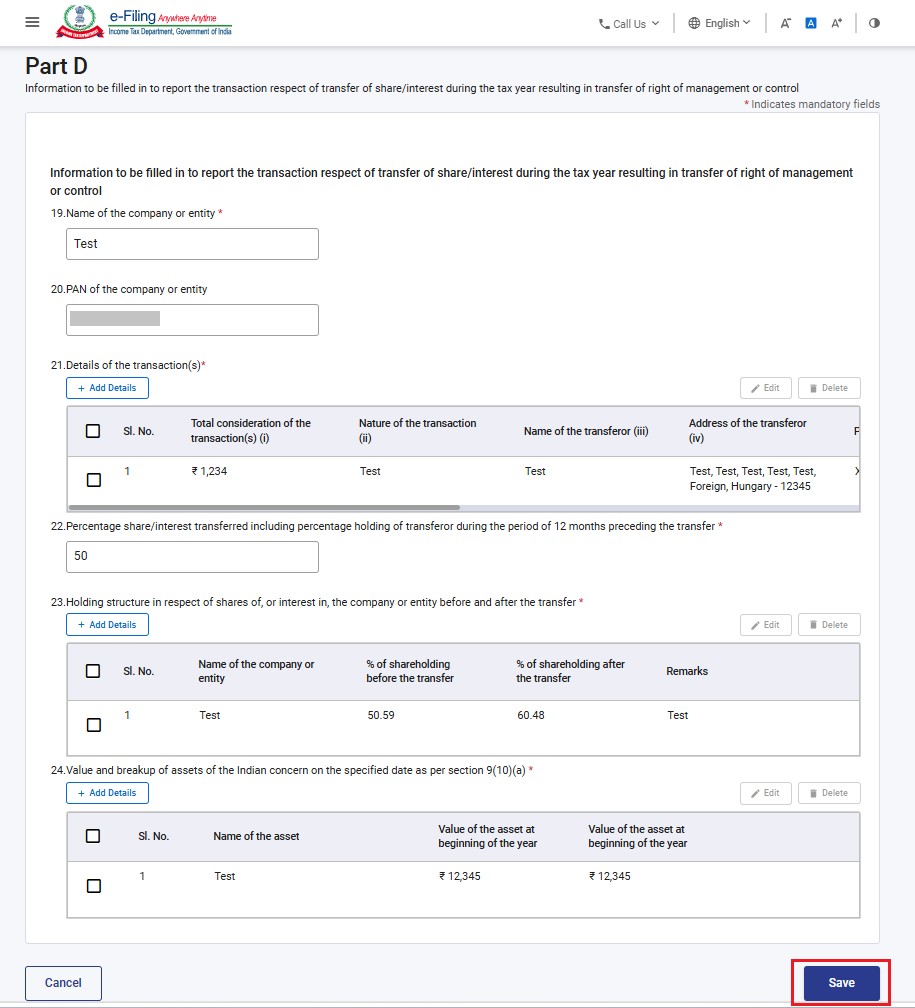
Step 14: In ‘Part D’, furnish the information required to report transactions involving the transfer of shares or interests during the tax year that result in the transfer of rights of management or control. Thereafter, click ‘Save’.
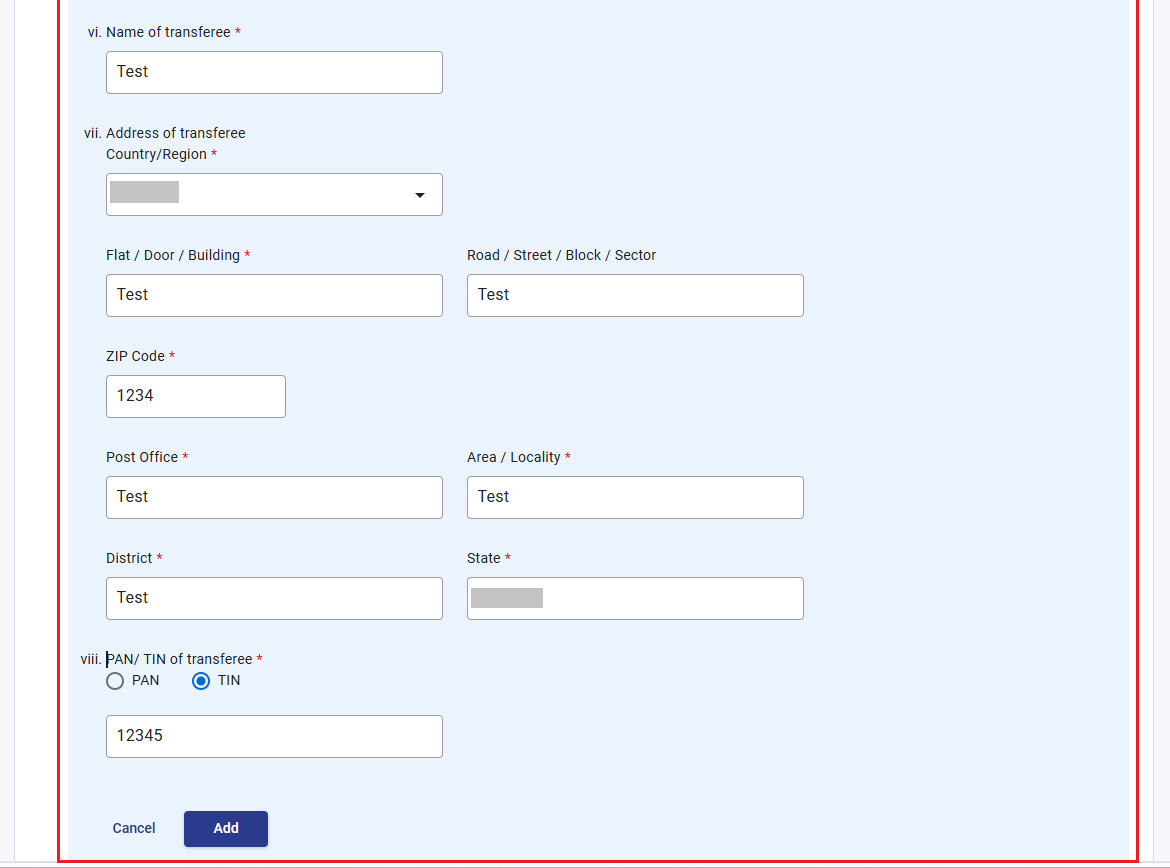
Serial No. 21: By clicking the “Add Details” button, users can enter the transaction details.
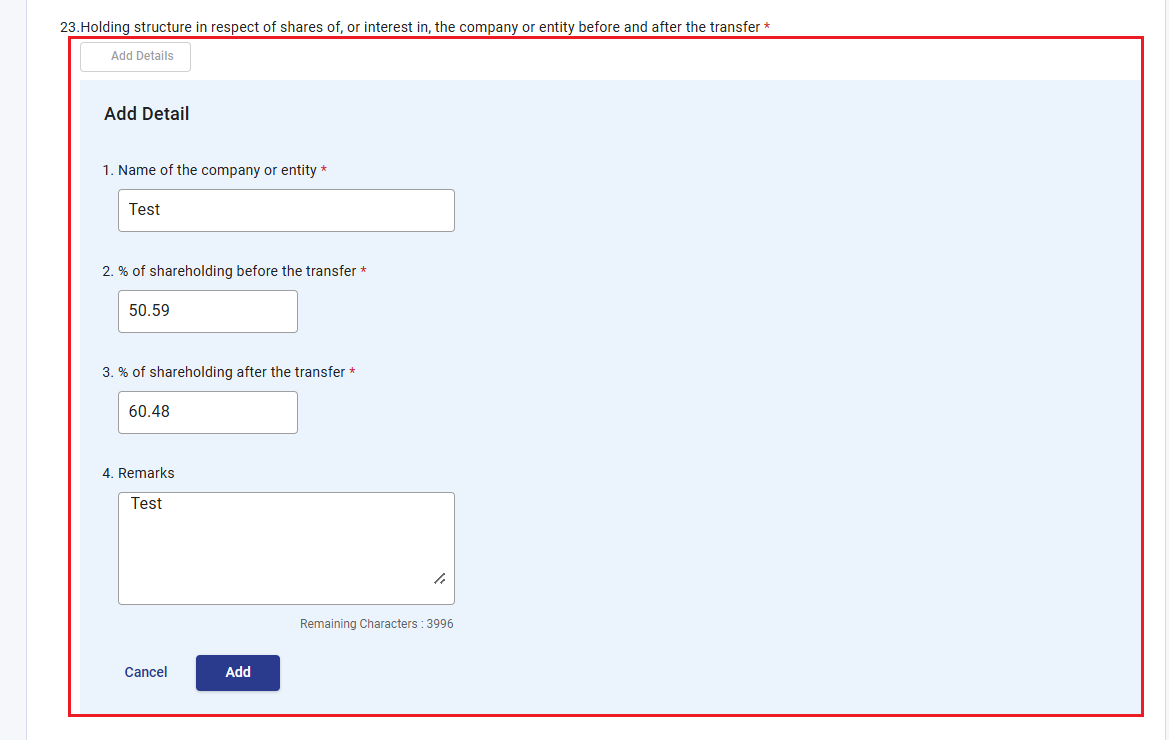
Serial No. 23: By clicking the “Add Details” button, users can Provide the details of Holding structure.
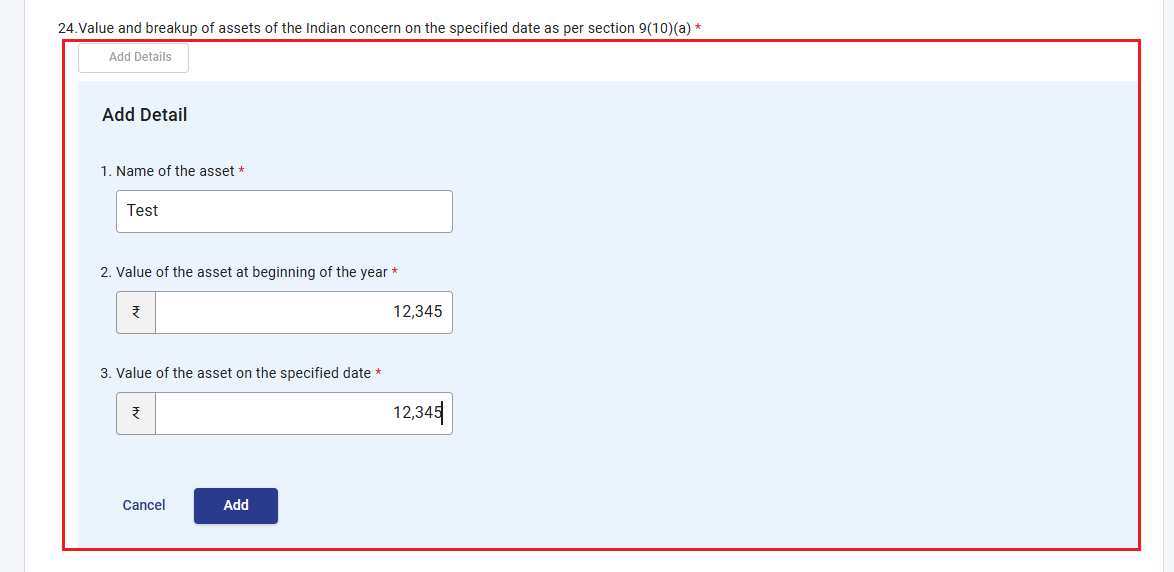
Serial No. 24: By clicking the “Add Details” button, users can Provide the Value and breakup of assets.
After completing all the mandatory fields, click “Save”.
Step 15: ‘Part D’ has been completed. Please proceed by selecting ‘Attachments’.
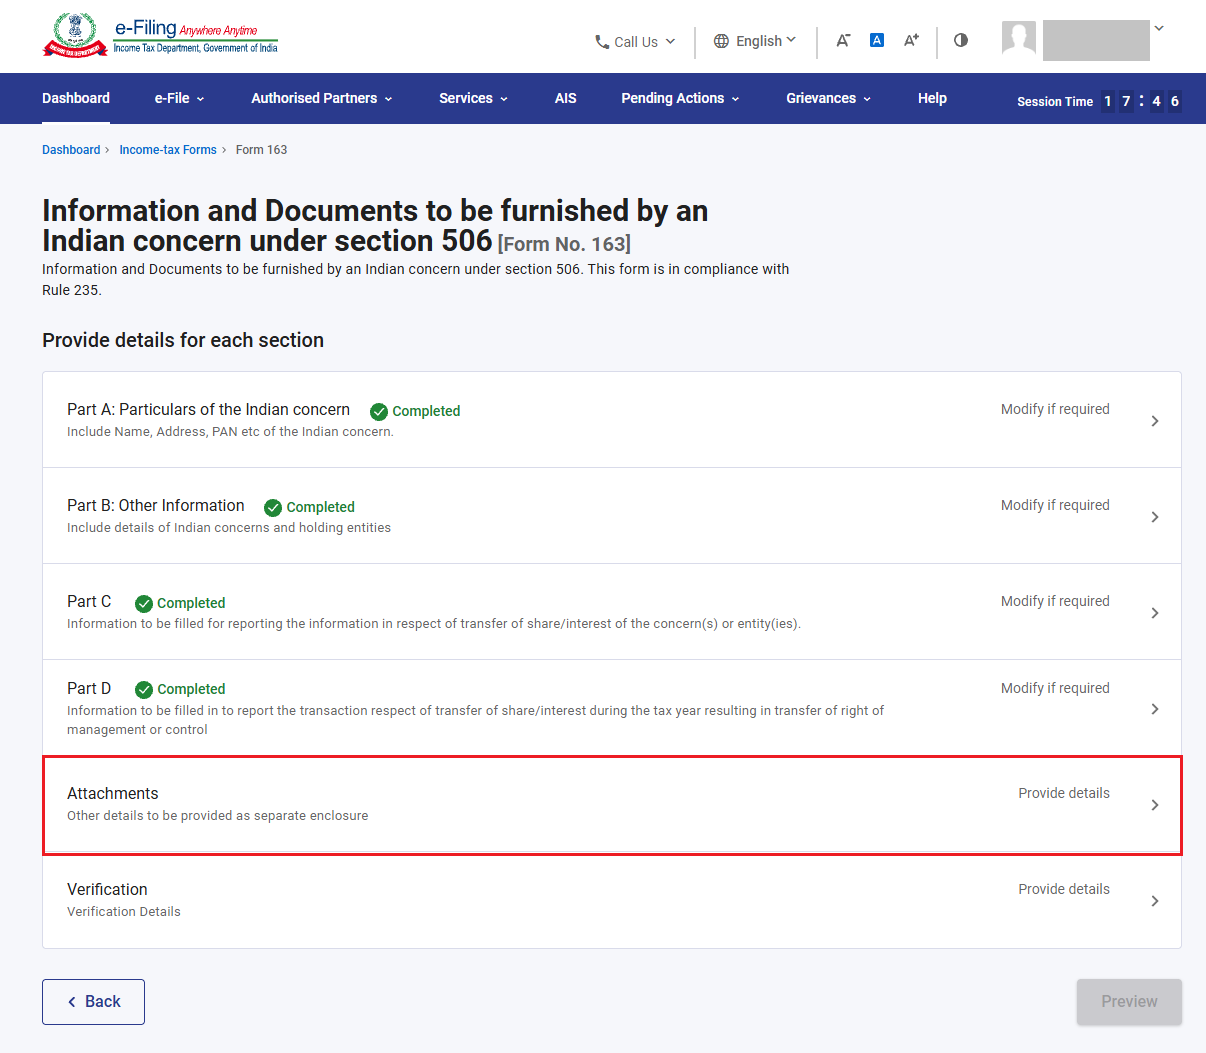
Step 16: In ‘Attachments’ Section Please attach the required documents and click on Save.
Note:
Please note that size of each attachment should not exceed 5MB.
All attachments should be in PDF or ZIP (can contain only) formats only.
In Attachment A-5, if the user uploads any file, the description text box becomes editable and mandatory.
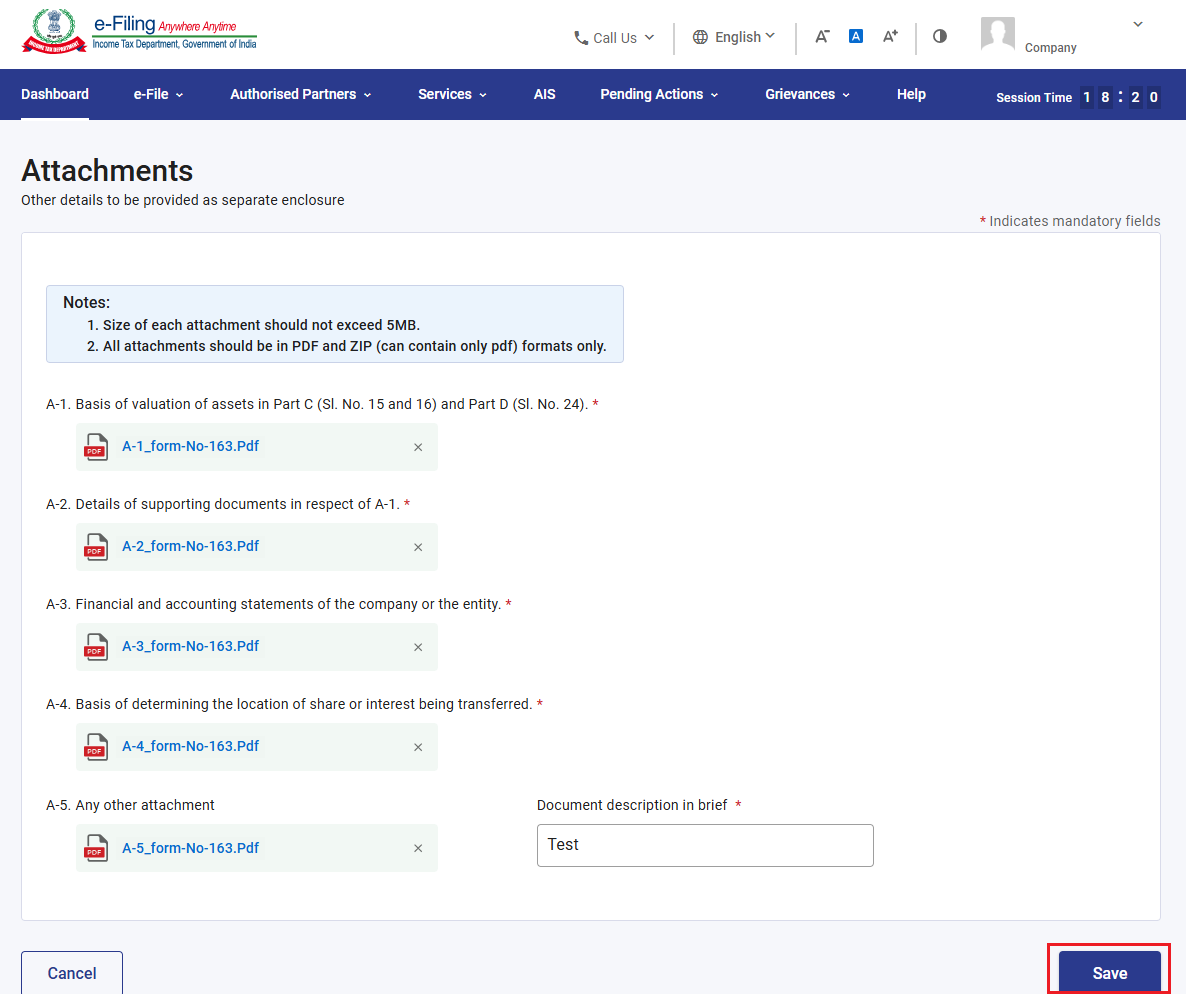
Step 17: ‘Attachments’ has been completed. Please proceed by selecting ‘Verification’.
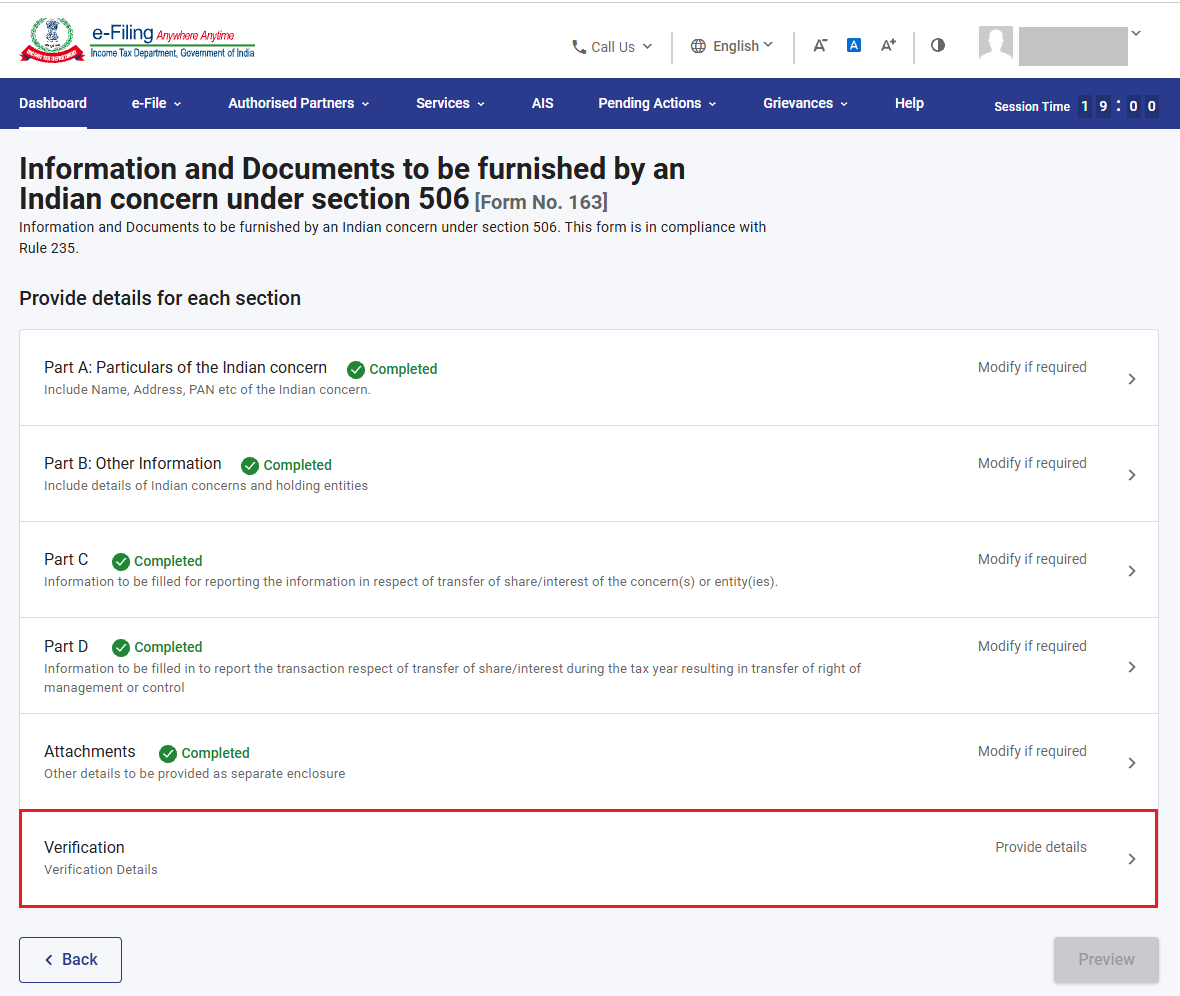
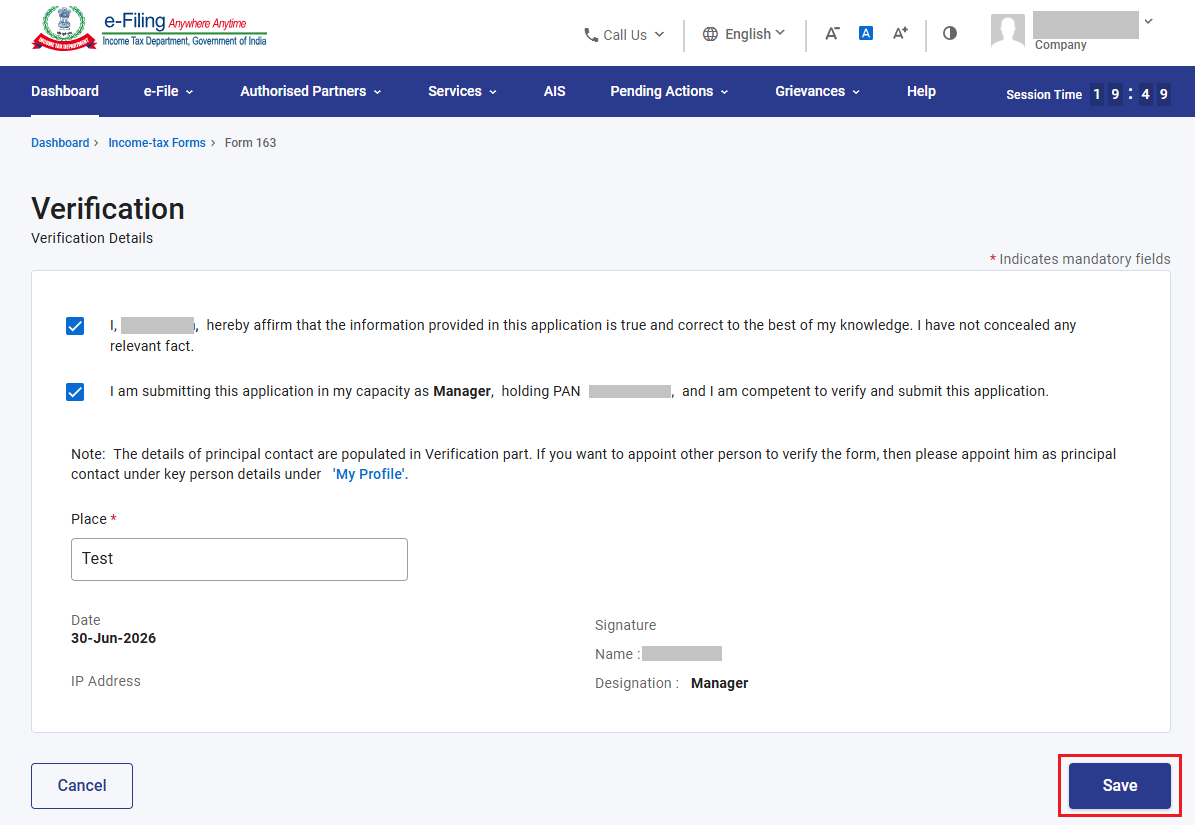
Step 18: In ‘Verification’, Kindly verify the prefilled details and confirm the declaration by selecting the appropriate checkbox and enter the place. Thereafter, click ‘Save’.
Note: The details of principal contact are populated in Verification part. If you want to appoint other person to verify the form, then please appoint him as principal contact under key person details under "My Profile" hyperlink.
Step 19: All sections have been completed. Please proceed by clicking on ‘Preview’.
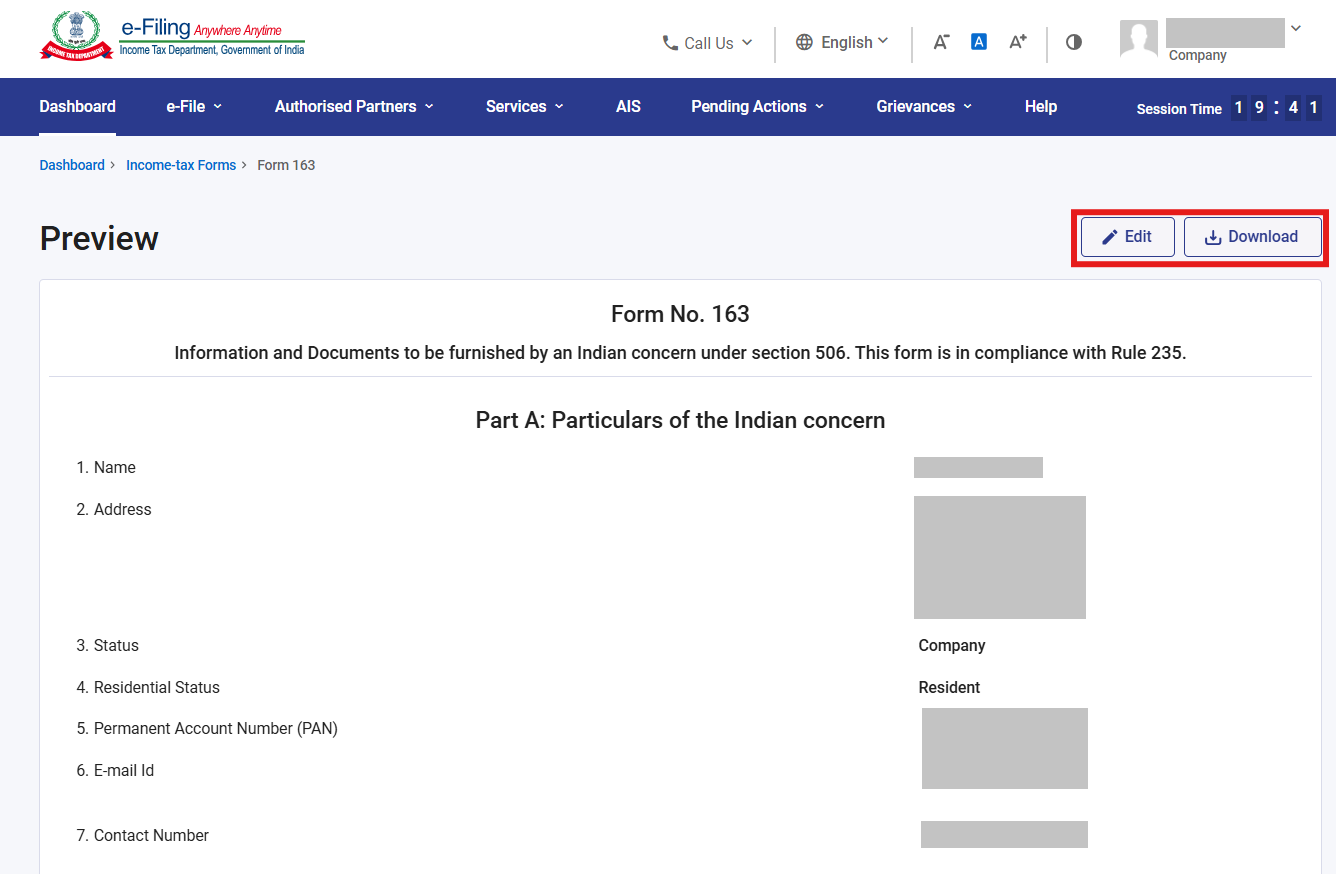
Step 20: Kindly review the preview of the form. Thereafter, click on ‘Proceed to E‑Verify’.
Note: By clicking “Edit,” users can return to the panel screen to make changes. By clicking the “Download” button, users can download and review the preview PDF.
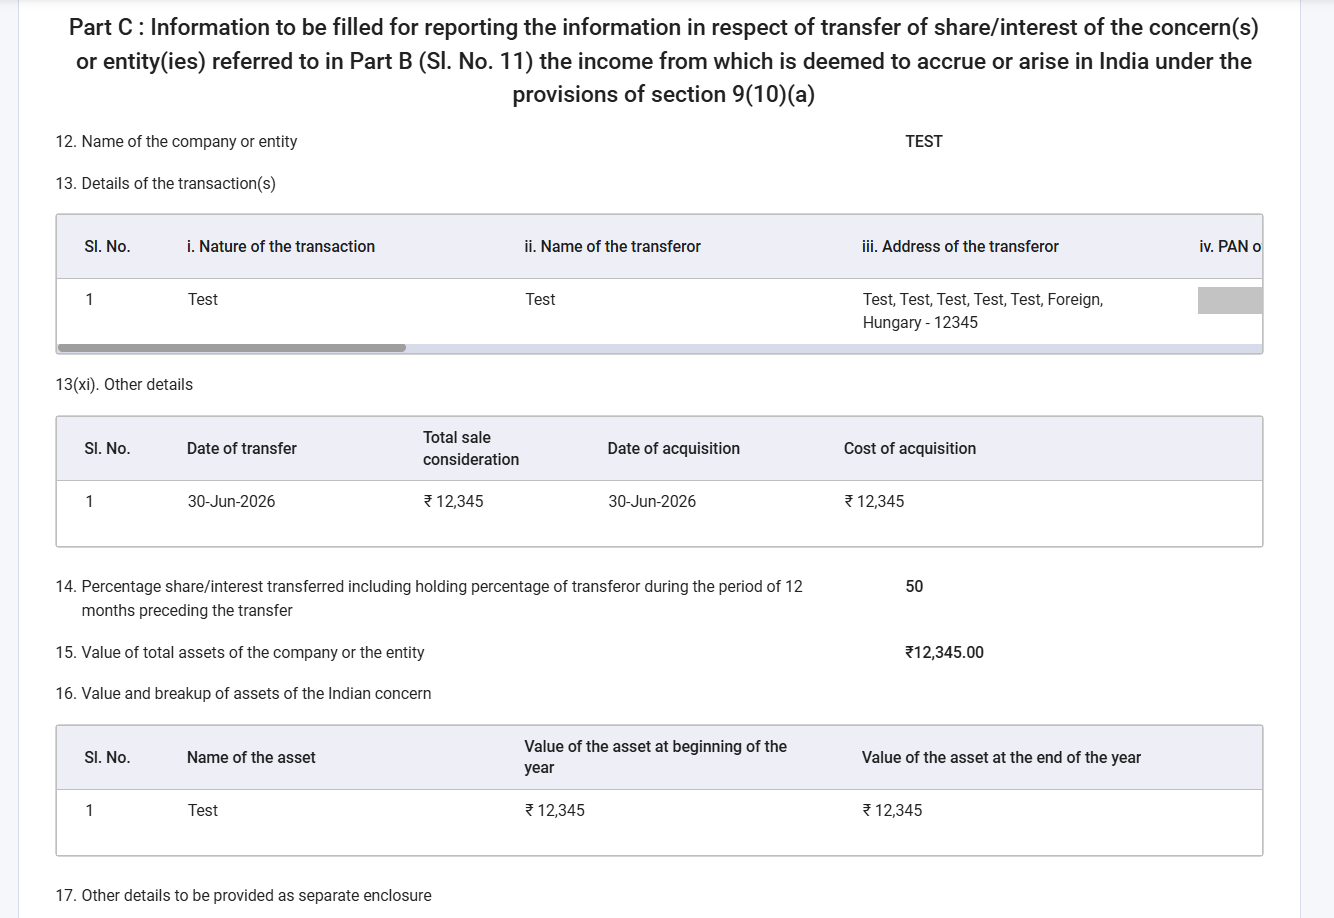
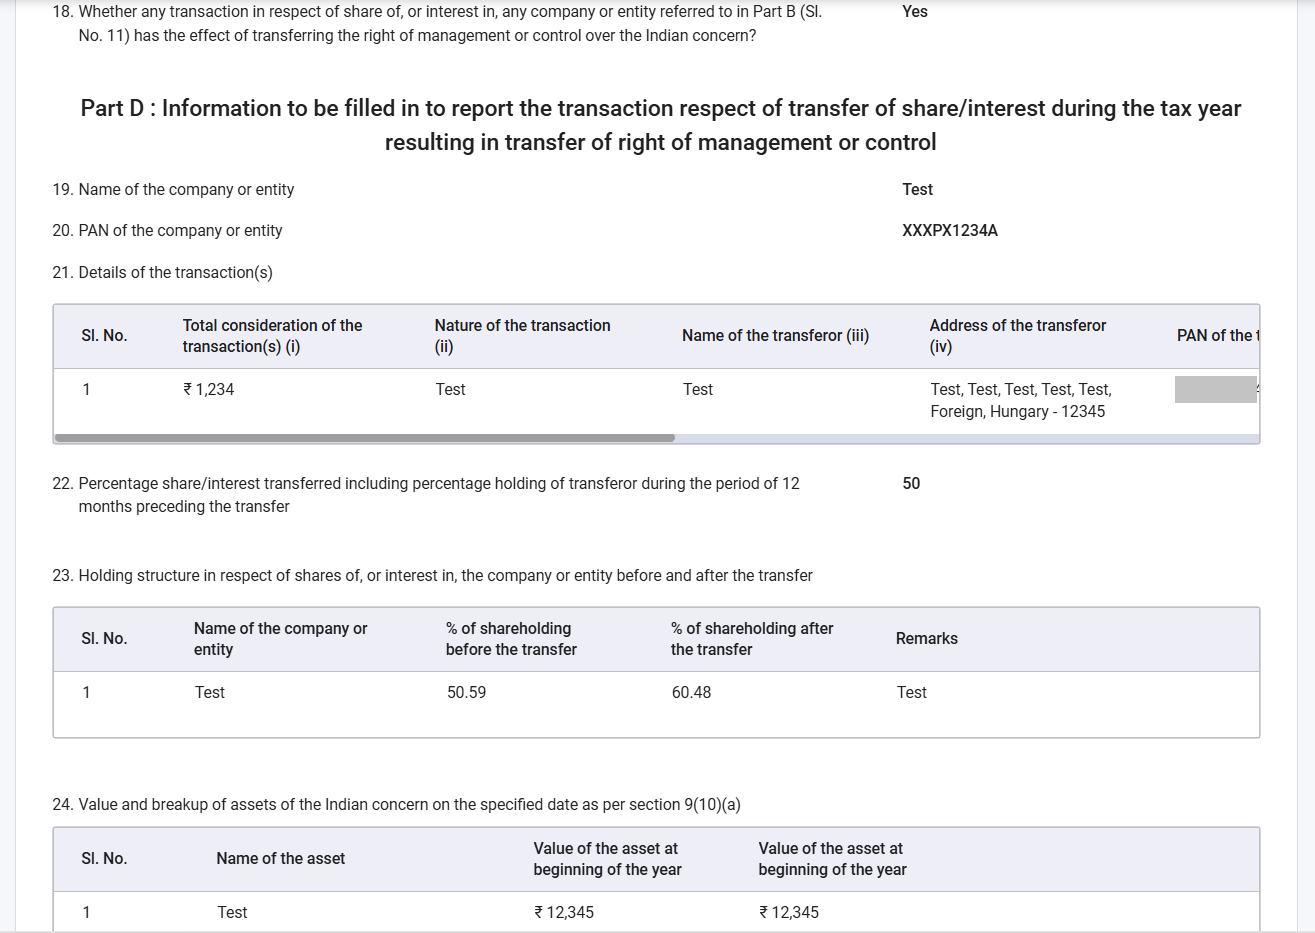
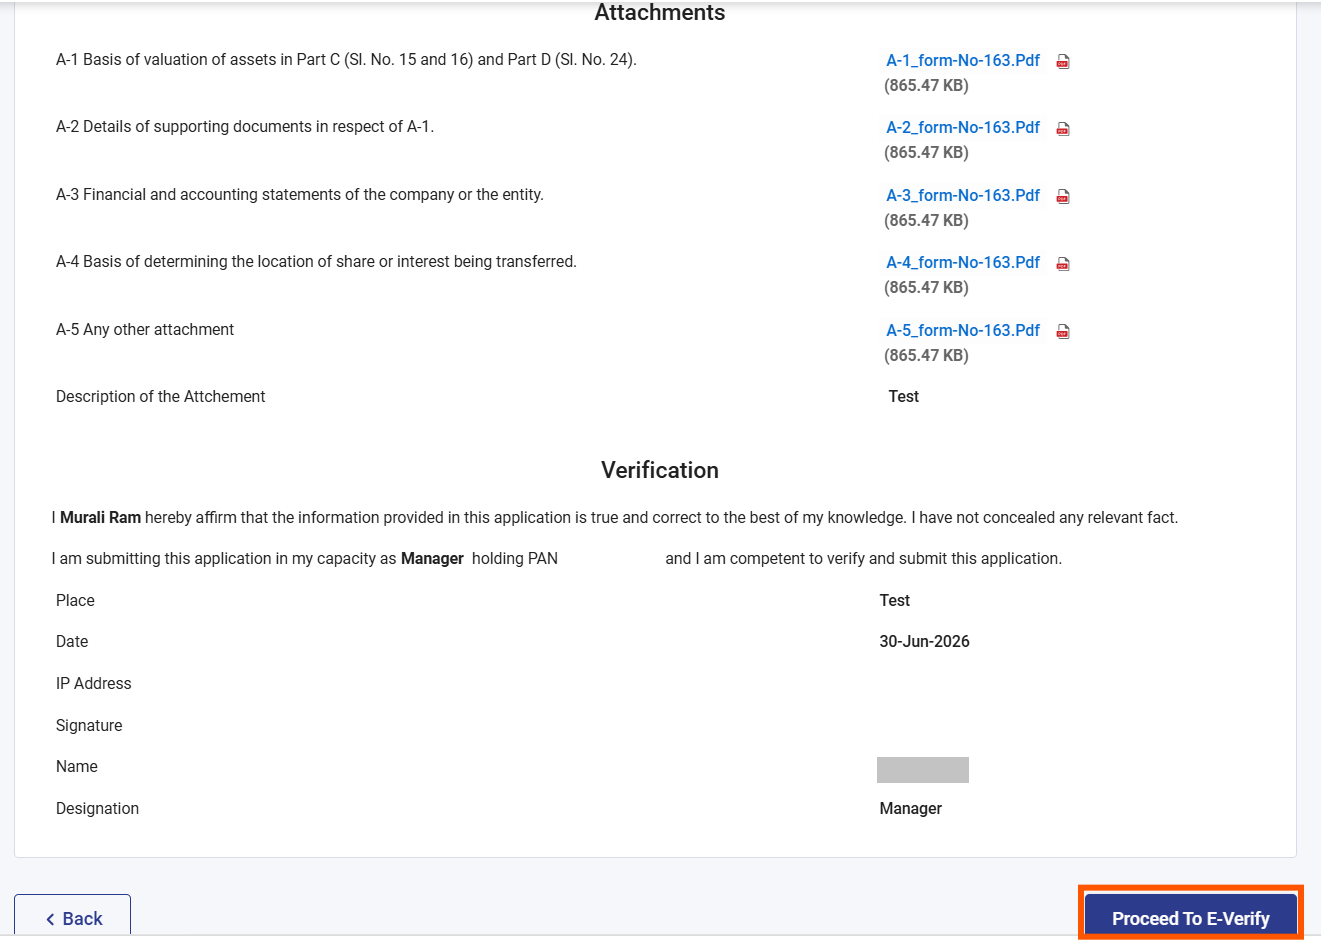
Upon clicking the “Proceed to e-Verify” button, a popup confirmation display, that you would like to proceed to e-Verify. Click on “Yes”
Step 21: On clicking Yes, you will be navigated to the e-Verify page where you can verify the Form 163 using DSC/EVC (as applicable).
Note: Refer to the How to e-Verify user manual to learn more.
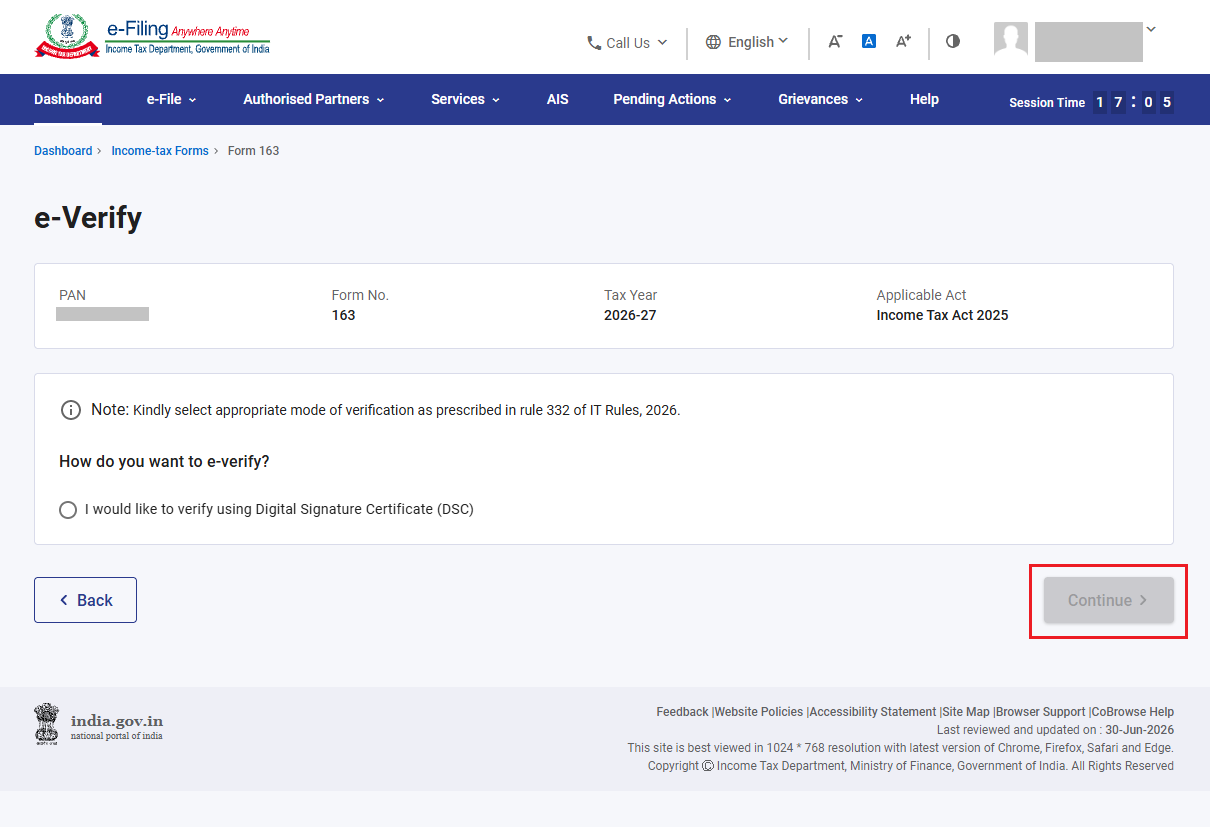
Step 22: After successful verification, the form will be submitted. Please note the Acknowledgement Number and Transaction ID for future reference. The same will also be communicated to the registered email ID.
Click on download button to download the Acknowledgement receipt.
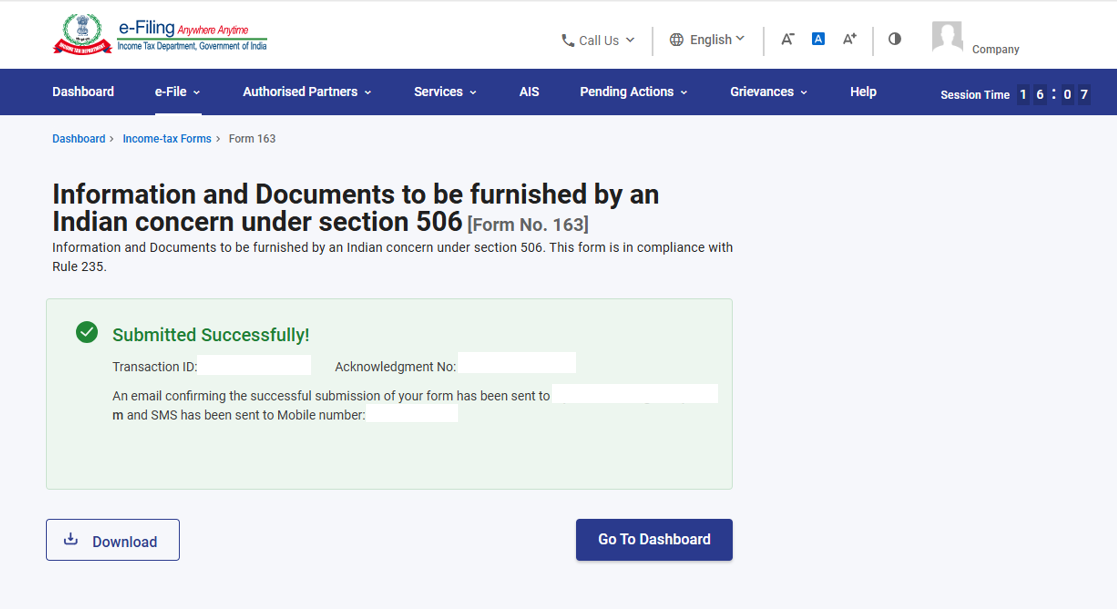
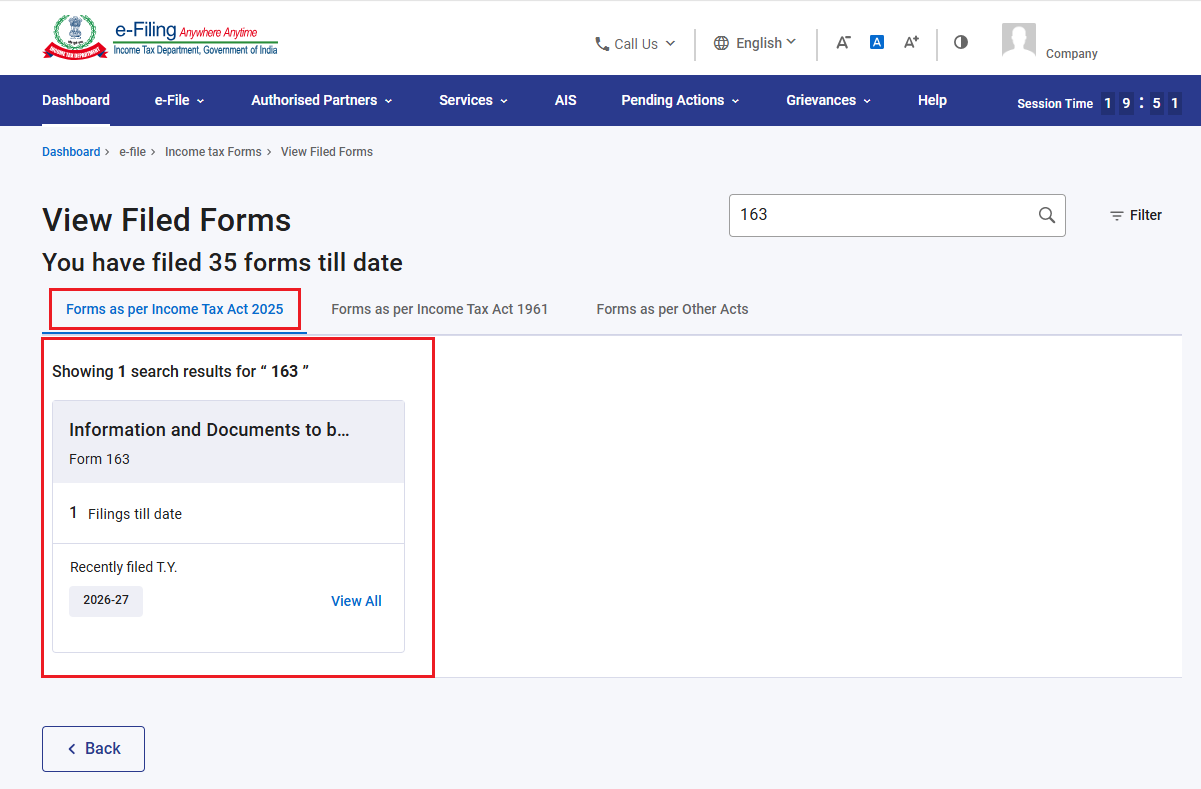
Step 23: After successful submission of form 163 the user can view the filled form under - On your Dashboard, click e-File > File Income Tax Forms > View Filed Forms> View Filed Form tab under “Forms as per Income Tax Act 2025”.