Form 186
1. Overview
Form 186 is an application that employers or trustees must file to obtain recognition of a Provident Fund as a “Recognized Provident Fund” under the Income-tax Act, 2025. Recognition provides tax benefits to both employers and employees, such as tax exempt contributions and tax free interest accumulation.
The form is prescribed under Rule 196 of the Income-tax Rules, 2026, and requires detailed information about the employer, the provident fund, its trustees, and its financial/investment details.
2. Prerequisites for availing this service
Registered user of the e-Filing portal with valid user ID and password. This form will be available for filing only under Trust Login and Representative Assessee can file this form on Efiling portal.
Before filing Form 186, ensure the following prerequisites are met:
A. Eligibility Prerequisites
- The applicant must be the employer or trustee managing the provident fund.
- The provident fund must be genuine, intended for employees’ benefit, and governed by a written scheme/trust deed.
B. Documentation Prerequisites
You must have the following documents ready:
- Trust deed (original + copy) or certified copy.
- Rules of the provident fund.
- Certificate of registration under applicable law (if applicable).
- Copy of latest balance sheet of the fund (if the fund already exists).
- Investment details of the fund.
C. Additional Requirements (if applicable)
- Details related to coverage under the EPF & MP Act, 1952.
- Proof of any previous recognition prior to 31-03-2006 (if applicable).
3. About the Form
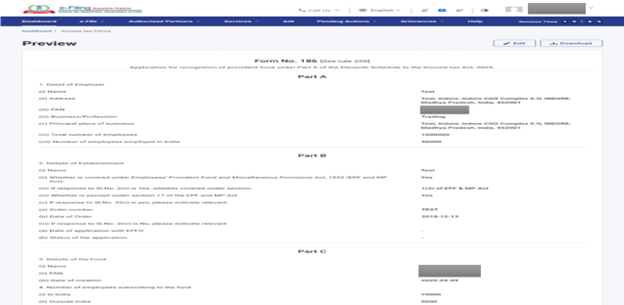
Form 186 is an application used by employers or trustees to obtain recognition of a Provident Fund under Part A of the Eleventh Schedule of the Income tax Act, 2026. It collects complete details of the employer, the establishment’s EPF compliance status, the provident fund, its trustees, contributions made by employer and employees, and relevant financial and regulatory information. The form is structured into four parts to ensure systematic disclosure:
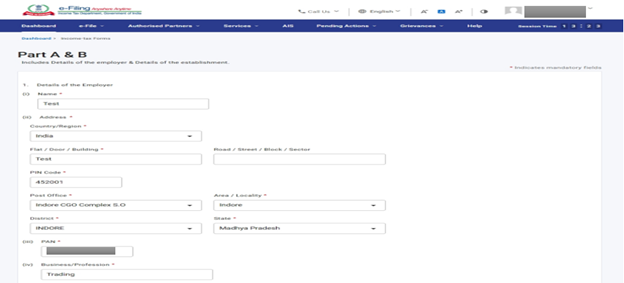
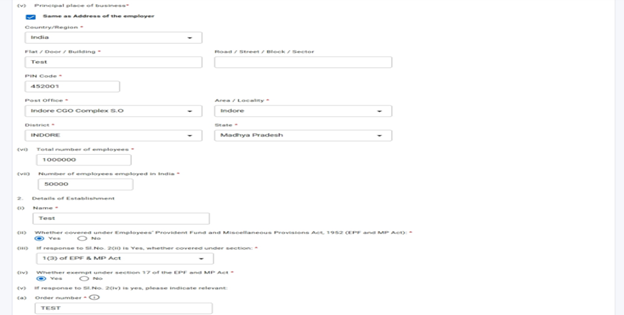
- Part A – Employer Details: Captures the name, address, PAN, business/profession, principal place of business, and the total number of employees, including those employed in India.
- Part B – Establishment Details: Records whether the establishment is covered under the EPF & MP Act, 1952, the applicable section (1(3) or 1(4)), exemption status under section 17, and related order details or EPFO application status.
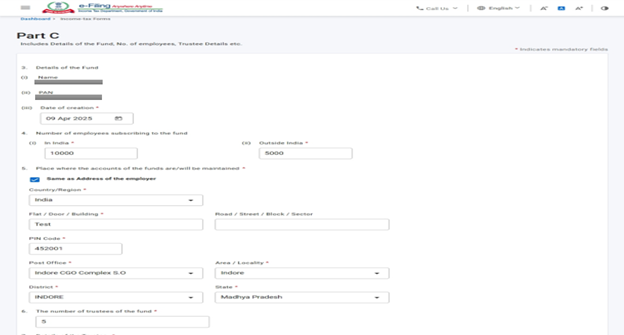
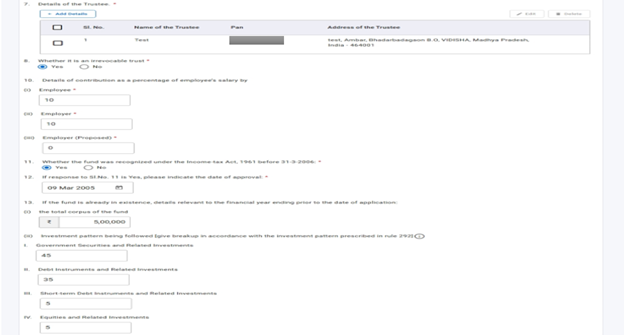
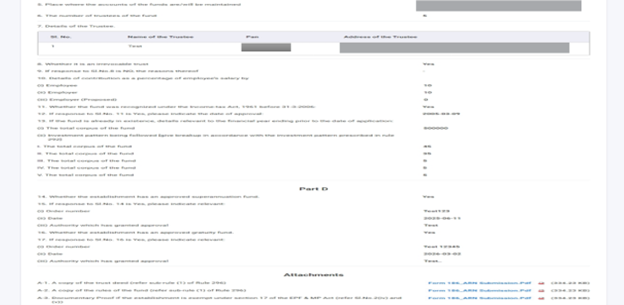
- Part C – Fund Details: Includes the fund name, PAN, date of creation, number of employees subscribing (India/outside India), place where accounts are/will be maintained, trustees’ details, trust irrevocability, contribution percentages, prior recognition under the 1961 Act (if any), fund corpus, and investment pattern as per Rule 292.
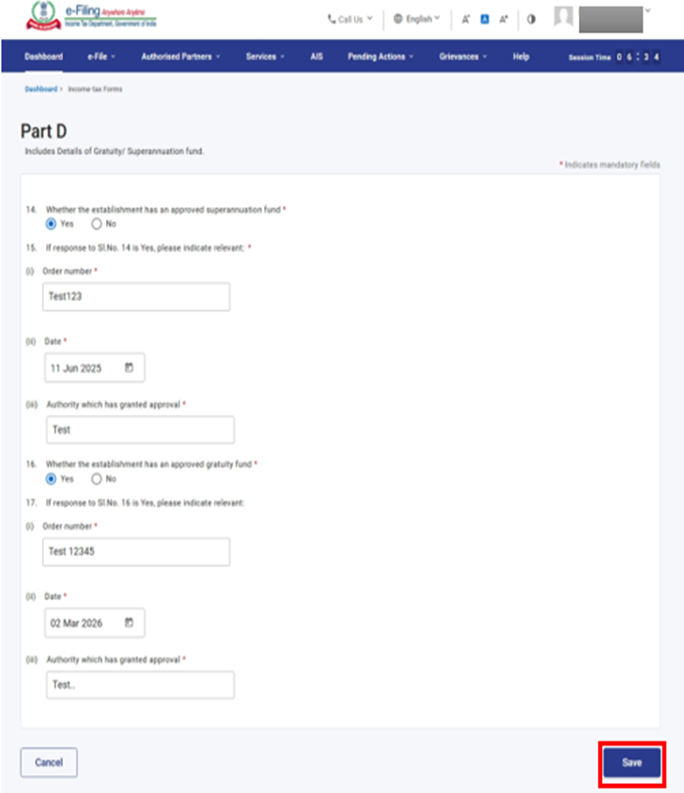
- Part D – Additional Approvals: Captures whether the establishment has an approved superannuation fund or approved gratuity fund along with applicable order numbers, dates, and approving authorities.
The form concludes with a verification section, where the authorized trustee certifies that all information provided is true and that enclosed documents are genuine. Additionally, mandatory annexures such as the trust deed, fund rules, EPF exemption proof, EPFO acknowledgment, prior approval letters, and the fund’s balance sheet (where applicable) must be attached.
4. How to Access and Submit
You can fill and submit Form 186 through the following methods:
- Online Mode - through e-Filing portal
5. Step By Step Guide
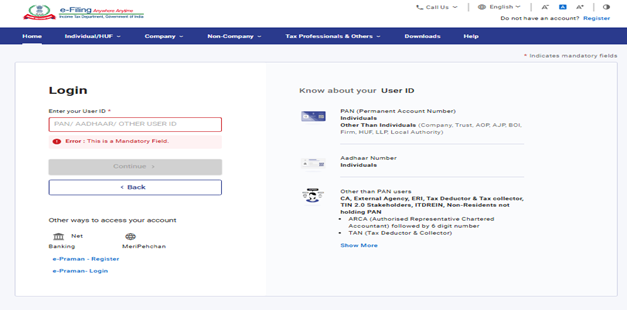
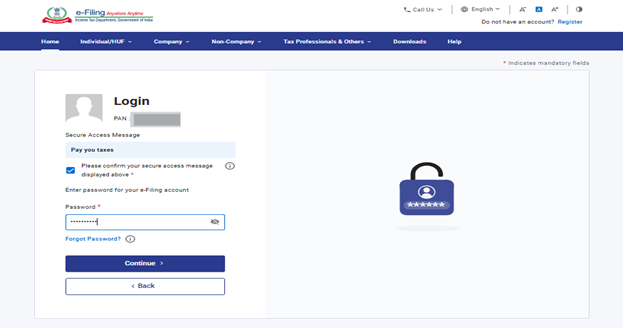
Step 1: Log in to the e-Filing portal with your User ID and Password.

Step 2: Enter the User ID (PAN) and Password.
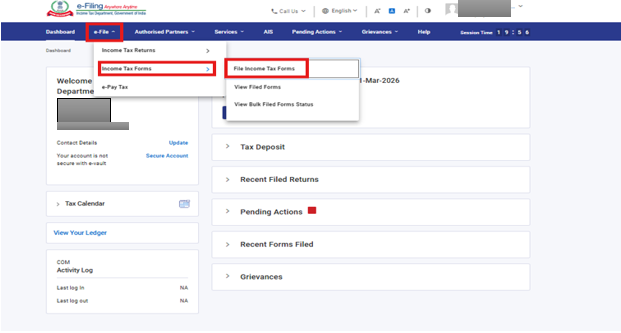
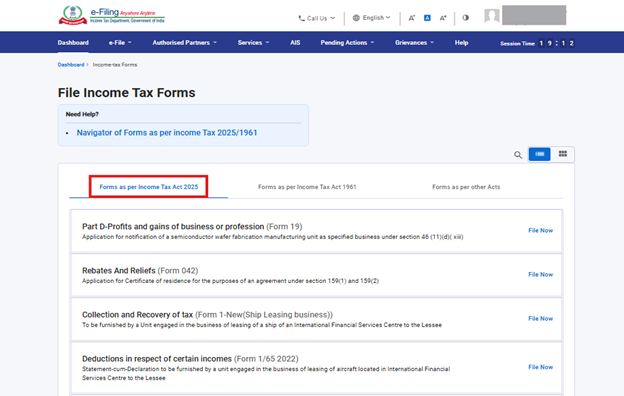
Step 3: Go to e-file >Income Tax Forms > File Income Tax Forms.
Step 4: Select Tab “Forms as per Income Tax Act 2025”.
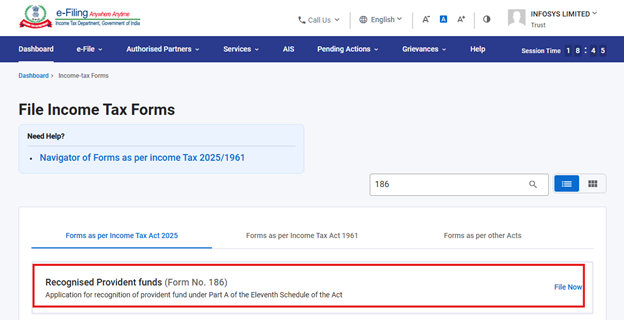
Step 5: Select/ Search Form 186.
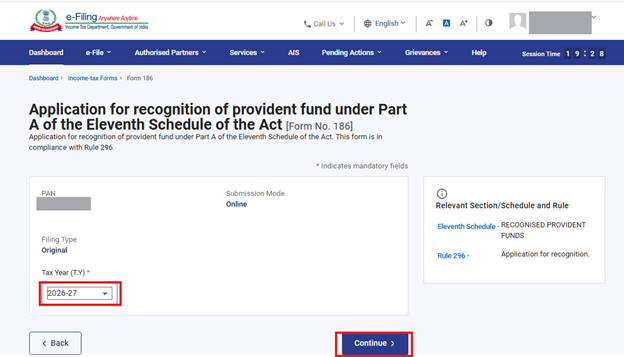
Step 6: Select the applicable Tax Year (T.Y) and click on Continue button.
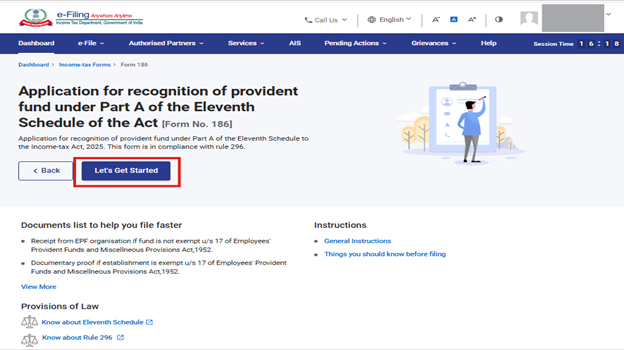
Step 7: Click on Let’s Get Started.
Step 8: Post clicking on Let’s Get Started screen, user will be navigated to Panel screen of Form No. 186.
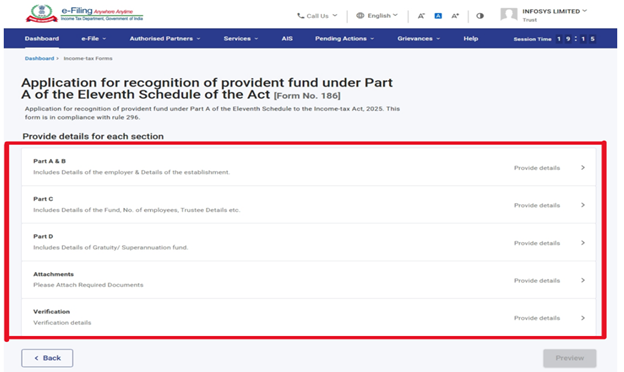
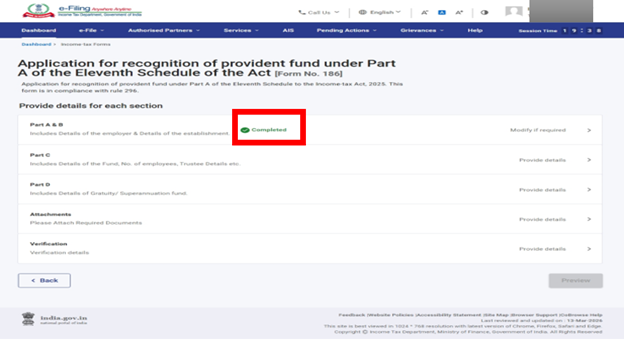
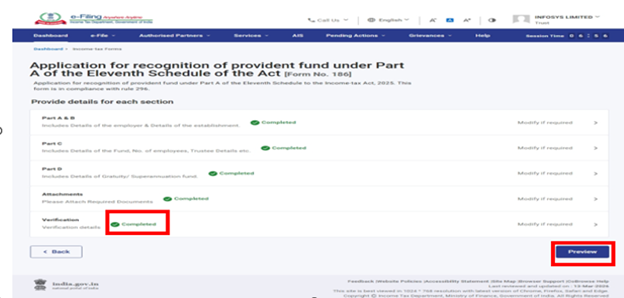
Step 9: Users are required to fill all mandatory fields within each panel. Once all entries in a panel are completed in accordance with the mandatory validations, the user can save that panel. After successful validation and saving, the panel will be marked as ‘Completed’ and indicated with a green tick on the Panel Screen.
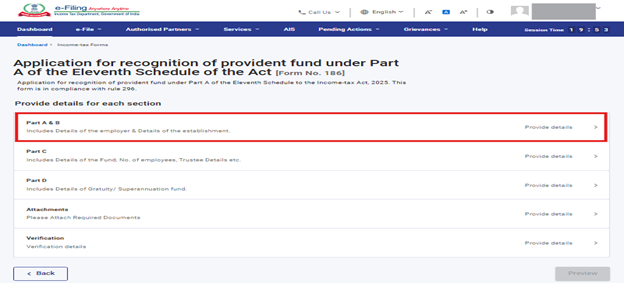
Step 9.1: Select Part A & B Panel in Panel screen of form 186.
Step 9.1.1: Enter all the required details of PART A and B and then click on Save button.

Step 9.1.2: After Clicking on save Button 1st Panel “Part A&B” is marked as completed in Panel Screen.
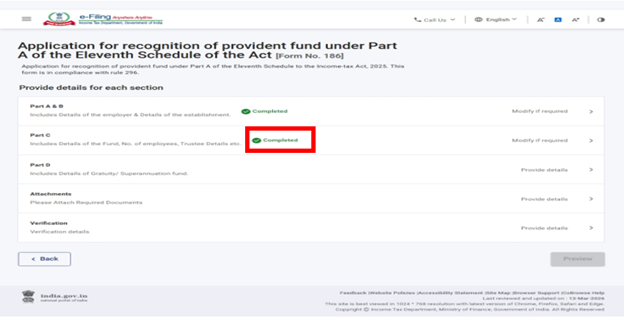
Step 9.2: Select Part C Panel in Panel screen of form 186.
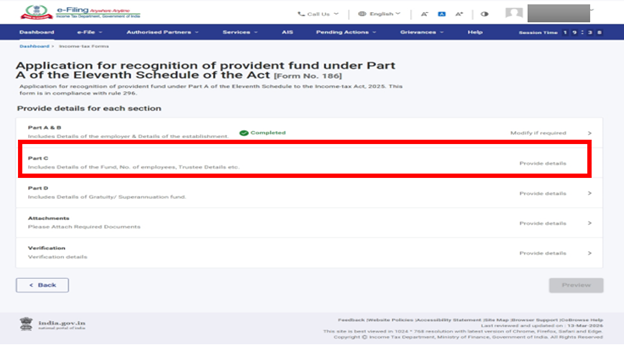
Step 9.2.1: Enter all the required details of PART C and then click on Save button.

Step 9.2.2: After Clicking on save button in 2st Panel “Part C” will be marked as completed in Panel Screen.
Step 9.3: Select Part D Panel in Panel screen of form 186.
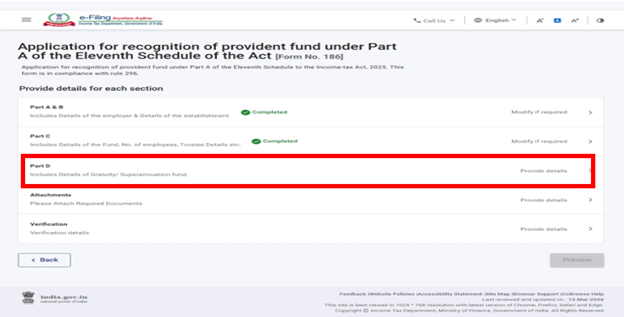
Step 9.3.1: Enter all the required details of PART D and then click on Save button.
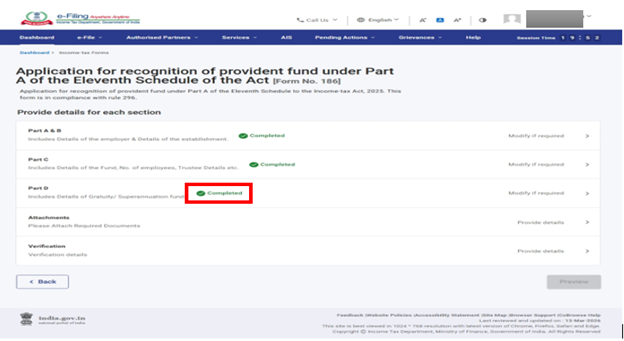
Step 9.3.2: After Clicking on save button in 3rd Panel “Part D” will be marked as completed in Panel Screen.
Step 9.4: Select Attachment Panel in Panel screen of form 186.
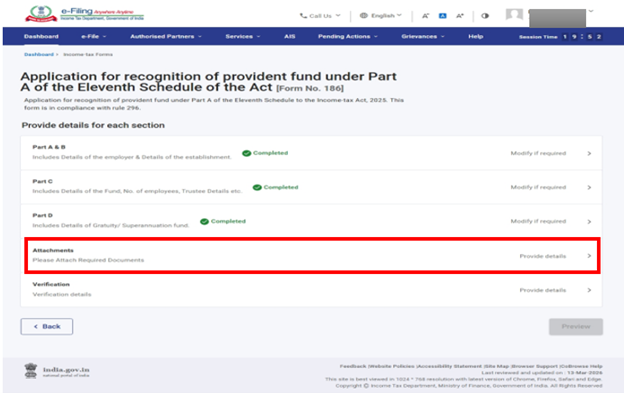
Step 9.4.1: Attach all the required documents which needs to be attached and then click on Save button.
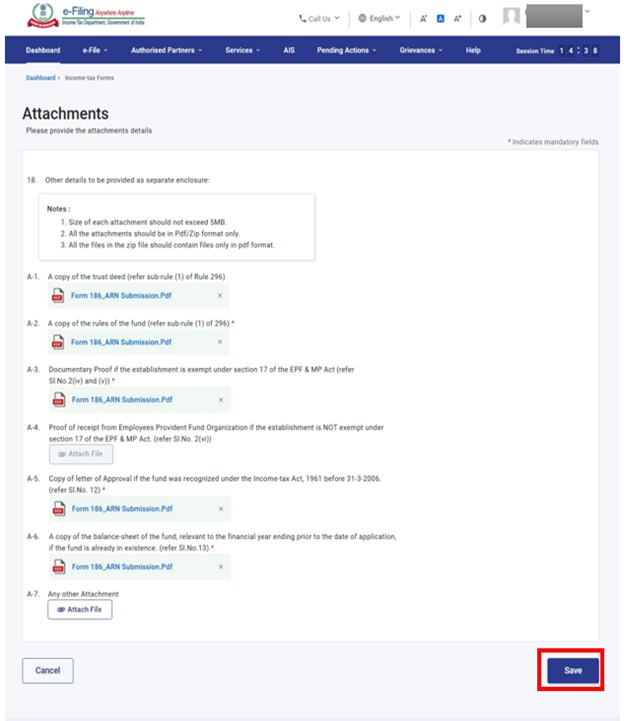
Step 9.4.2: After Clicking on save button in 4th Panel “Attachment” will be marked as completed in Panel Screen.
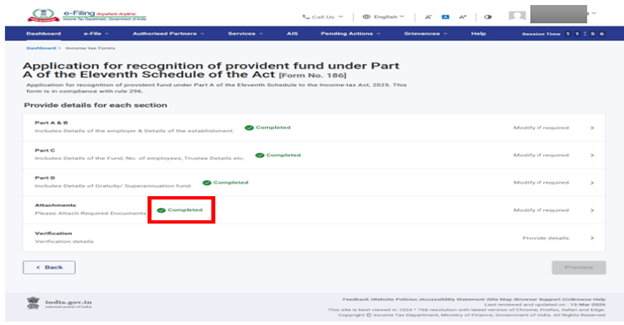
Step 9.5: Select Verification Panel in Panel screen of form 186.
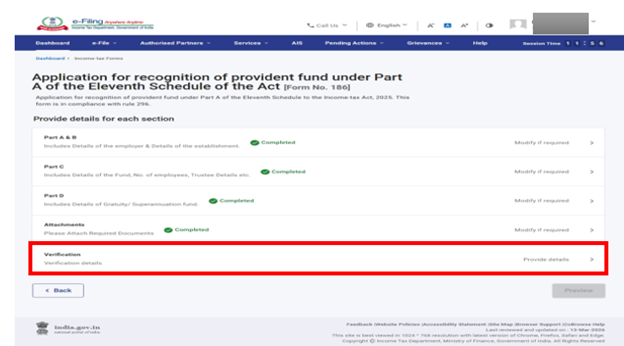
Step 9.5.1: Enter all the required details in Verification panel and then click on Save button.
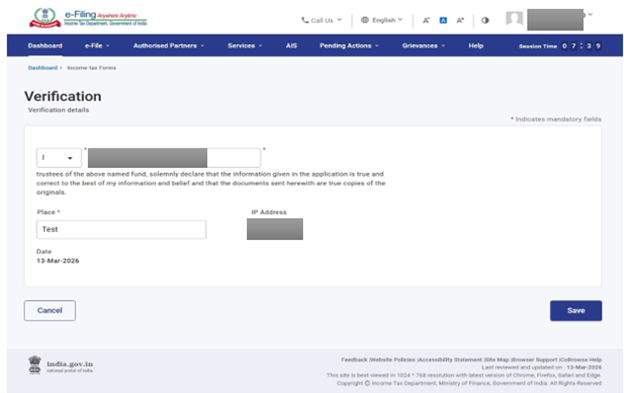
Step 9.5.2: After Clicking on save button in 5th Panel “Verification” will be marked as completed in Panel Screen and Preview Button will get enabled.
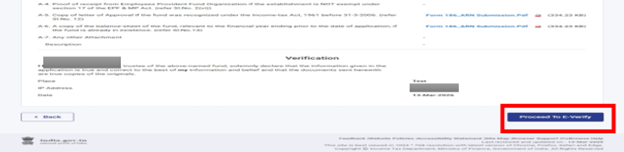
Step 10: On the Preview page, verify the details and click Proceed to e-Verify.
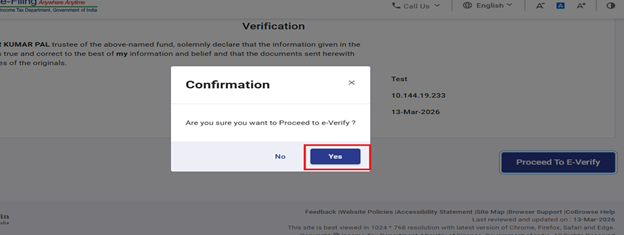
Step 11: Click Yes to submit. On clicking Yes, you will be taken to the e-Verify page
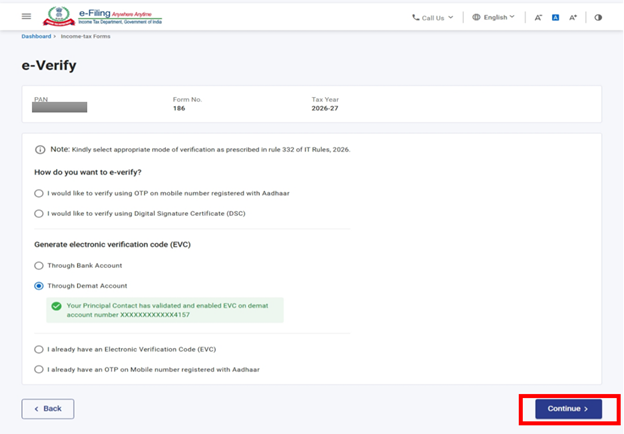
Step 12: You can e-Verify the Form through any of the modes of Verification.
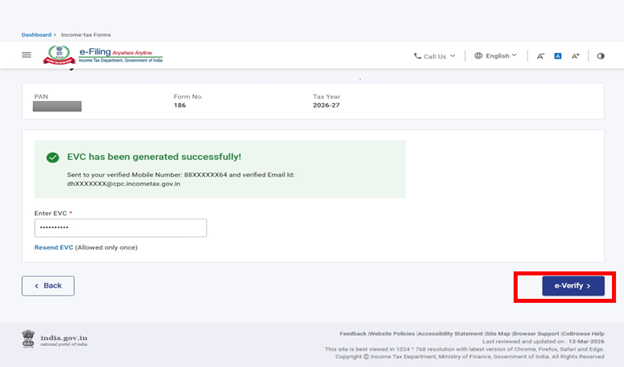
Step 13: Enter EVC generated and click on e-Verify in order to e-Verify Form
Note: Refer to the How to e-Verify user manual to learn more.
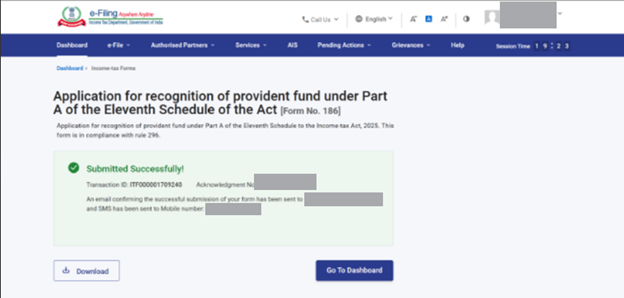
After successful e-Verification, a success message is displayed along with a Transaction ID and Acknowledgement Number. Please keep a note of the Transaction ID and Acknowledgement Number for future reference. You will also receive a confirmation message on your email ID and mobile number registered with the e-Filing portal.
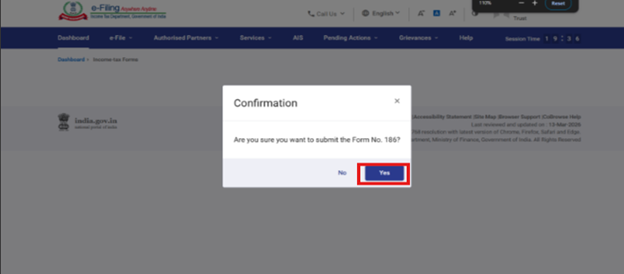
Step 14: To submit the form click on Yes.
Step 15: The form will be submitted successfully. Once the form is submitted, the user can download the acknowledgement receipt using the Download button. You may also return to the Dashboard, where, under the View Filed Form section, you can download and review the submitted form.