

1. Overview
The e-Filing Vault Higher Security service is available to registered users to enable higher security of their e-Filing account. e-Filing Vault adds a second level of authentication when logging into the e-Filing account and second factor authentication for password reset through one of the following options:
- Net Banking
- Digital Signature Certificate (DSC)
- OTP on mobile number registered with Aadhaar
- Bank Account EVC
- Demat Account EVC
2. Prerequisites for availing this service
- Registered user on the e-Filing portal with valid user ID and password
- The user should have any one of the following:
- Valid DSC registered with e-Filing
- Pre-Validated and EVC-enabled bank account in e-Filing
- Pre-Validated and EVC-enabled demat account in e-Filing
- Valid net banking account
3. Step-by-Step Guide
Step 1: Log in to the e-Filing portal using your user ID and password.
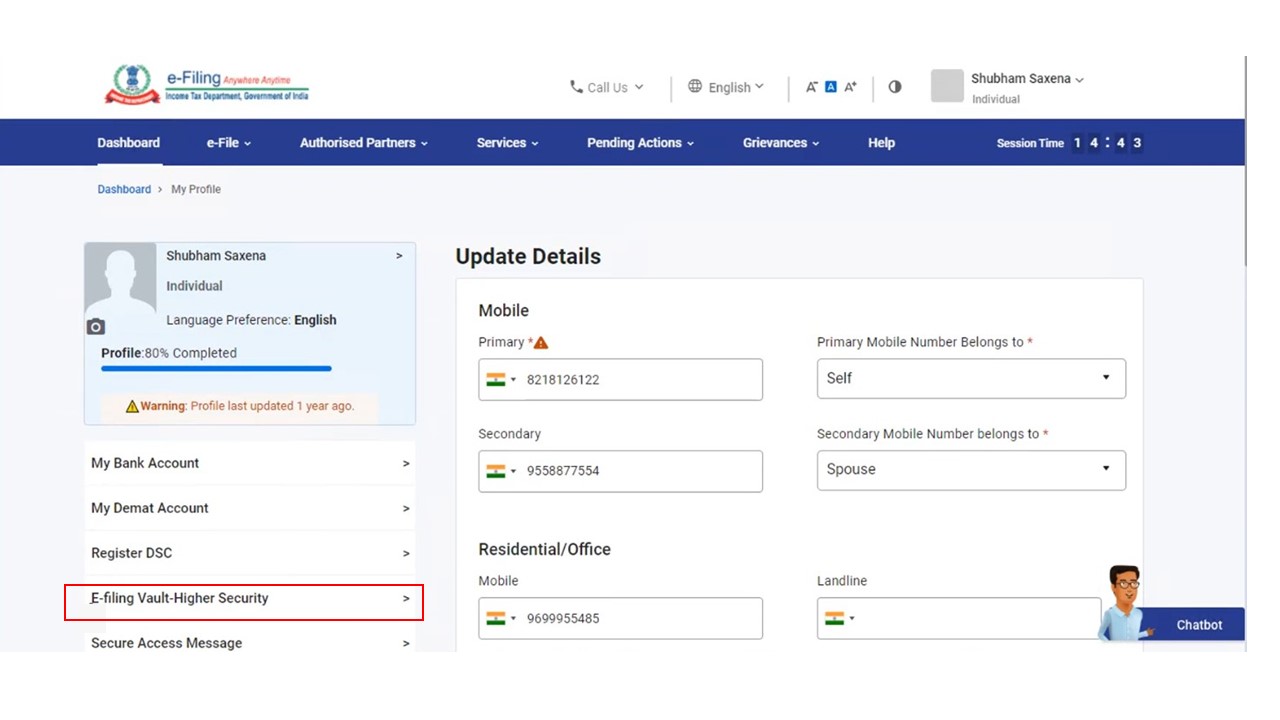
Step 2: On the top right corner of your Dashboard, click My Profile. On the My Profile page, click e-Filing Vault Higher Security.
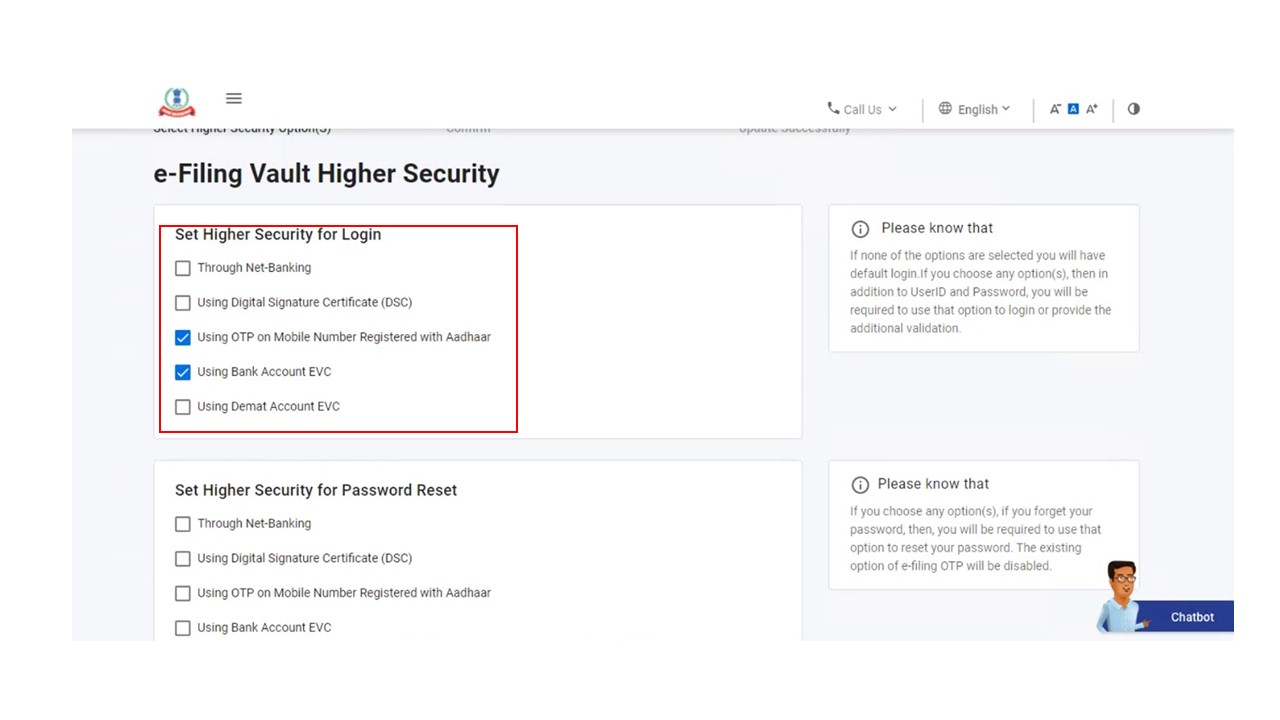
On the e-Filing Vault Higher Security page, you can select either one of the following
| Enable OTP on Mobile Number registered with Aadhaar | Refer to Section 3.1 |
| Enable Bank Account EVC / Demat Account EVC / DSC / Through Net Banking | Refer to Section 3.2 |
| Deselect Higher Security Options | Refer to Section 3.3 |
3.1 Enable OTP on Mobile Number registered with Aadhaar
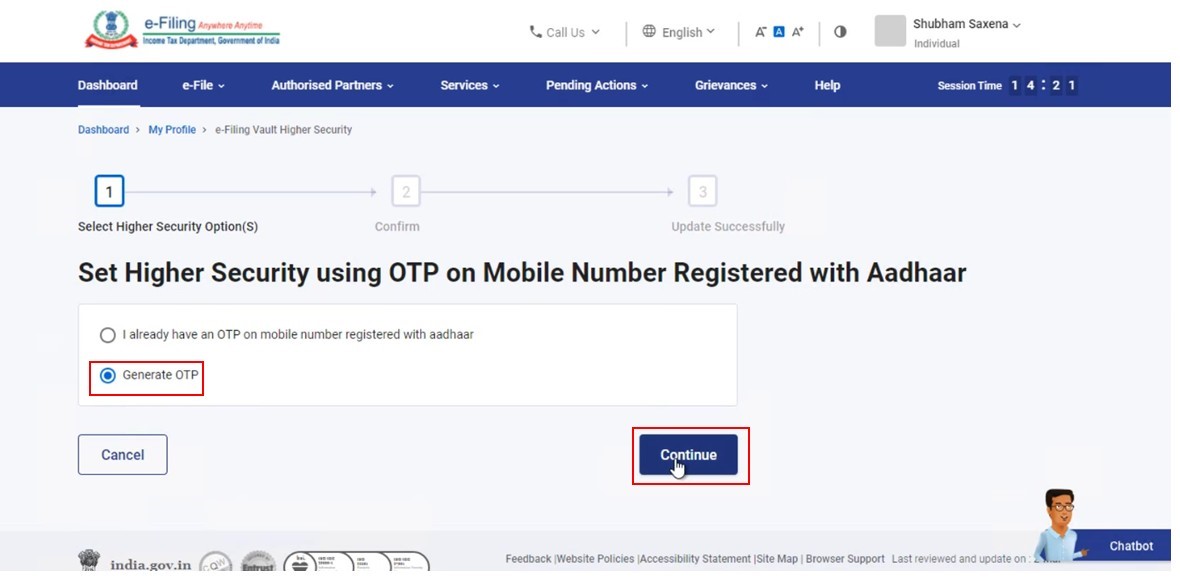
Step 1: In the Set Higher Security for Login and Set Higher Security for Password Reset sections, select the higher security option that you would like to apply. If you prefer second factor authentication using OTP on mobile number registered with Aadhaar, select that particular option.
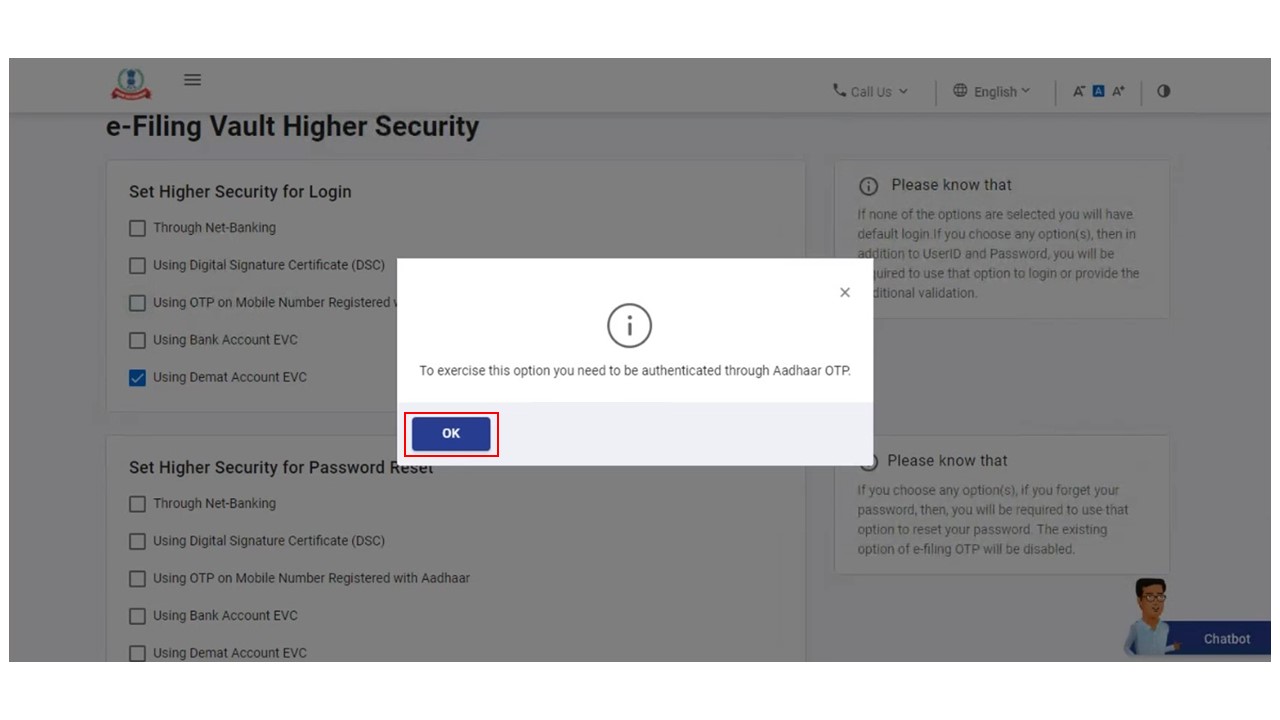
Step 2: A popup message is displayed stating you need to be authenticated through Aadhaar OTP. Click OK.
Step 3: If you have an OTP, select I already have OTP on mobile registered with Aadhaar. Else, generate the OTP. You will receive it on your mobile number registered with Aadhaar.
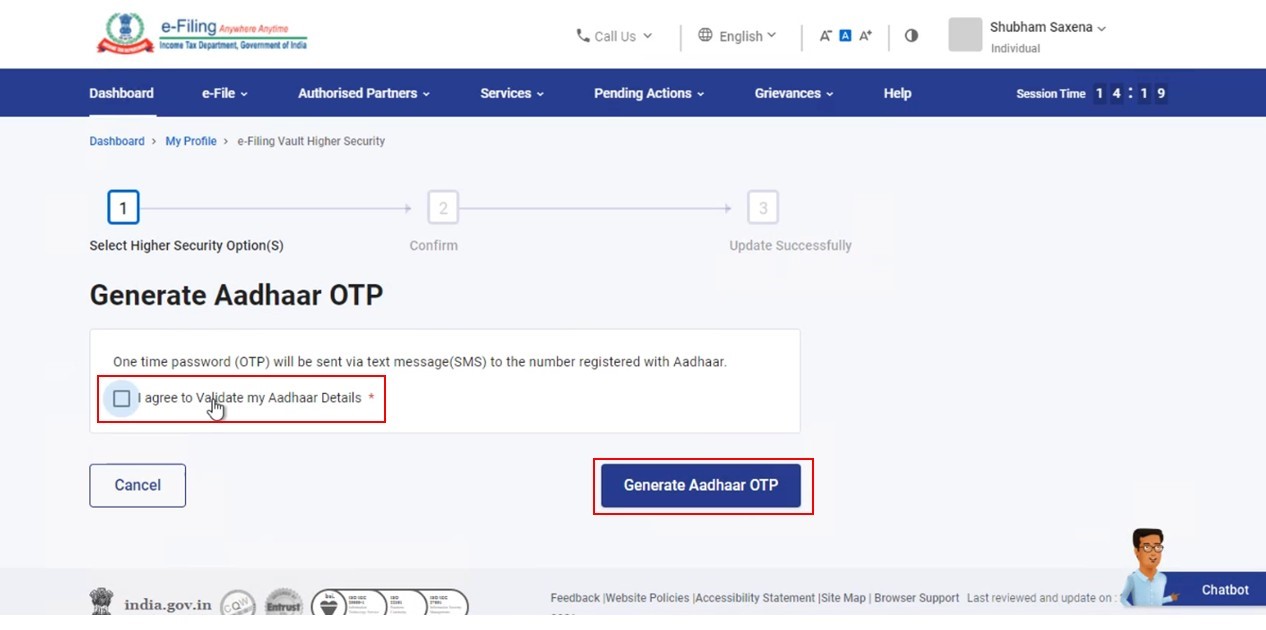
Step 4: Click I agree to Validate my Aadhaar details, then click Generate Aadhaar OTP.
Step 5: On the Verify OTP page, enter the 6-digit OTP received on the mobile number registered with Aadhaar, and click Validate.
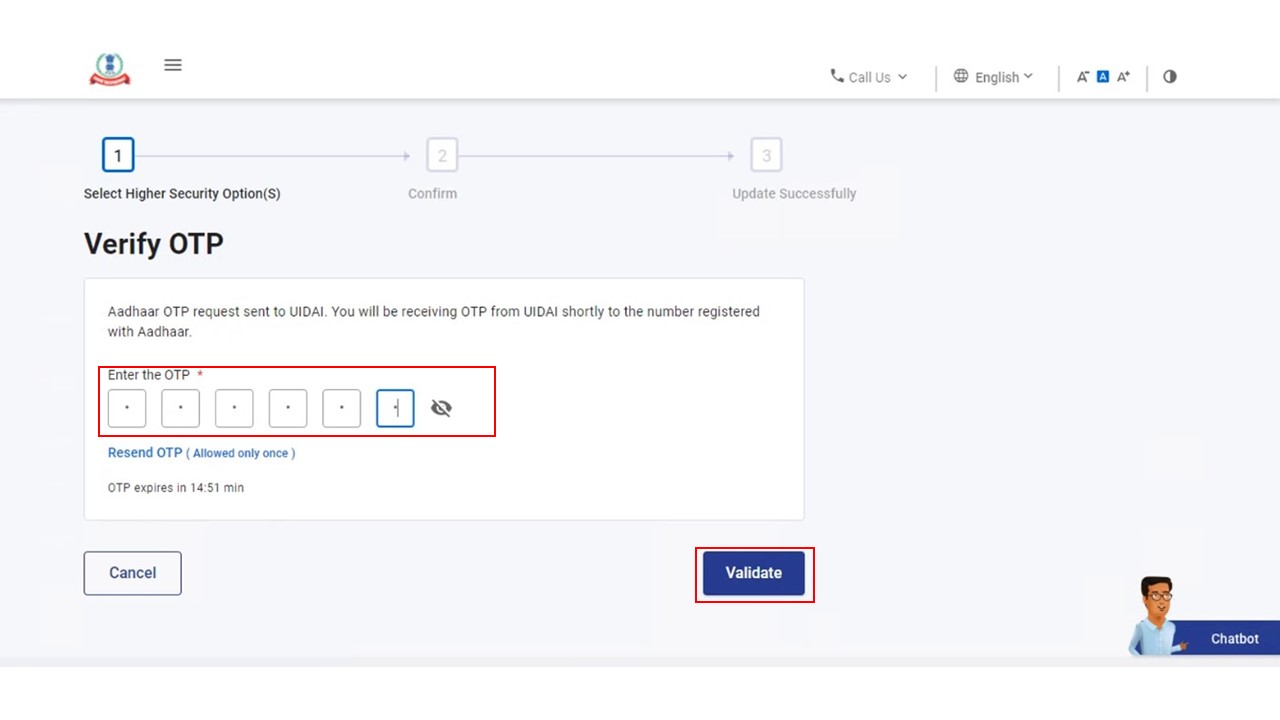
Note:
- OTP will be valid for 15 minutes only.
- You have 3 attempts to enter the correct OTP.
- On clicking Resend OTP, a new OTP will be generated and sent to the mobile number registered with Aadhaar.
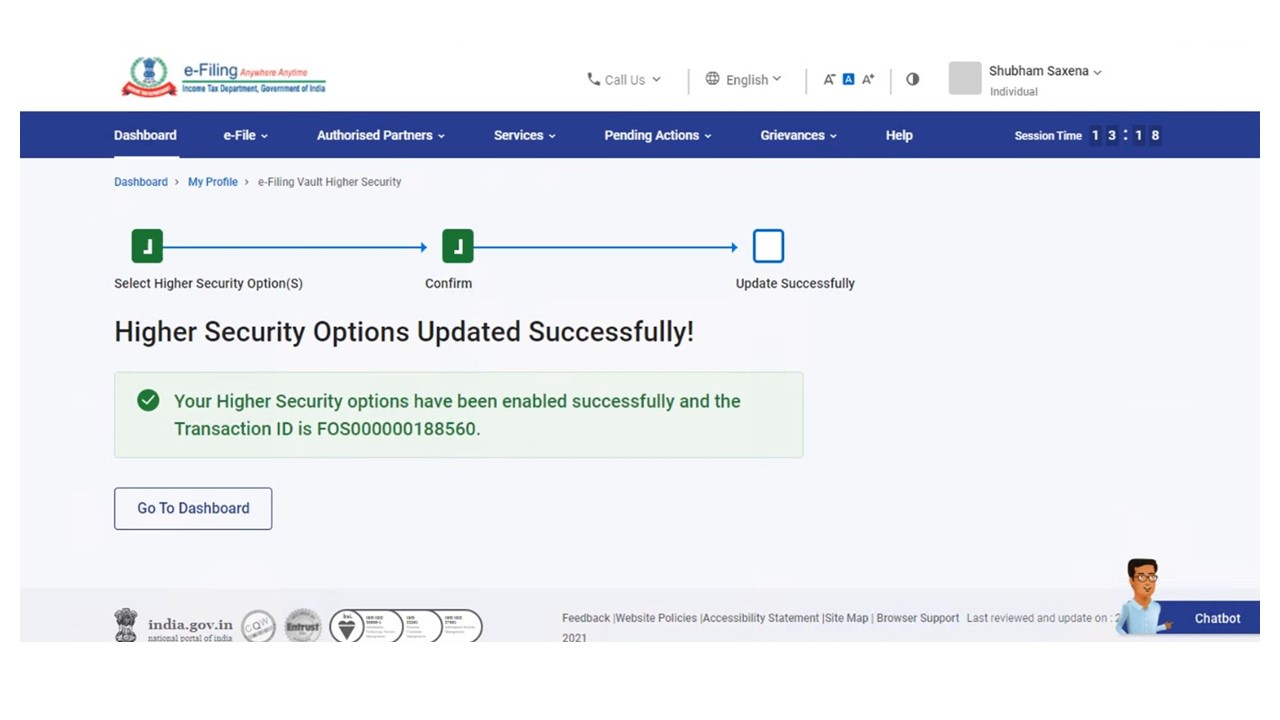
On successful validation, a success the following message will be displayed .
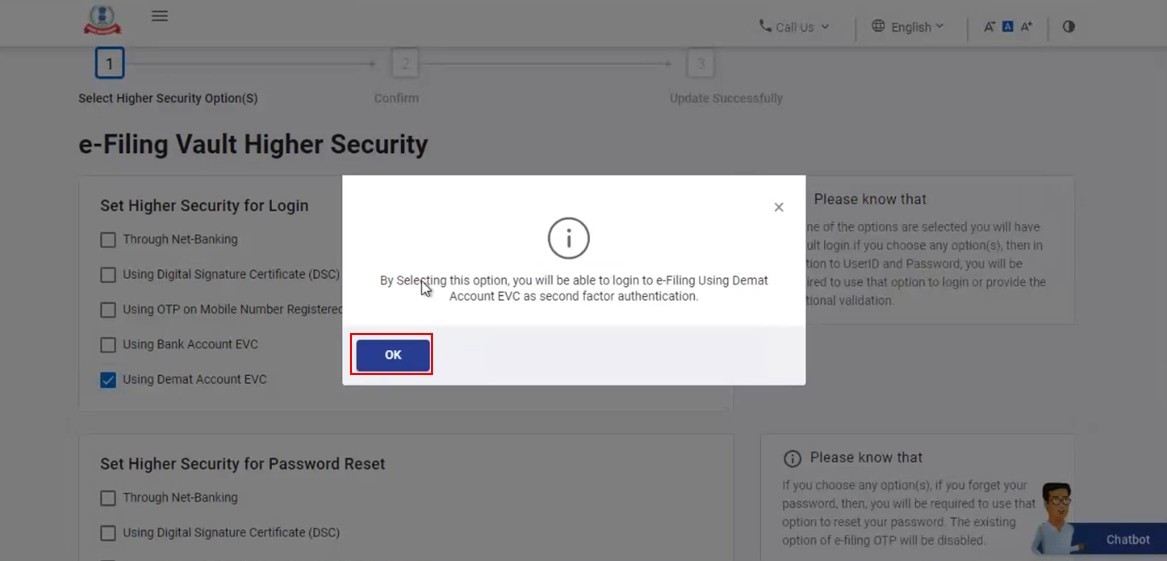
3.2 Enable Bank Account EVC / Demat Account EVC / DSC / Through Net Banking
Step 1: In the Set Higher Security for Login and Set Higher Security for Password Reset sections, select the higher security option that you would like to apply.

Step 2: Based on the option selected, on successful validation, an information message is displayed. Click OK.
Once selected , you will be directed to the confirm , Please click on 'confirm' to enable the higher security on the selected options .
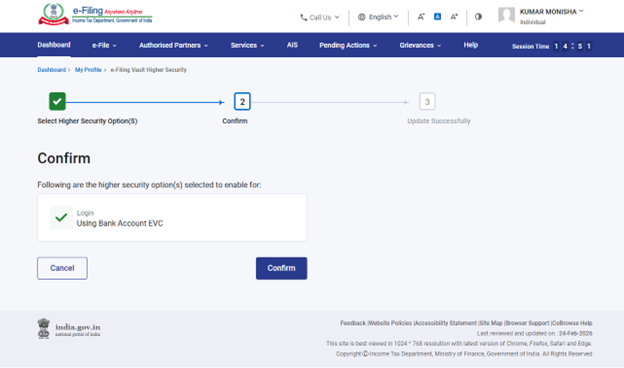
The chosen option is now applied to your e-Filing profile. A success message is displayed along with a Transaction ID.
3.3 Deselect Higher Security Options
Step 1: On the e-Filing Vault Higher Security page, you will see the option you selected for second-factor authentication for Login and Password Reset. Deselect the options where you do not need higher security and click Continue.
Note: You may choose to deselect higher security option for login and / or password reset.

Step 2: On the Confirm page, click Confirm to disable higher security on the selected options.
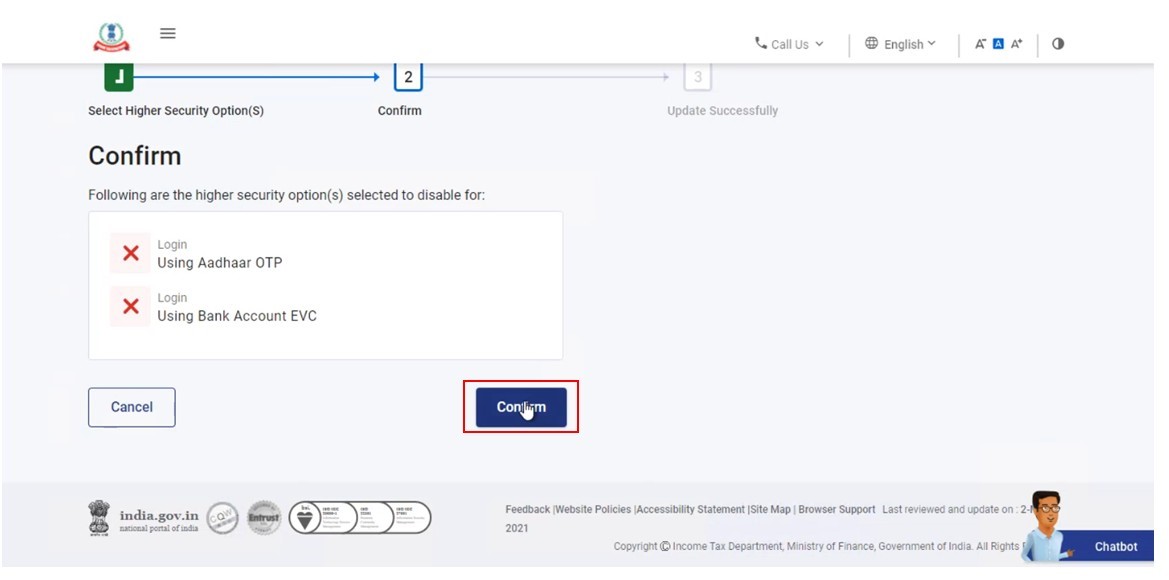
On successful validation, a success message is displayed along with a Transaction ID.


