1. Overview
The My Demat Account service is available to the registered e-Filing users who have a valid PAN and a valid demat account. This service allows you to:
- Add a demat account
- Remove an existing demat account
- Enable or Disable EVC
- Update Primary Contact Details as per the contact details linked with the demat account
- Re-validate failed demat account
2. Prerequisites for availing this service
- Registered user on the e-Filing portal with valid user ID and password
- Valid demat account with NSDL or CDSL linked with PAN
- For NSDL Depository type, you must have a DP ID and Client ID
- For CSDL Depository type, you must have a demat account number
- Valid mobile number and email ID linked with demat account
3. Step-by-Step Guide
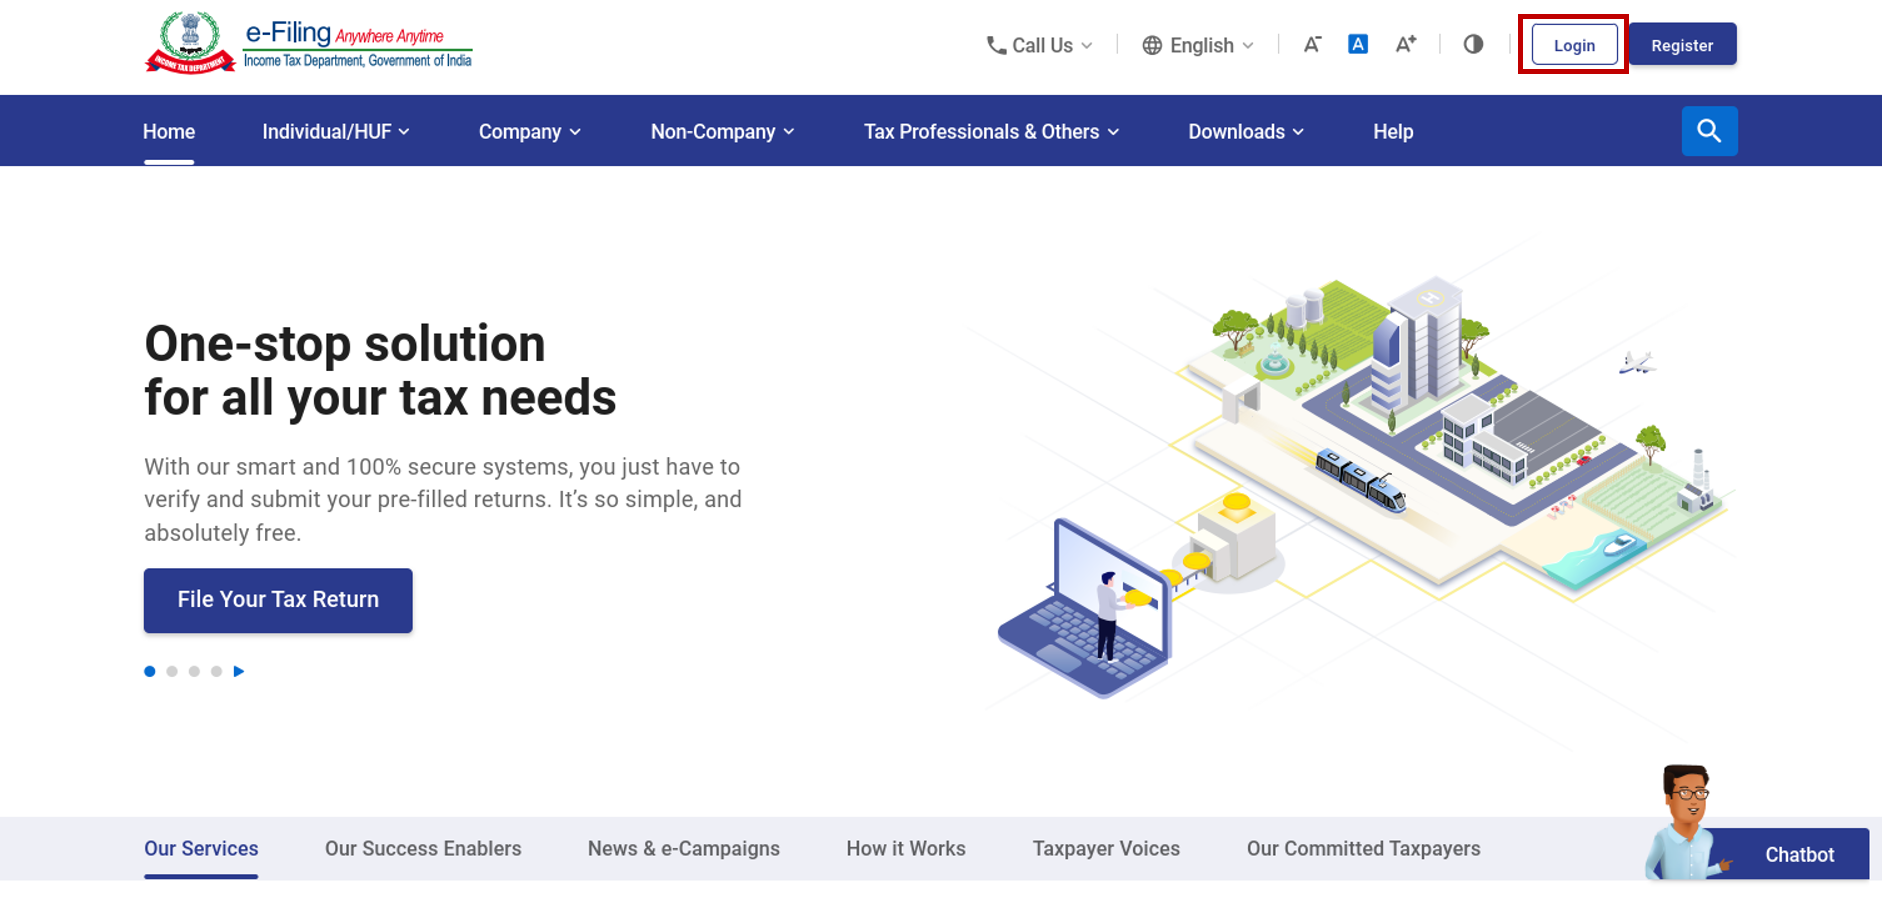
Step 1: Log in to the e-Filing portal using your user ID and password.
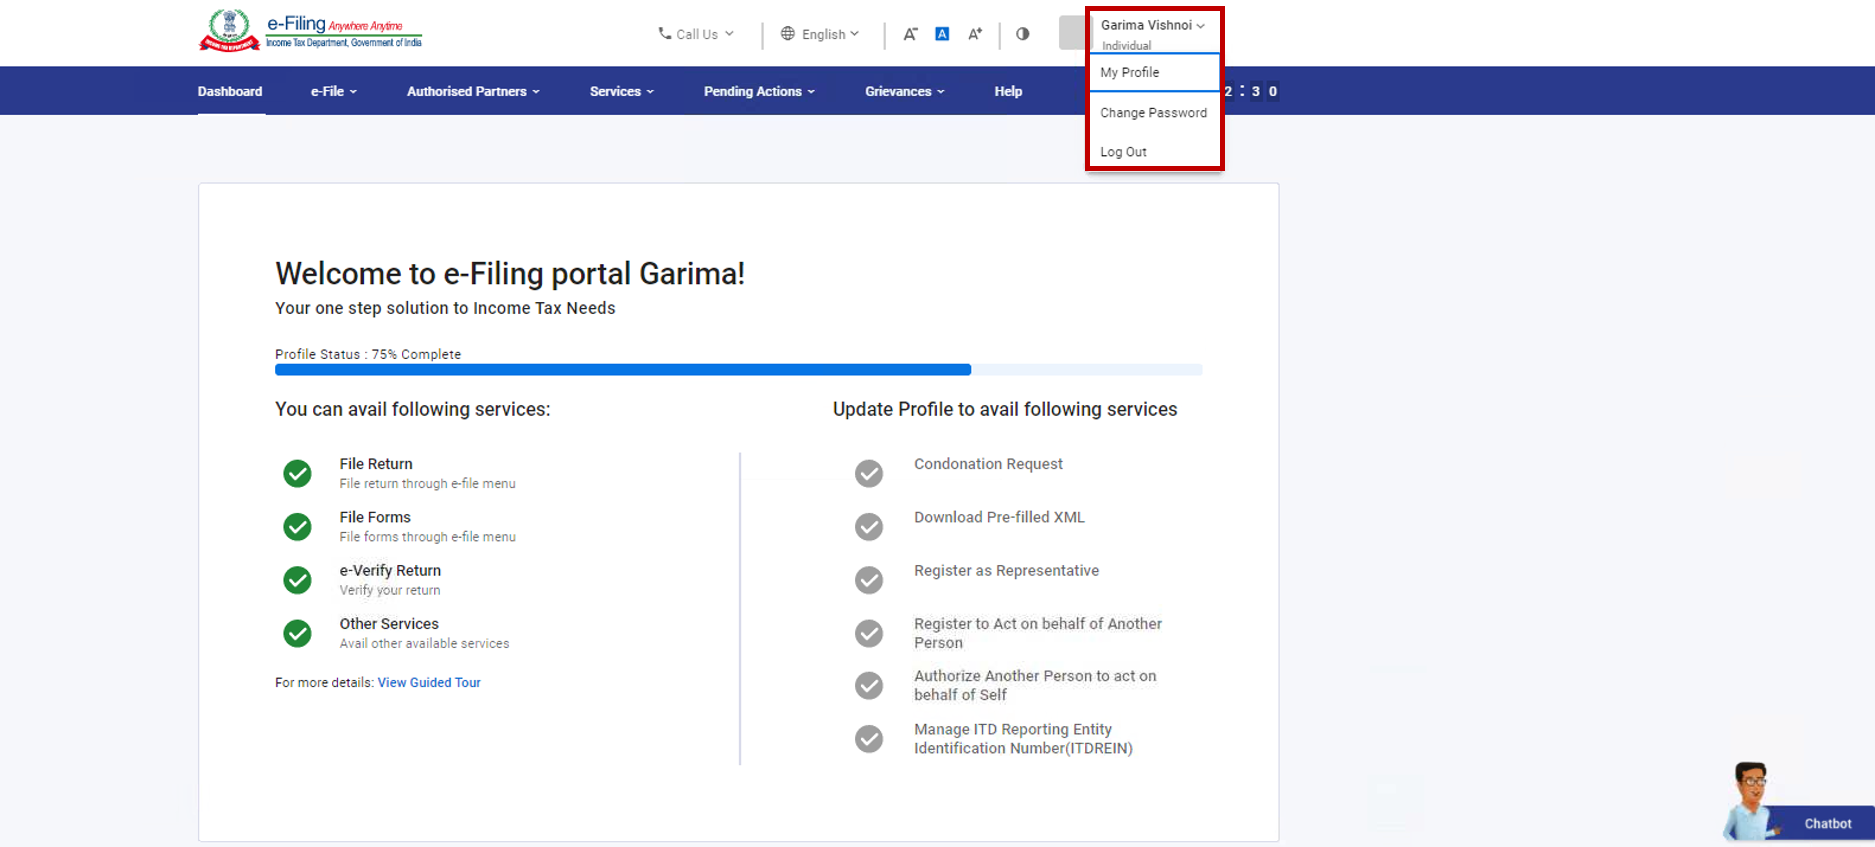
Step 2: On the top right corner of your Dashboard, click My Profile.
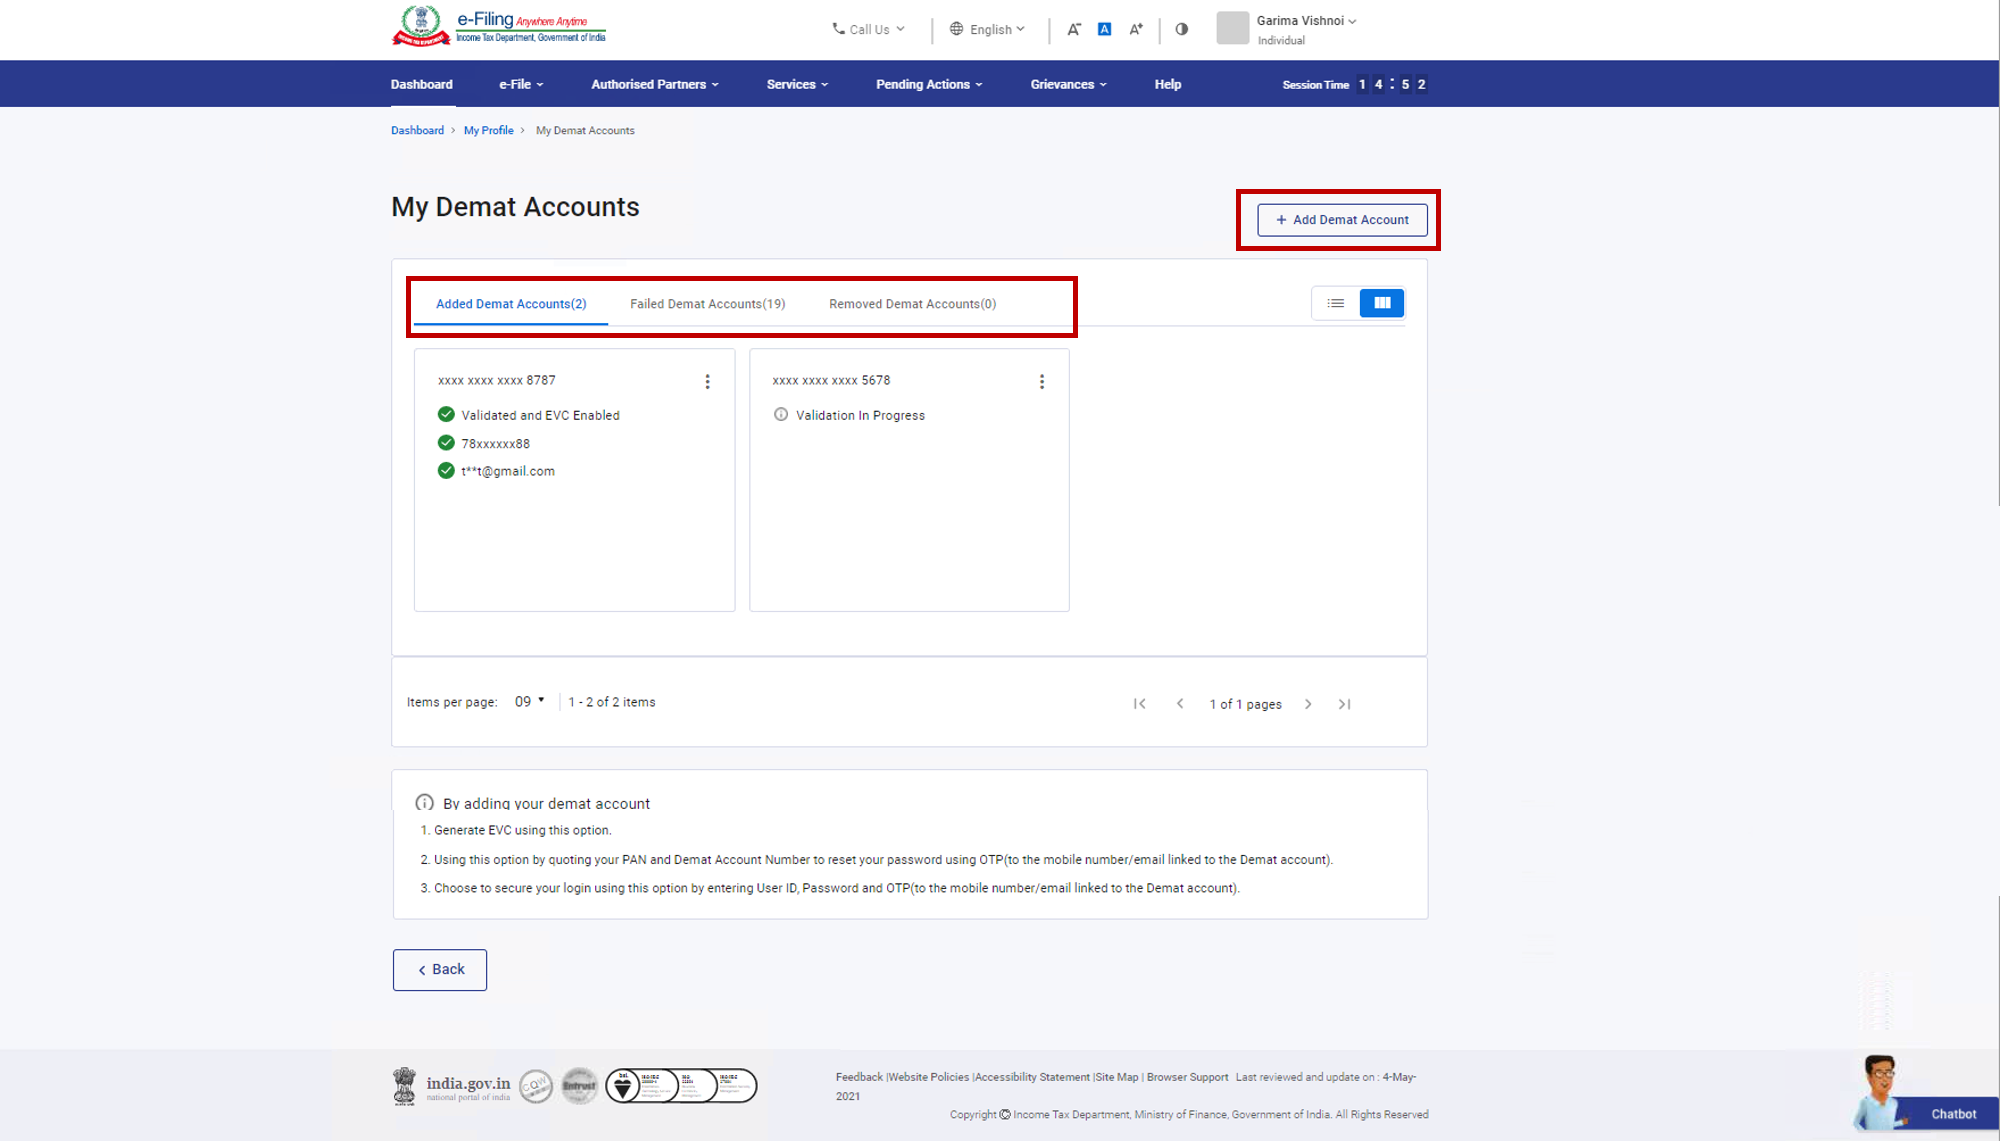
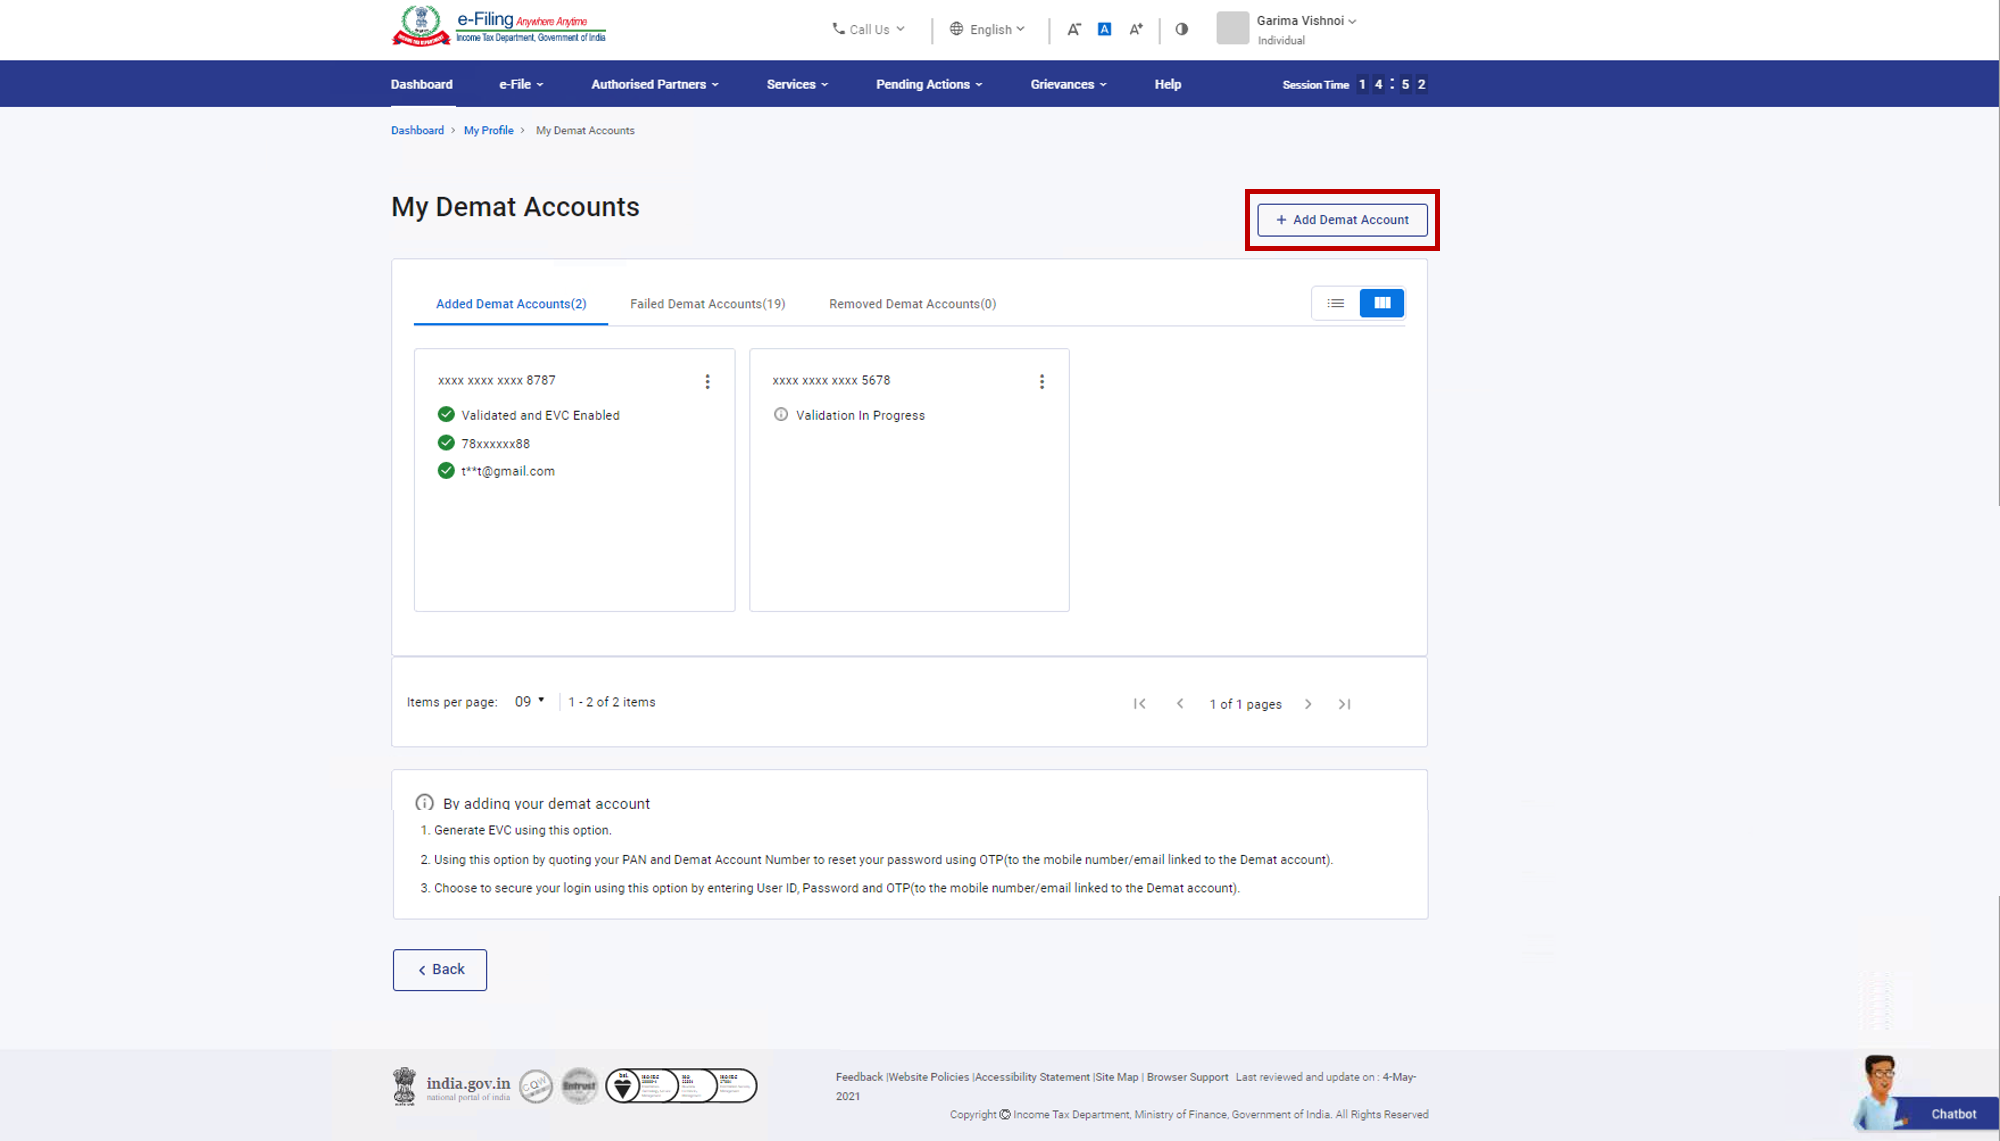
Step 3: On My Profile page, click Demat Account.
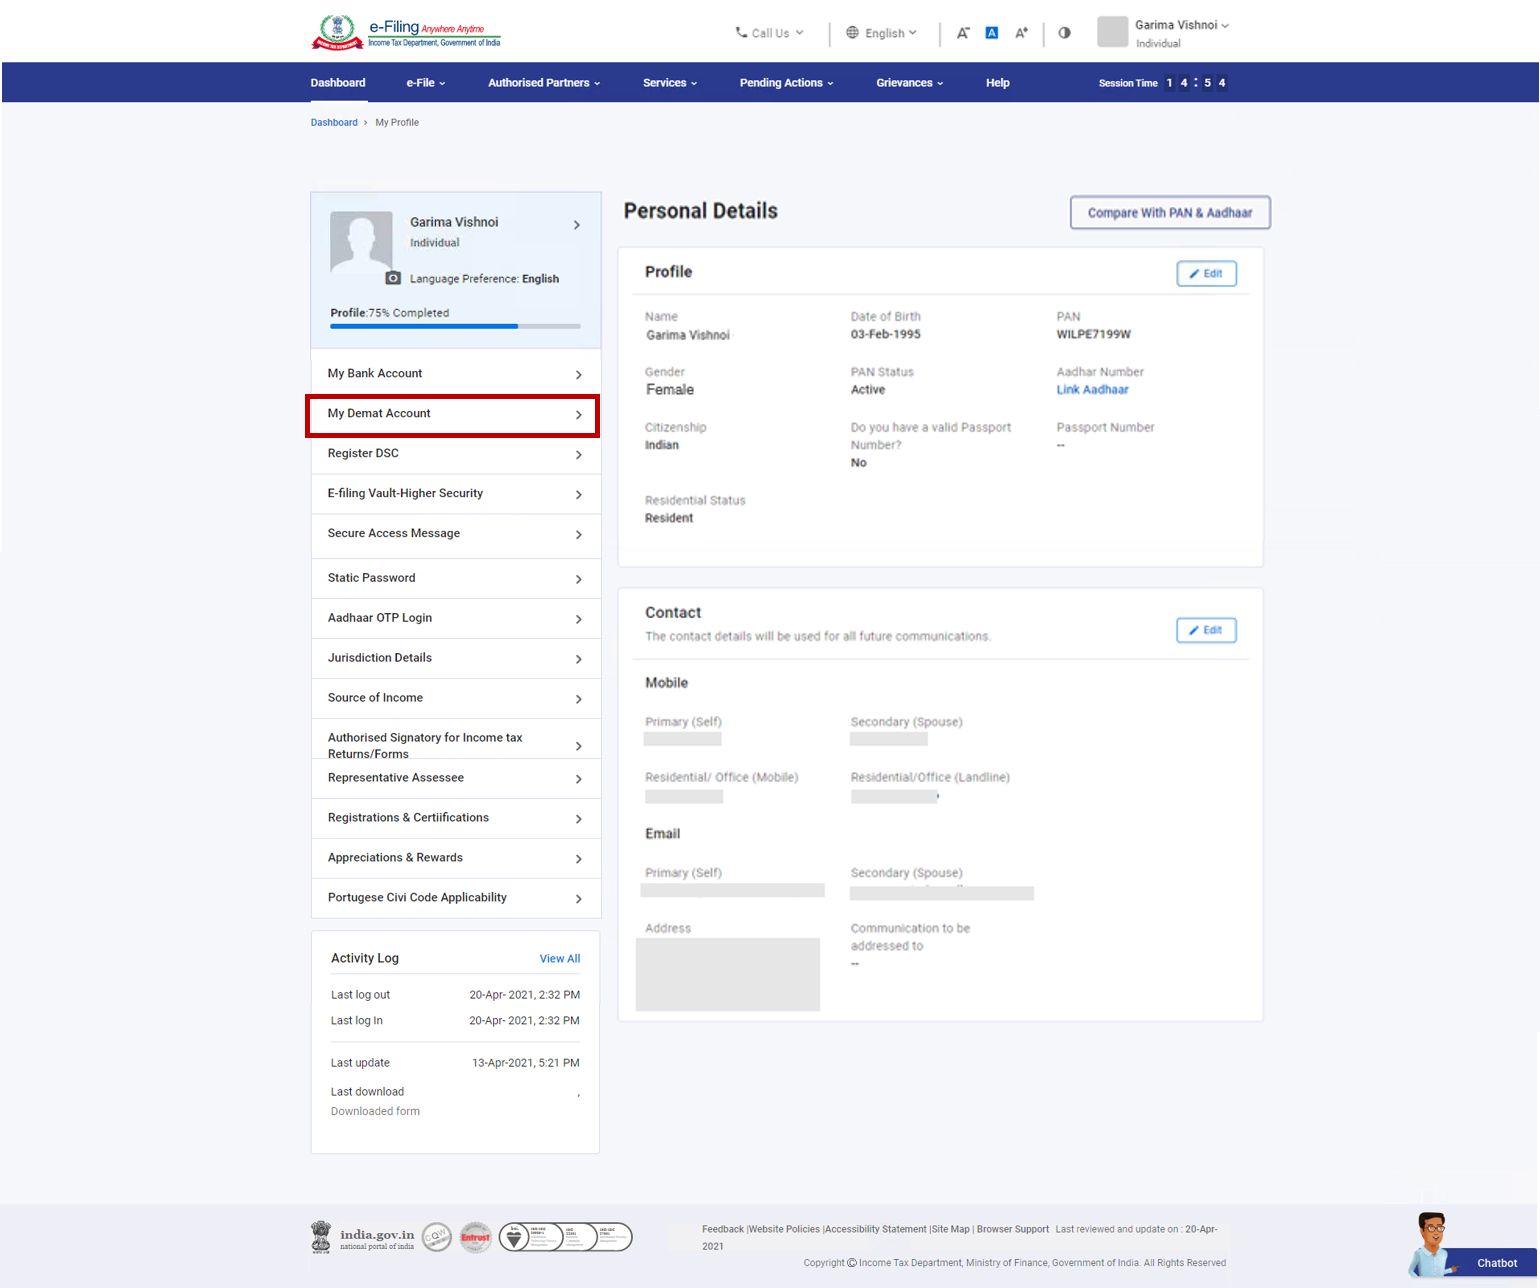
You will be able to view the list of Added, Failed and Removed Demat Account along with the option to Add Demat Account.
Step 4: In case you want to -
| Add Demat Account | Refer to Section 4.1 |
| Remove Demat Account | Refer to Section 4.2 |
| Enable or Disable EVC | Refer to Section 4.3 |
| Update Primary Contact Details to match Demat Account Details | Refer to Section 4.4 |
| Re-validate Failed Demat Account | Refer to Section 4.5 |
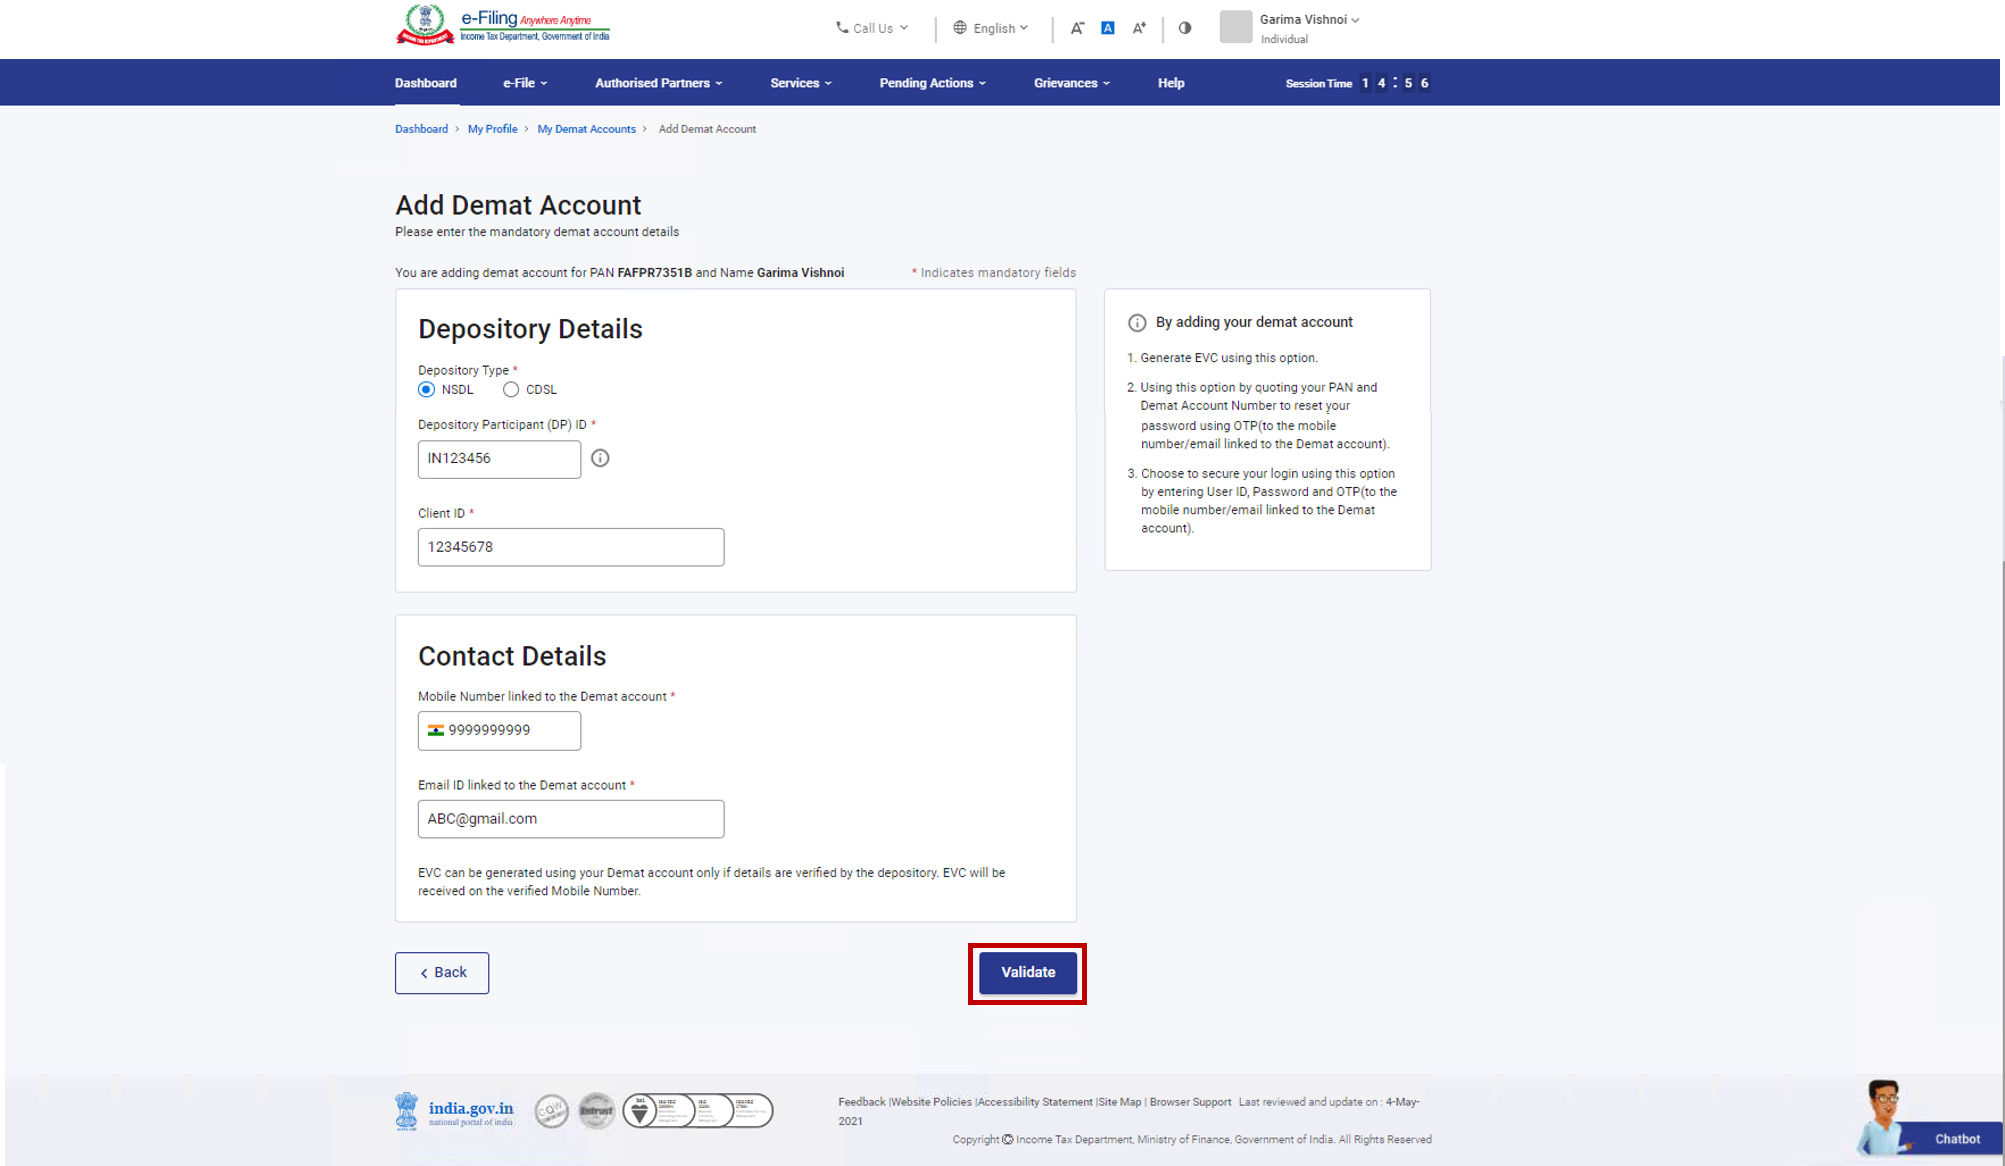
4.1 Add Demat Account
Step 1: Click + Add Demat Account.
Step 2: Select Depository Type and enter relevant details.
Step 2a: If you select depository type as NSDL – enter relevant details (DP ID, Client ID and contact details - Mobile Number and Email ID).
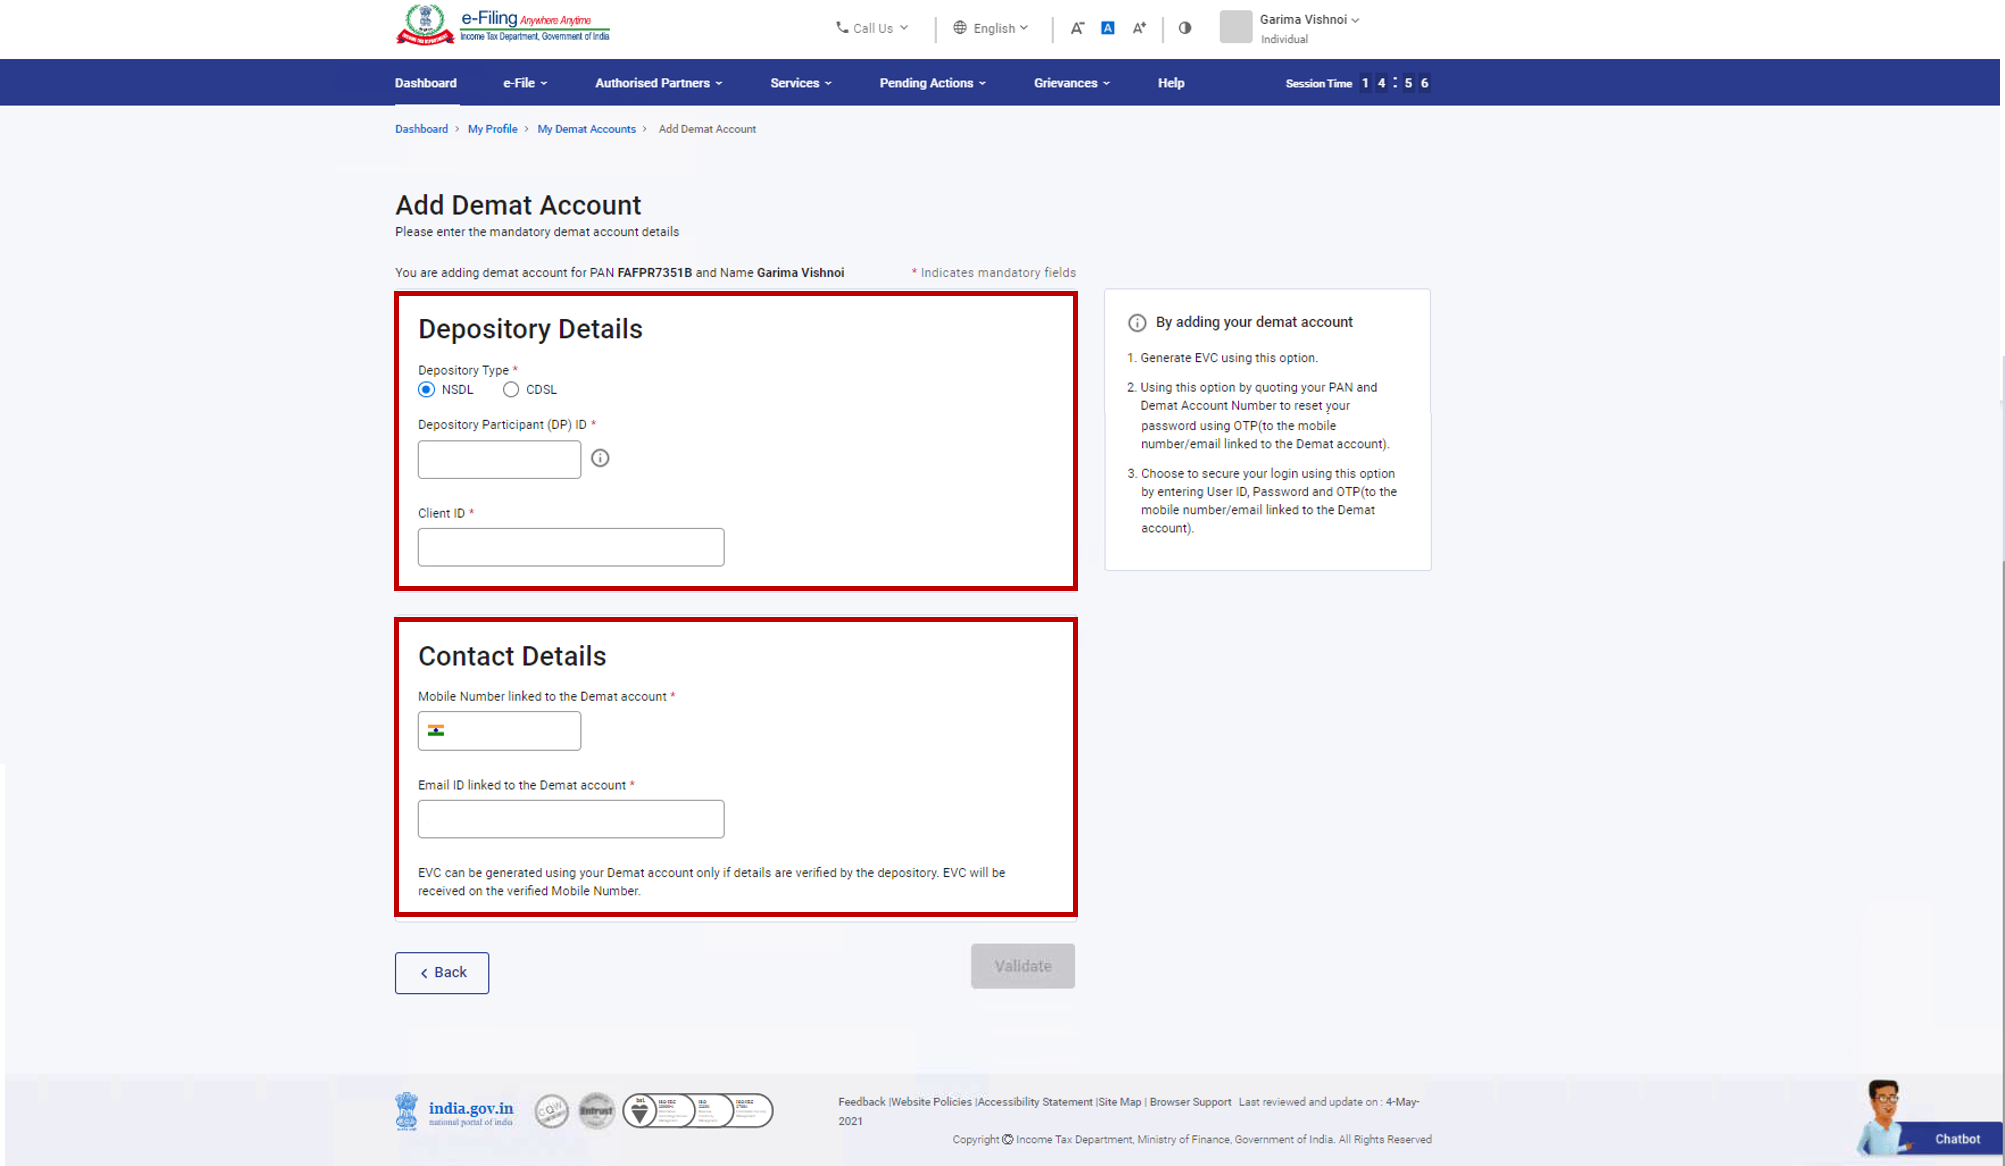
Step 2b: If you select depository type as CDSL – enter relevant details (Demat account number and contact details - Mobile Number and Email ID).
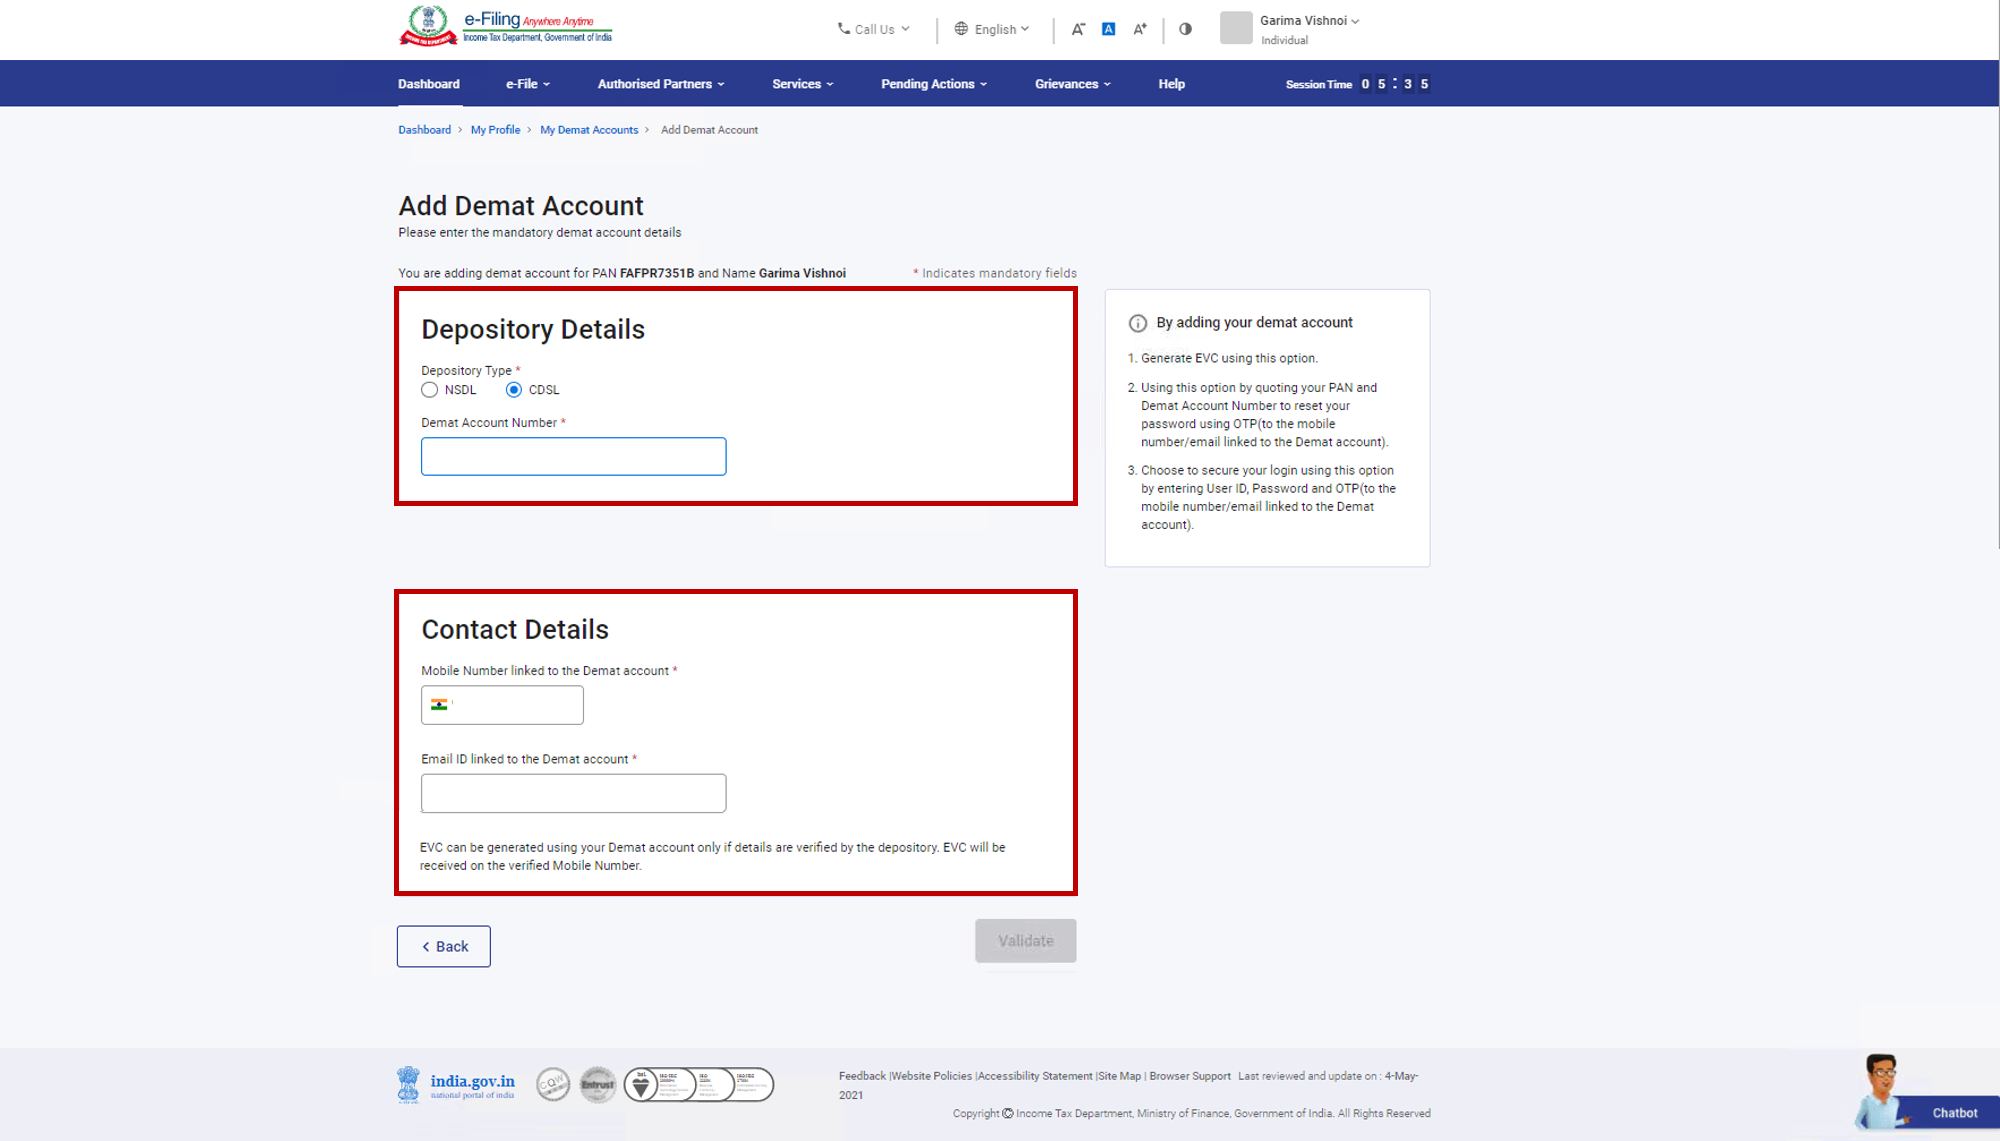
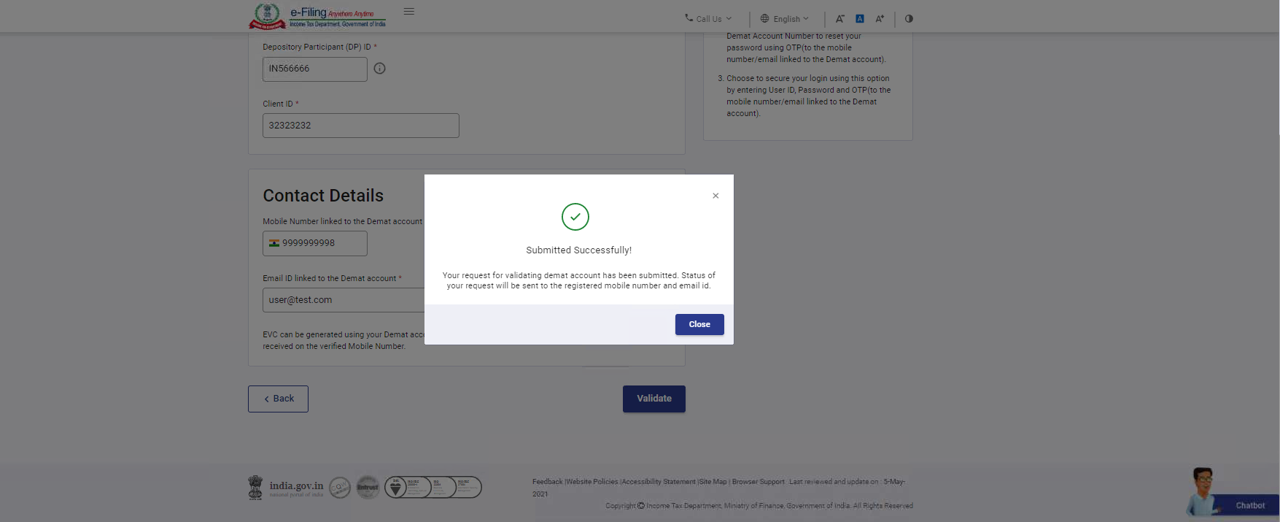
Step 3: Click Validate.
A popup message will appear once the request for adding the demat account is successfully submitted.
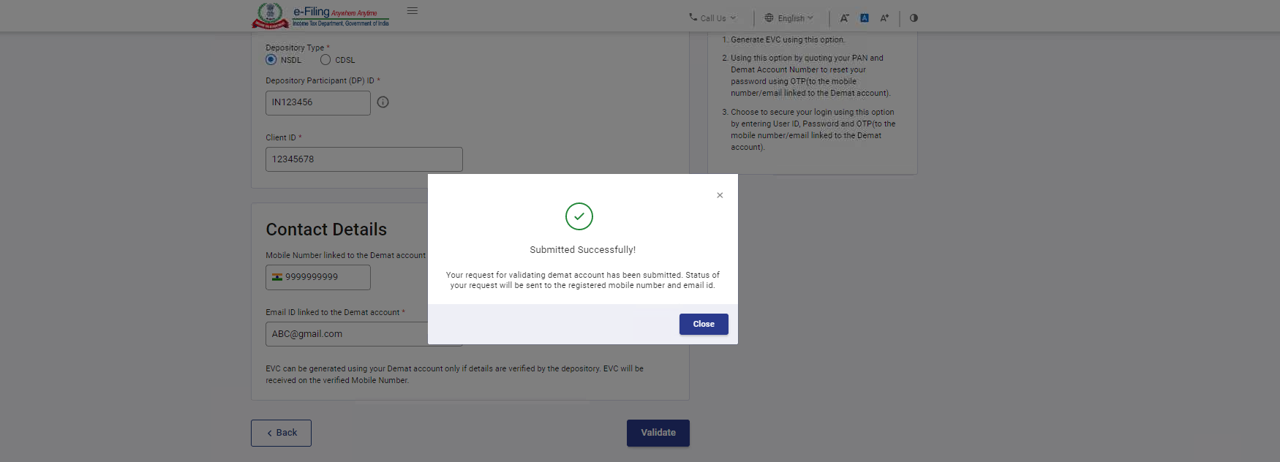
Step 4: Click Close. The details of the demat account will be will be displayed under Added Demat Accounts tab and you will be able to view the status of the newly added Demat account as Validation in Progress.
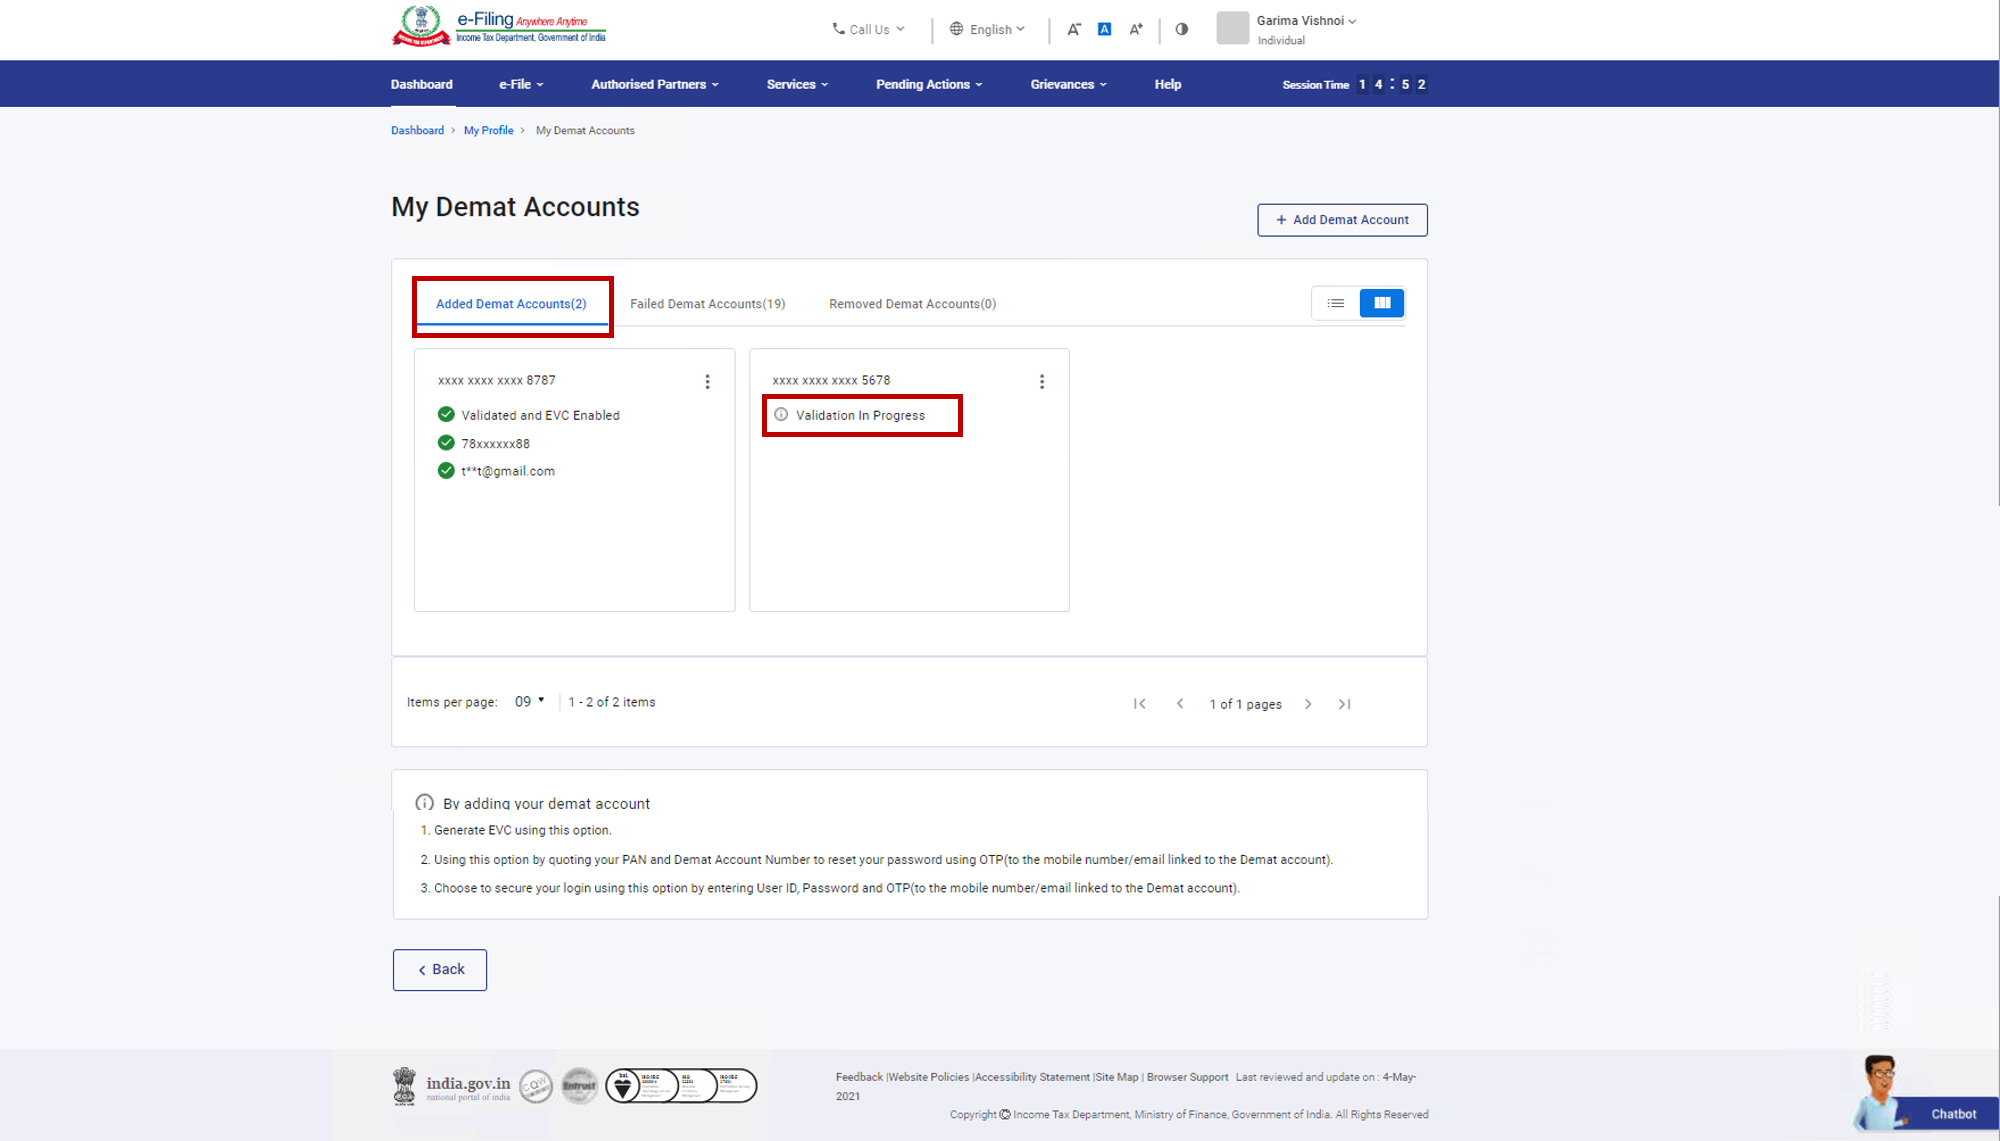
Once the validation is successful, details of the demat account will be displayed under Added Demat Account tab with status Validated and EVC enabled. You will receive the status of the validation on the mobile number and email ID registered with the e-Filing portal.
Note:
- EVC can be enabled for one demat account at a time. If there are any Demat accounts already added, the status for the newly added demat account will be updated with status as Validated.
- In case you are not able to validate your demat account, a message will be displayed with the Reason of Failure. Click Revalidate button and you will be taken to the Add demat accounts page where you will be required to edit the details and validate the demat account again.
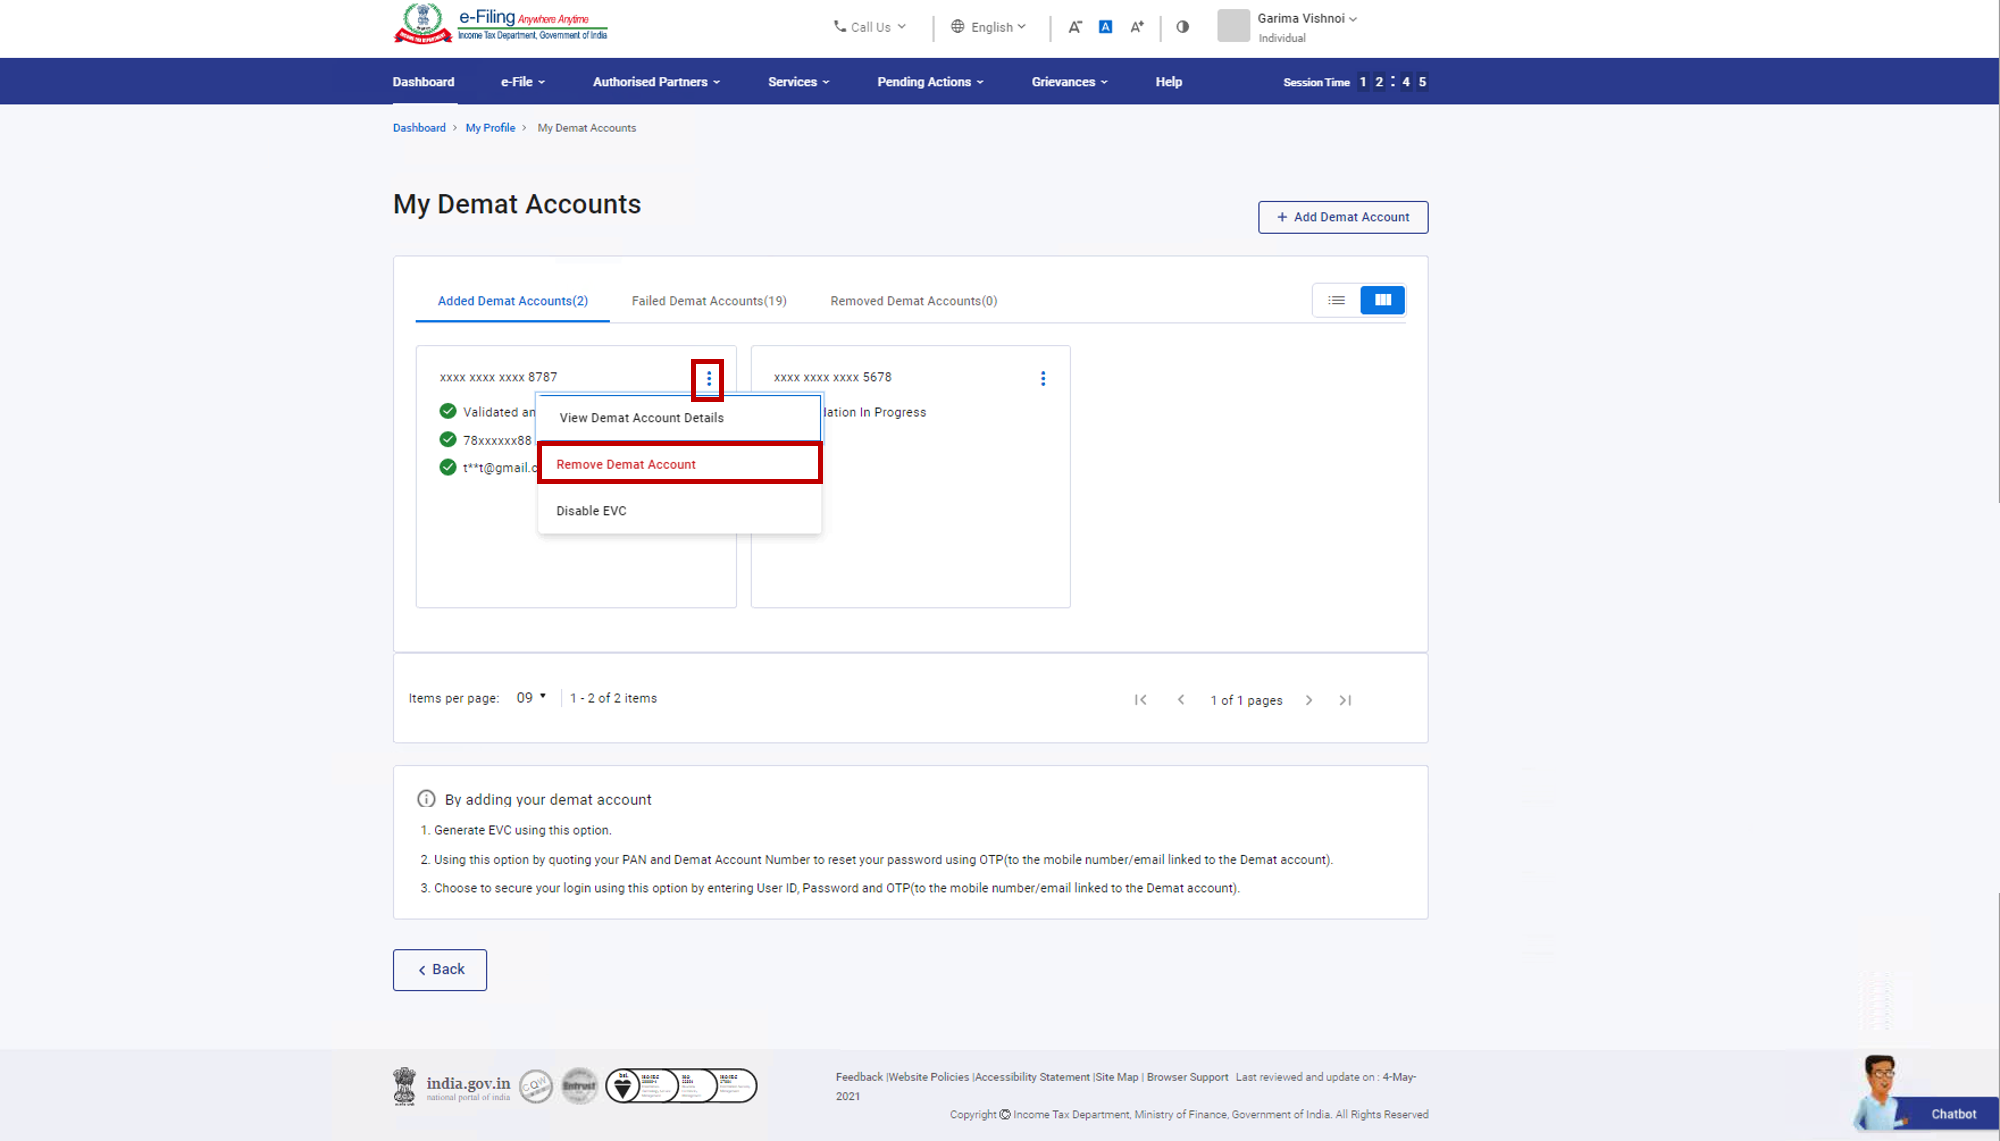
4.2 Remove Demat Accounts
Step 1: Under the Added Demat Accounts tab, click Remove Demat Account for the account you wish to remove.
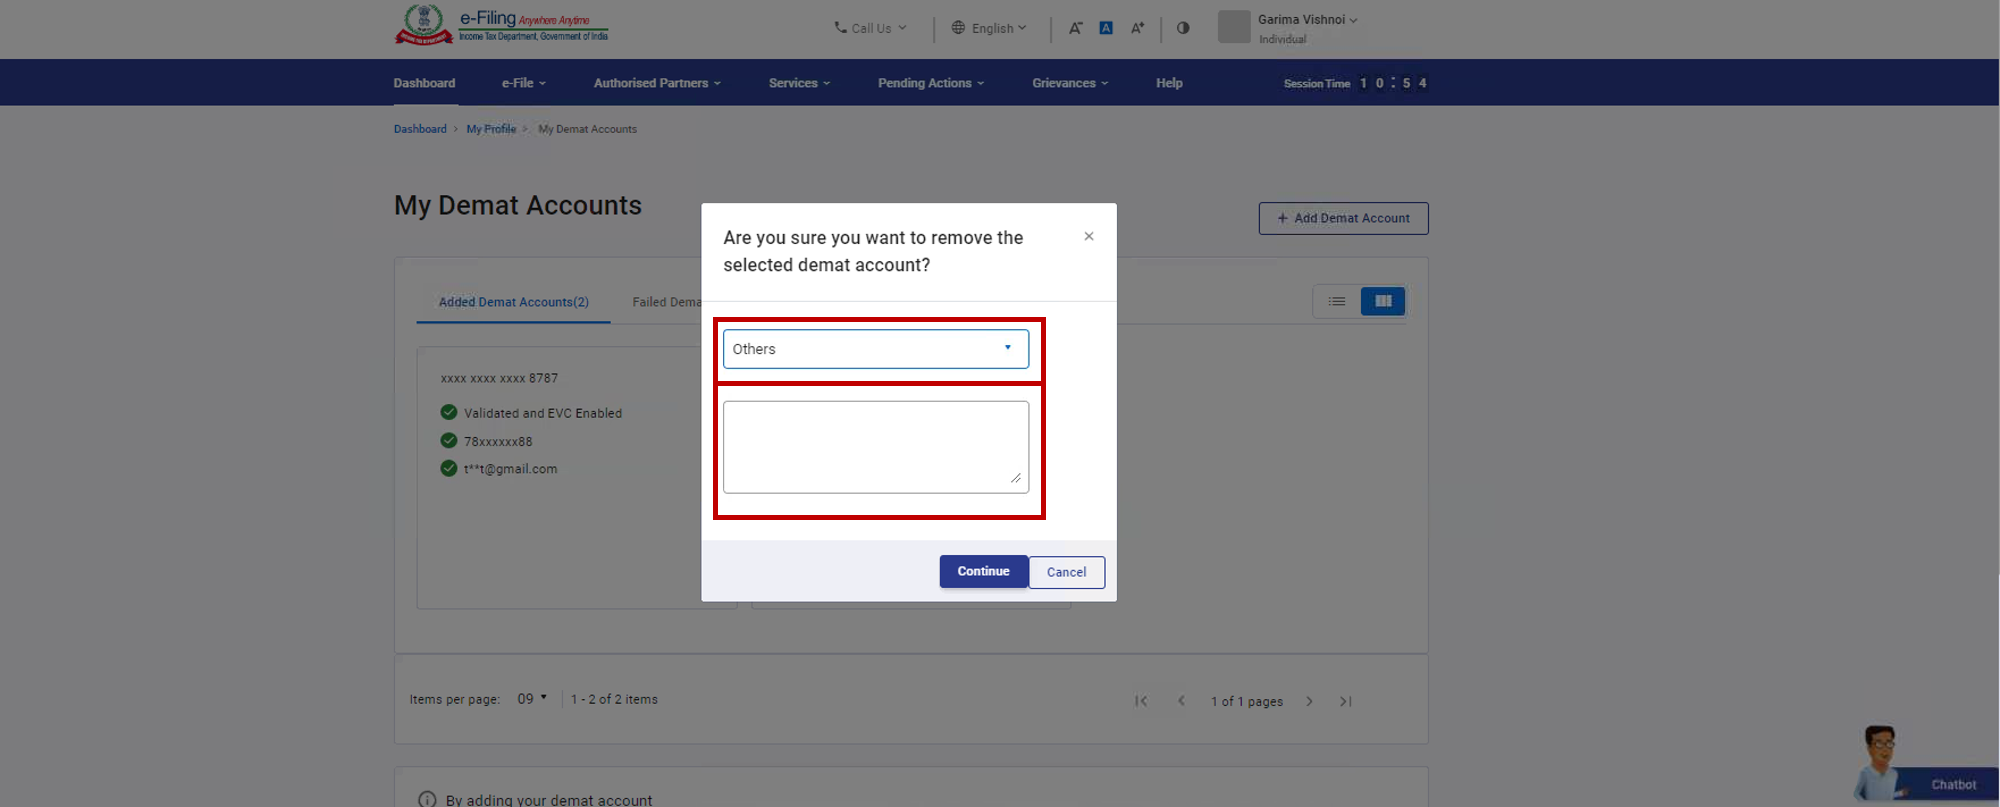
Step 2: Select a reason for removing the account and click Continue.
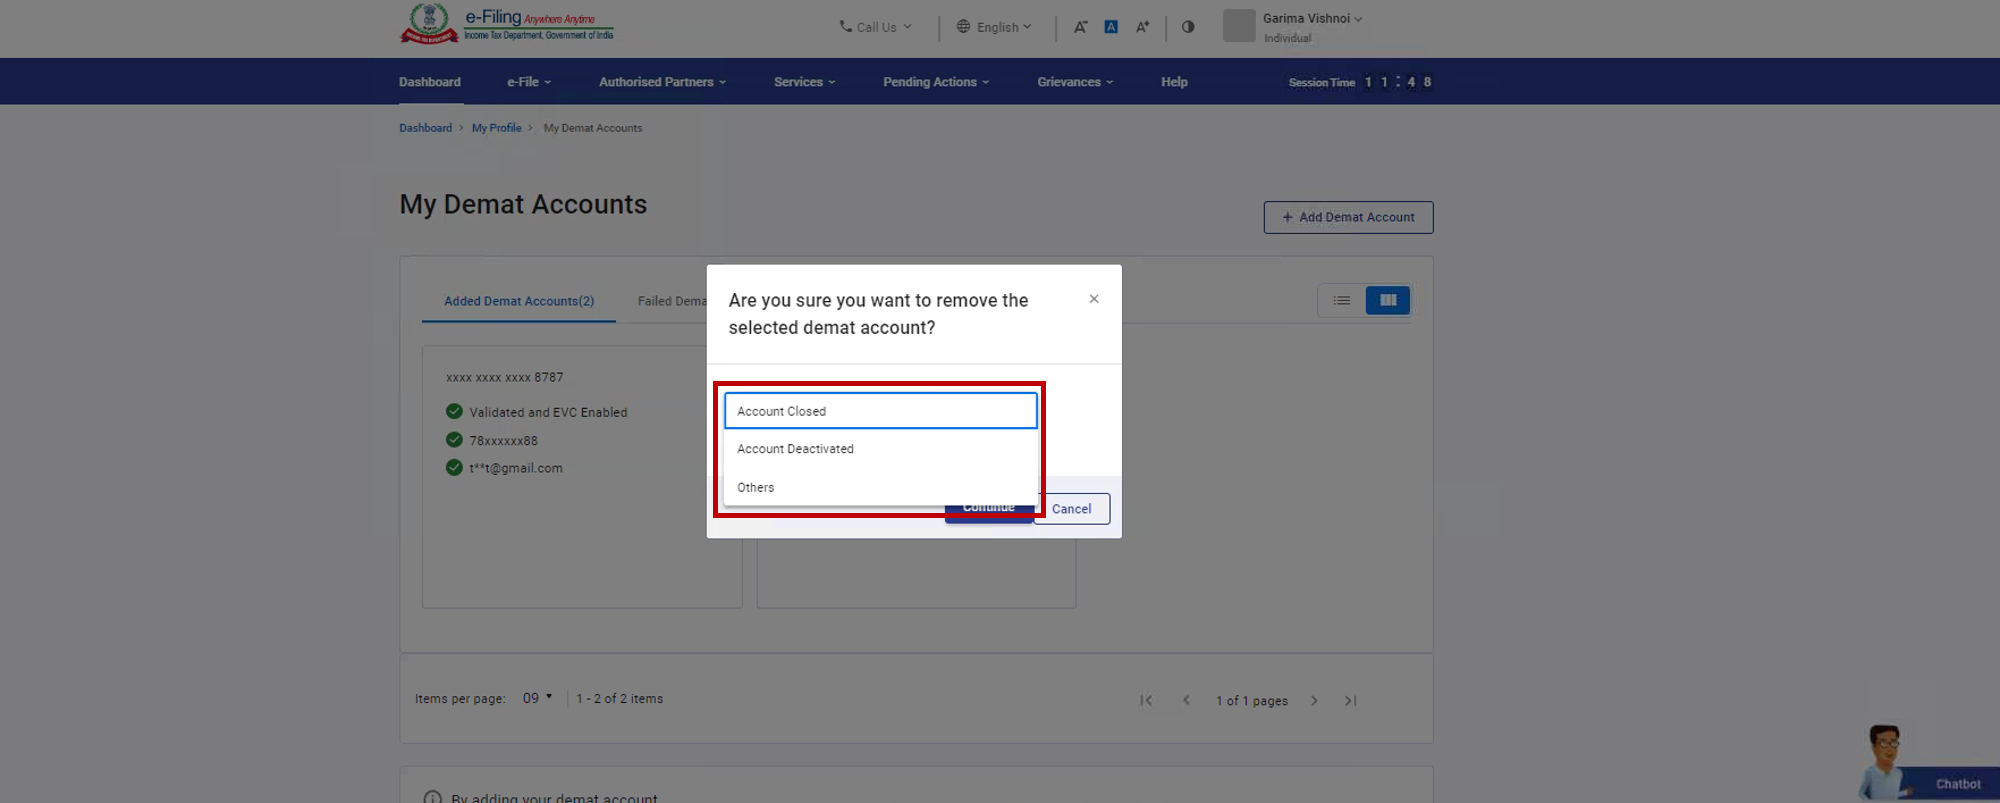
Note: If you select the reason as Other, enter the reason in the textbox and click Continue.
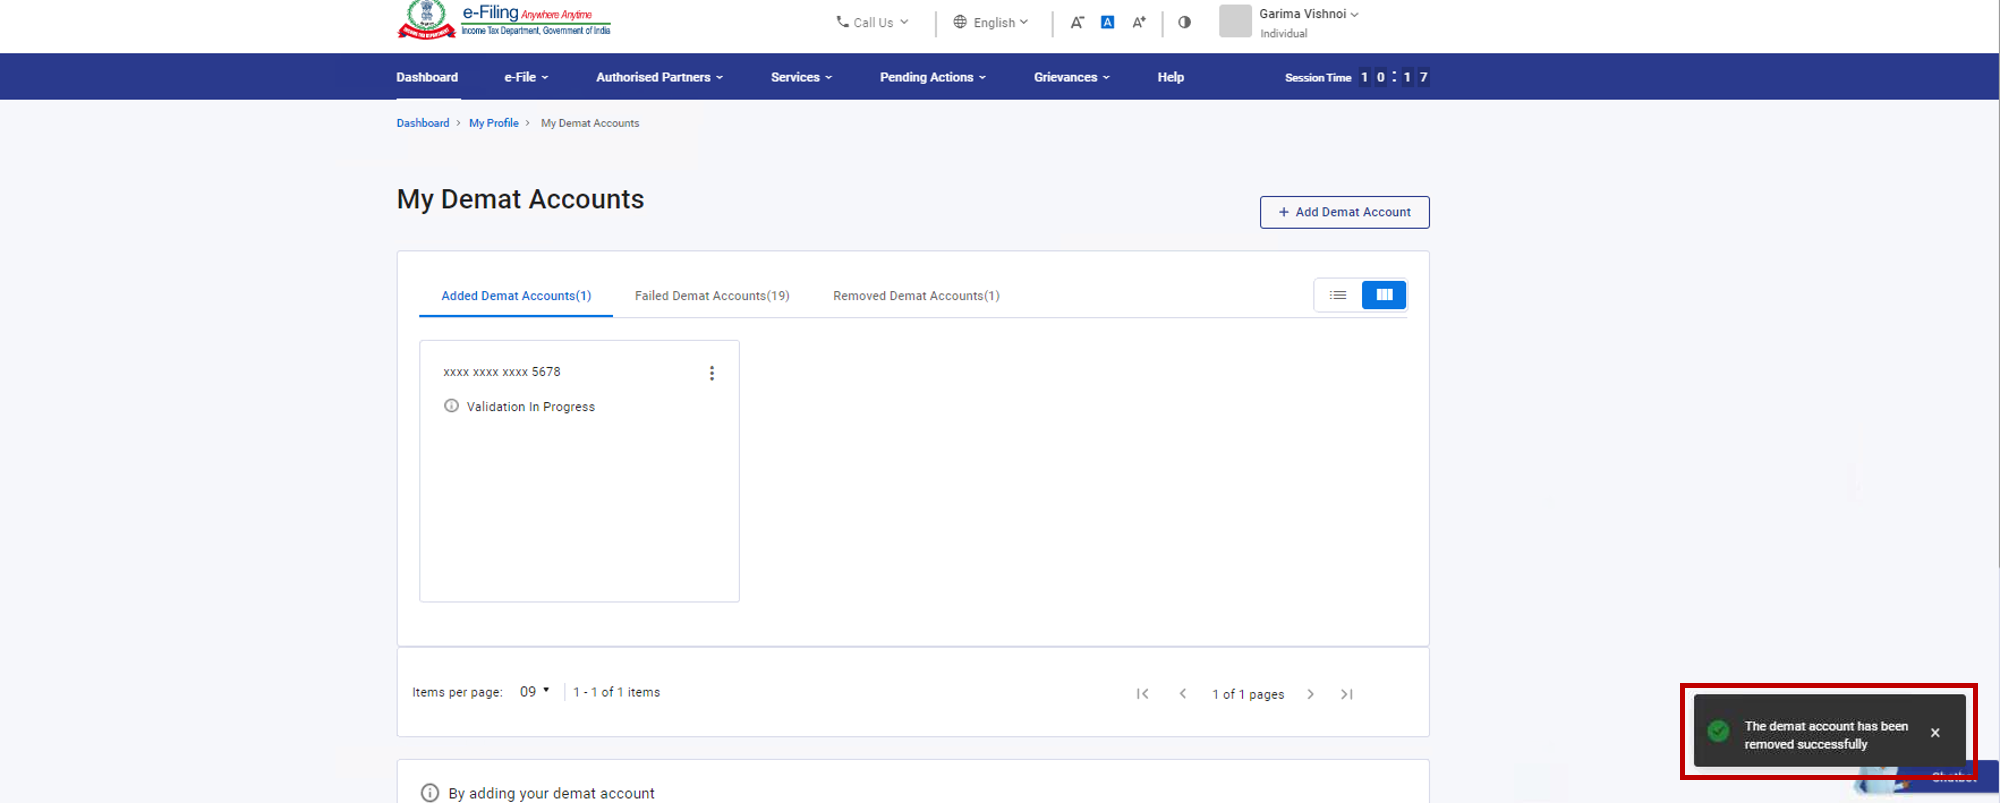
A popup message will appear on successful removal of the demat account and the demat account will be moved to Removed Demat Accounts tab.
4.3. Enable and Disable EVC
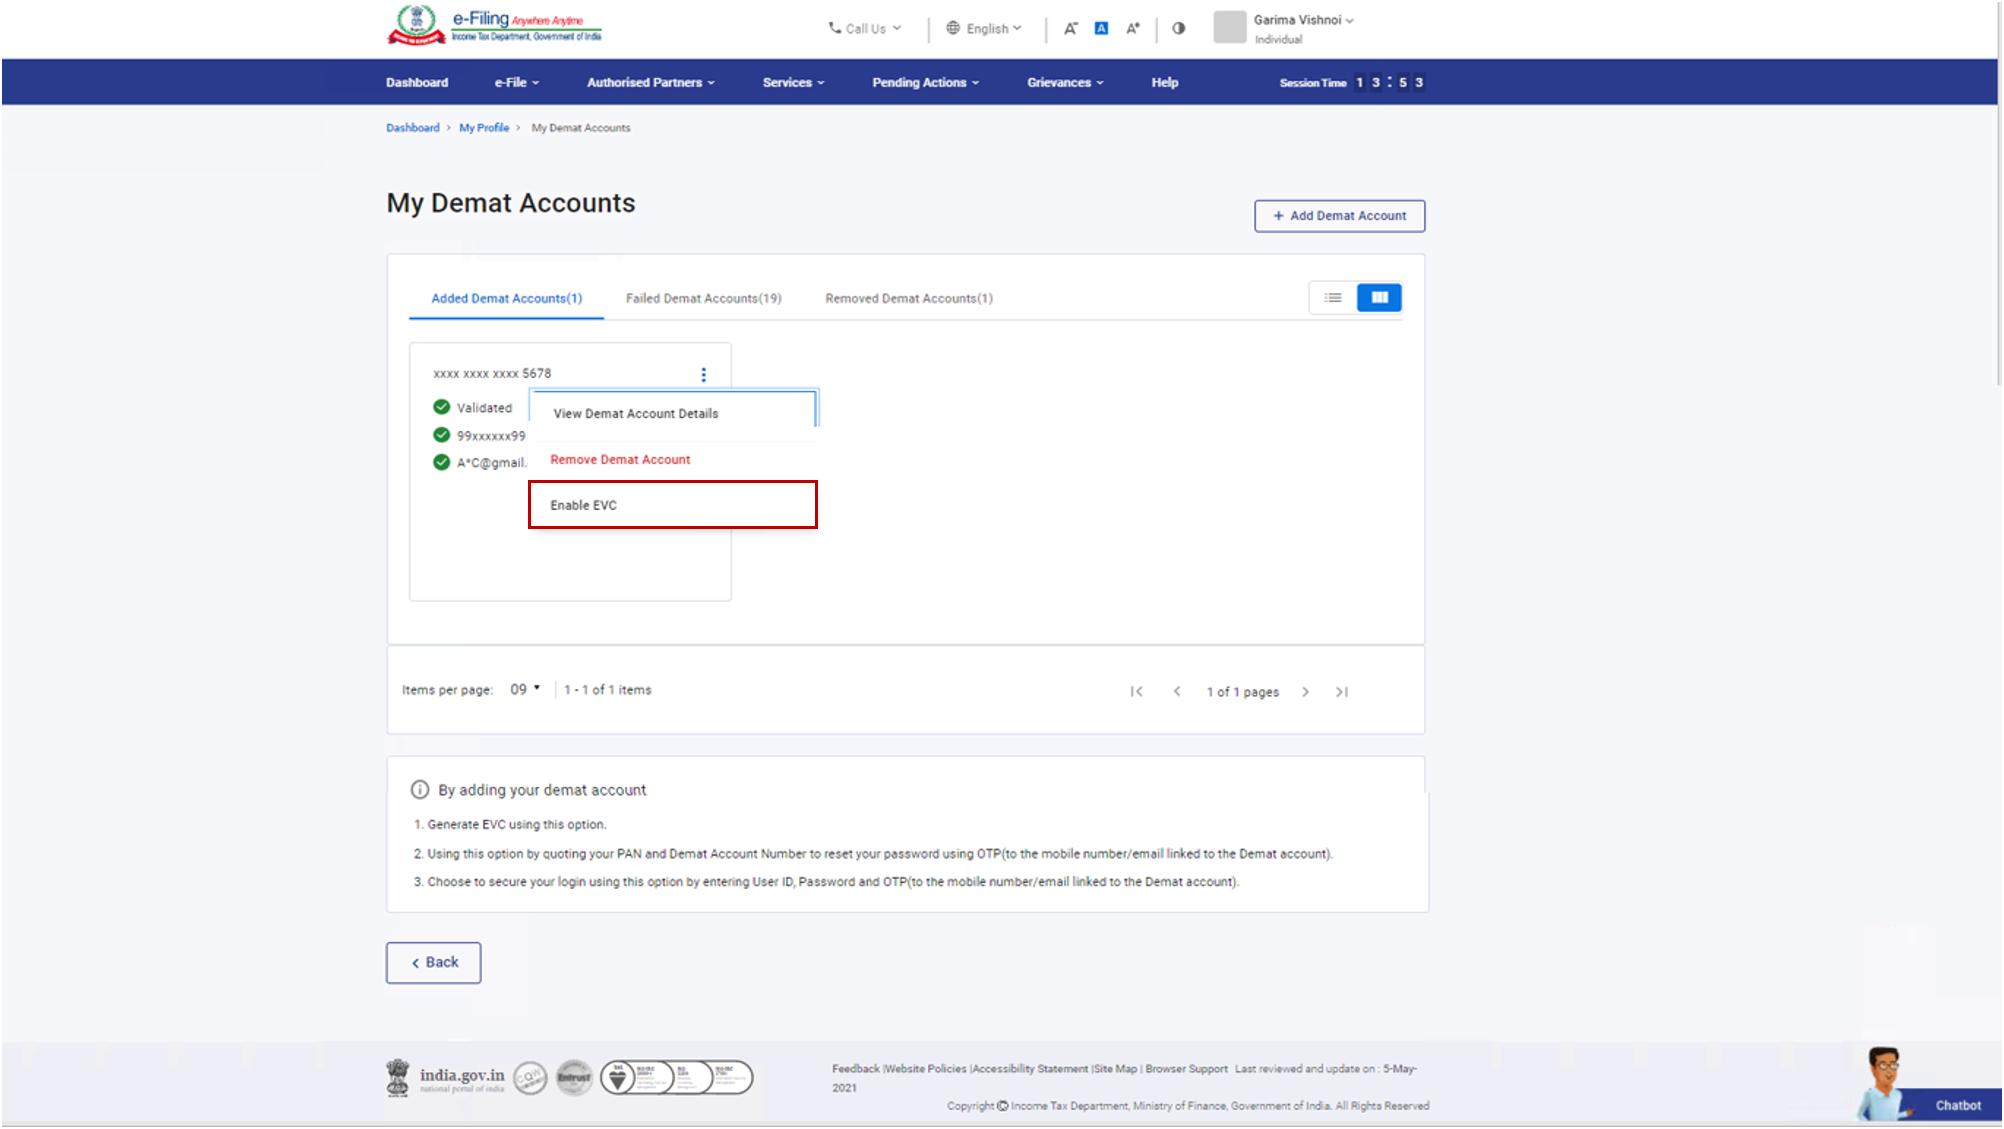
Step 1: Click Enable EVC for the account you wish to be EVC enabled.
Step 2: A confirmation popup will appear. Click Continue. EVC will be enabled for the selected demat account if the following two conditions are met:
- Mobile number is verified by depository for selected account
- EVC is NOT enabled for any other demat account
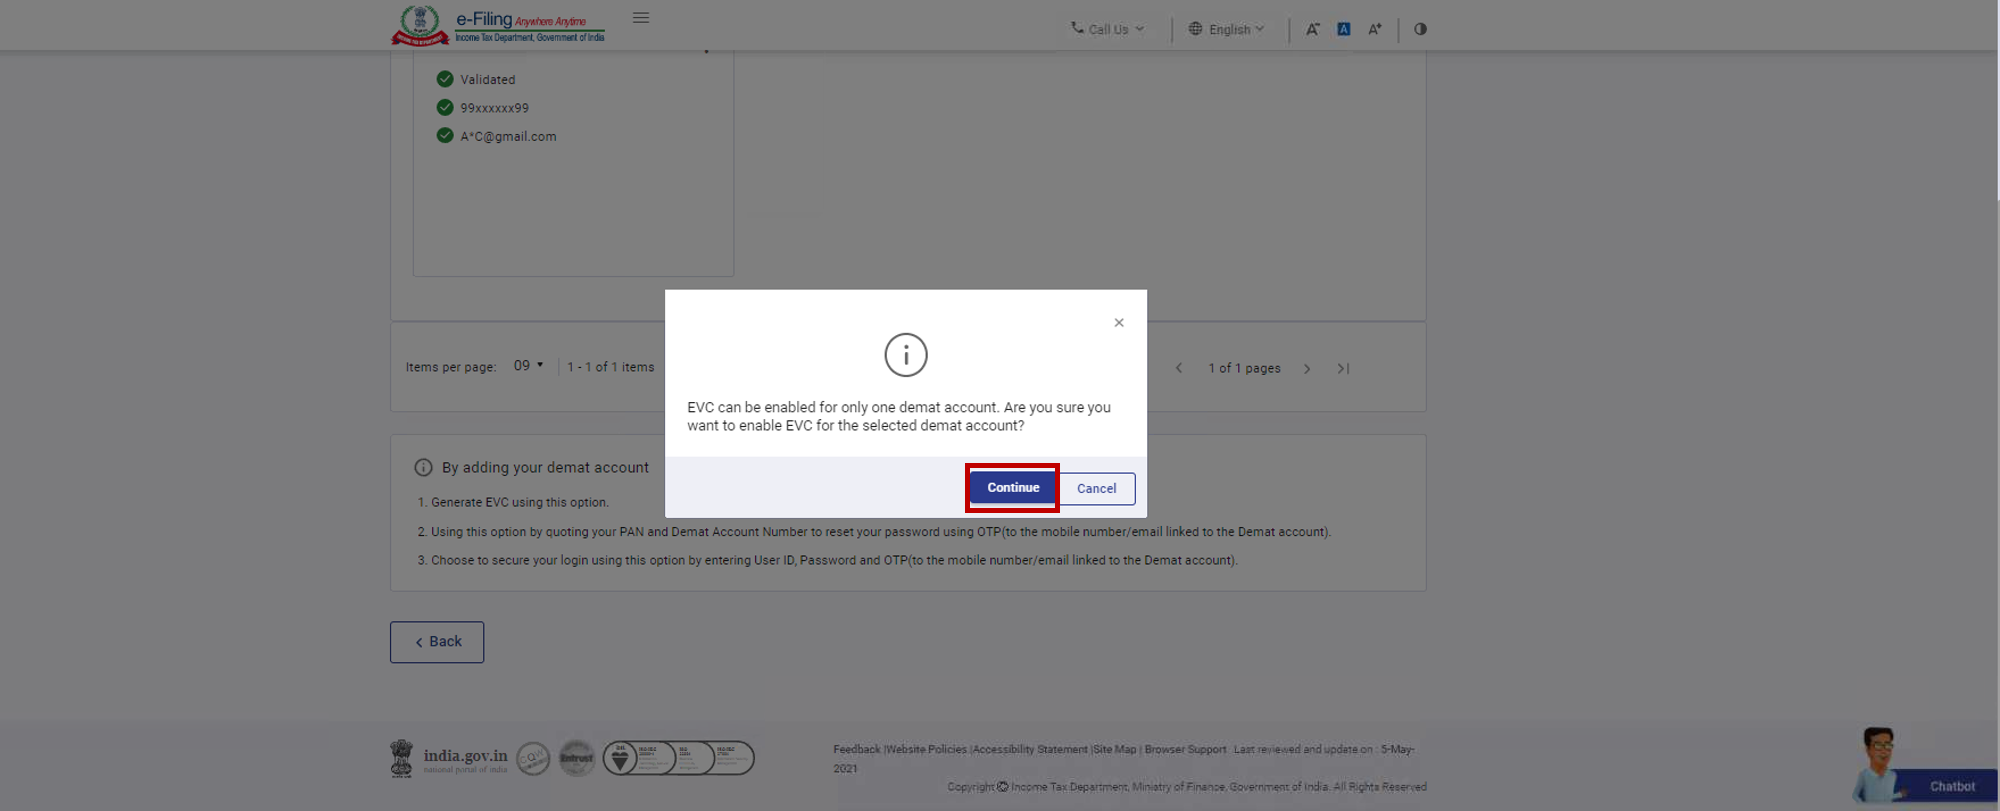
Note: In case your mobile number is not verified, you will be required to link the mobile number with the demat account.
Step 3: If EVC is already enabled for a demat account (and you try to enable EVC another demat account), a popup message is displayed notifying the same. Click Continue to enable the EVC.

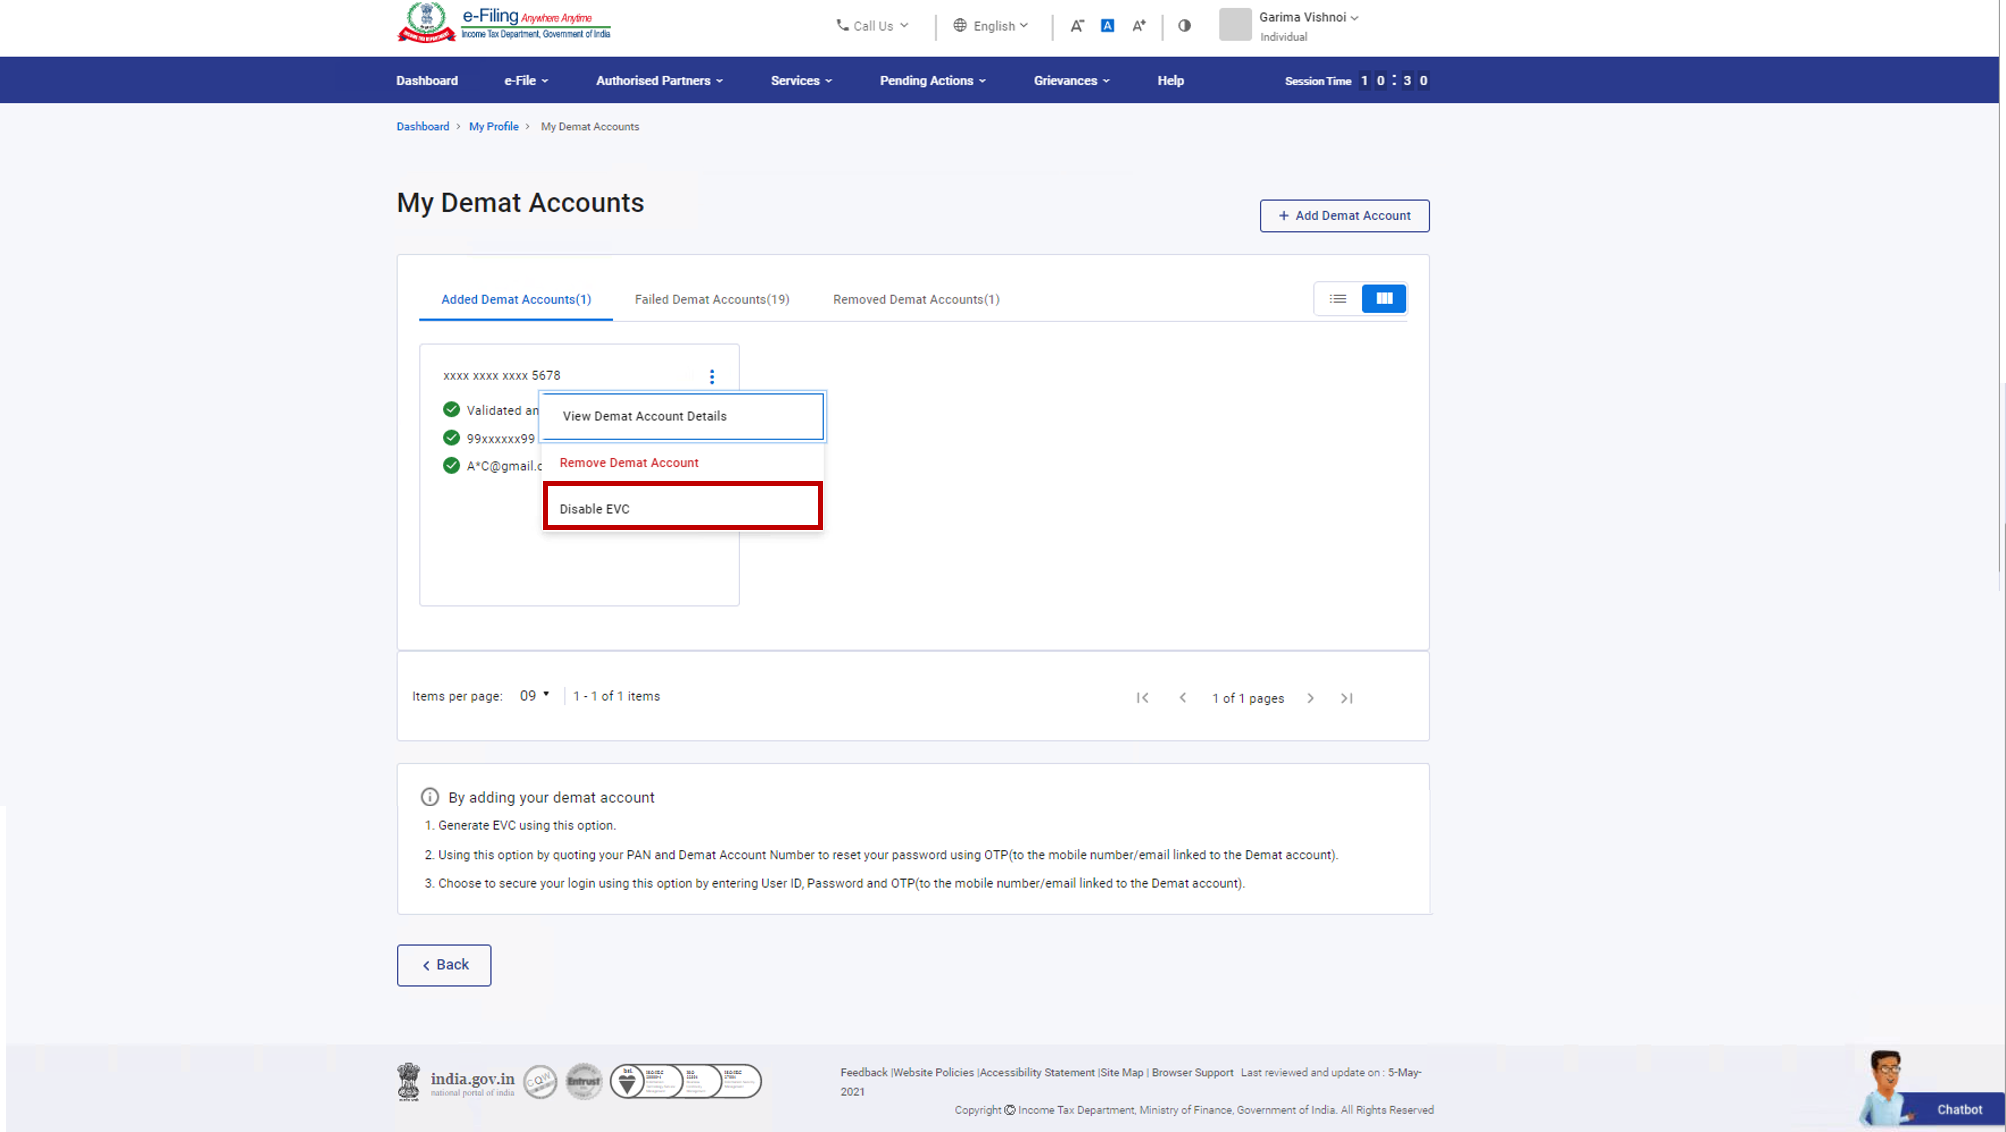
Step 4: Click Disable EVC for the account you wish to be EVC-disabled.
Step 5: A confirmation message is displayed. Click Continue.
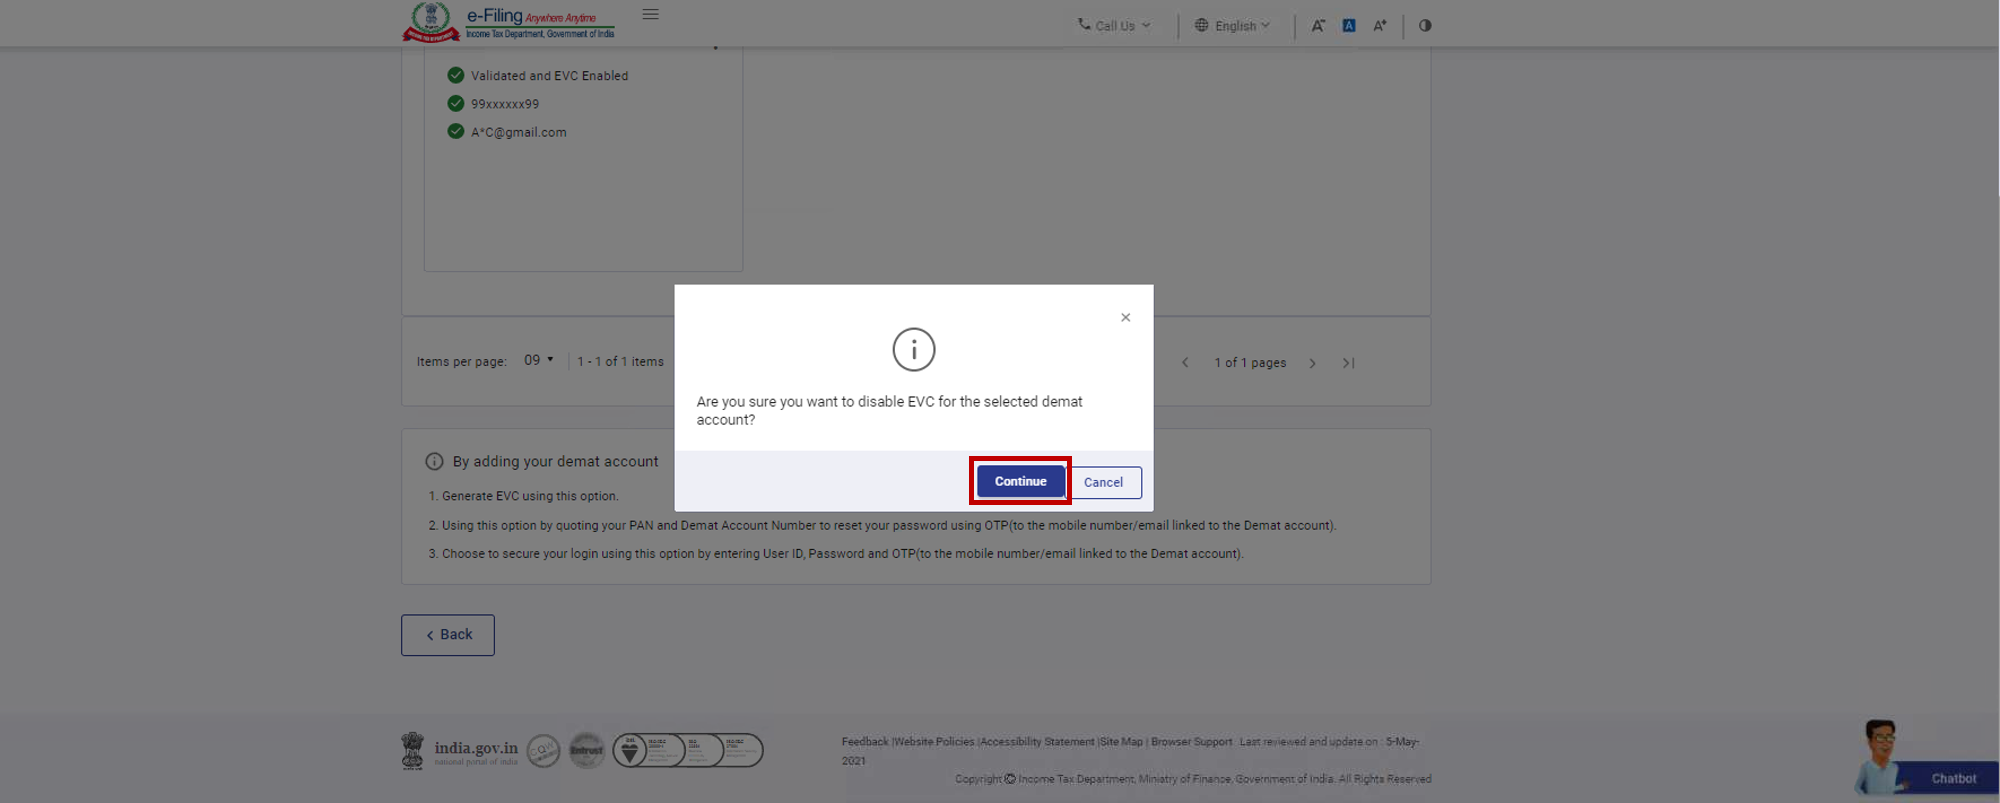
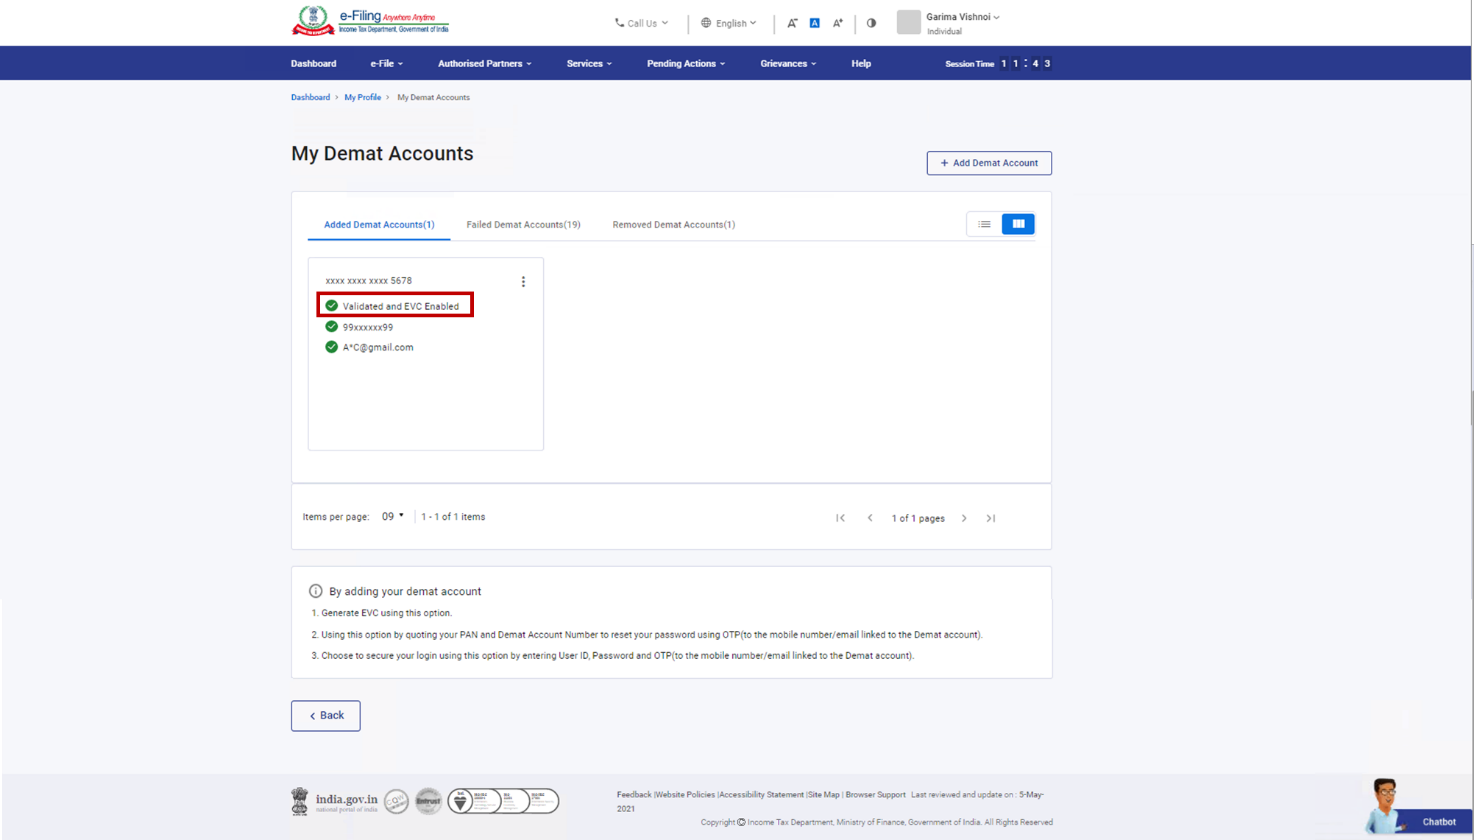
EVC will be disabled from the selected account and status will be updated to Validated.
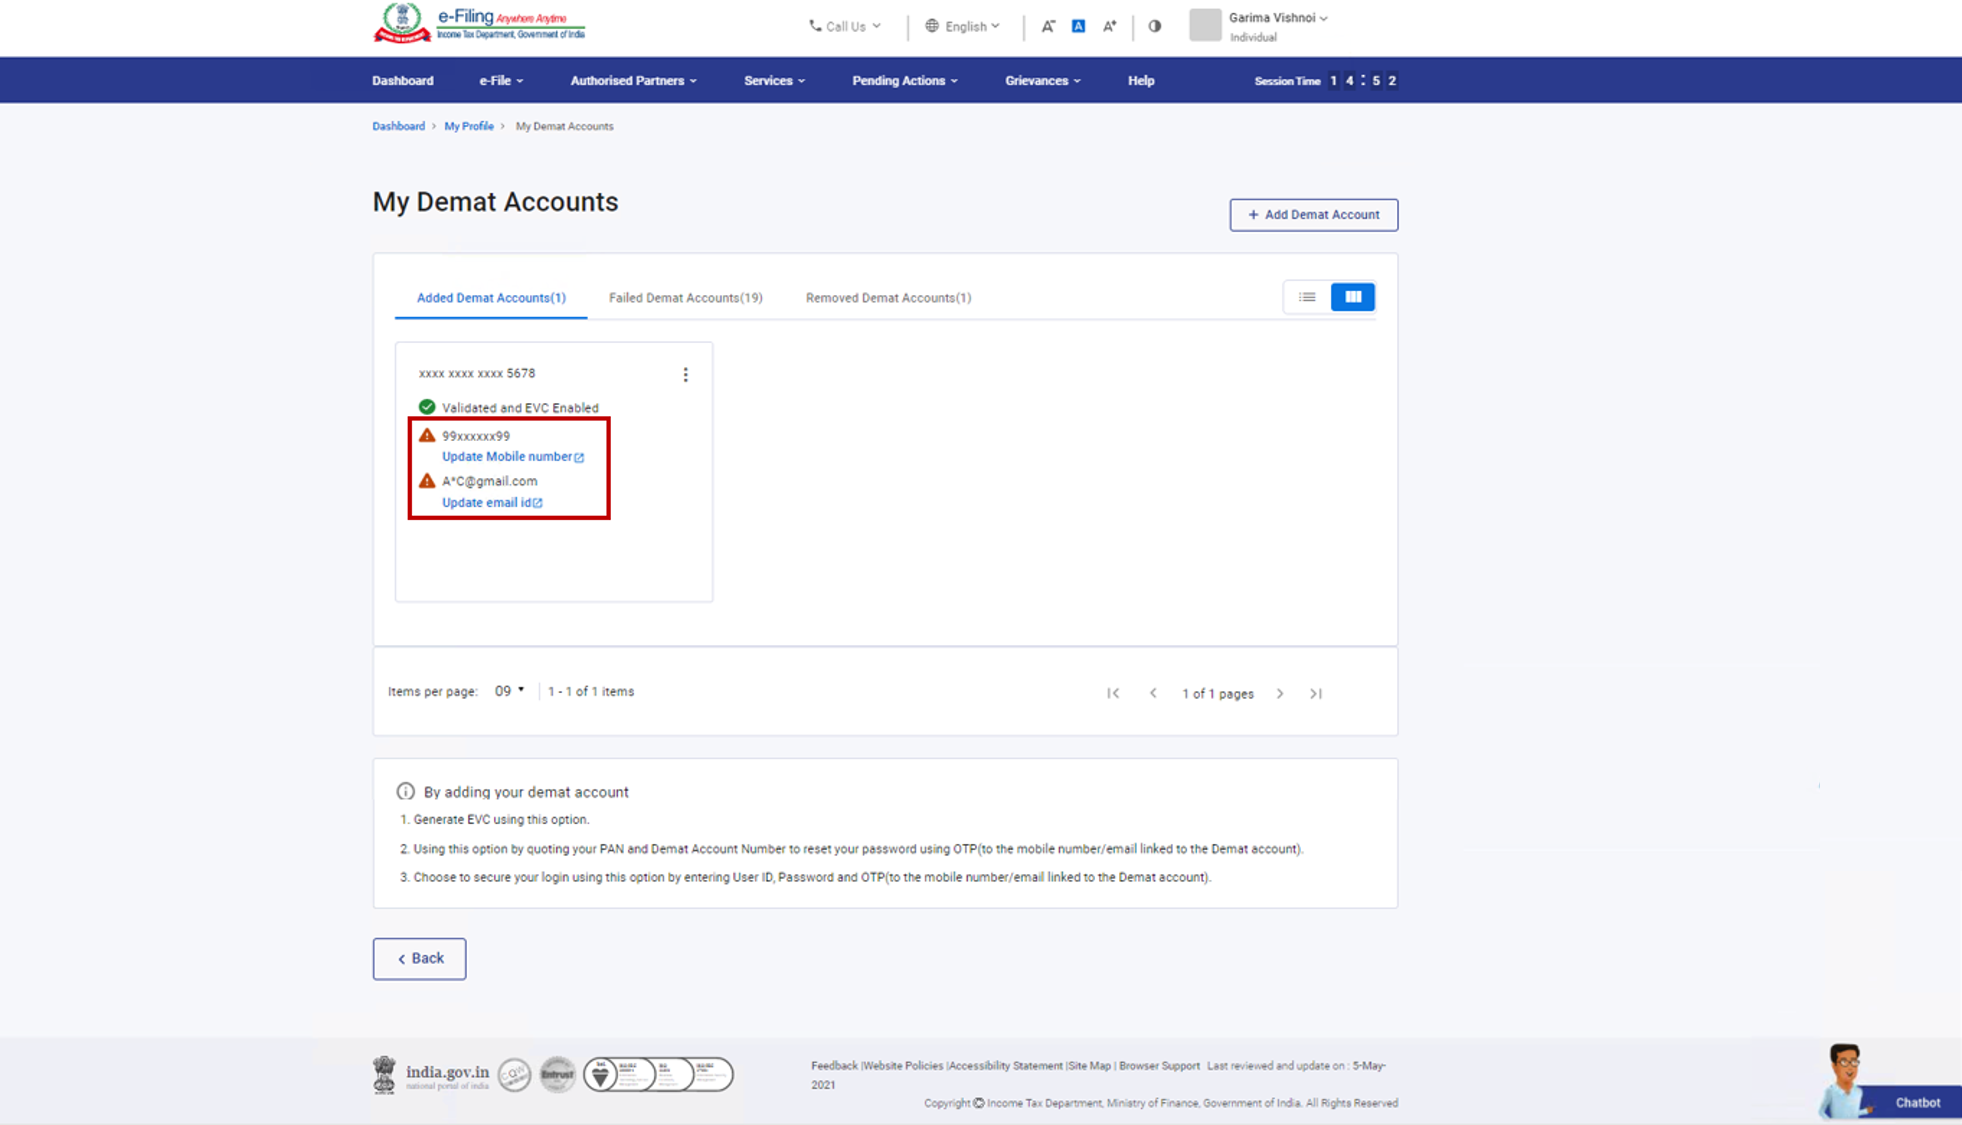
4.4. Update Primary Contact Details to match Demat Account Contact Details
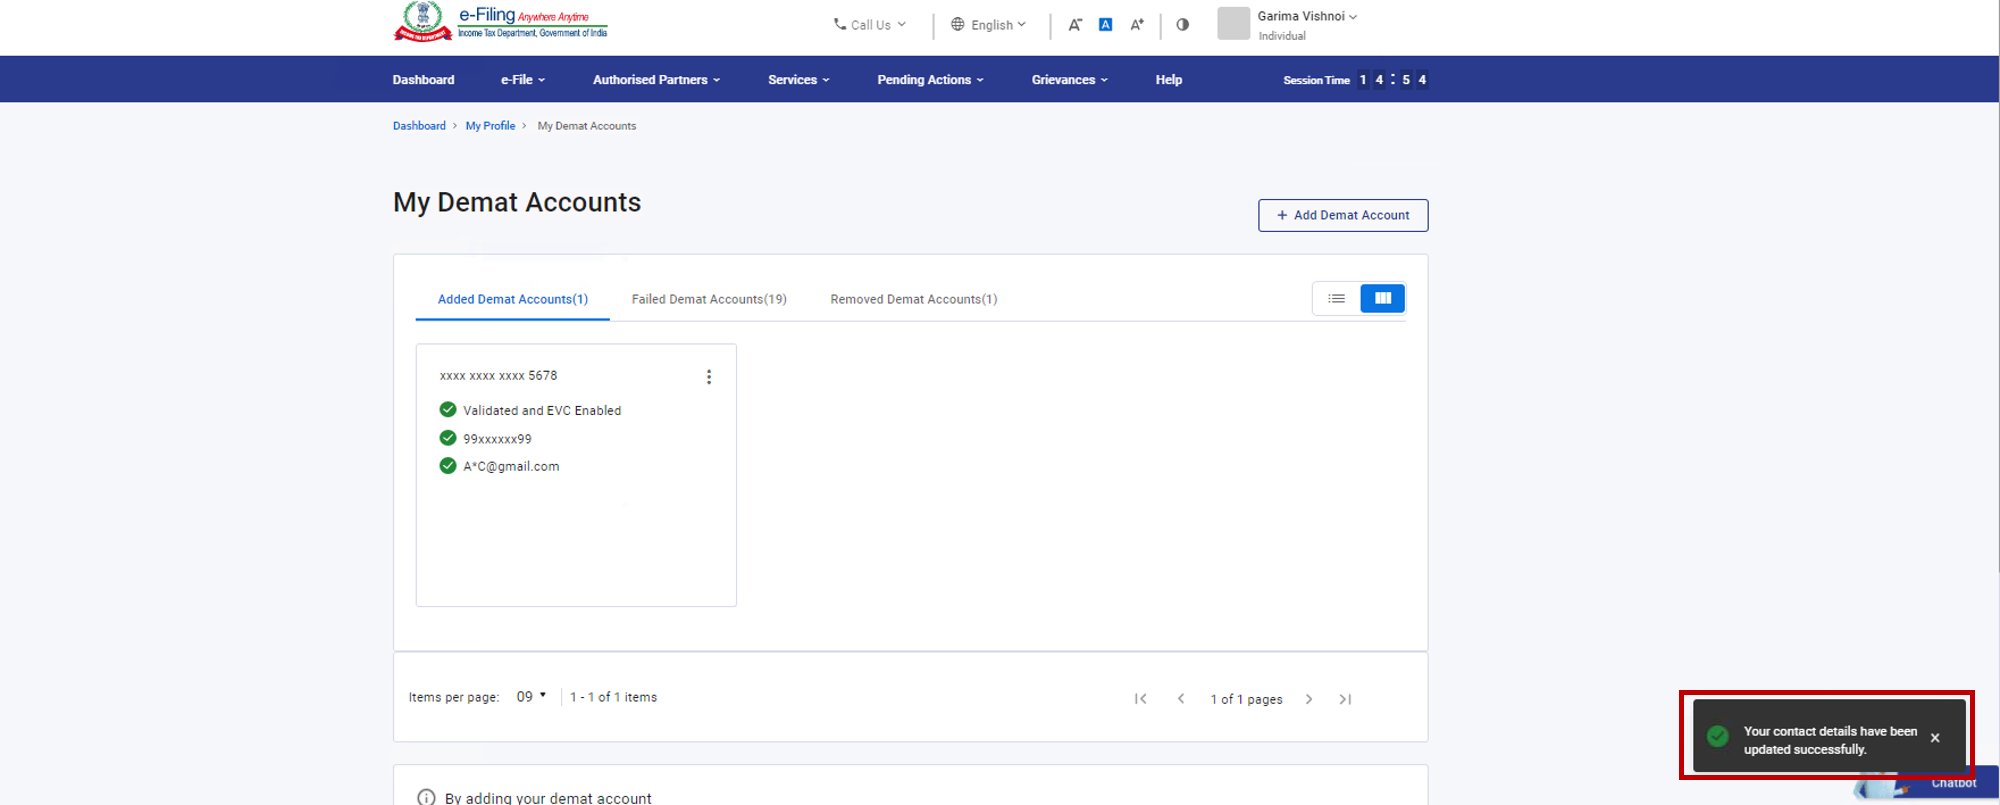
Step 1: If your mobile number or email ID verified with your demat account and primary contact details are different, a ! (Warning symbol) with a message will be displayed next to verified mobile number / email ID. Click on the hyperlink in the message displayed to update mobile number / email ID.
Step 2: On the Synchronize Added Demat Contact Details page, enter the 6-digit OTP received on mobile number or the email ID registered with the demat account and click Submit.

Note:
- OTP will be valid for 15 minutes only.
- You have 3 attempts to enter the correct OTP.
- The OTP expiry countdown timer on screen tells you when the OTP will expire.
- On clicking Resend OTP, a new OTP will be generated and sent.
- If you are updating your mobile number, you will receive the OTP on the mobile number registered with the demat account.
- If you are updating your email ID, you will receive the OTP on the email ID registered with the demat account.
Post successful validation, a popup message will appear once the contact details are successfully updated as per demat details on the e-Filing portal.
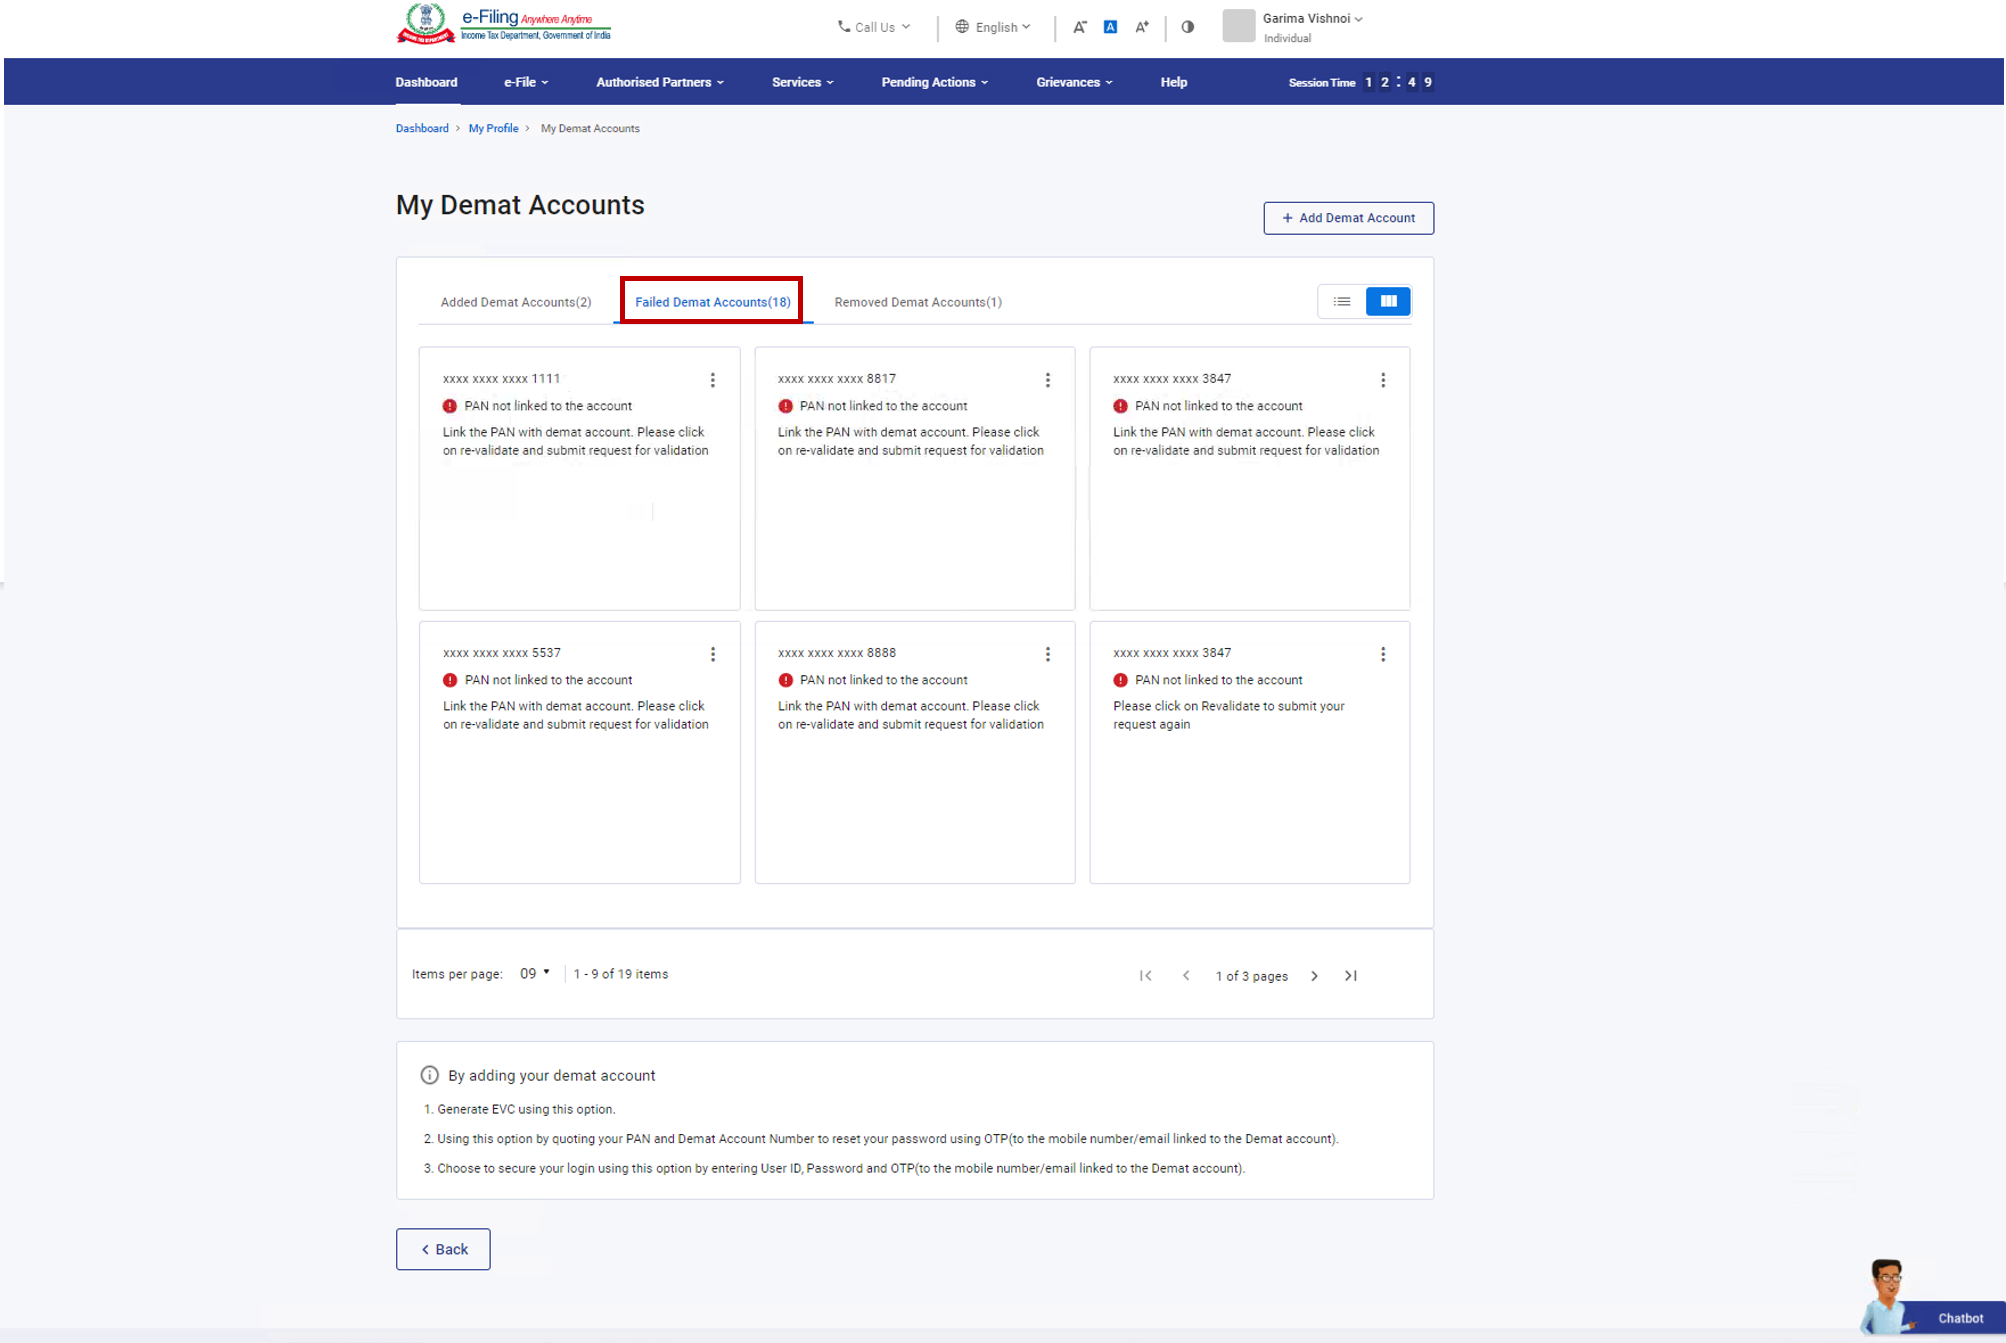
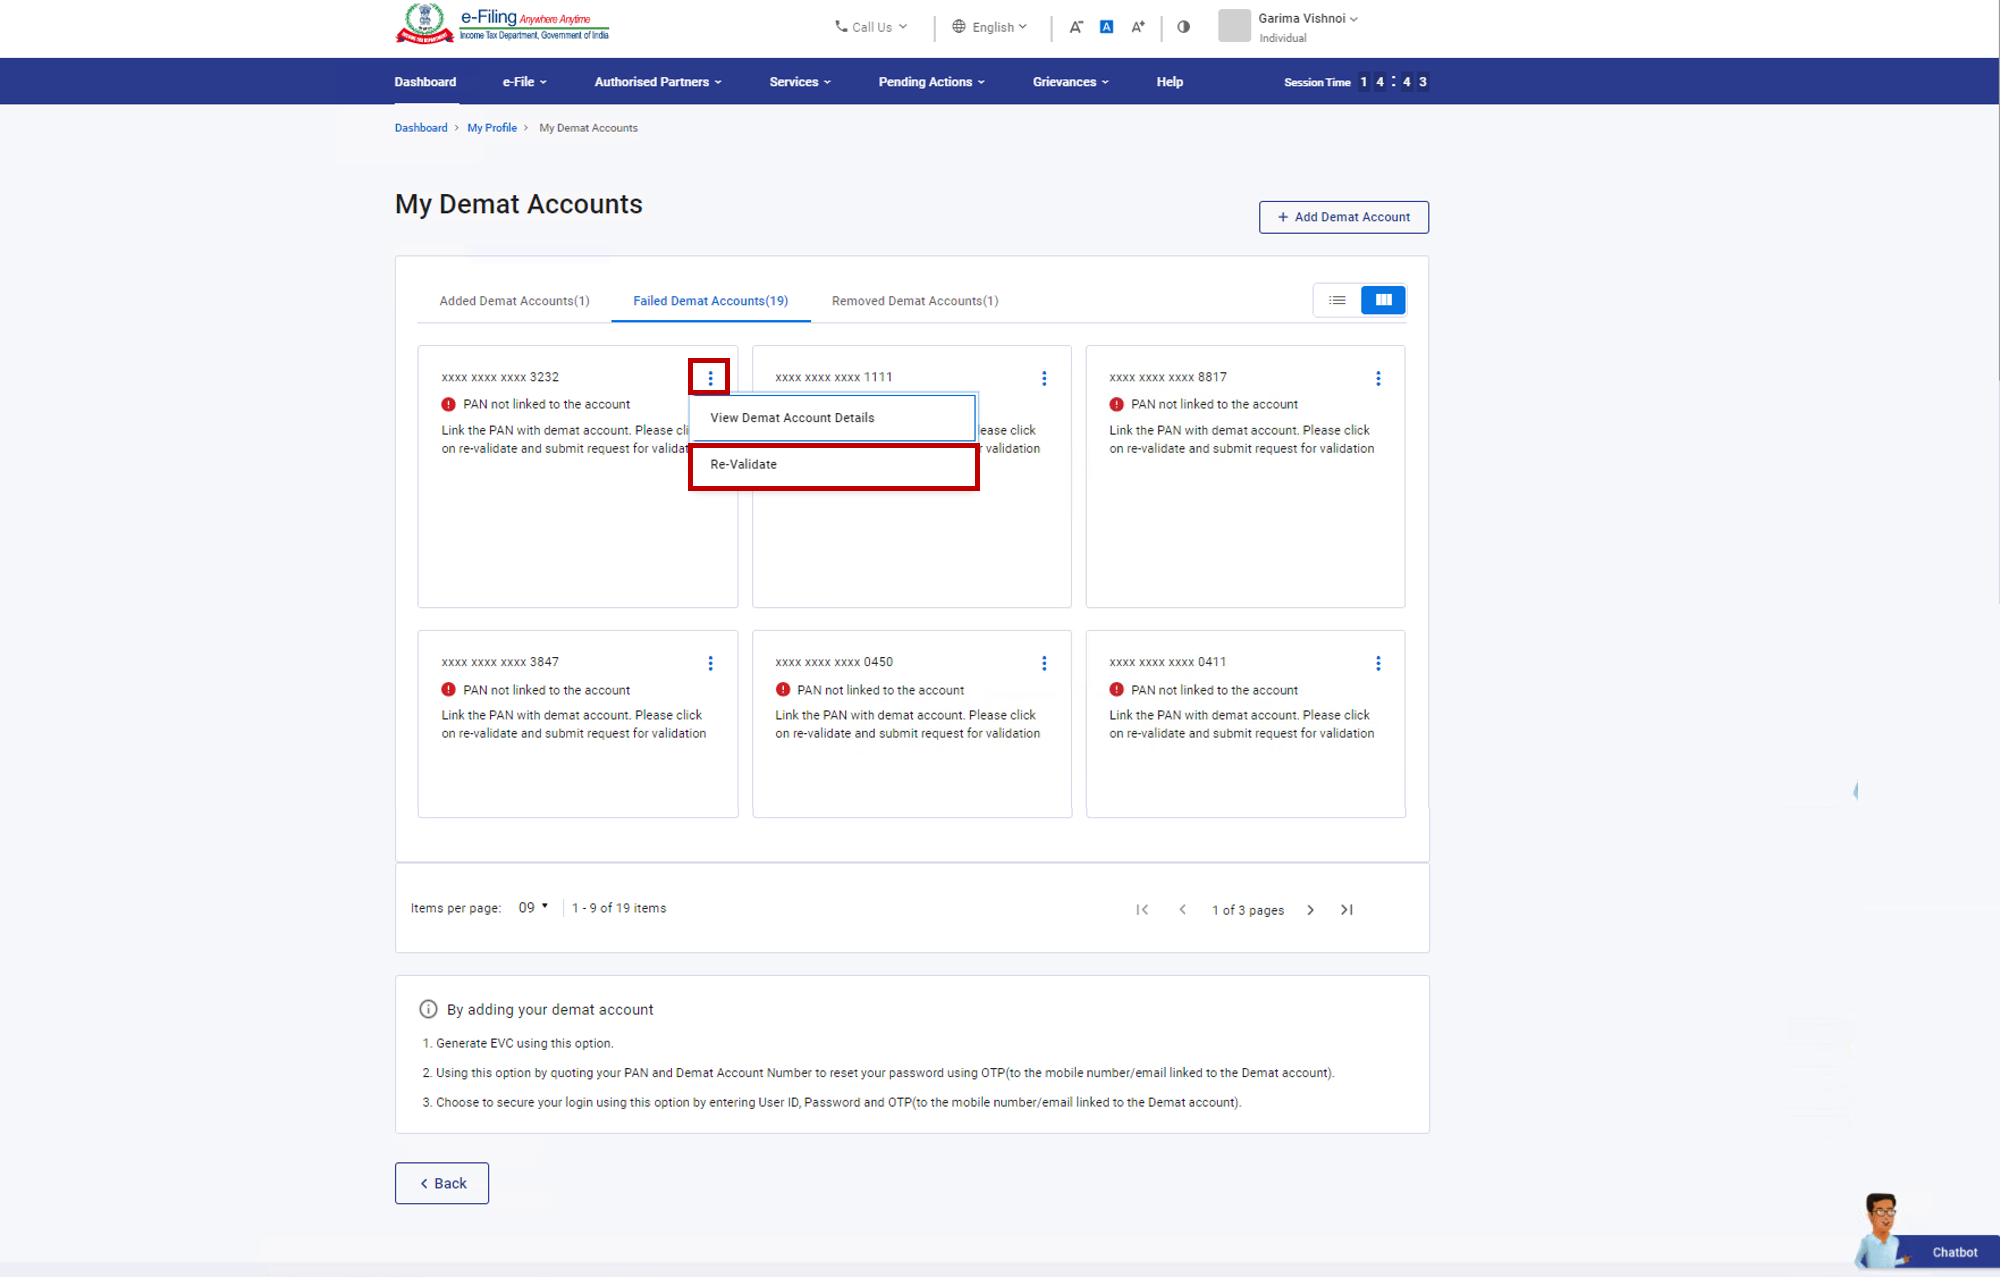
4.5. Re-validate Failed Demat Account
Step 1: Under Failed Demat Accounts tab, select the demat account you wish to validate.
Step 2: Click Revalidate.
Step 3: Edit the prefilled details and click Validate.

A pop message will be displayed on successful submission of the request and the re-validated demat account will be moved to Added Demat Accounts tab with the status as Validation in Progress.