

Form 54 User Manual
1. Overview
Transfer pricing can create uncertainty when international transactions are involved, as the price must be at arm’s length to avoid future disputes. To provide certainty in advance and reduce litigation, the Income Tax Department allows taxpayers to enter into an Advance Pricing Agreement (APA) for such transactions.
Form 54 is the Application for Renewal of an Advance Pricing Agreement (APA). It can be filed for a unilateral, bilateral, or multilateral agreement, along with the prescribed fee. The same form also allows the applicant to request rollback, so that the agreed approach can be applied to earlier years, wherever permitted by the rules.
Form 54 is available on the income tax e filing portal and can be submitted online only.
2. Prerequisites for availing this service
• You should be a registered user having valid User ID and Password on the e-Filing portal
• Status of PAN of the taxpayer should be "Active"
• PAN and Aadhaar are linked (recommended)
• You should have a valid DSC to verify the form if you choose to verify it through DSC mode, and it must be registered on the e-filing portal and not expired
3. About the Form
3.1 Purpose
Request for renewal of an Advance Pricing Agreement (APA) may be made as a new application in Form No. 54 for agreement.
3.2 Who can use it?
All registered users on the e Filing portal can submit Form 54 for providing the details required for renewal of an Advance Pricing Agreement (APA), including the request for rollback wherever applicable, as permitted under the relevant provisions of the Income tax Act and Rules.
3.3 Form at a Glance
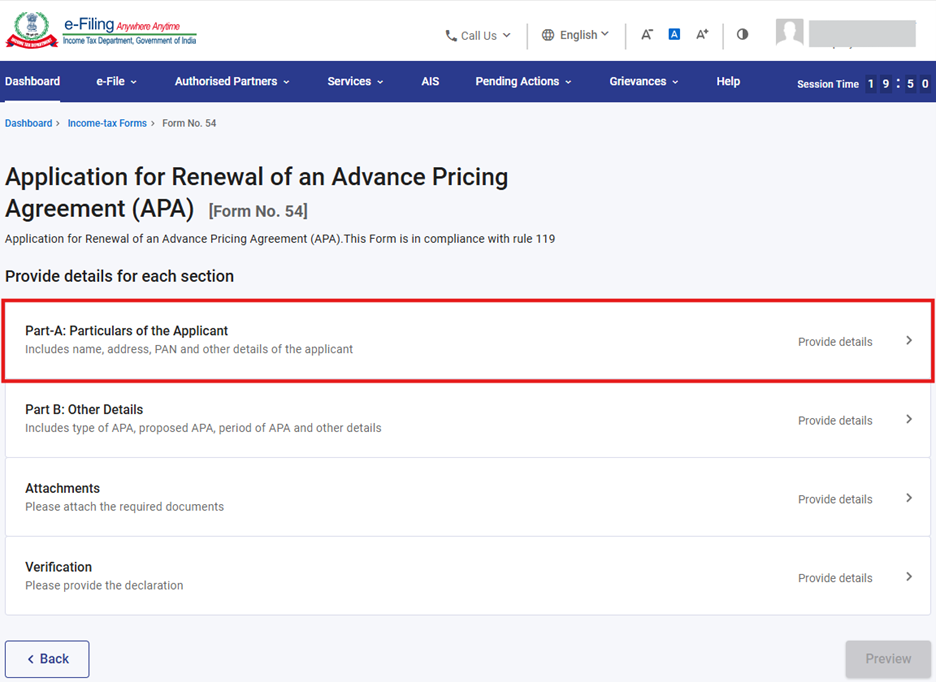
Form 54 has four panels:
1. Part A- Particulars of the Person
2. Part B - Other Details
3. Attachments
4. Verification
4. Step-by-Step Guide
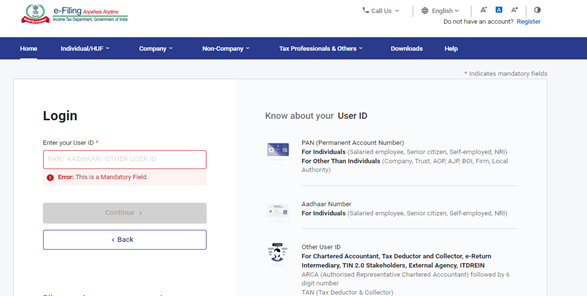
Step 1: Log in to the e-Filing portal with your User ID and Password.
Step 2: Enter the User ID (PAN) and Password.
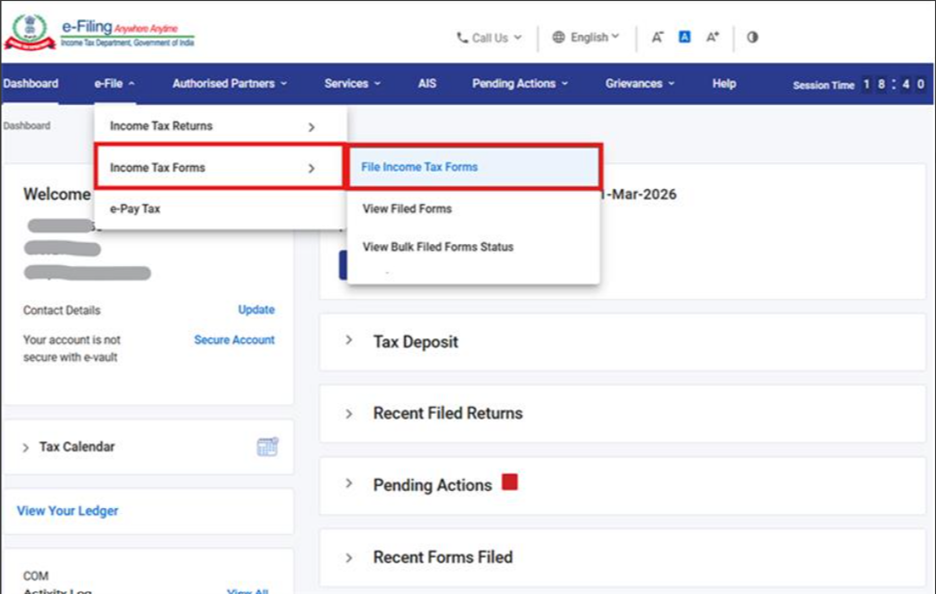
Step 3 : Go to e-File >Income Tax Forms > File Income Tax Forms.
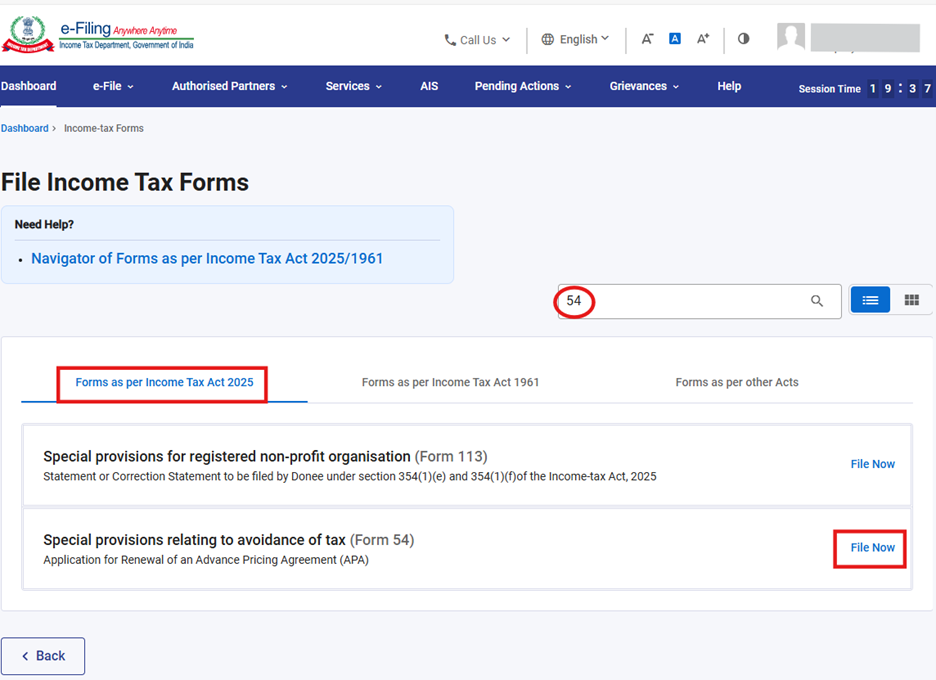
Step 4: Select the “Forms as per Income Tax Act 2025” tab, search for Form 54, and click the “File Now” button.
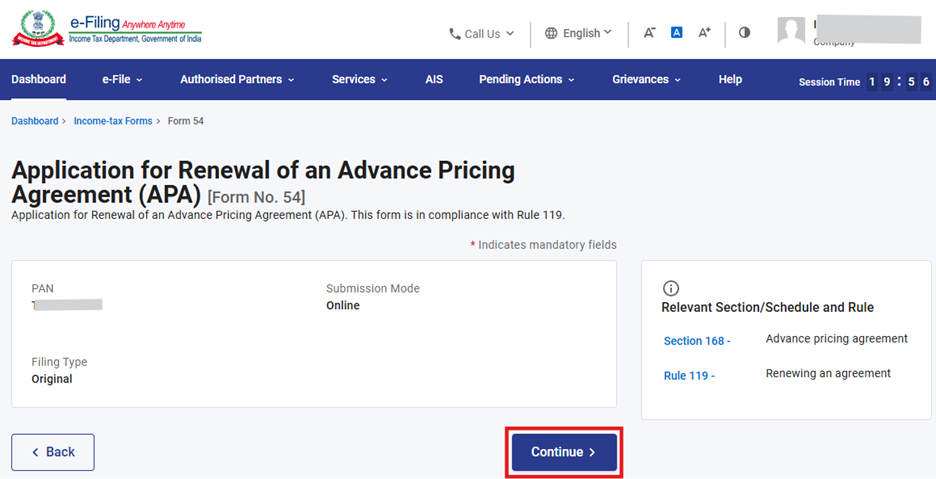
Step 5: click on “Continue” button.
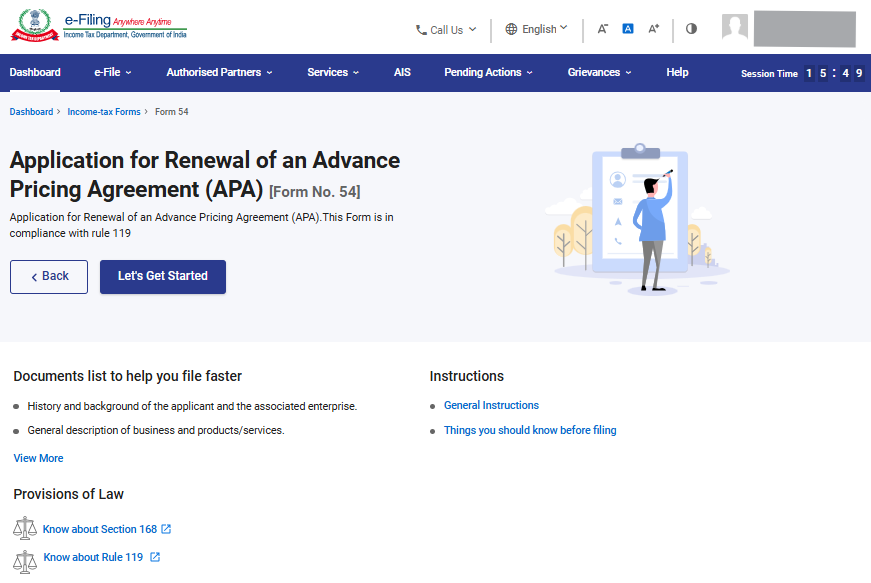
Step 6: Click on “Let’s Get Started”.
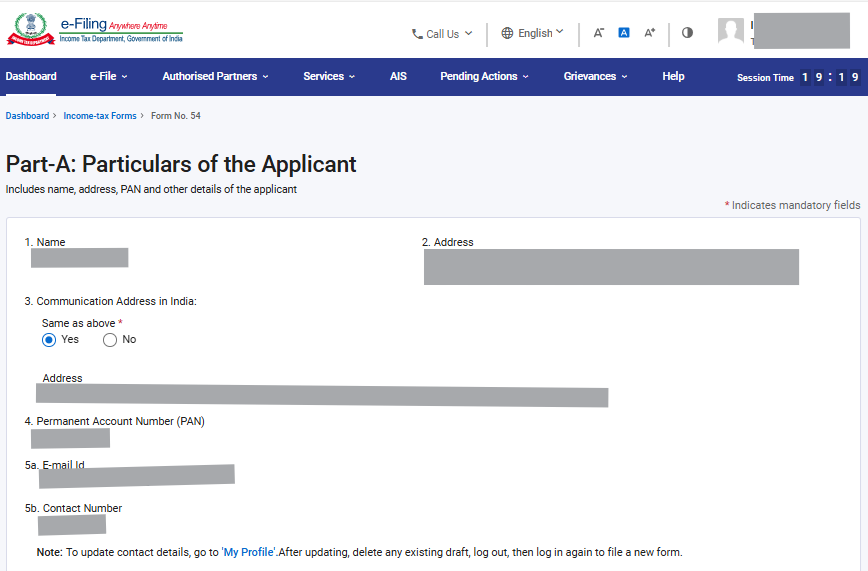
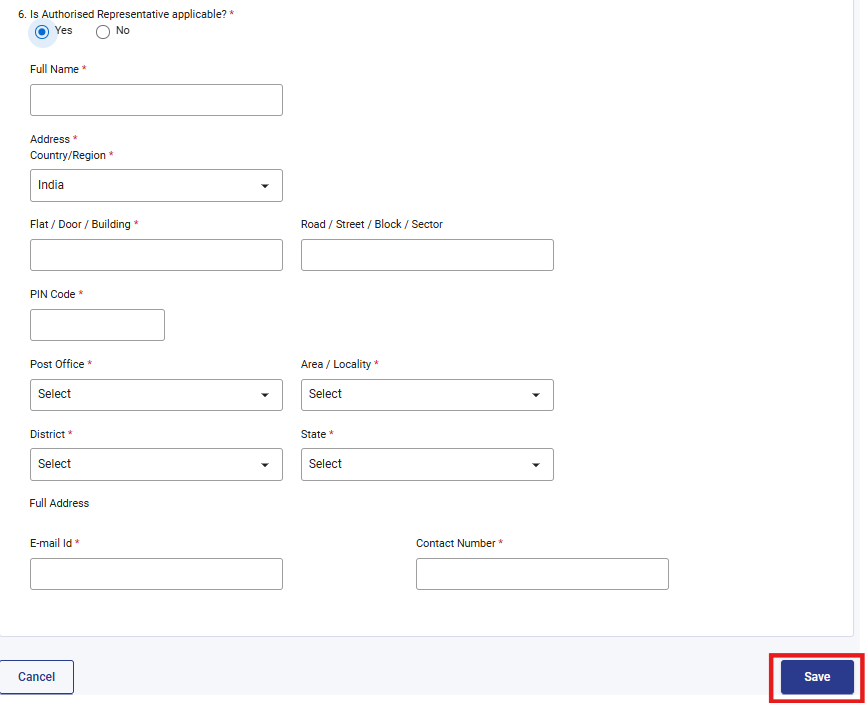
Step 7 : Post clicking on Let’s Get Started button, user will be navigated to Panel screen. Select the 1st Panel: “Part-A: Particulars of the Applicant”.
Step 8: Confirm the 1st Panel Part-A: Particulars of the Applicant and click on “Save”.
Note: Please ensure that all mandatory details under "My Profile" section including address is completed. You can update your contact and address details by clicking on hyperlink “My Profile”.
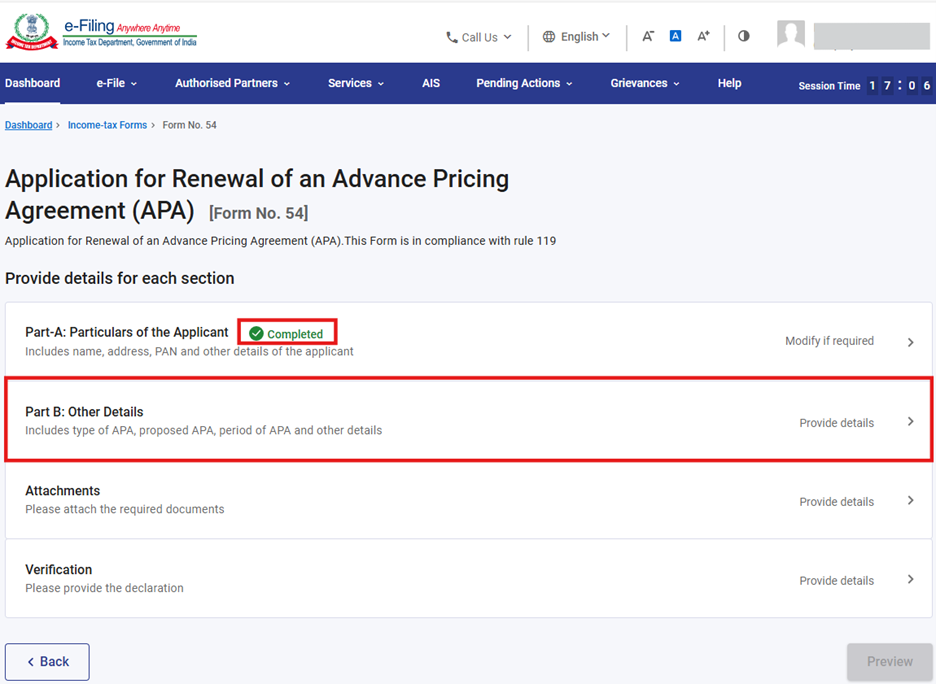
Step 9: Post saving, the 1st panel status will be shown “completed”. Select the 2nd Panel: “Part B: Other Details”.
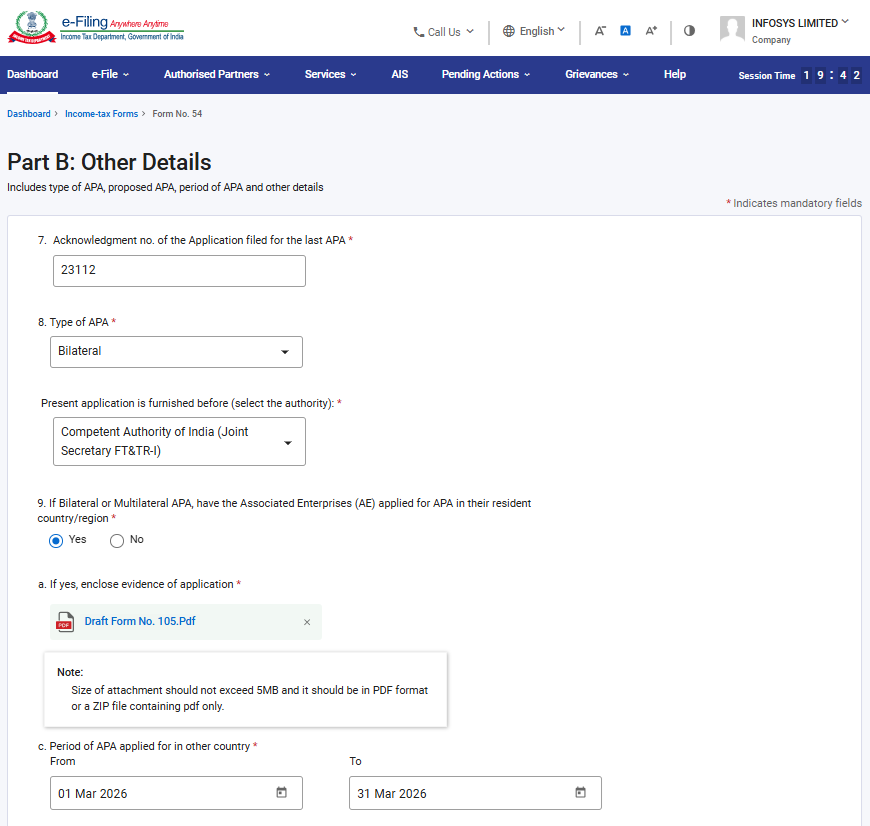
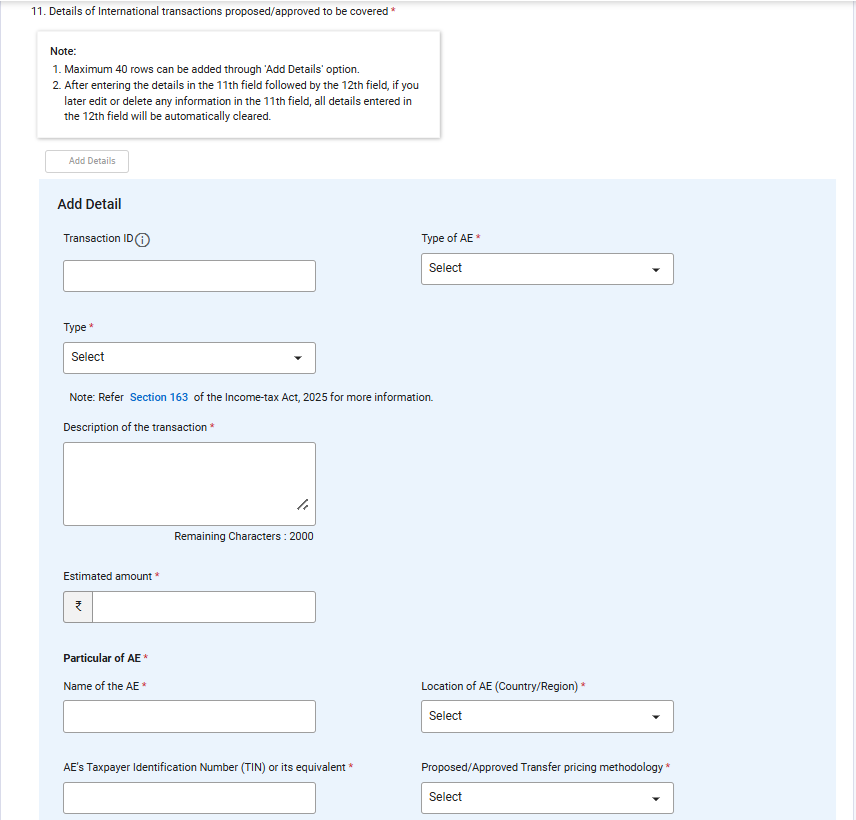
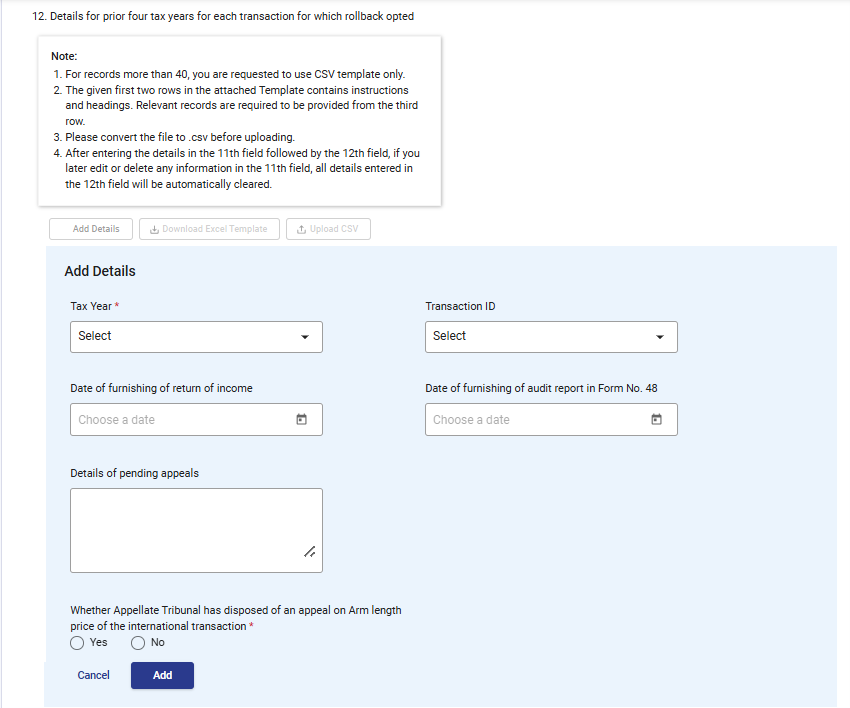
Step 10: Enter details in 2nd Panel: “Part B: Other Details” and click on “Save”. For Field No. 11, you will find two options—"Add Details” or “CSV Upload”. The user may choose either option to complete Field No. 12.

Notes:
- Field no. 10 is applicable only in case Bilateral or Multilateral APA is selected in field no. 9 (Type of APA).
- If you are applying for unilateral APA, please select "Pr. CCIT (IT)" under the field “Present application is furnished before”. If the multilateral or bilateral APA is with countries in North America including Caribbean Islands and Europe, please select “Competent Authority of India (Joint Secretary FT&TR-I)”. Else Select, “Competent Authority of India (Joint Secretary FT&TR-II)” under the field “Present application is furnished before”.
Notes:
- Field no. 132 will be enabled only in case if yes is selected for the field “Whether Rollback is opted for” under field no. 11.
- Kindly read the instructions mentioned in the Note under field no. 12: “Details for prior four tax years for each transaction if rollback opted”.
- Tax Years will be displayed on the basis of the period selected in the 10th field: Period of proposed APA and date from which APA is requested”. For example, if period selected is from 01st April 2026 to 31st March 2031 then the rollback tax years will be displayed from TY 2022-23 to TY 2025-26.
- Transaction ID’s for which rollback is being opted for in field no. 12 will be displayed under the Transaction ID field.
- If you want to enter more than 40 records in field no. 12, then you should download the excel template, fill the details, convert the excel file into .CSV format and upload the same.

Notes:
Follow the below mentioned instructions to fill the above excel template:
|
|
|
|
|
|
Sl.No |
Enter the serial numbers starting from 1 |
Yes |
|
|
Tax year |
Enter the relevant tax year for which rollback being opted in YYYY-YY format |
Yes |
7 characters in the below mentioned format:>
YYYY-YY |
|
Transaction ID |
Enter the Transaction ID entered in field No. 11 for which rollback being opted |
Yes |
|
|
Date of furnishing of return of income |
Enter the date on which return of income is furnished for that respective tax year |
No |
Enter the date in the below mentioned format “DD/MM/YYYY” For example: If the date is 20th June 2023, then enter the date as 20/06/2023.
|
|
Date of furnishing of audit report in Form No. 48 |
Enter the date on which audit report in Form No. 48 is furnished for that respective tax year |
No |
Enter the date in the below mentioned format “DD/MM/YYYY” For example: If the date is 20th June 2023, then enter the date as 20/06/2023.
|
|
Details of pending appeals |
Enter the pending appeals details |
No |
<2000 characters maximum |
|
Whether Appellate Tribunal has disposed of an appeal on Arm length price of the international transaction |
Select Yes or No from the dropdown |
Yes |
|
Notes:
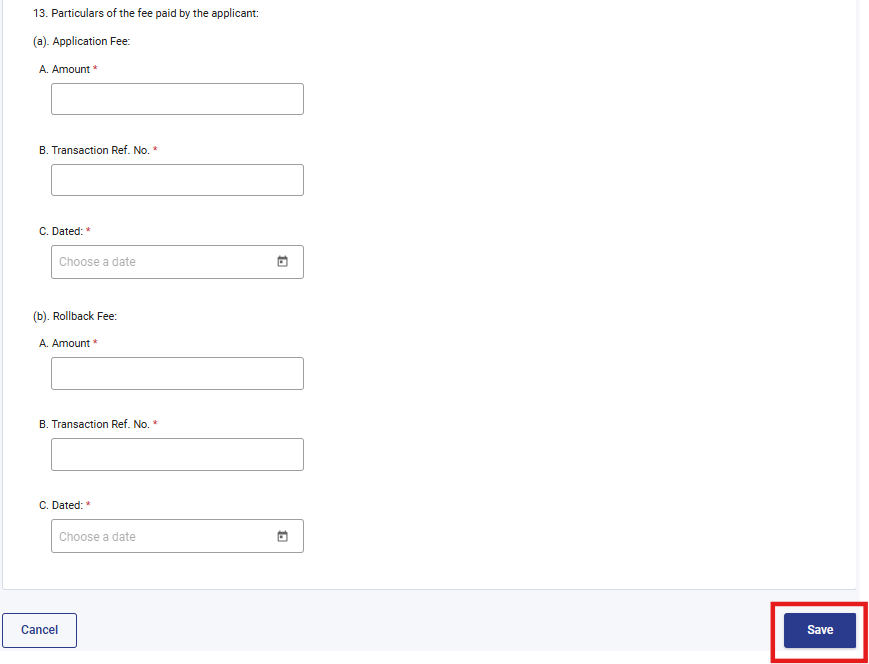
- Field No. 13(b): Rollback Fee will be enabled only when you have selected “Yes” for the field “Whether Rollback is opted for” in field no. 11.
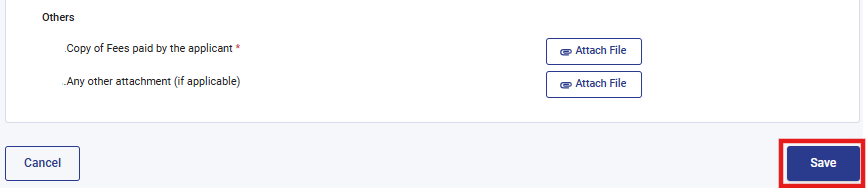
- As per the rule 106 and 111 of Income-tax rules, 2026, you need to provide the details of application fee, rollback fee paid and you need to attach the copy of the fee paid in A-27 under the attachment panel.
Step 11: Post saving the 2nd panel and it will show completed, select the 3rd Panel: “Attachments”.
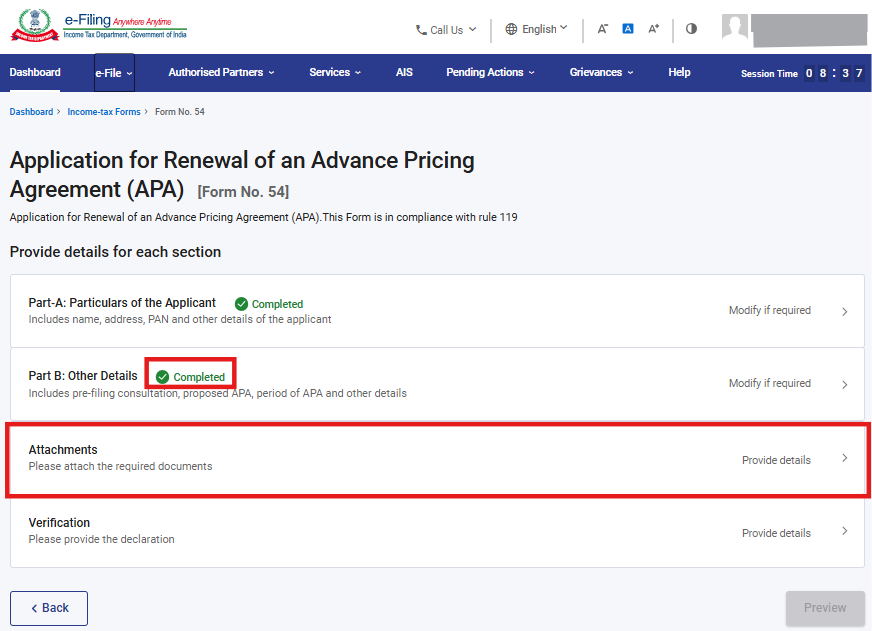
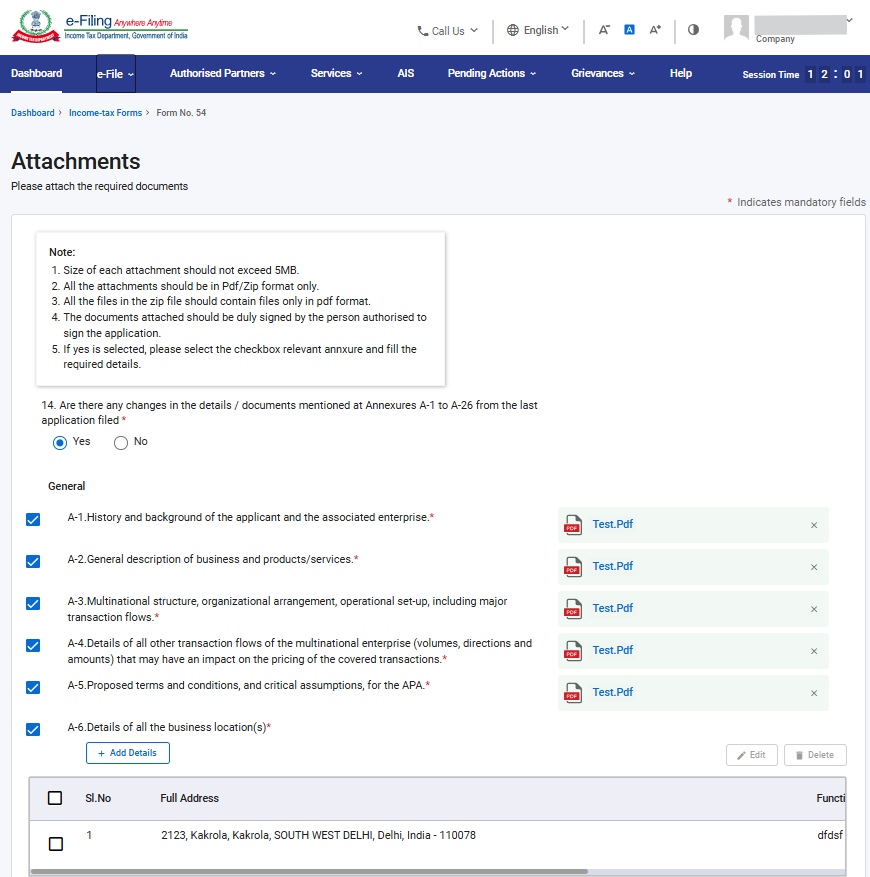
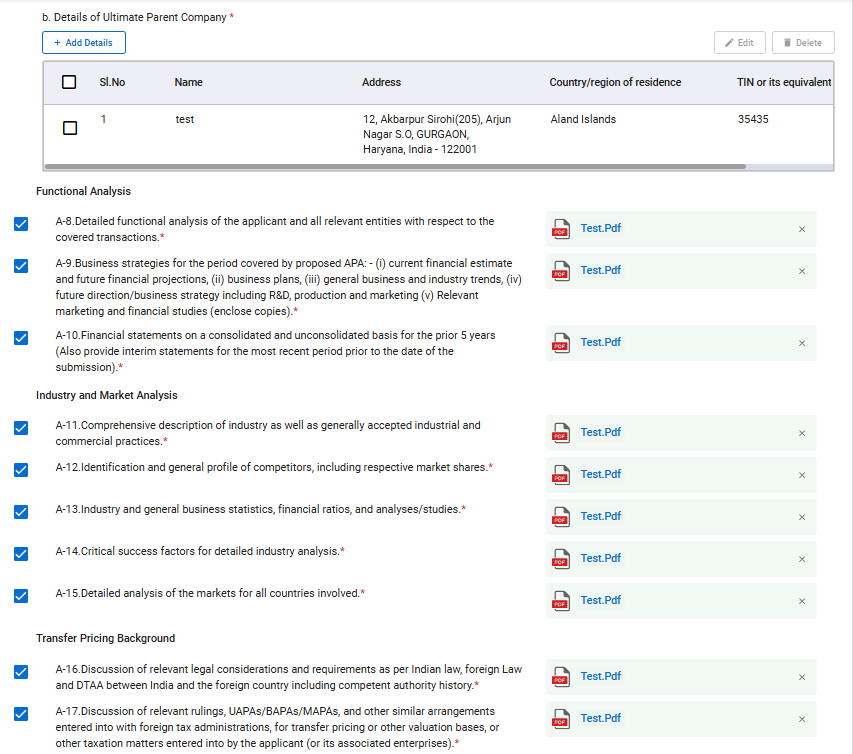
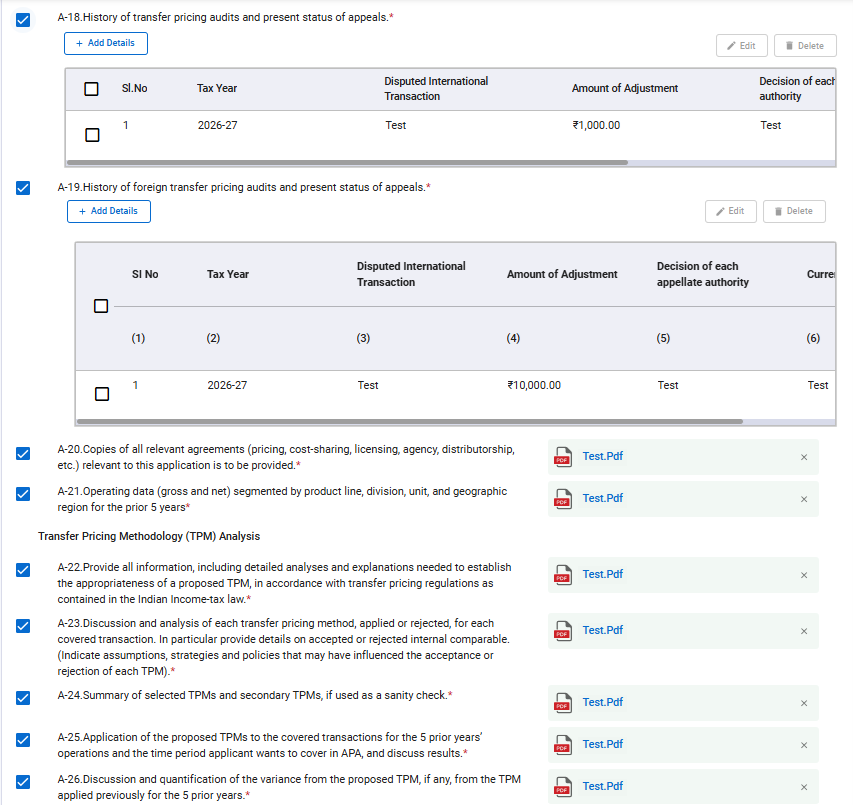
Step 12: Post saving the 2nd panel and it will show completed, select the 3rd Panel: “Attachments”. Field no. A-1, A-2 …. will be enabled if you select “yes” in field no. 14 and select the check box to provide the details. If “No” is selected, you will not be able to select check box for A-1 to A-26.
Step 13: Post saving the 3rd panel, status of panel will be displayed as “Completed” then select the 4th Panel: “Verification”.
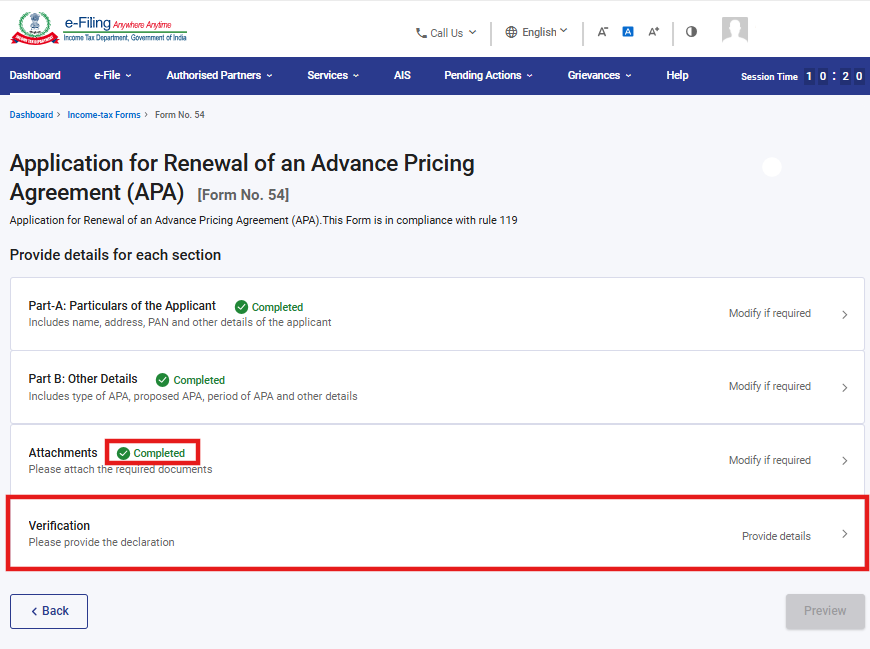
Step 14: Post filling the 4th panel “Verification” and click on “Save”.
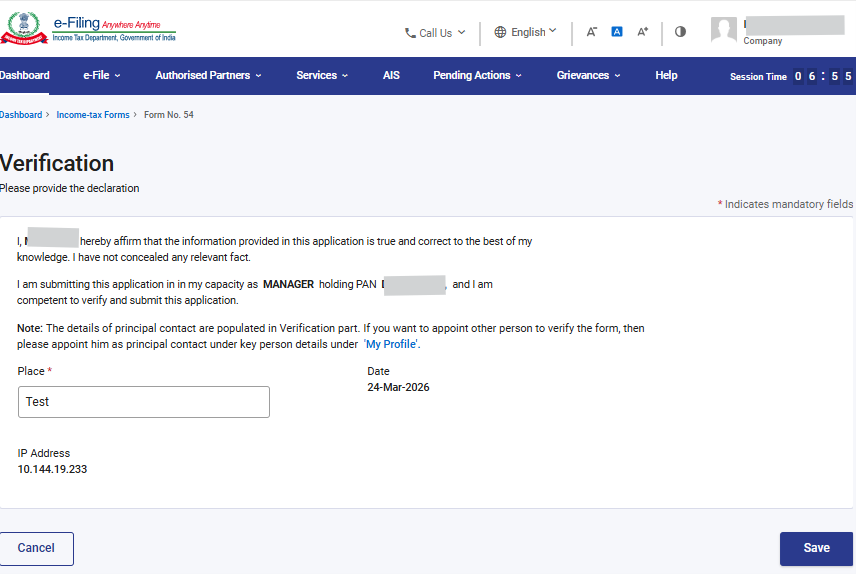
Step 15: Post saving the 4th panel, status of panel will be displayed as Completed then click on Preview.
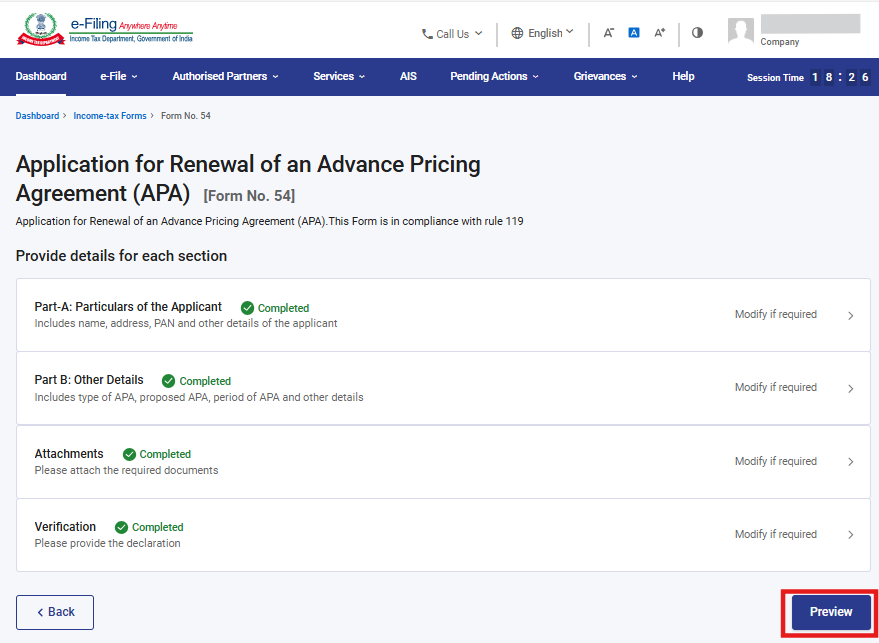
Step 16: On the Preview page, verify the details and click Proceed To E-Verify.

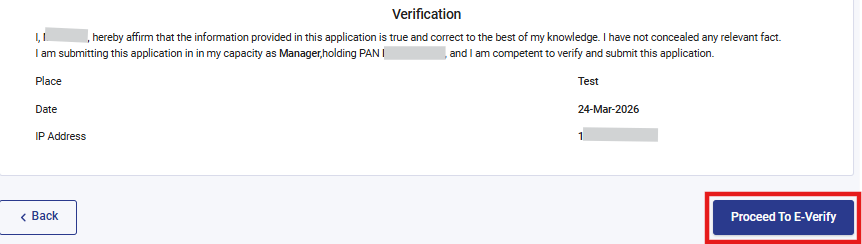
Step 17: Post clicking on Proceed To E-Verify button, a popup confirmation displaying that you would like to proceed to e-Verify. Click on “Yes”.
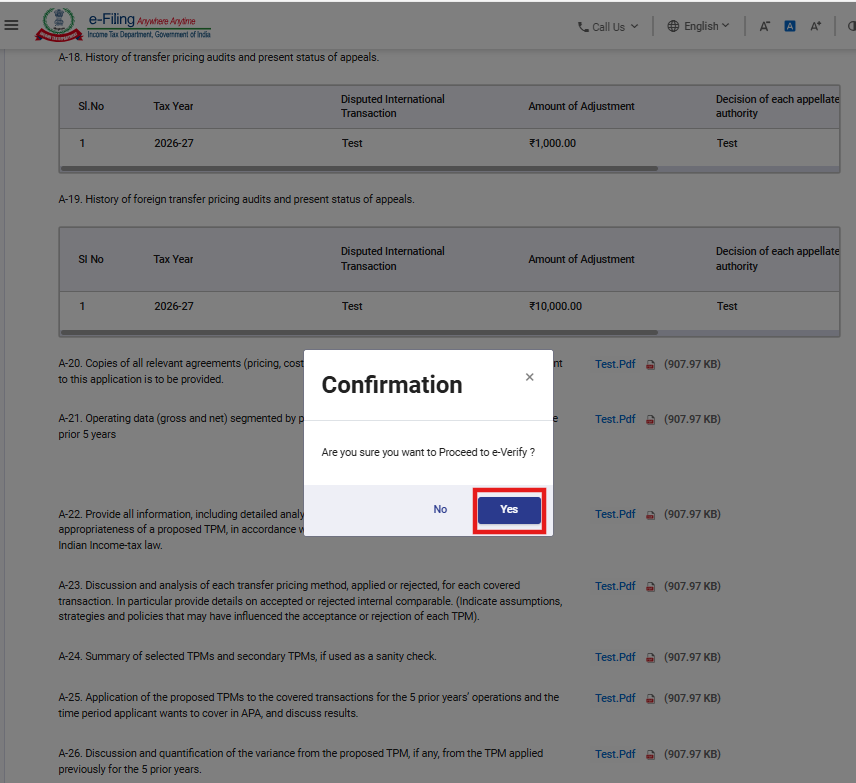
Step 18: On clicking Yes, you will be navigated to the e-Verify page where you can verify the Form 104 using EVC/DSC (as applicable).
Note: Refer to the How to e-Verify user manual to learn more.
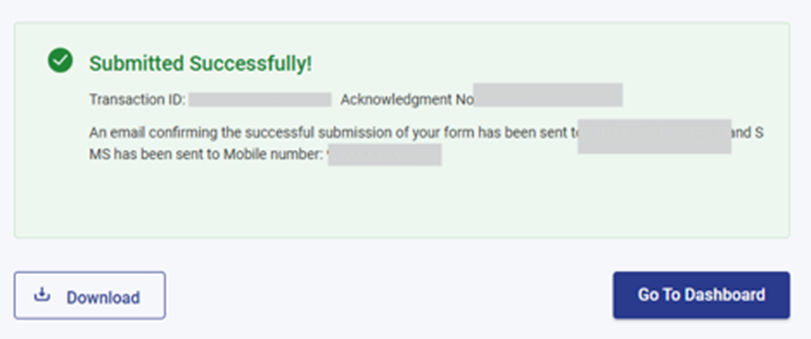
After successful e-Verification, a success message is displayed along with a Transaction ID and Acknowledgement Receipt Number. Please keep a note of the Transaction ID and Acknowledgement Receipt Number for future reference. You will also receive a confirmation message on the email ID(s) and mobile number(s) registered with the e-Filing portal.
5. Related Topics
• Login
• Dashboard and Worklist (Taxpayer)
• How to e-Verify
• Generate EVC
• Register as Authorize signatory /Register as Representative-Request Submission
6. Glossary
|
Acronym/Abbreviation |
Description/Full Form |
|
DSC |
Digital Signature Certificate |
|
EVC |
Electronic Verification Certificate |
|
ARN |
Acknowledgement Receipt Number |
|
TY |
Tax Year |

