1. Overview
This service is available to all the registered users of the e-Filing portal. This service enables registered users of the e-Filing portal who are not able to verify their ITRs / Forms / Service Requests owing to absence from the country or being a non-resident, or for any other reason, to authorize another person to verify ITRs / Forms / Service Requests. The service also allows users to register as Representative Assessees and register themselves to act on behalf of another person.
2. Prerequisites for availing this service
- Registered user of the e-Filing portal with valid user ID and password
- Active PAN of the user and the representative
3. Step-by-Step Guide
3.1 Authorize another Person to act on Behalf of Self
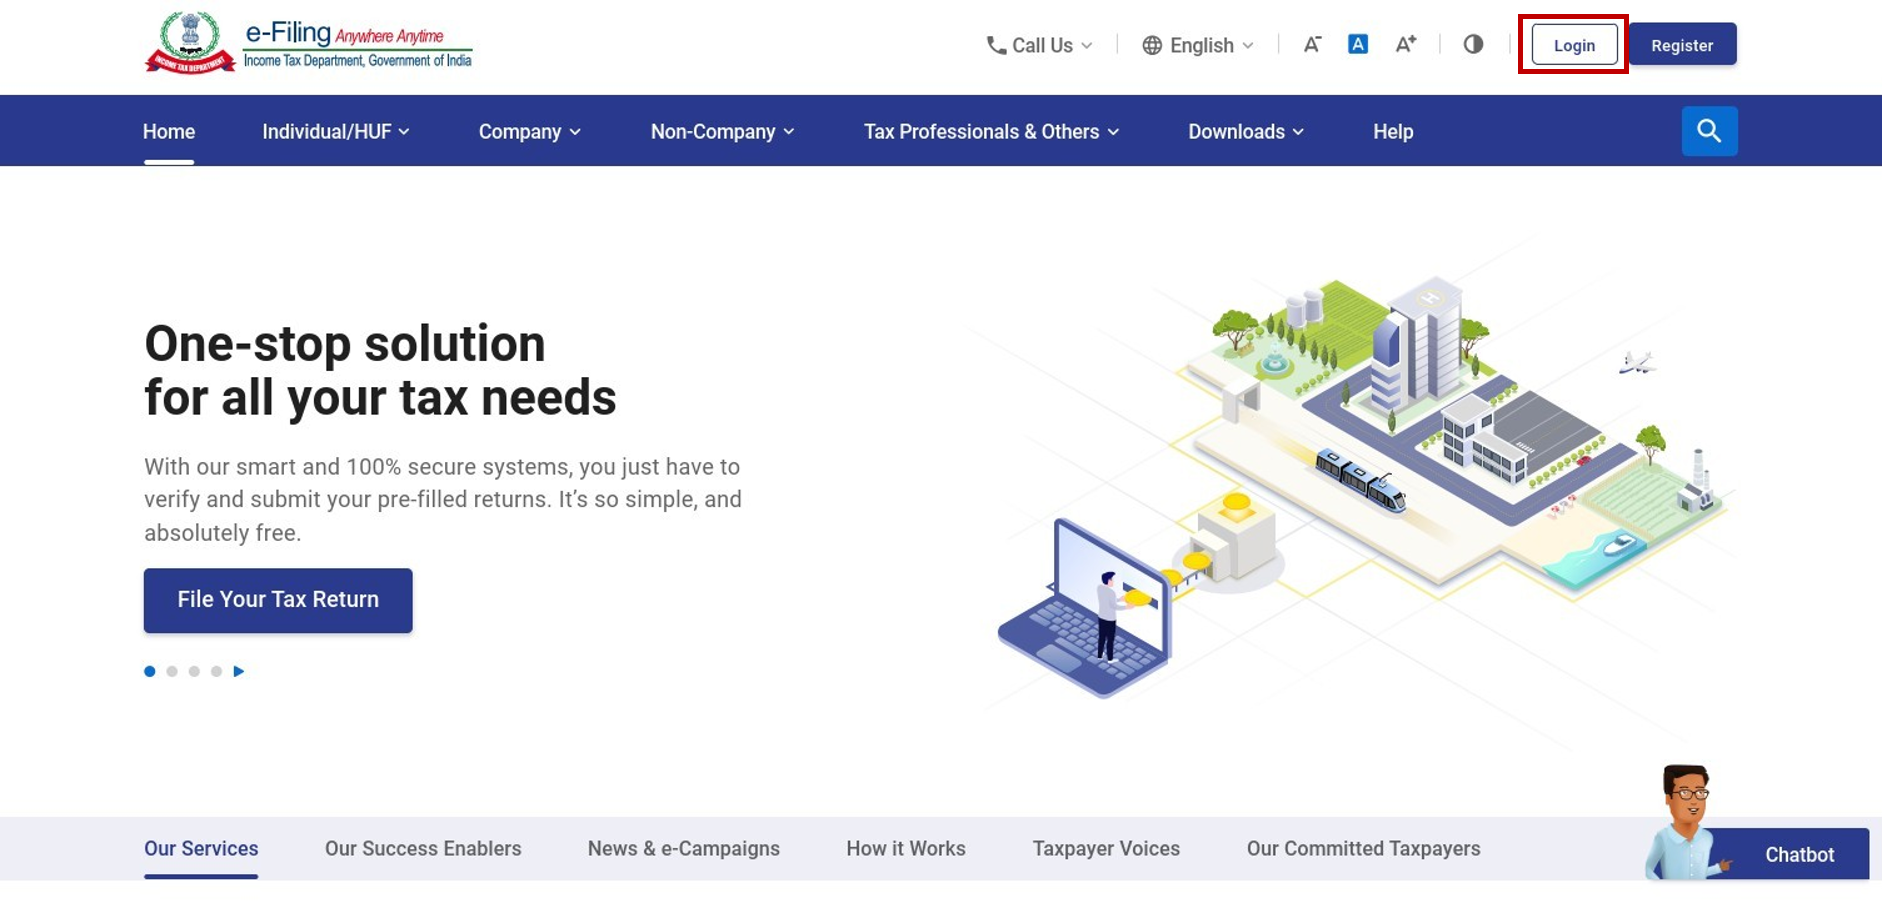
Step 1: Log in to the e-Filing Portal using your user ID and password.
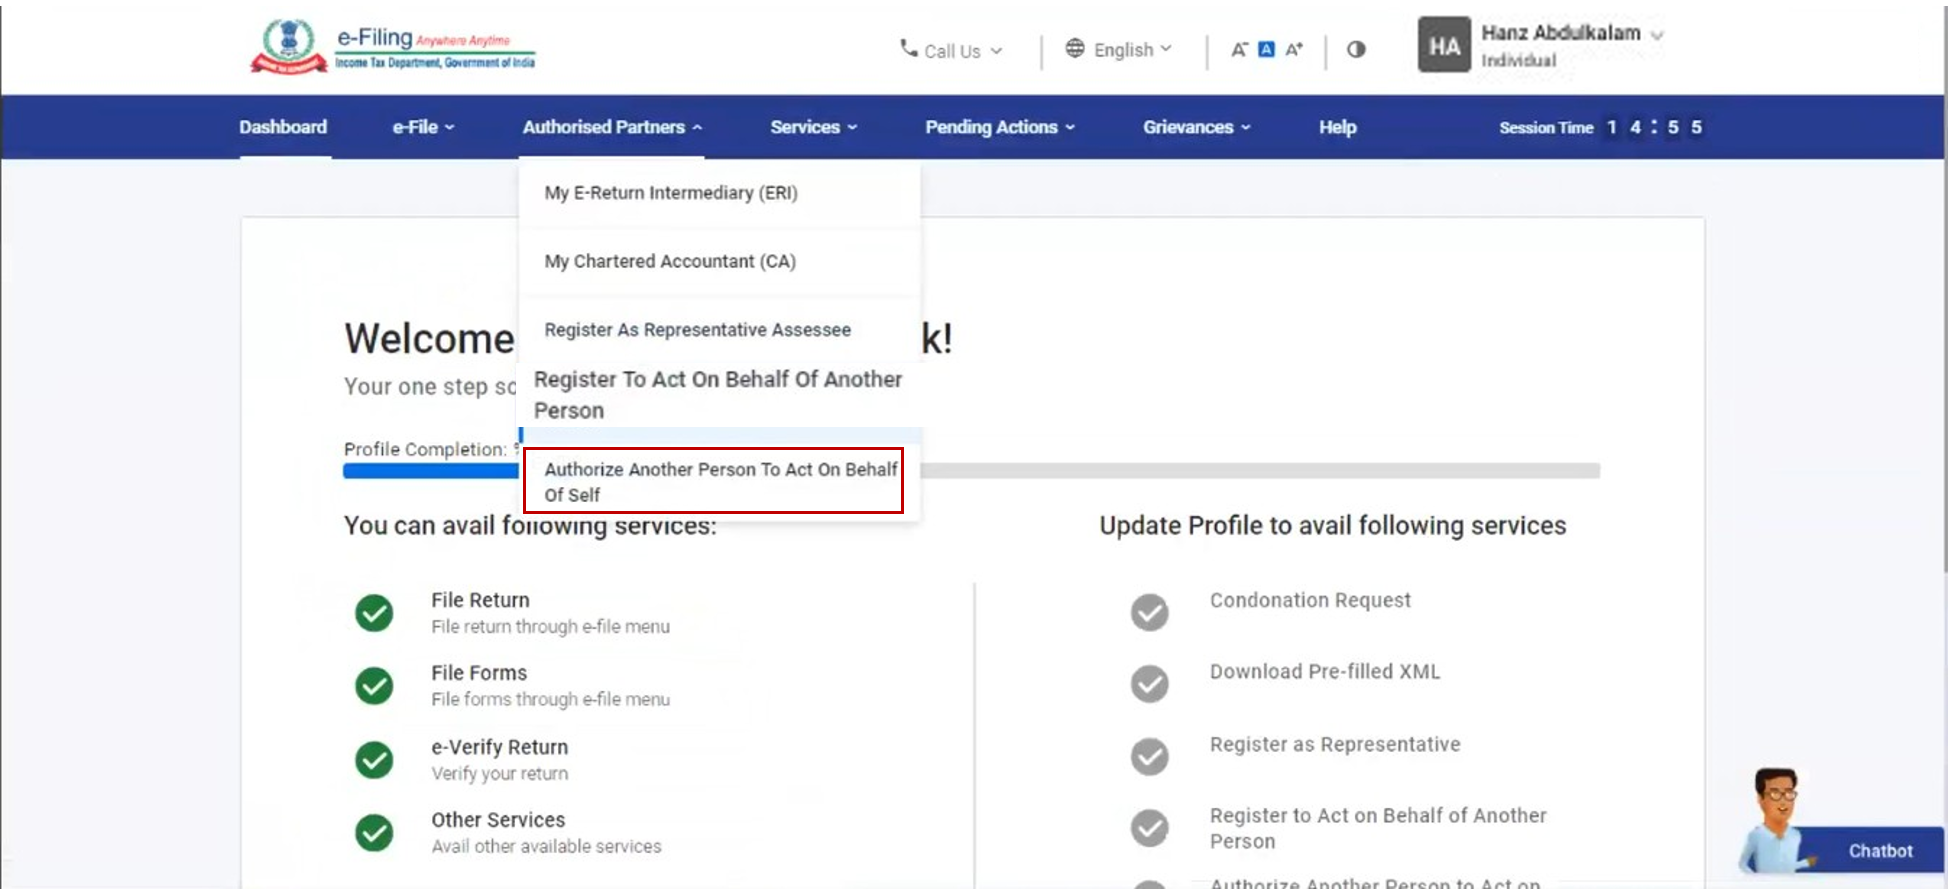
Step 2: Click Authorized Partners > Authorize another person to act on behalf of self.
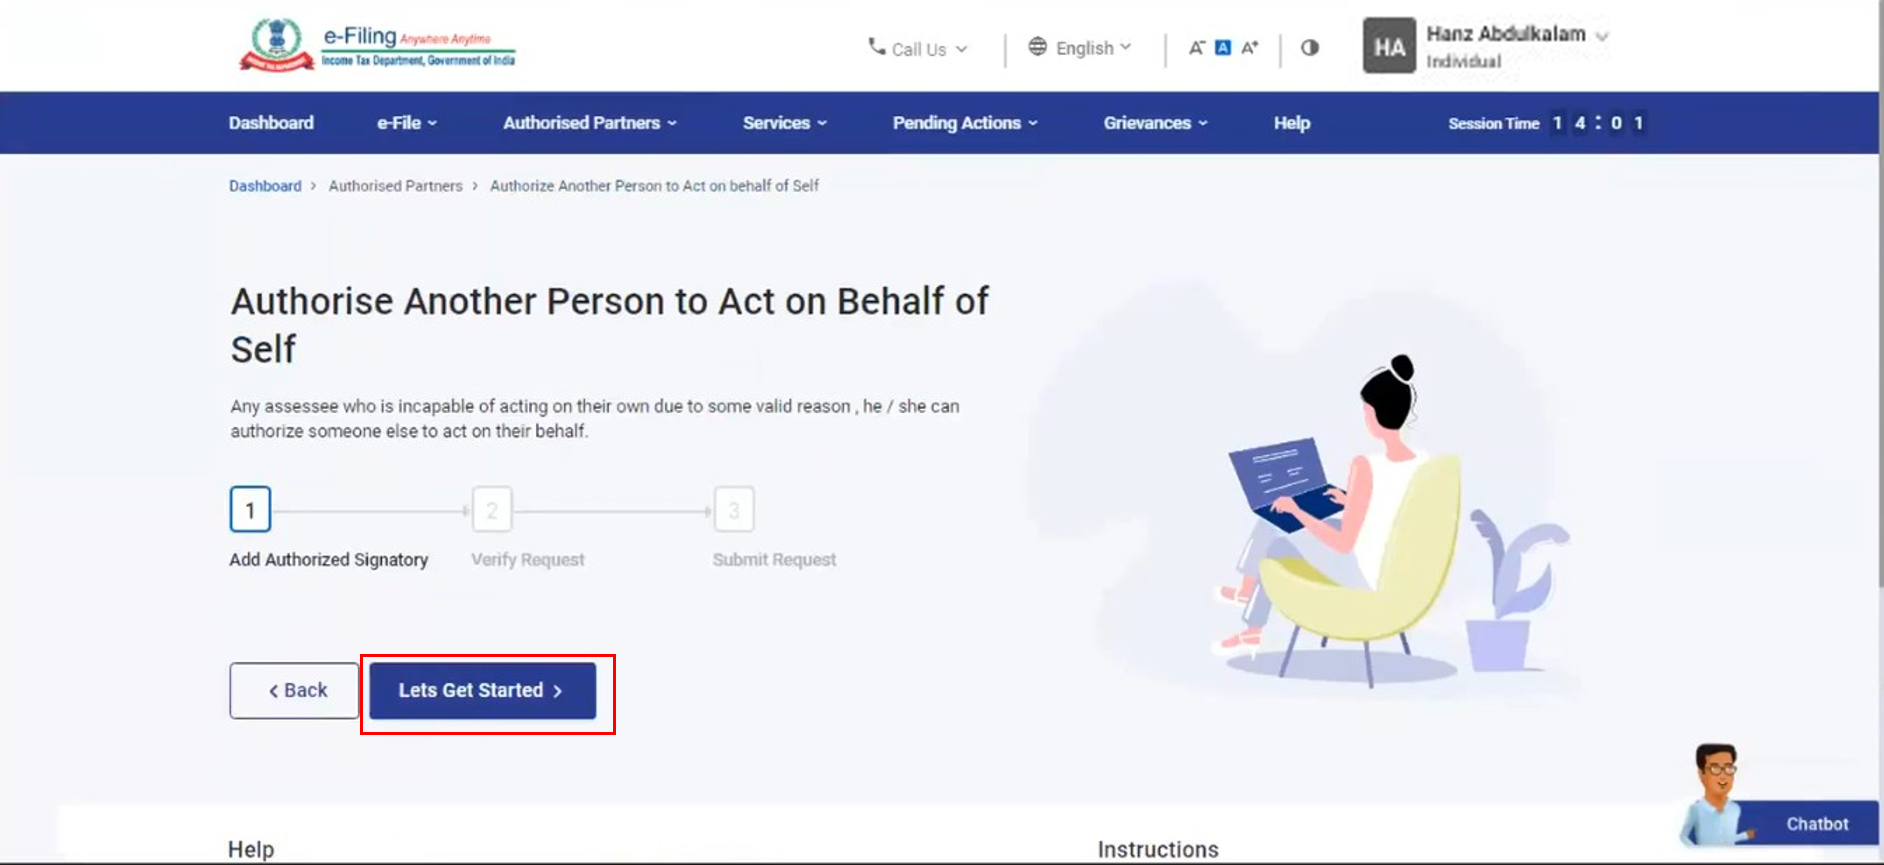
Step 3: A page with instructions regarding the service is displayed. After reading the instructions, click Let's get started.
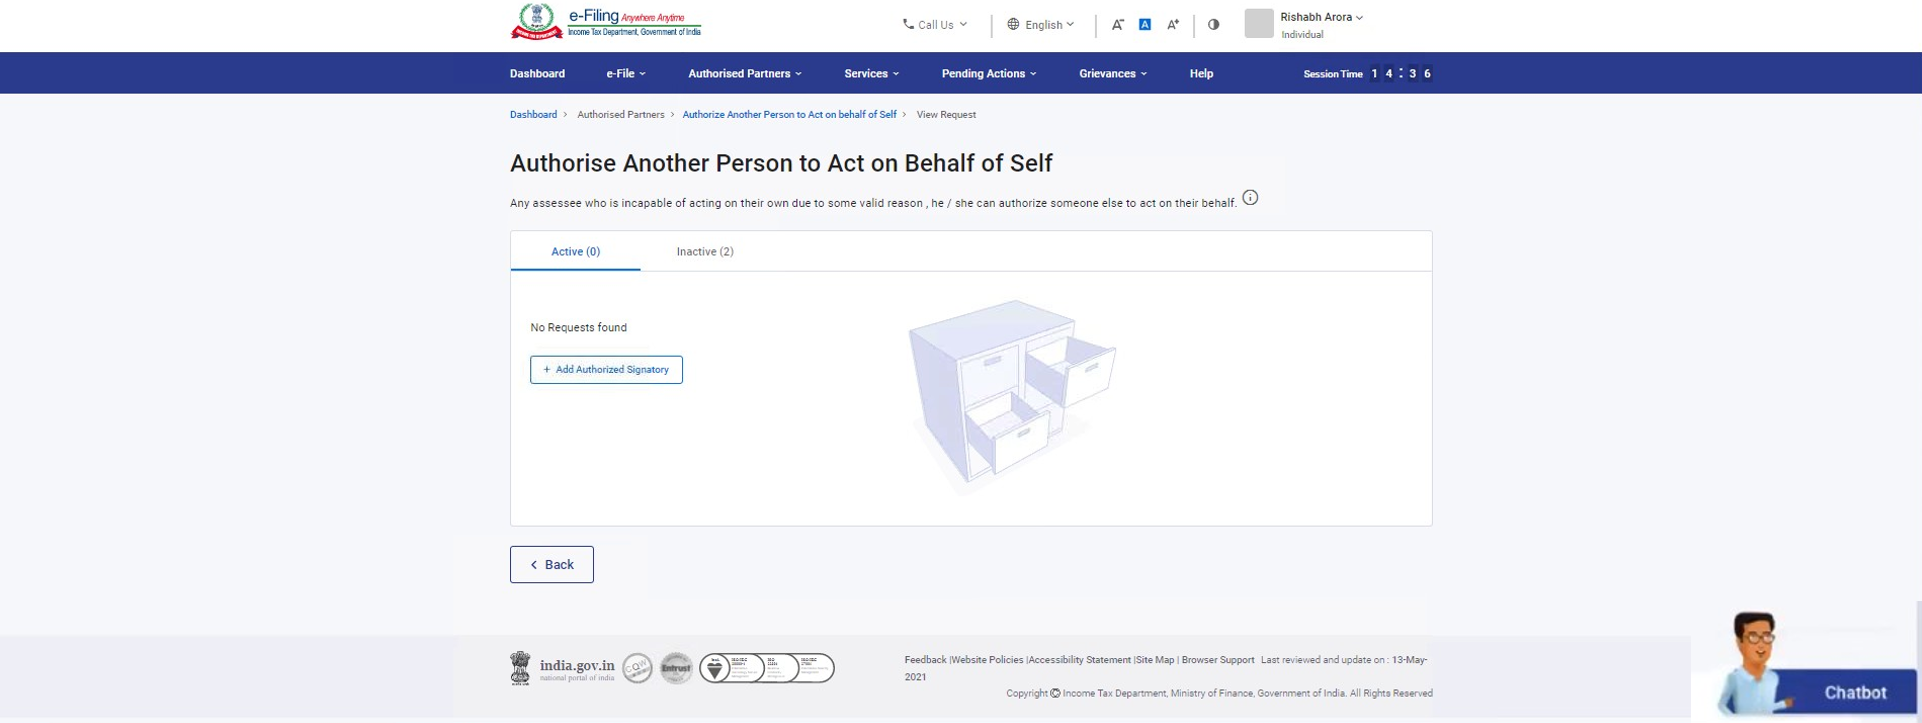
Step 4: You will now be able to view all the previous requests. For a new request, click Add Authorized Signatory.
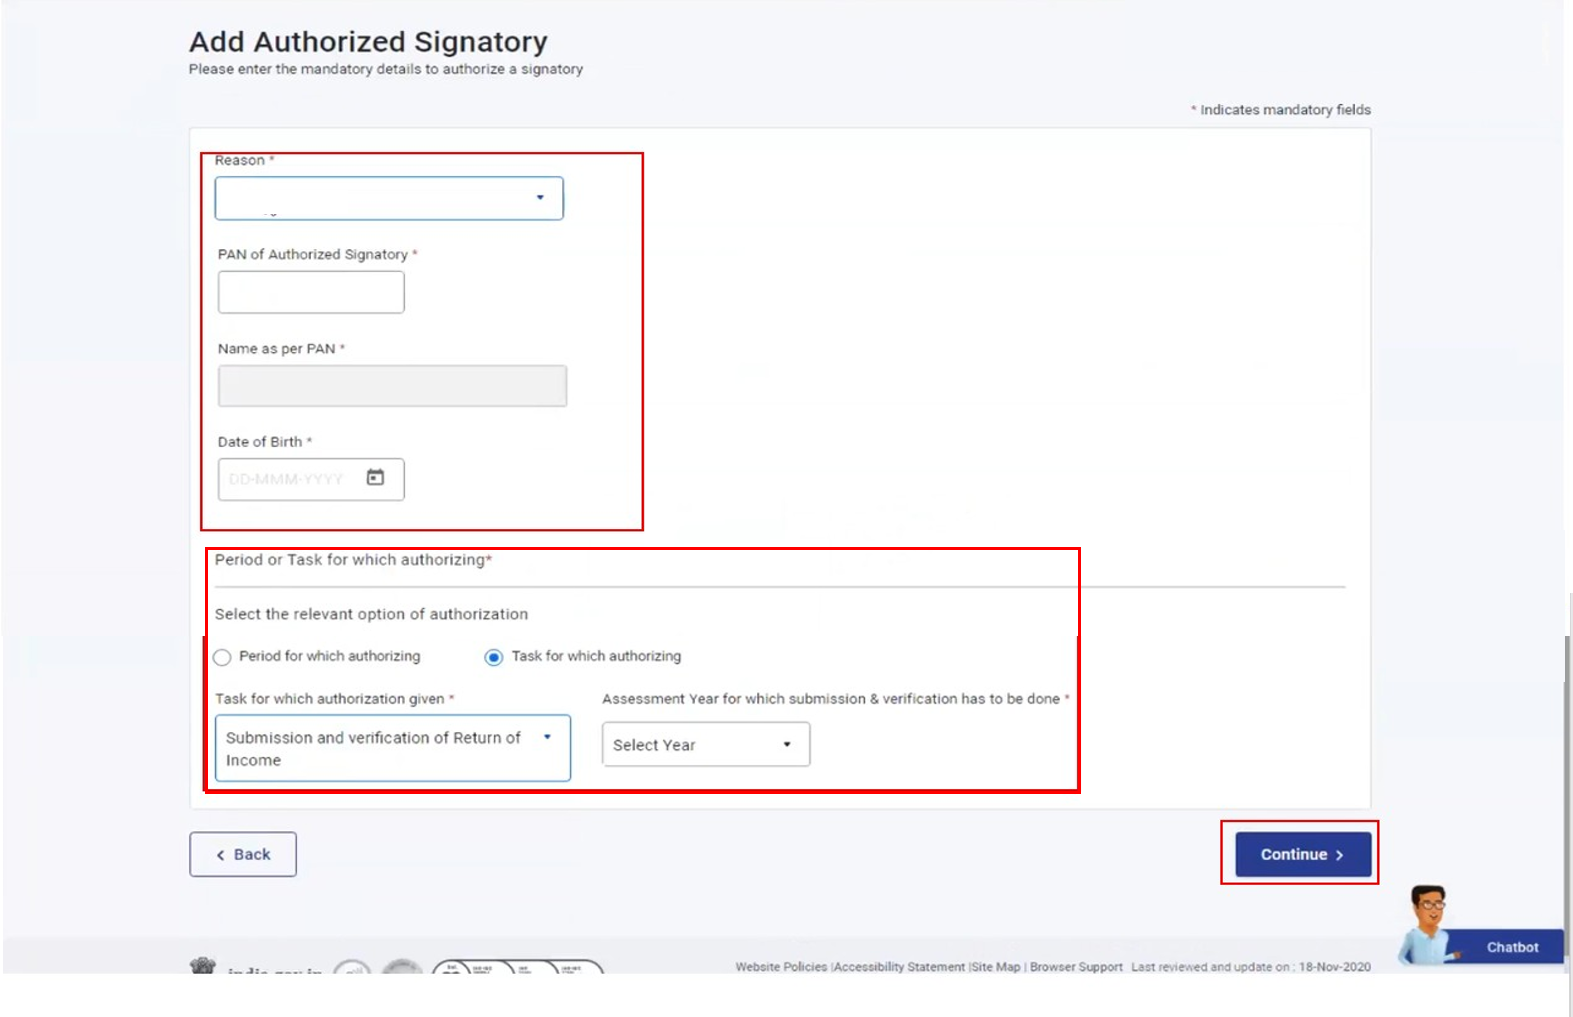
Step 5: On the Add Authorized Signatory page, fill the necessary details like Reason, Name, PAN and Date Of Birth of the Authorized Signatory (details as per PAN) and click Continue.
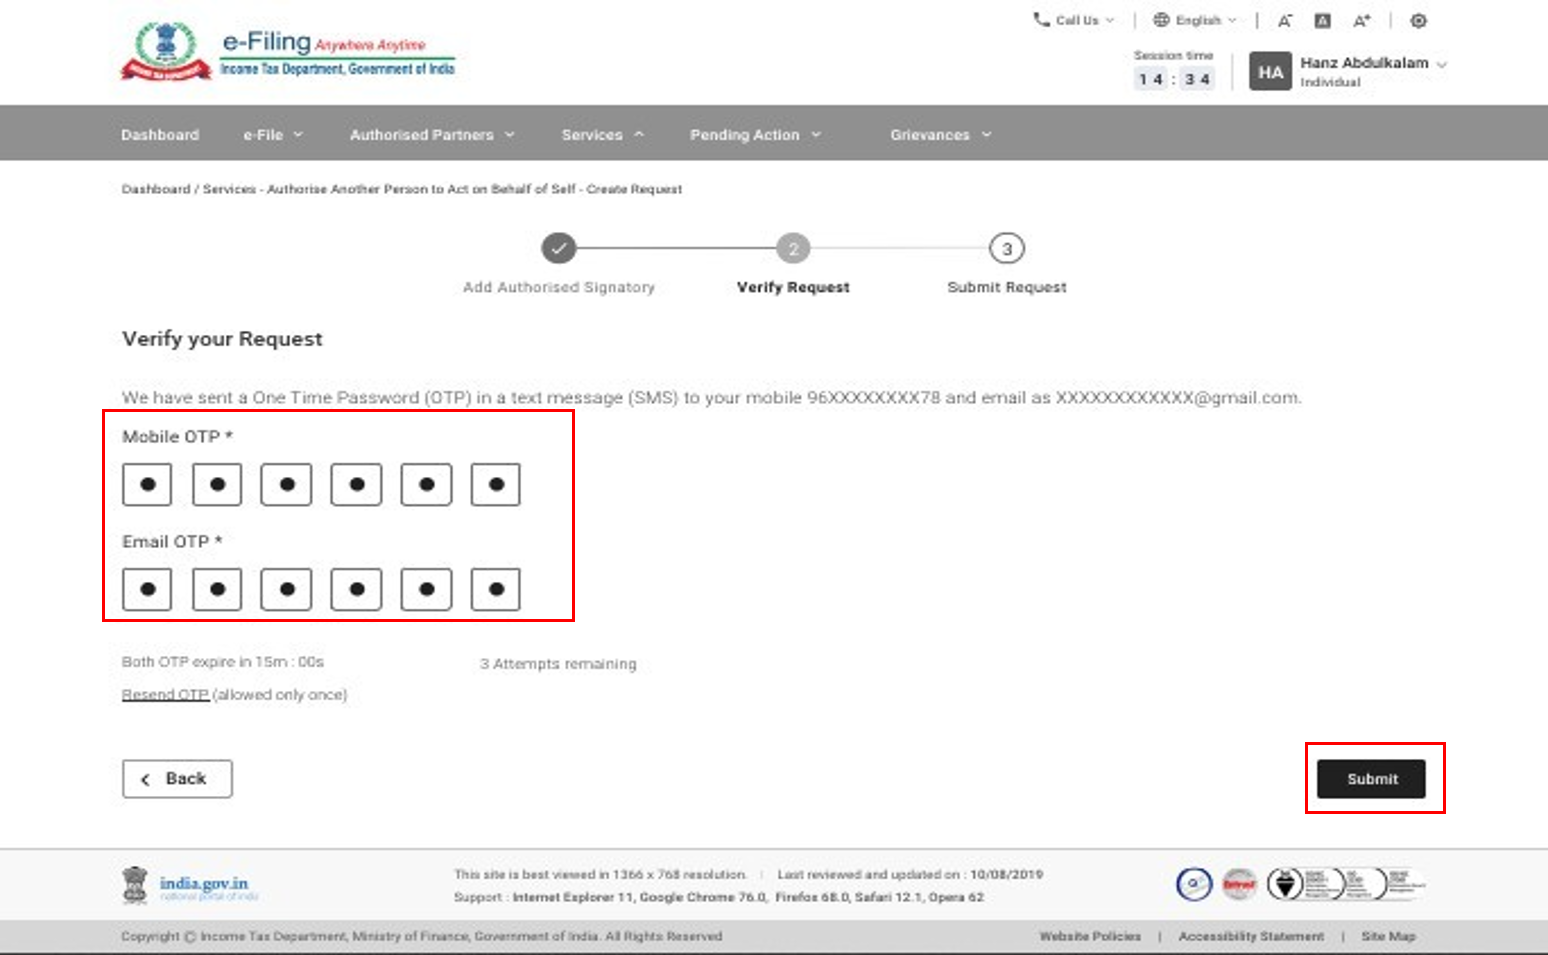
Step 6: On the Verify your Request page, provide the 6-digit OTP received on your mobile number and email ID registered with the e-Filing portal and click Submit.
Note:
- OTP will be valid for 15 minutes only.
- You have 3 attempts to enter the correct OTP.
- The OTP expiry countdown timer on screen tells you when the OTP will expire.
- On clicking Resend OTP, a new OTP will be generated and sent.
Step 7: On successful validation, a success message is displayed along with a Transaction ID. Please keep a note of the Transaction ID for future reference. Click on the View Request button to view all previously submitted requests.
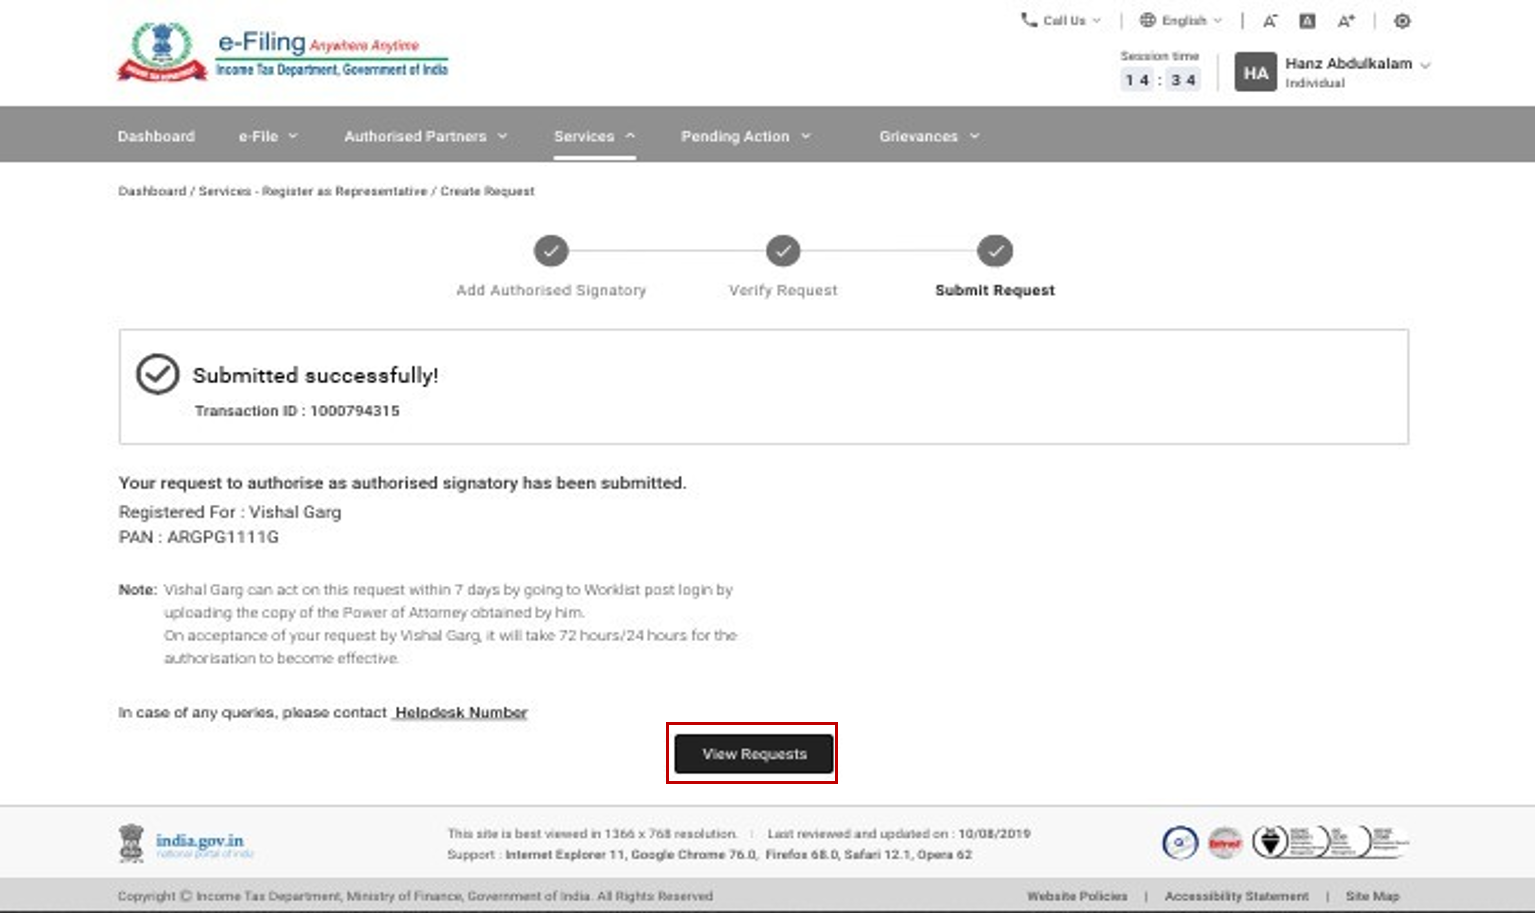
Note: After submitting, the request:
- An alert message will be sent to the Authorized Signatory's email ID and mobile number intimating that a request has been raised.
- The Authorized Signatory can login to the e-Filing portal; go to Worklist > For Your Action to view / accept / reject the request.
- The Authorized Signatory should either accept or reject the request within 7 days from the date of raising the request. The request can be accepted by attaching a PDF copy of notarized Power of Attorney (POA) received from the assessee or the same can be rejected by providing the comments.
- A Cancel Request button appears if the case status is Pending Approval. To cancel a request, click Cancel Request. The status of the request changes to Authorization Withdrawn. Once you click Cancel, the representative will not be able to accept or reject the request.
- A Withdraw Request button appears if the case status is Accepted and Activated. To withdraw a request, click Withdraw Request. The status of the request changes to Authorization Withdrawn.
3.2 Register as Representative
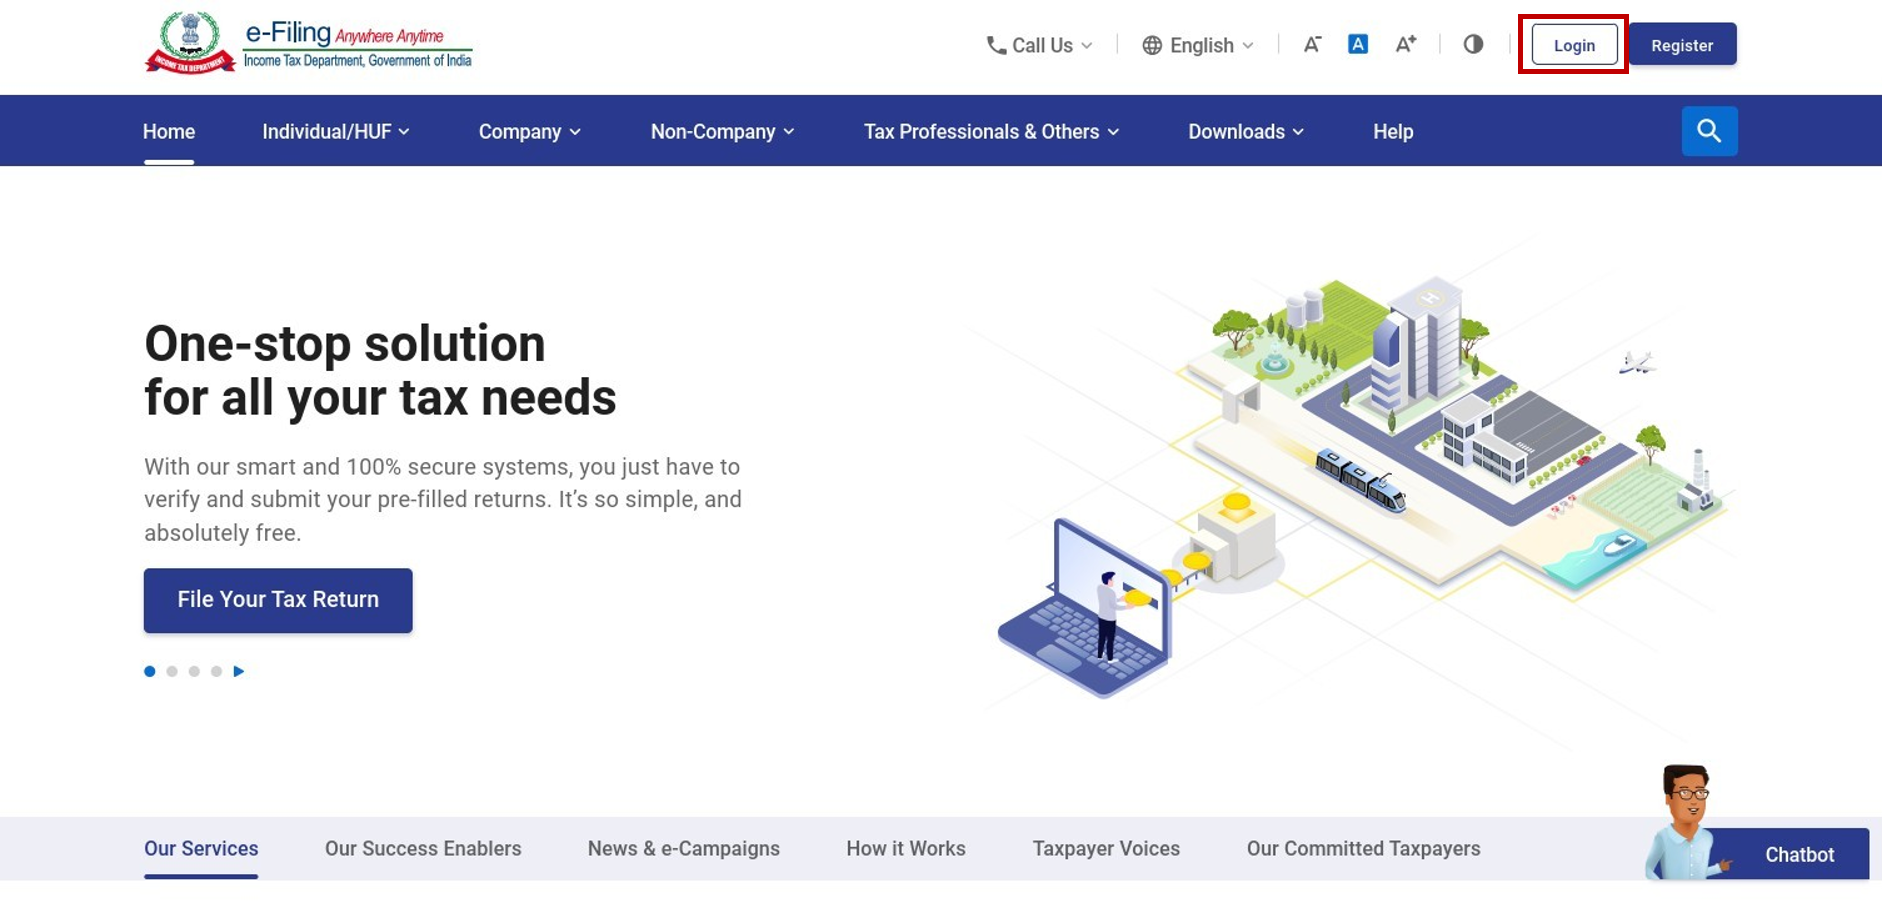
Step 1: Log in to the e-Filing Portal with your user ID and password.
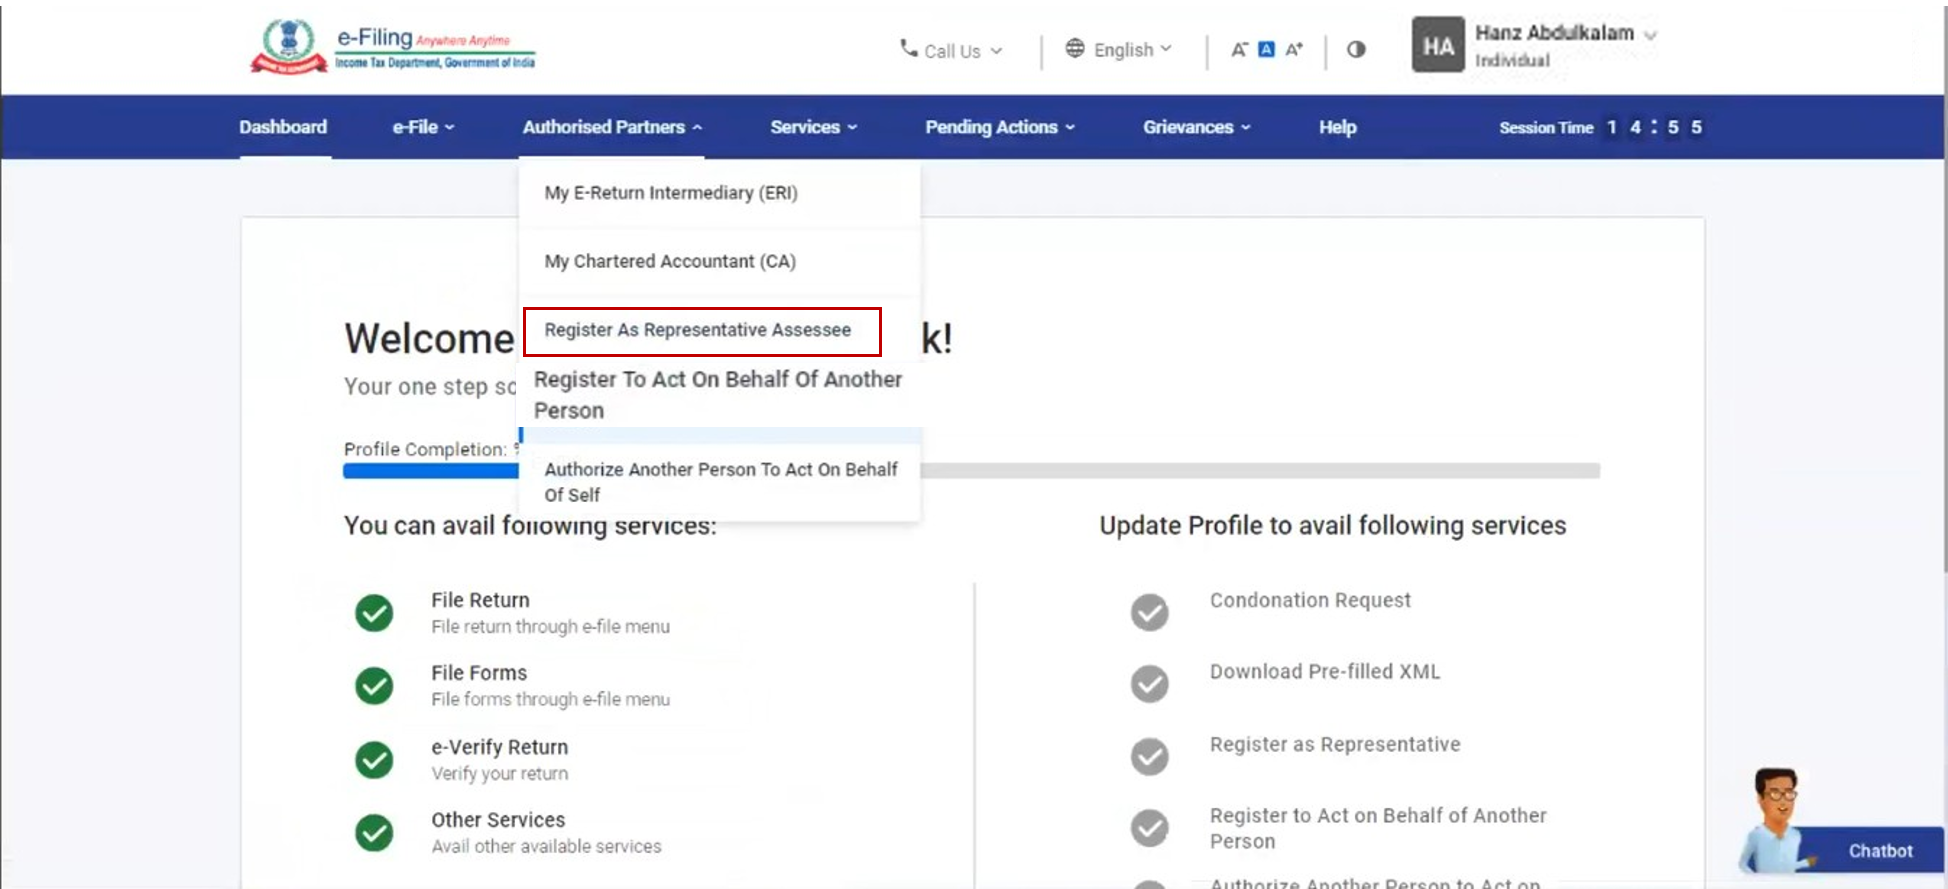
Step 2: Click Authorized Partners > Register as Representative Assessee.
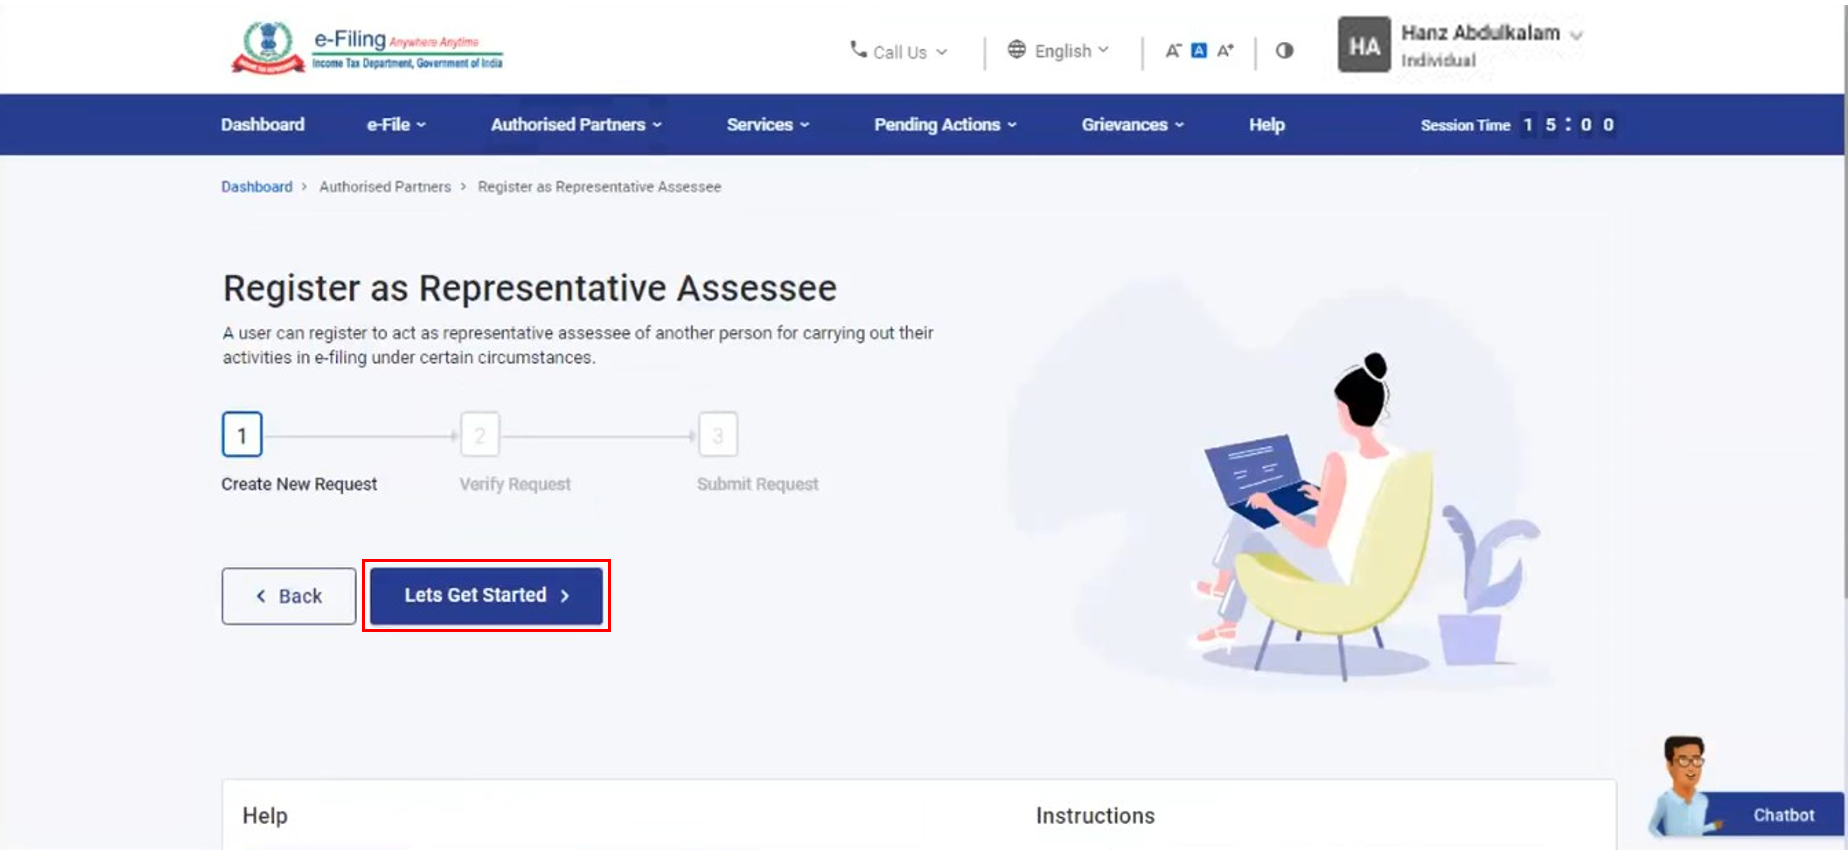
Step 3: Click Let's get Started to view all previous requests.
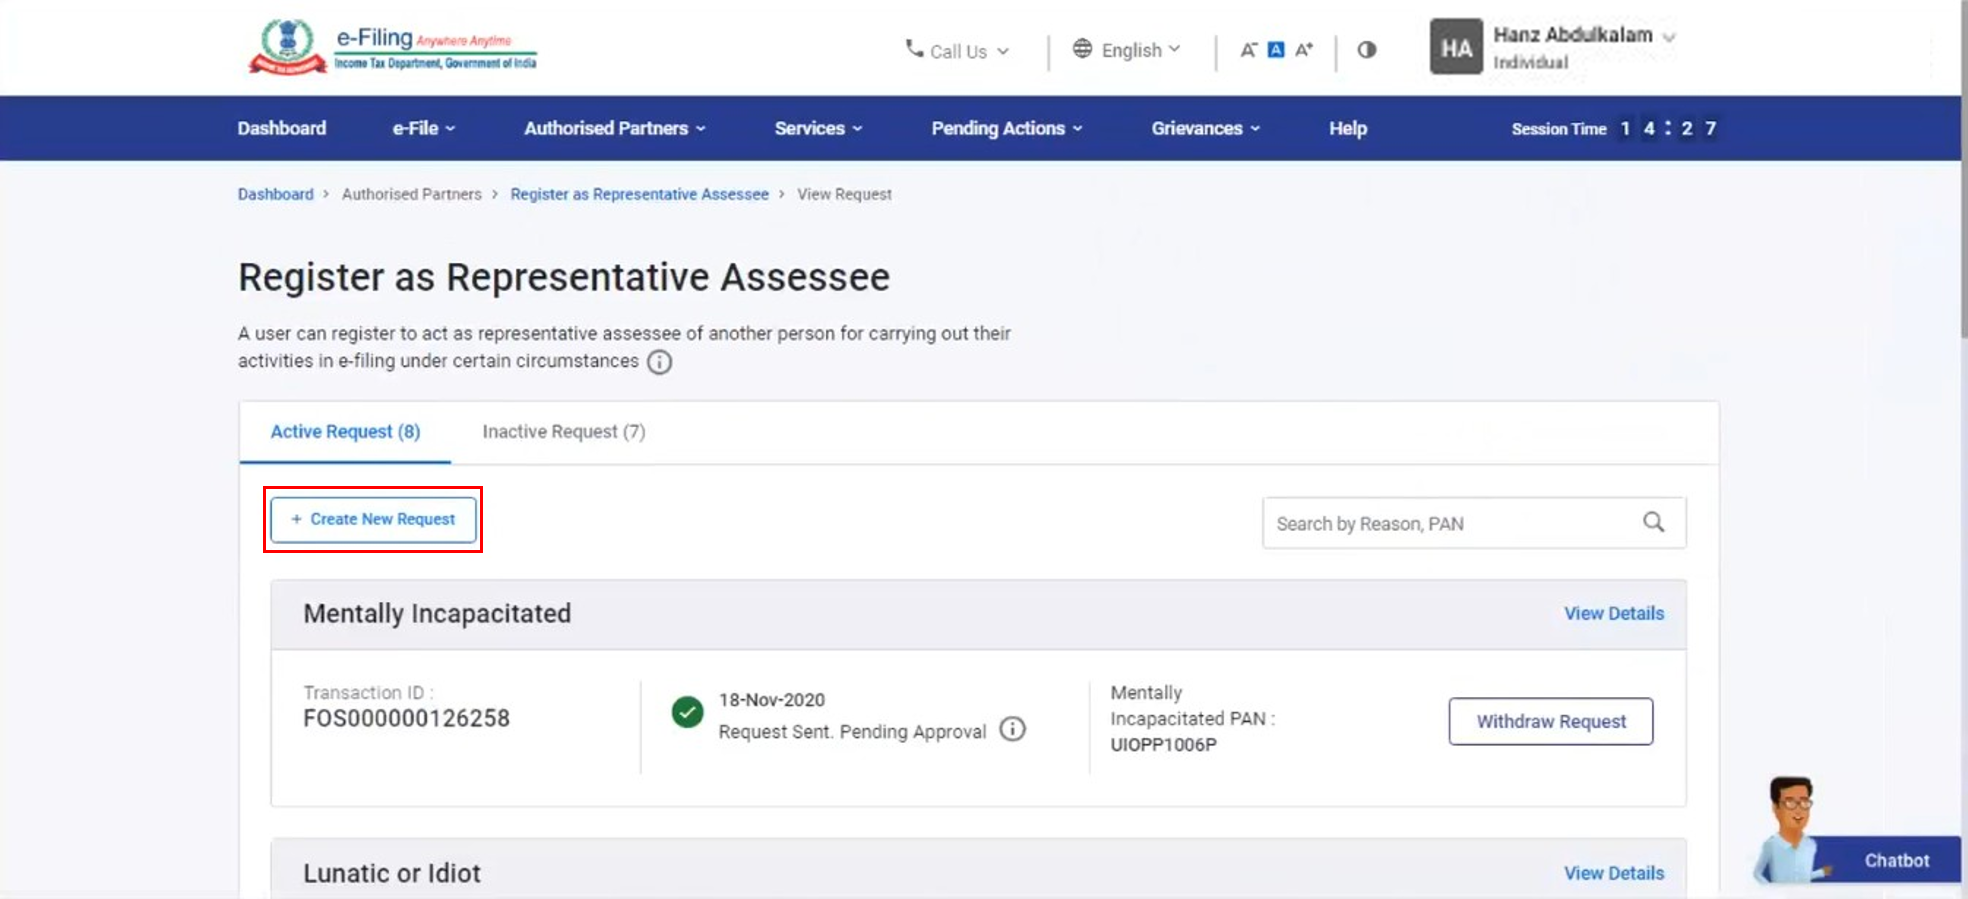
Step 4: On the Register as Representative Assessee page, click Create New Request .
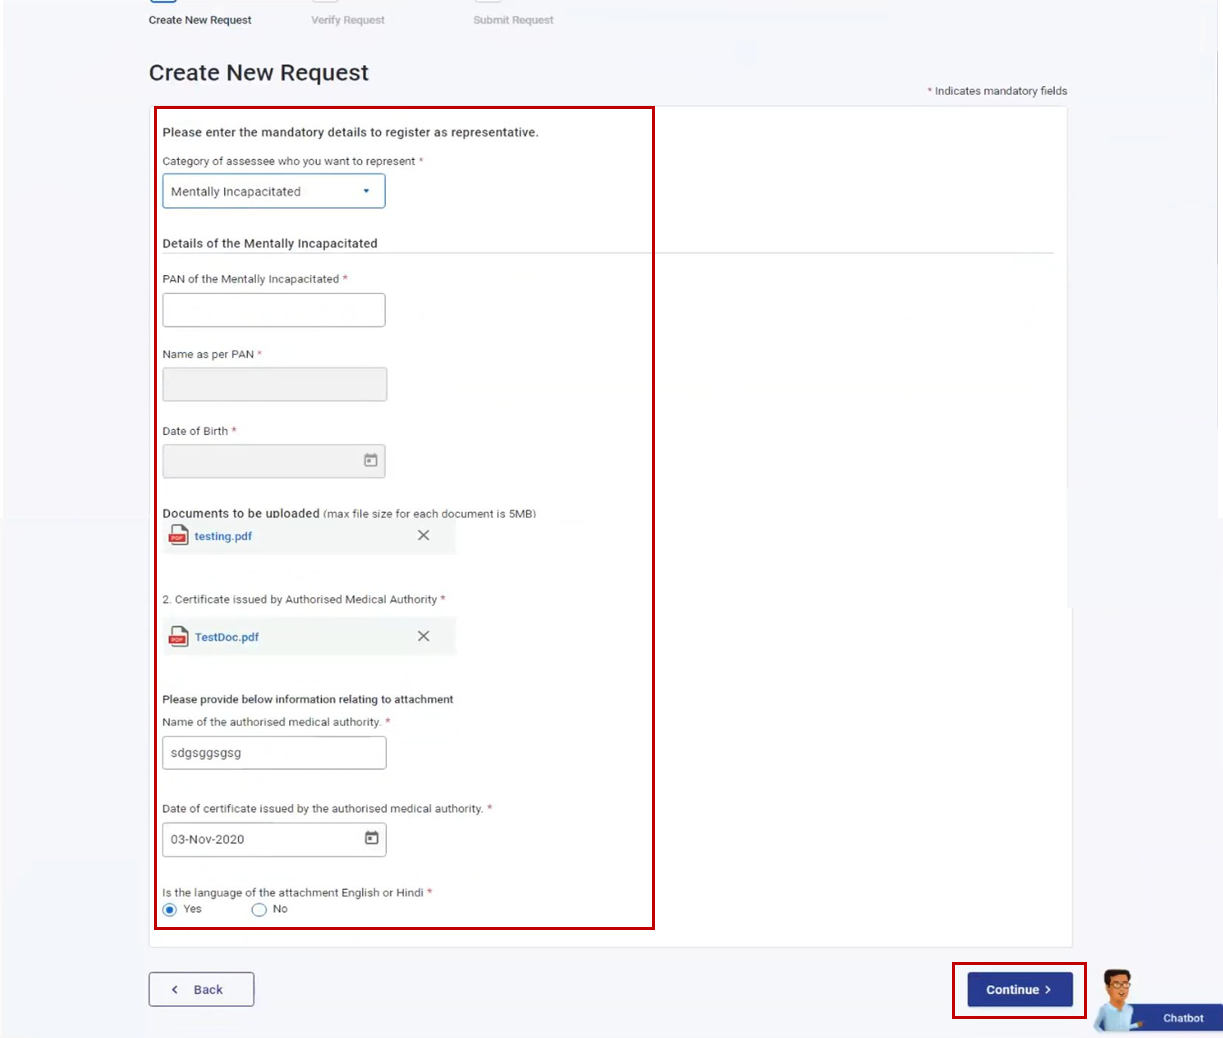
Step 5: Choose the Category of assessee who you want to represent from the dropdown, and enter the required details. Upload mandatory attachments and click Continue.
Note:
- The maximum size of the attachment should be 5 MB.
- If you have multiple documents to upload, put them in a zipped folder and upload the folder. The maximum size for all the attachments in a zipped folder should be 50 MB.
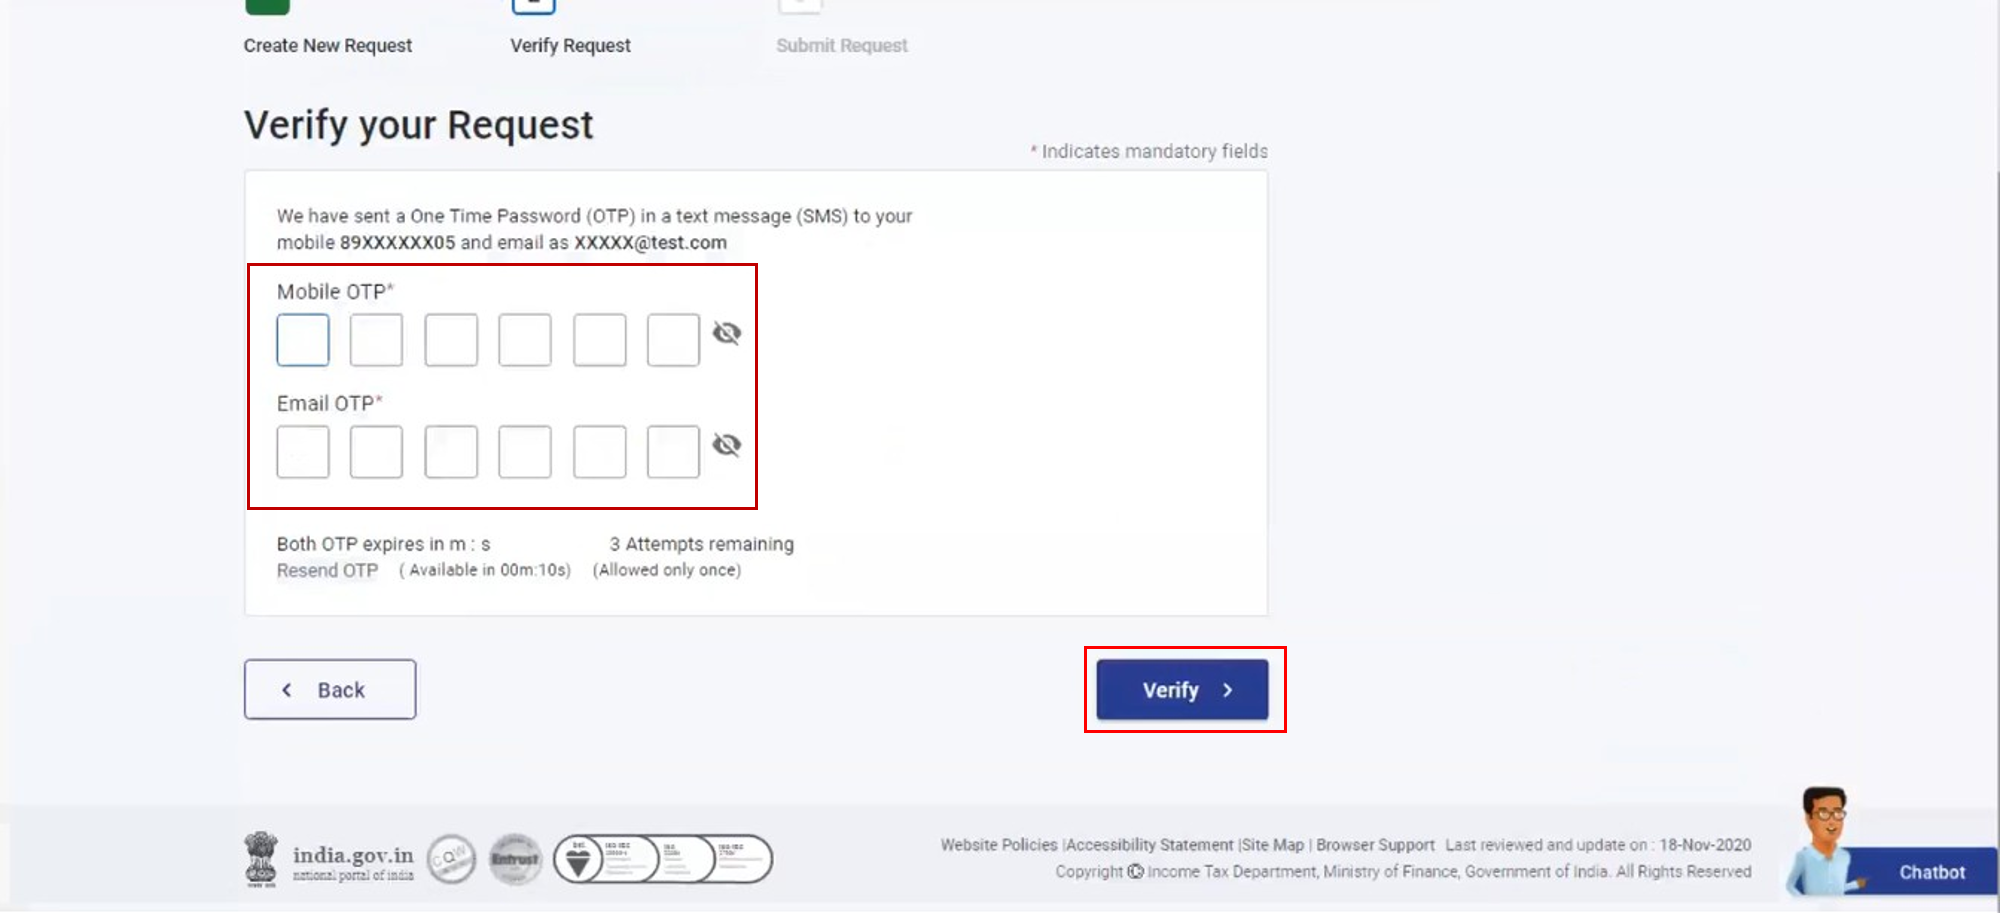
Step 6: On the Verify your Request page, provide the 6-digit OTP received on your mobile number and email ID registered with the e-Filing portal and click Submit.
Note:
- OTP will be valid for 15 minutes only.
- You have 3 attempts to enter the correct OTP.
- The OTP expiry countdown timer on screen tells you when the OTP will expire.
- On clicking Resend OTP, a new OTP will be generated and sent.
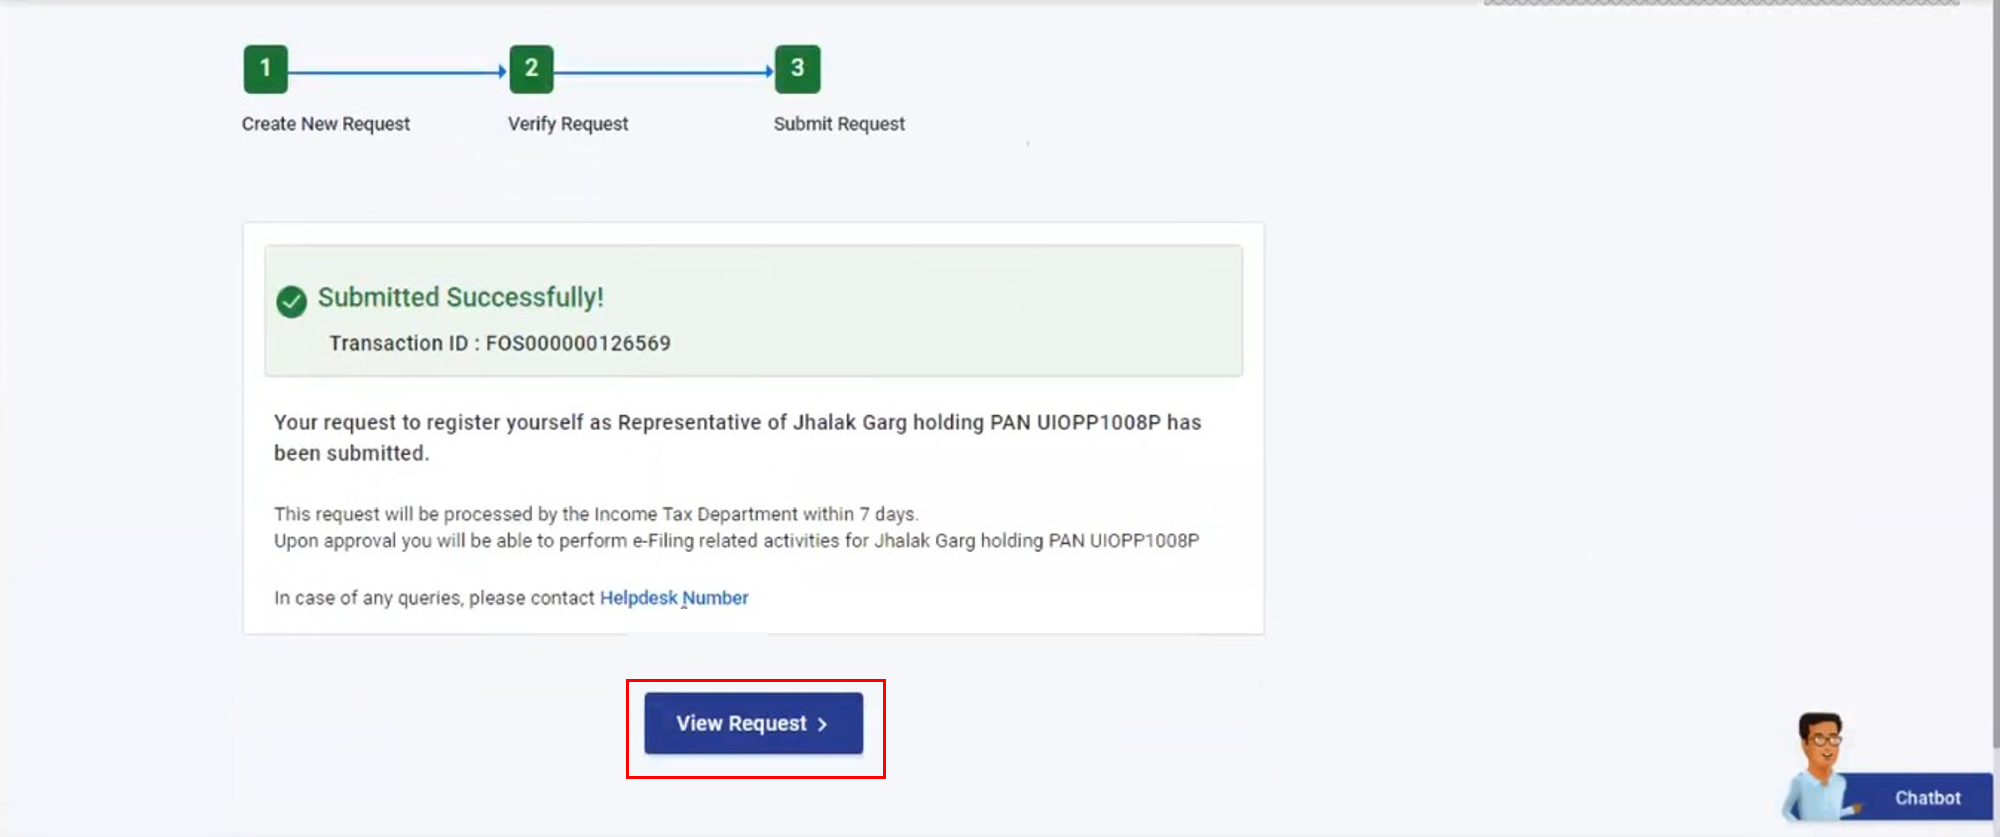
Step 7: Click View Request to see all submitted requests along with the uploaded attachments.
Note:
- A Cancel Request button appears if the case status is Pending Approval. To cancel a request, click Cancel Request. The status of the request then changes to Representation Withdrawn.
- A Withdraw Request button appears if the case status is Accepted and Activated. To withdraw a request, click Withdraw Request. The status of the request then changes to Representation Withdrawn.
3.3 Register on Behalf of Another Person
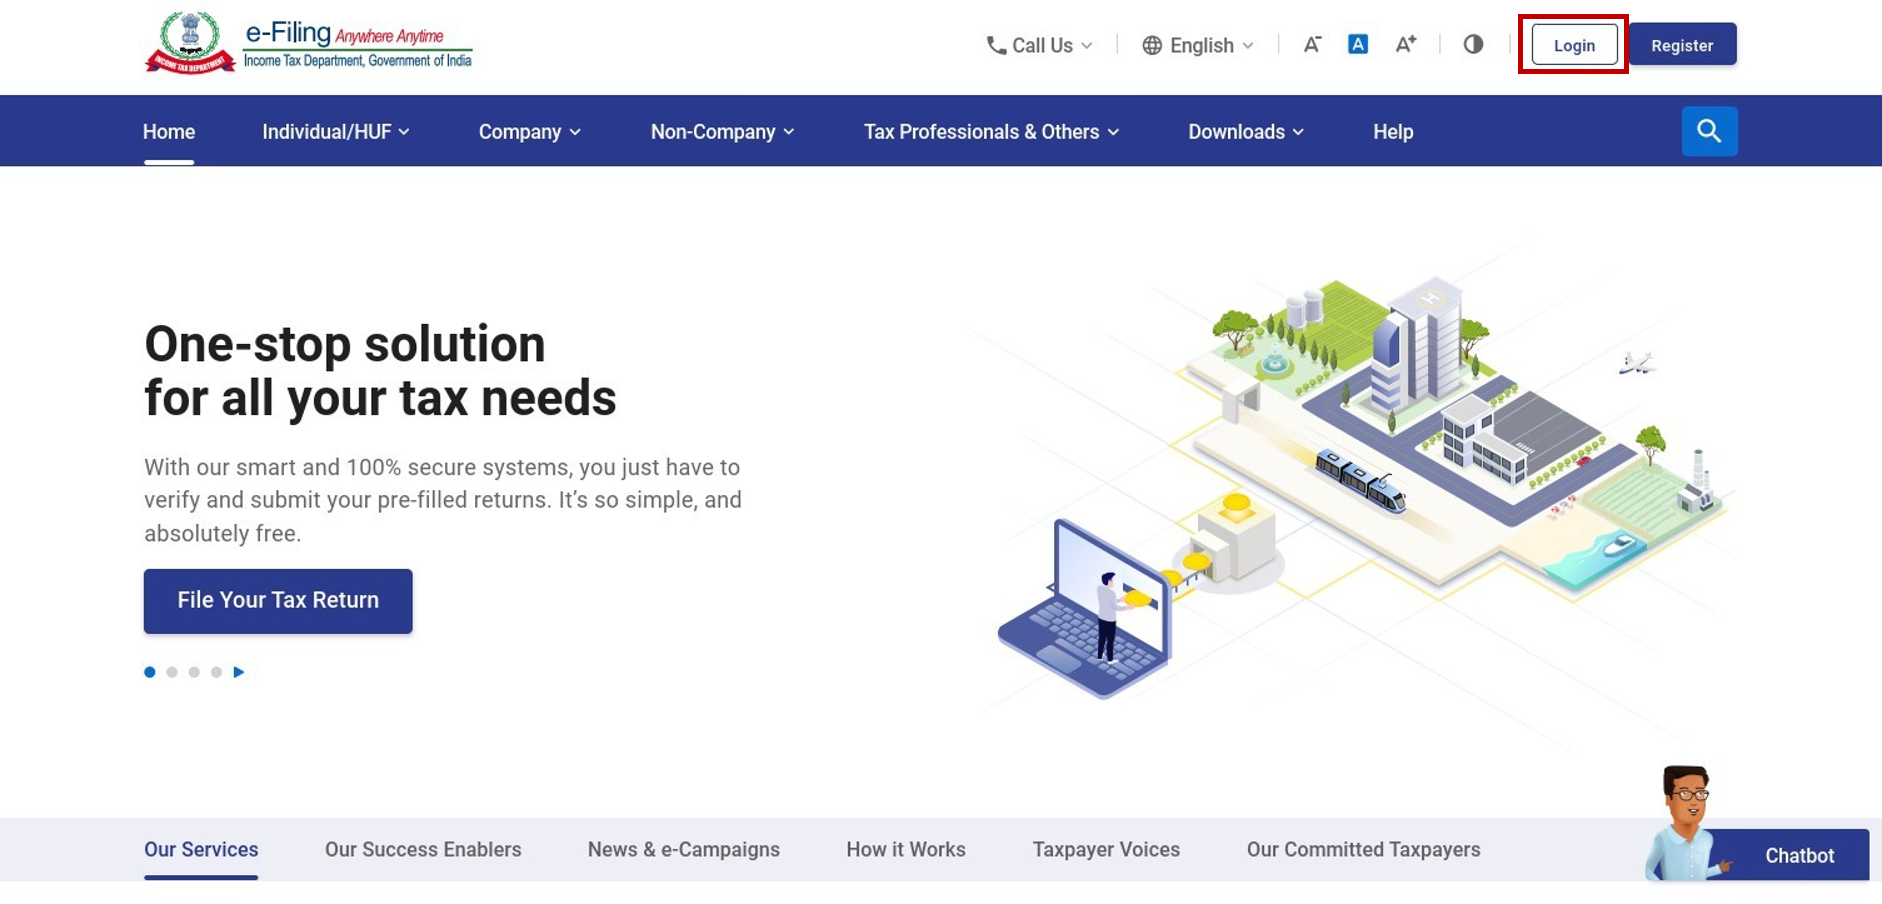
Step 1: Log in to the e-Filing portal using your user ID and password.
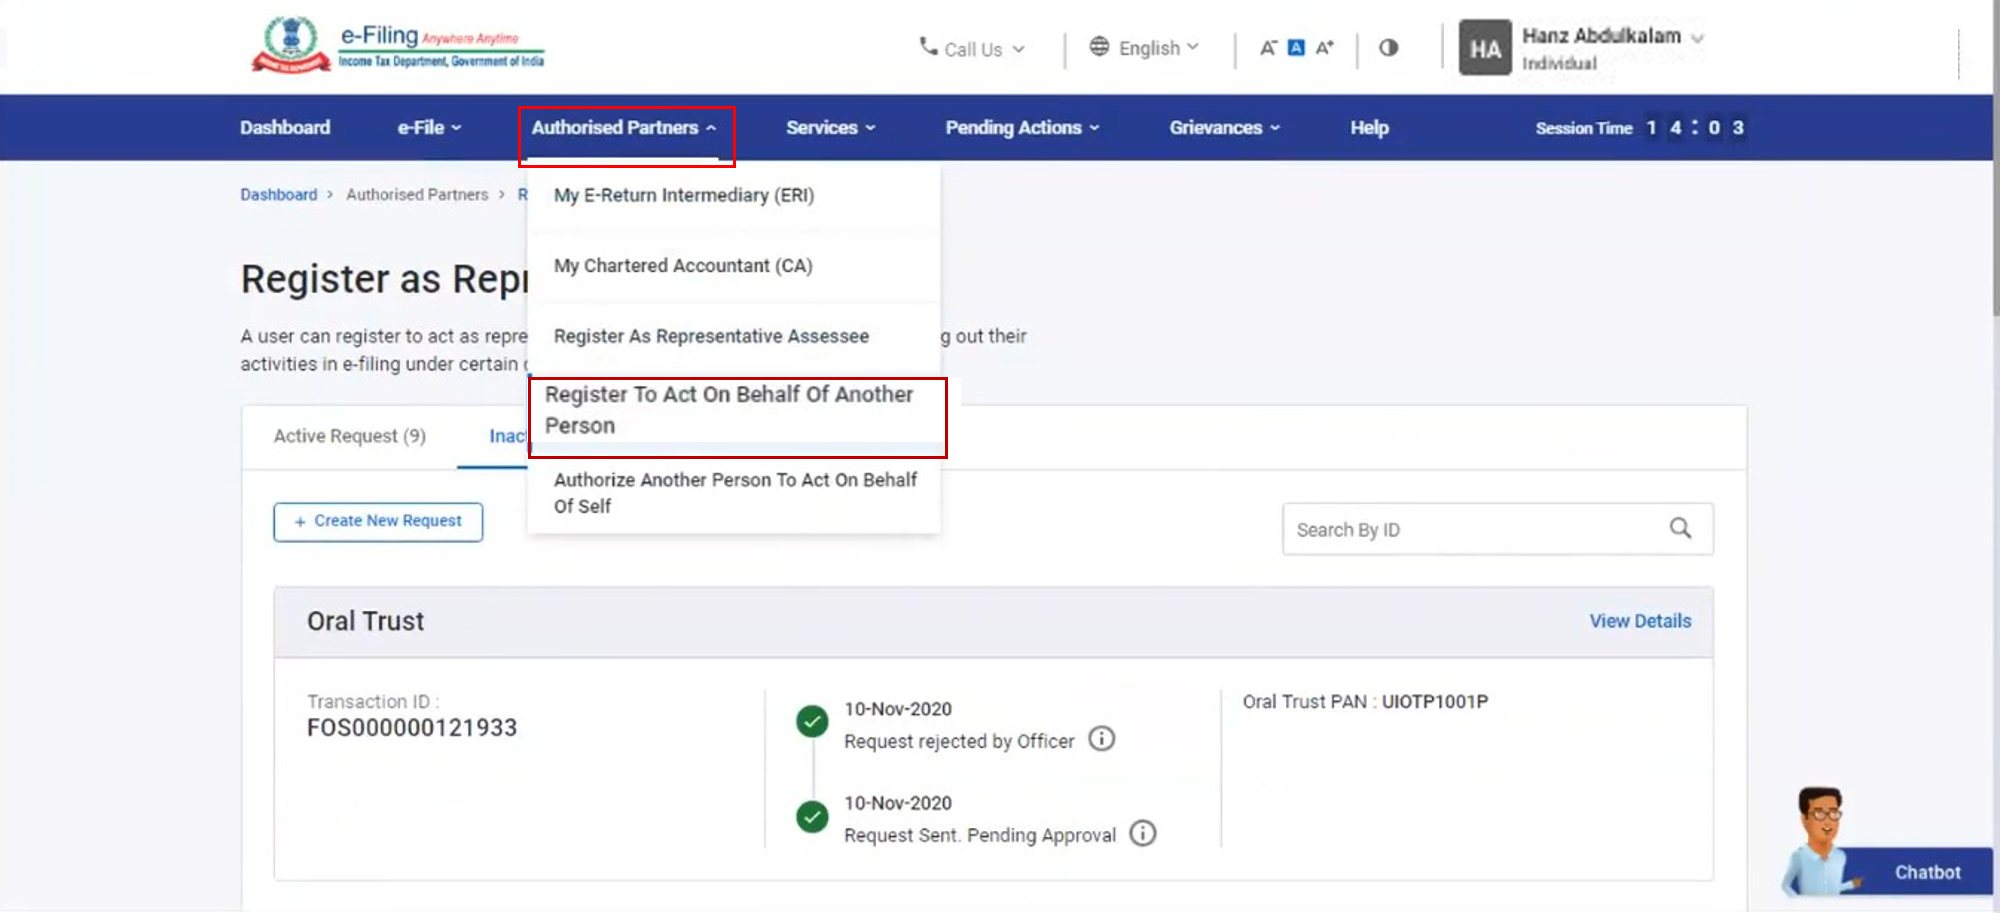
Step 2: Click Authorized Partners > Register to act on behalf of another person.
Step 3: Click Let's get Started.
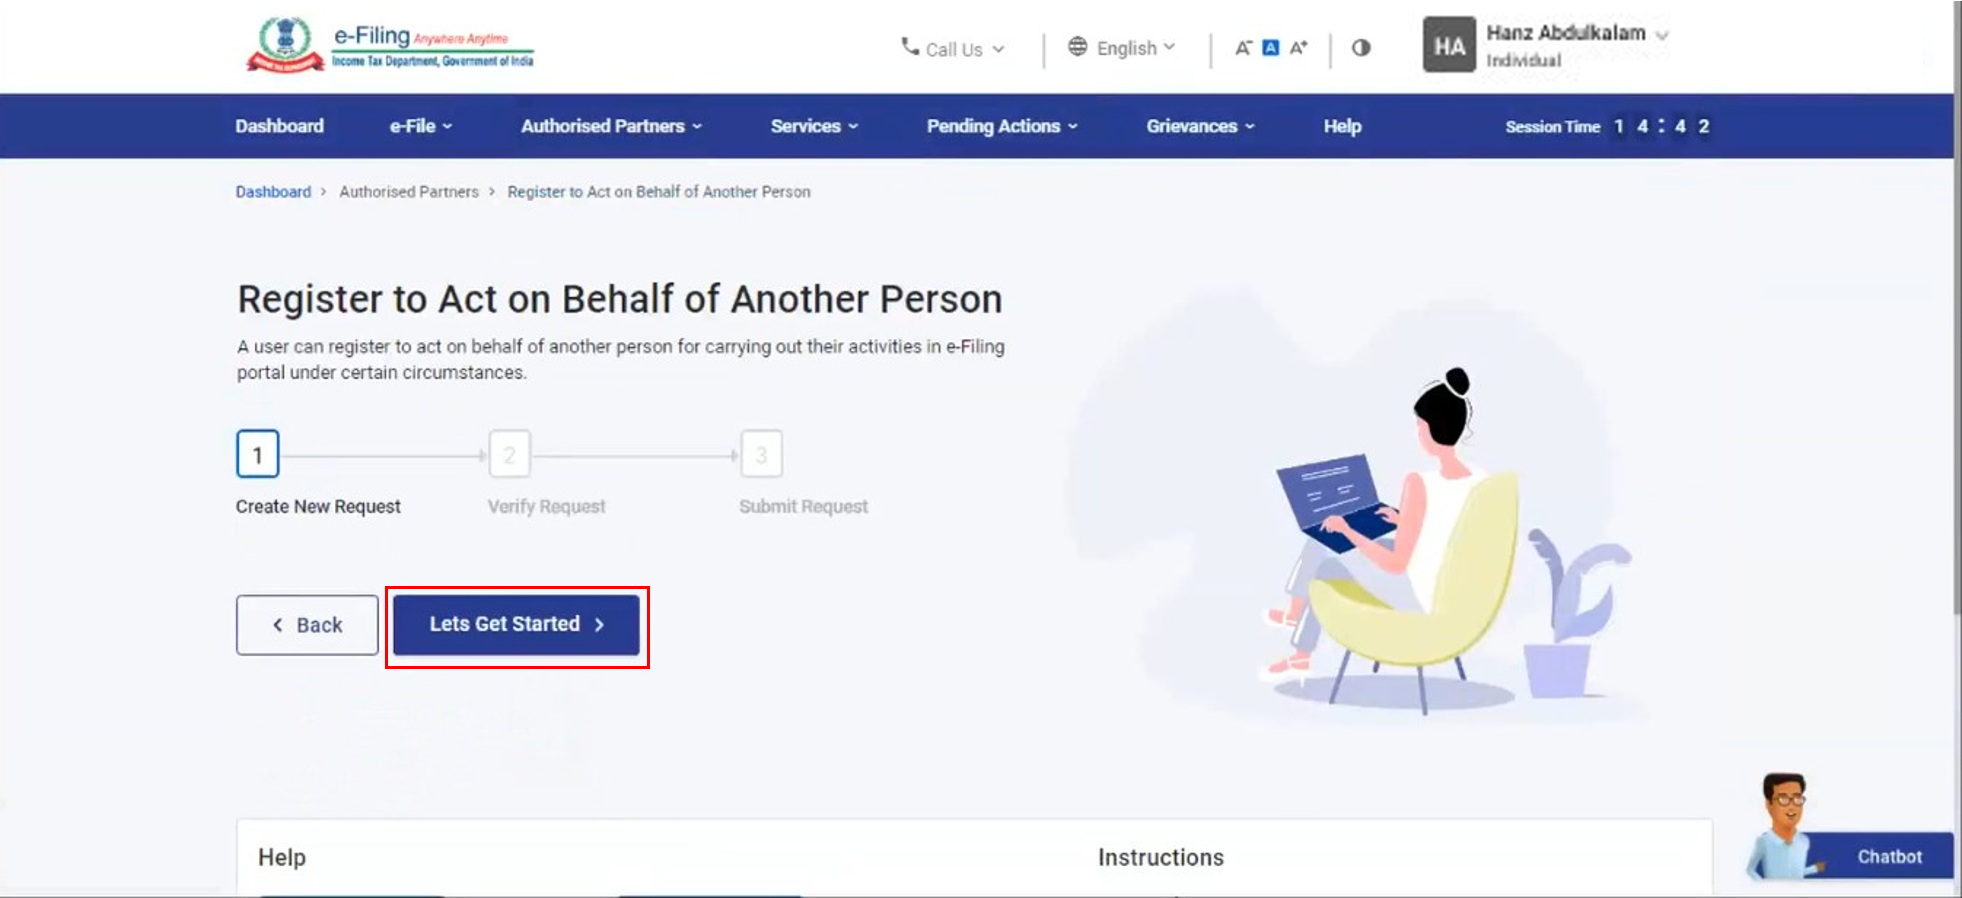
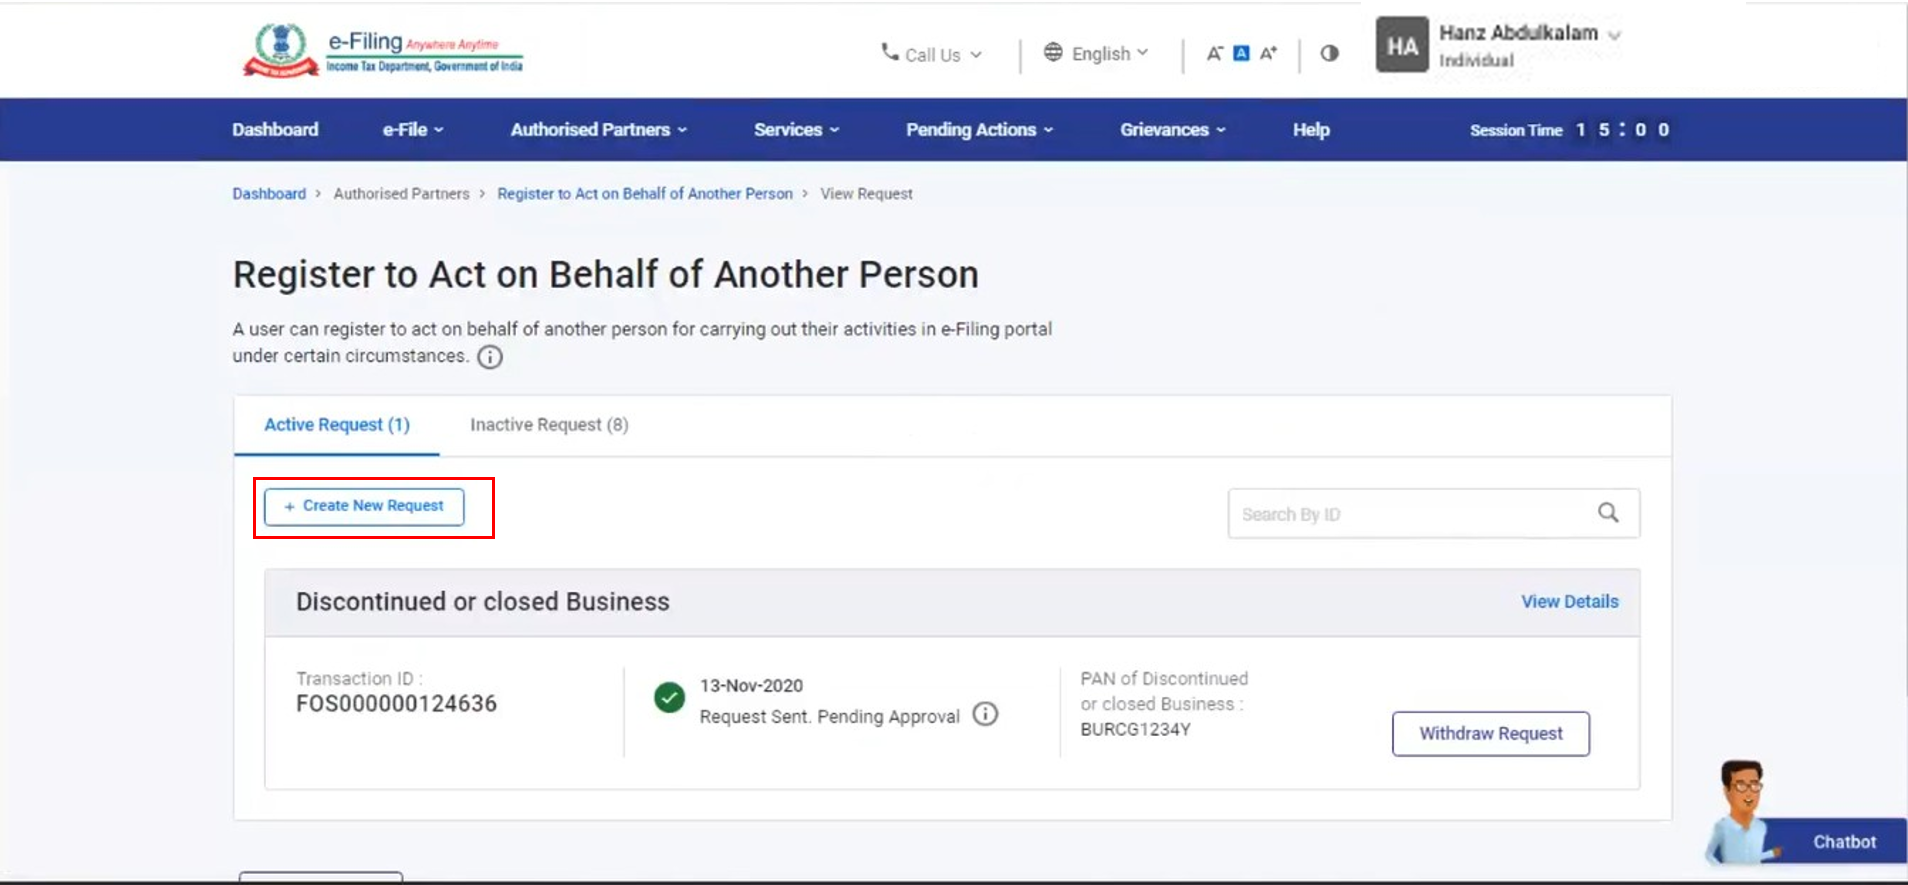
Step 4: On the Register to Act on Behalf of Another Person page, click Create New Request.
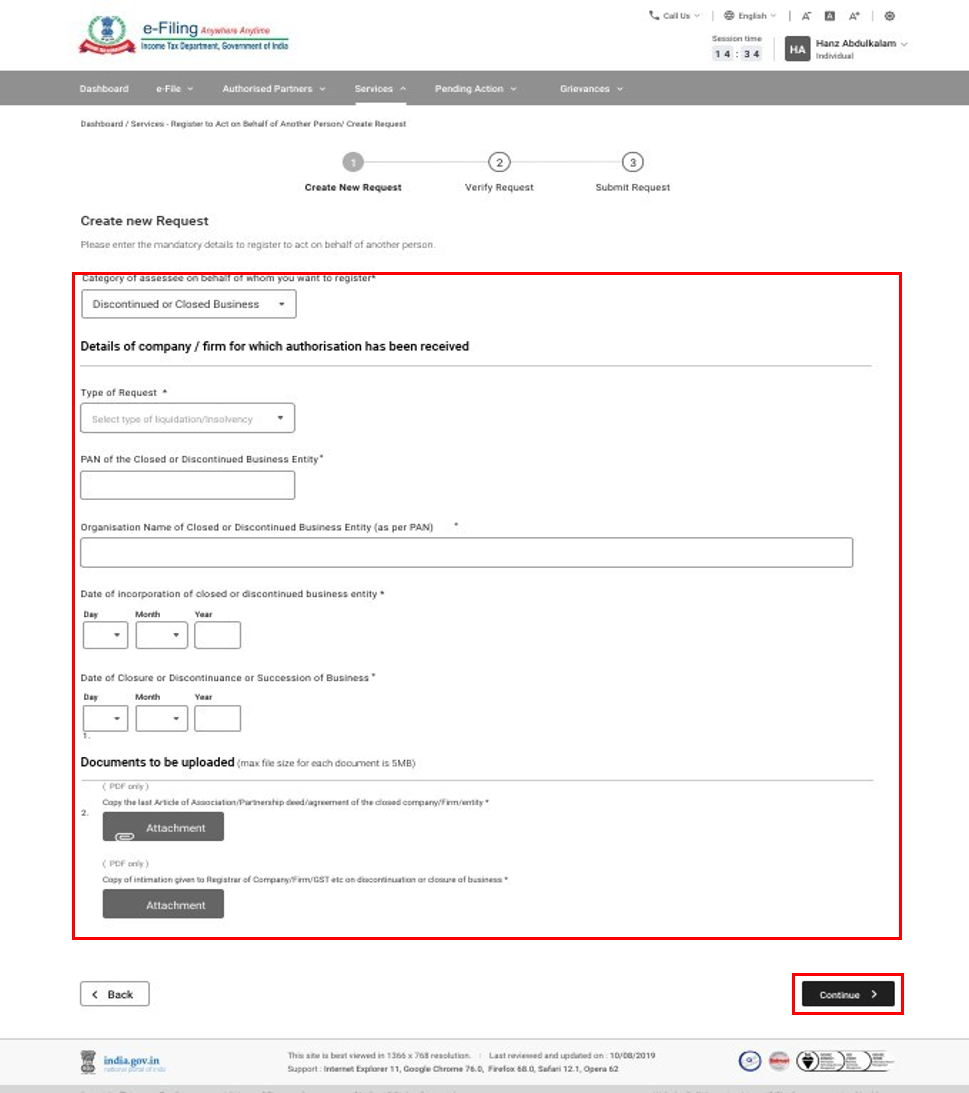
Step 5: Choose the Category of assessee on behalf of whom you want to register from the dropdown and enter the required details. Upload the mandatory attachments and click Continue.
Note:
- The maximum size of the attachment should be 5 MB.
- If you have multiple documents to upload, put them in a zipped folder and upload the folder. The maximum size for all the attachments in a zipped folder should be 50 MB.
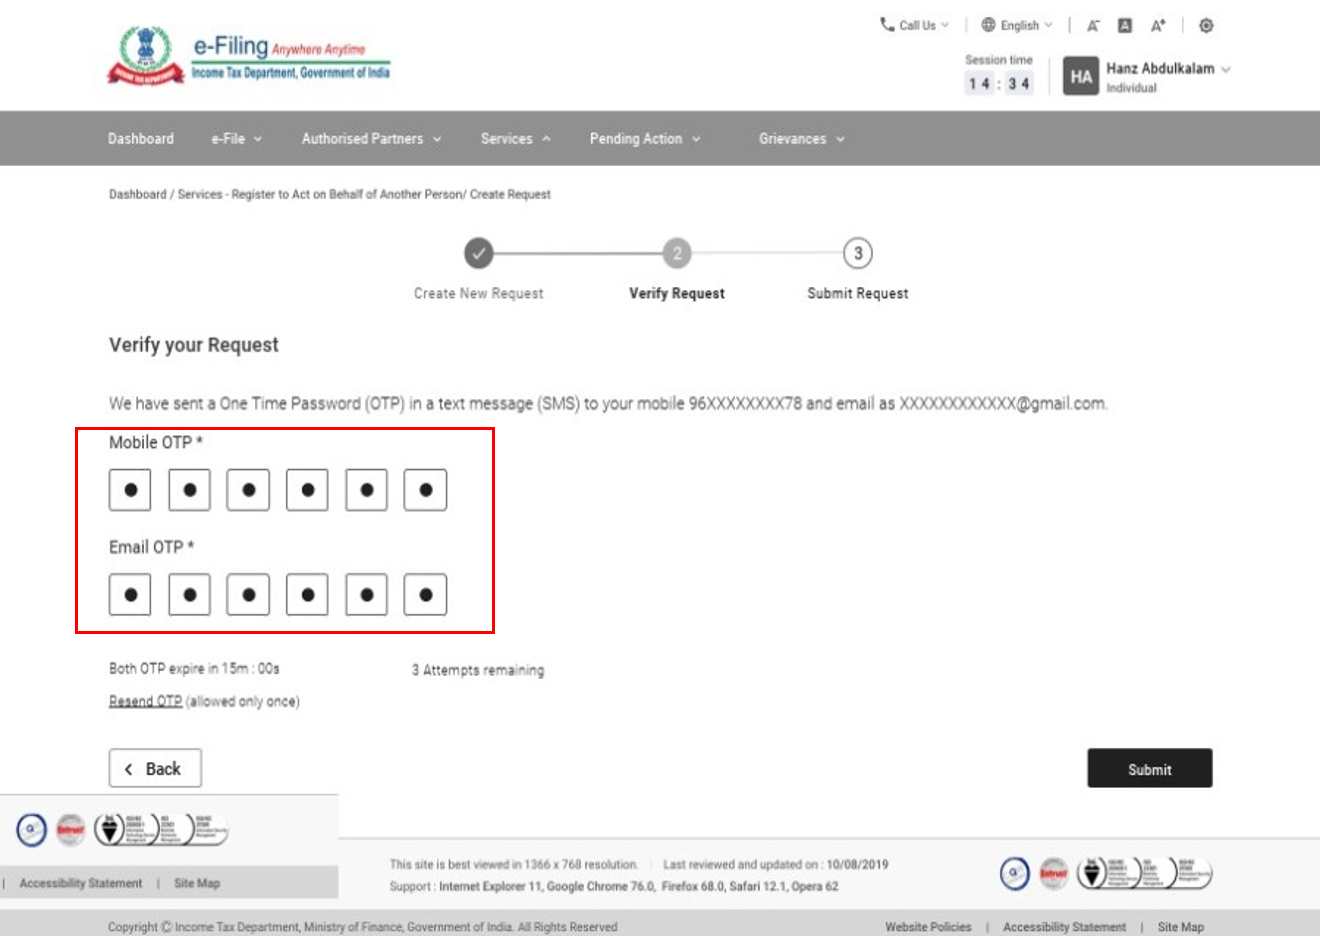
Step 6: On the Verify your Request page, provide the 6-digit OTP received on your mobile number and email ID registered on the e-Filing portal and click Submit.
Note:
- OTP will be valid for 15 minutes only.
- You have 3 attempts to enter the correct OTP.
- The OTP expiry countdown timer on screen tells you when the OTP will expire.
- On clicking Resend OTP, a new OTP will be generated and sent.
Step 7: Click View Request to see all submitted requests along with the uploaded attachments.
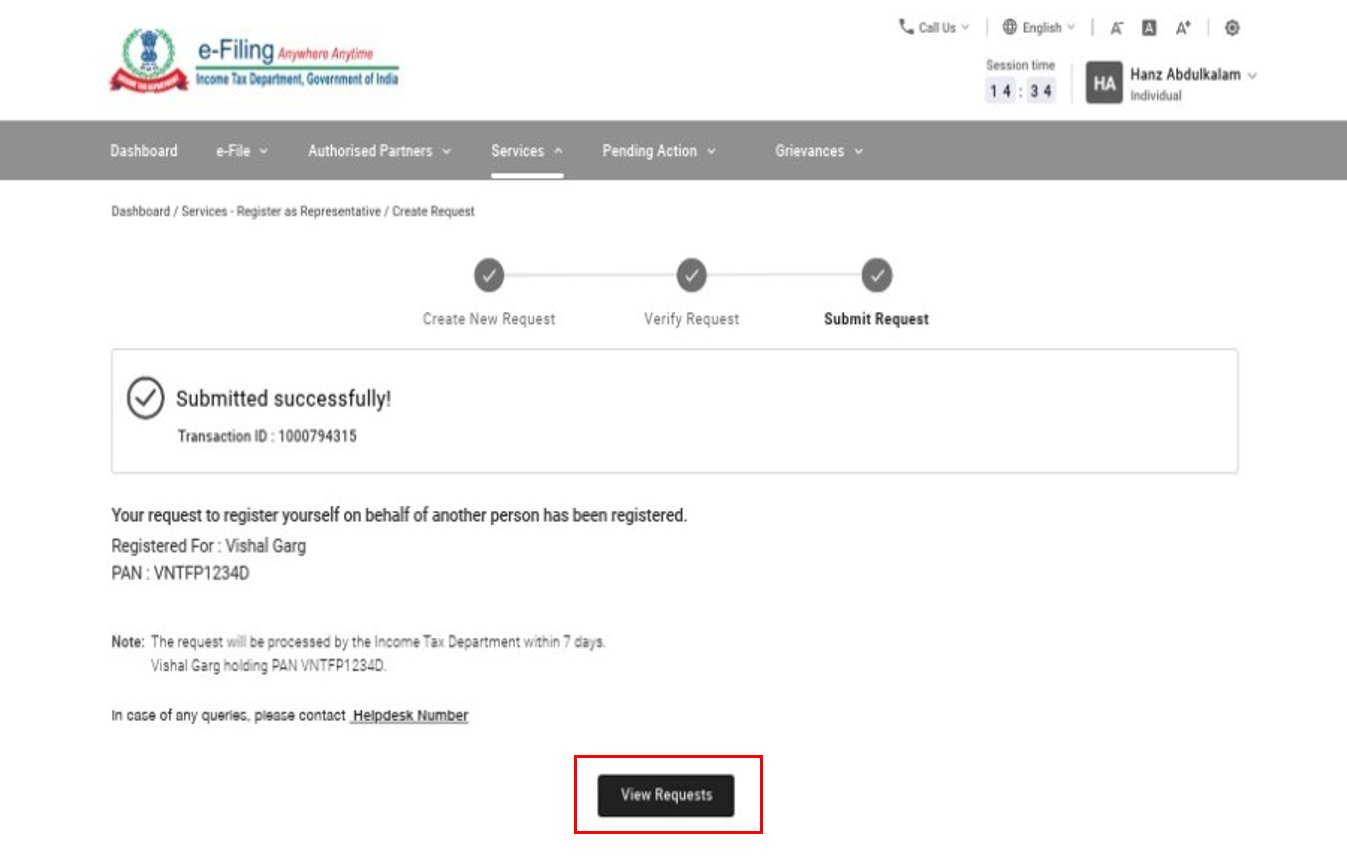
Note:
- A Cancel Request button appears if the case status is Pending Approval. To cancel a request, click Cancel Request. The status of the request then changes to Representation Withdrawn.
- A Withdraw Request button appears if the case status is Accepted and Activated. To withdraw a request, click Withdraw Request. The status of the request then changes to Representation Withdrawn.


